Fall is hands down my favorite season for getting creative — the cozy weather, the warm colors, and of course, the pumpkins! But here’s the thing: I’ve never been a big fan of the messy carving part. The scooping, the seeds, the smell… no, thank you. That’s why pumpkin painting became my go-to tradition for fall decorating.
If you’re looking for a fun, easy, and mess-free way to give your pumpkins a stunning makeover, you’ll love these 11 DIY pumpkin painting ideas. Whether you’re aiming for classy, spooky, or modern chic, there’s something here for everyone.
Let’s dive into the designs — I promise, by the end, you’ll be itching to grab a paintbrush.
11 Pumpkin Painting Ideas for A Stylish Fall
Here are eleven creative pumpkin painting ideas you can copy:
1. Checkered Pumpkins
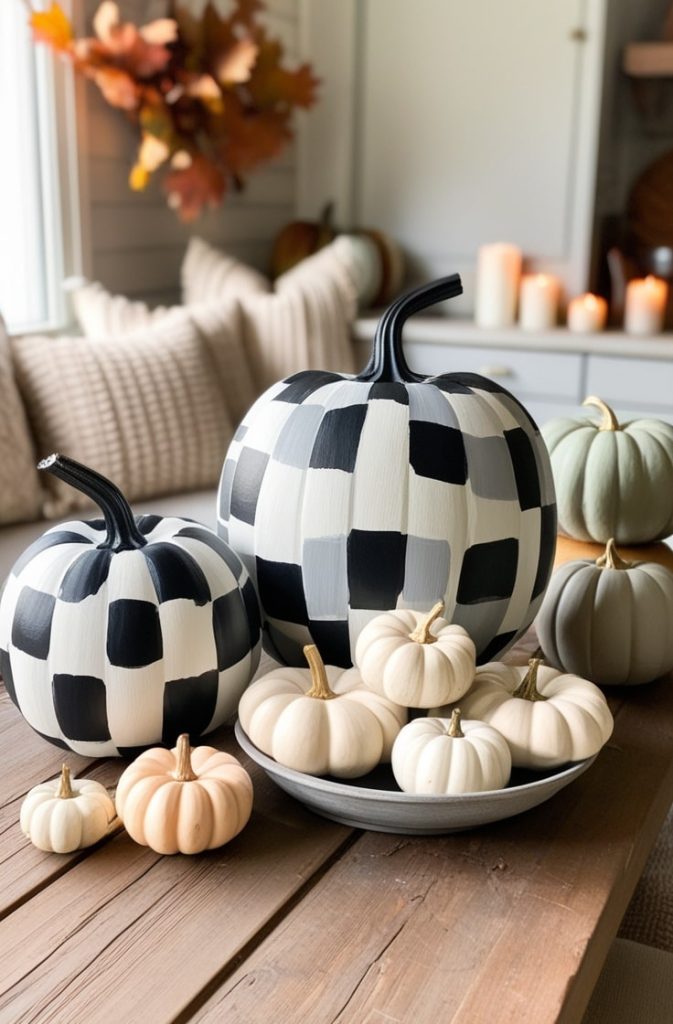
Checkered pumpkins are one of those designs that instantly make your fall decor look stylish without much effort. The classic black-and-white check pattern gives a modern farmhouse vibe — perfect for porch displays, cozy kitchen corners, or mantel styling.
What I love most is how customizable this idea is; you can switch up the colors to match your aesthetic — think beige and cream for a neutral look or even sage and white for a softer palette.
How I do it:
I start by choosing a medium-sized pumpkin with a smooth surface. First, I paint the entire pumpkin with a base coat — usually white or cream — and let it dry completely. Once that’s ready, I use painter’s tape to section off small squares in a checkered pattern.
Then, I fill in every other square with black acrylic paint. I remove the tape carefully before the paint dries fully to keep the edges sharp and clean.
If I want to make it a bit more rustic, I’ll freehand the pattern with a flat brush instead of taping it off. It gives that slightly imperfect, hand-painted charm that feels more natural.
Pro Tips:
- Use matte paint for a farmhouse finish or glossy paint for a modern look.
- Always prime real pumpkins with clear acrylic spray or Mod Podge so the paint sticks better.
- Try mini checkered pumpkins in different color combinations — they look adorable grouped together in a bowl or tray.
2. Classic Painted Pumpkins
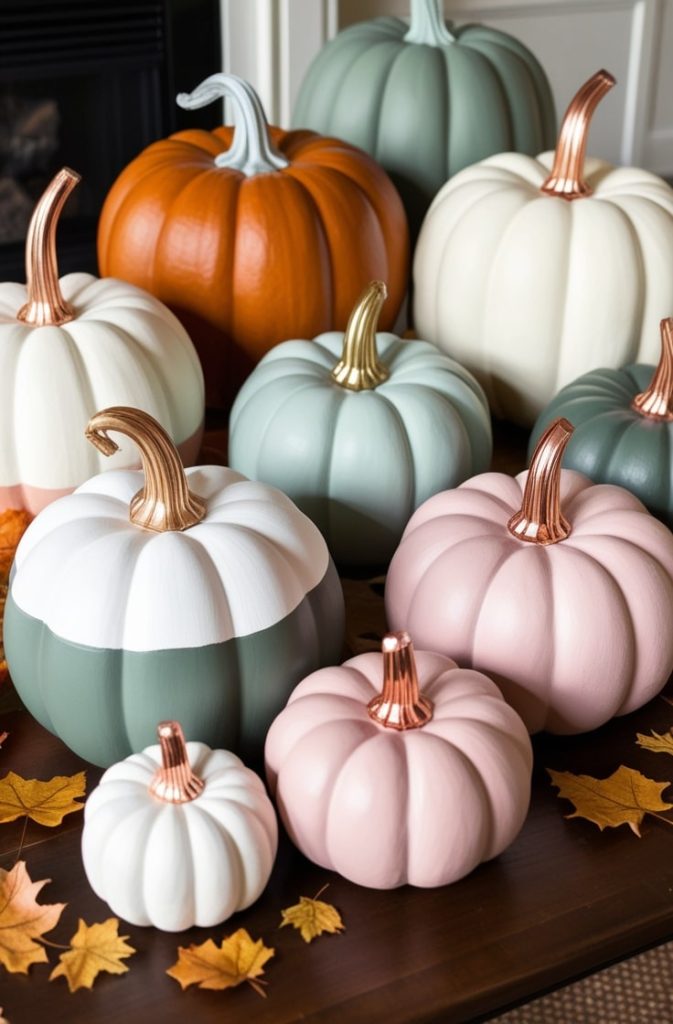
Sometimes, simple is the most stunning. Classic painted pumpkins are all about celebrating color and creativity without overcomplicating the design.
Whether you go for solid shades, color blocking, or soft ombré tones, this idea is timeless and effortlessly chic. I love doing this style early in the season because it blends perfectly with both fall and Halloween decor — plus, it’s a great base idea for anyone new to pumpkin painting.
How I do it:
I usually start with a few real or faux pumpkins in different sizes for variety. After wiping them clean, I apply a thin layer of acrylic paint as the base coat — my go-tos are ivory, burnt orange, sage green, or blush pink depending on the theme I’m going for that year.
Once the base coat dries, I sometimes layer a second complementary shade to create dimension — for example, blending terracotta into pumpkin orange for a cozy, rustic look. You can also use metallic gold or copper paint for stems to make them pop.
I finish everything off with a clear sealer to protect the paint and give the surface a smooth, lasting shine.
Pro Tips:
- Use foam brushes for streak-free coverage, especially on larger pumpkins.
- If you’re using spray paint, apply thin coats and let each layer dry before adding the next.
- For a cozy cottagecore feel, mix matte pastel shades like blush, sage, and cream.
3. Pumpkin Flowers
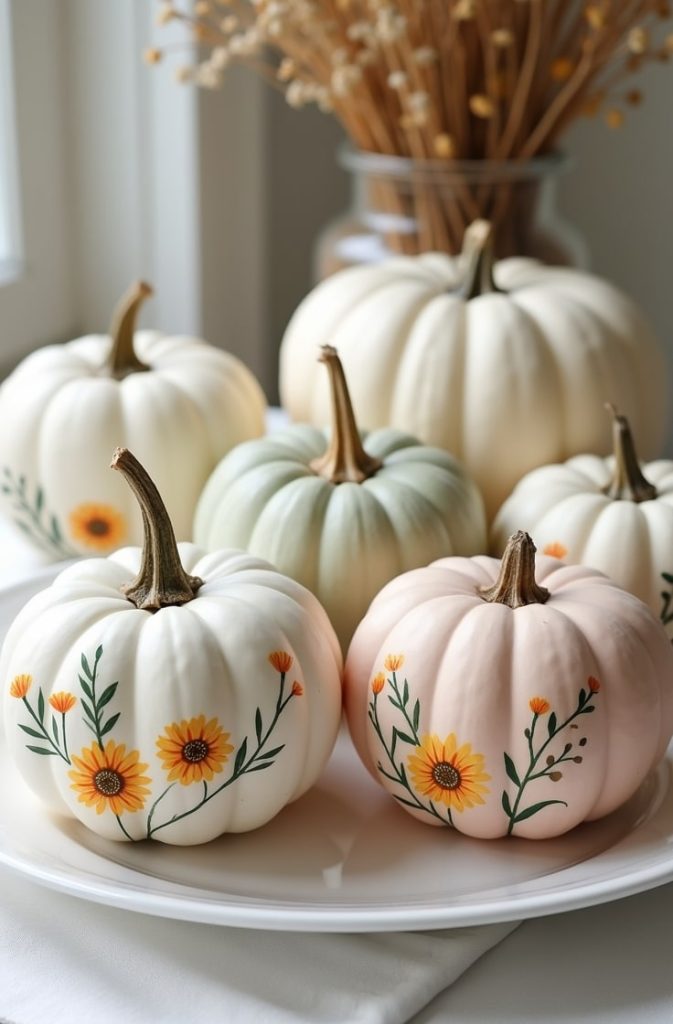
If you love soft, romantic fall decor, floral-painted pumpkins are the perfect choice. This design brings together the warmth of autumn with the charm of a hand-painted bouquet. It’s delicate, whimsical, and surprisingly easy to do — even if you’re not a skilled painter.
Floral pumpkins look stunning as table centerpieces, on mantels, or even as porch accents paired with greenery and candles.
How I do it:
I start with a white or pastel-colored base coat — usually ivory, blush, or soft sage. Once it’s completely dry, I lightly sketch my floral design with a pencil or chalk. I keep it loose and natural — think daisy petals, sunflowers, or little clusters of wildflowers.
Then, using a small round brush, I paint the flowers in layers. I start with the base color (for example, a soft pink for petals), add darker tones for depth, and finish with a white or gold highlight to make the flowers pop.
Sometimes I’ll even paint leaves trailing down the sides or add tiny buds for extra detail. If I want texture, I’ll glue on real dried flowers or pressed petals once the paint dries — it gives a gorgeous, artistic 3D effect.
Pro Tips:
- Use acrylic or chalk paint — both work beautifully for blending soft floral details.
- Stick to a limited color palette (2–3 shades max) for a cohesive, elegant look.
- For a quick beginner’s hack, use stencils or floral stamps instead of freehand painting.
4. Spiderweb Pumpkin
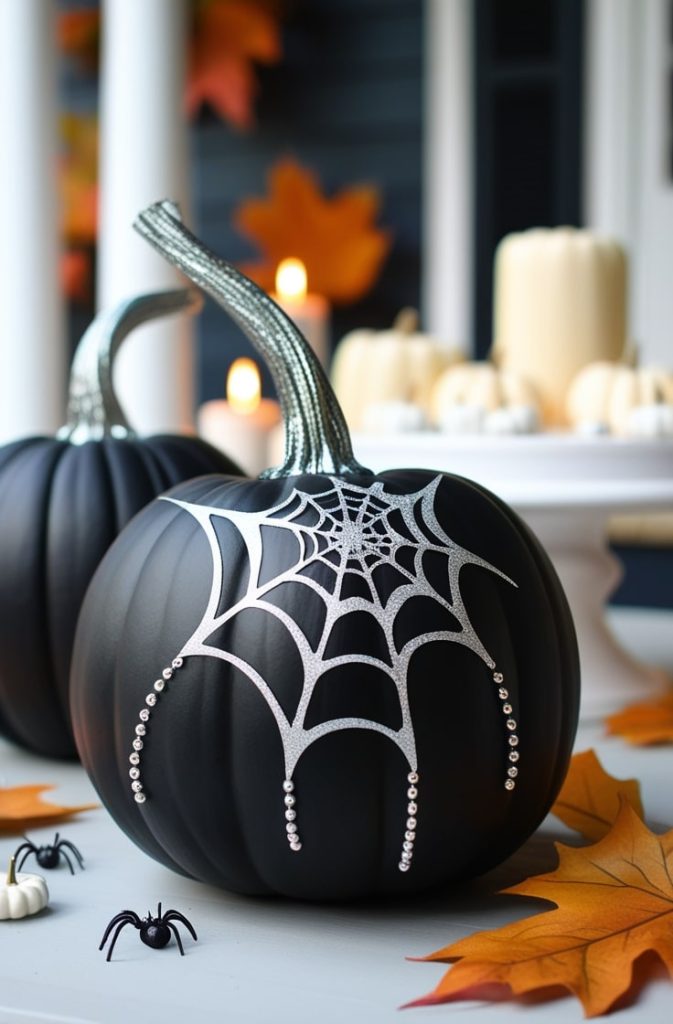
When Halloween rolls around, I always find myself craving a touch of spooky decor — but without the gore. The spiderweb pumpkin is my go-to for that classy Halloween look. It’s elegant, a little eerie, and incredibly easy to create.
You can make it bold and dramatic with a black base or keep it soft and subtle using neutral tones. It’s the perfect pumpkin design to place by your front door or on a Halloween dessert table.
How I do it:
First, I paint the pumpkin black using matte acrylic paint — I love the contrast it creates. After the base coat dries, I take a fine liner brush (or a white paint pen if I’m in a hurry) and start drawing thin web lines from the stem outward. Then, I connect the lines with little curved strokes to form the web pattern.
If you want to level it up, add a faux spider made from beads or black rhinestones — or even a tiny glittered one for a sparkly effect. For something more elegant, swap white for metallic silver or gold paint — it gives the pumpkin a chic Halloween glam vibe.
Pro Tips:
- White gel pens or metallic markers make drawing clean web lines much faster than brushes.
- Try painting the stem in metallic gold or silver for a luxe contrast.
- Use mini black pumpkins with gold spiderwebs for table decor — they look amazing under candlelight.
5. Abstract Pink Pumpkins
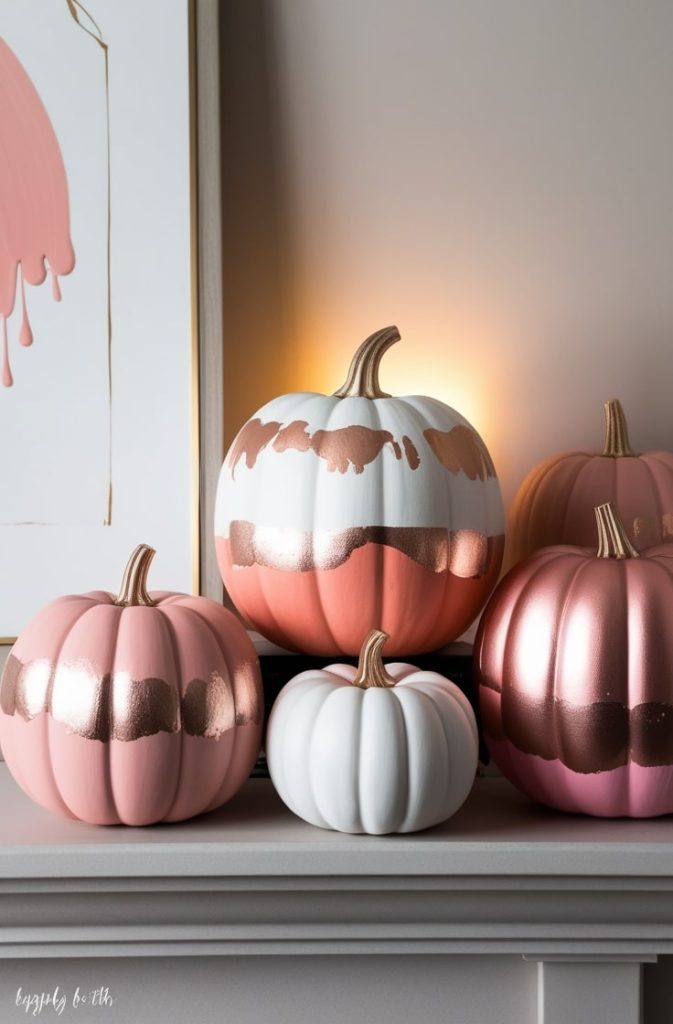
If you love modern, playful, and slightly unexpected designs, abstract pink pumpkins are a must-try. They bring a soft, feminine touch to fall decor while still feeling bold and artistic.
I love using them to brighten up neutral spaces or add a chic statement to a mantel, tablescape, or bookshelf.
The best part? No design needs to be perfect — the “messy” look is actually what makes them so trendy and eye-catching.
How I do it:
I start with a white or blush base coat and let it dry completely. Then I layer on different shades of pink — blush, coral, and rose gold — using broad, uneven brush strokes. I like to add splatters of metallic gold or even a thin layer of glitter paint to make the pumpkin shimmer.
Sometimes I also try a dripping paint effect: I thin out some paint with water, pour it over the top, and let it naturally run down the pumpkin’s curves. Each one comes out unique, which is part of the fun.
Pro Tips:
- Use different brush sizes for texture — a small brush for fine lines and a large flat brush for sweeping strokes.
- Don’t stress about perfect edges; imperfections give character.
- Metallics and glitter accents make the abstract style feel more sophisticated and high-end.
6. Black and White Painted Pumpkins
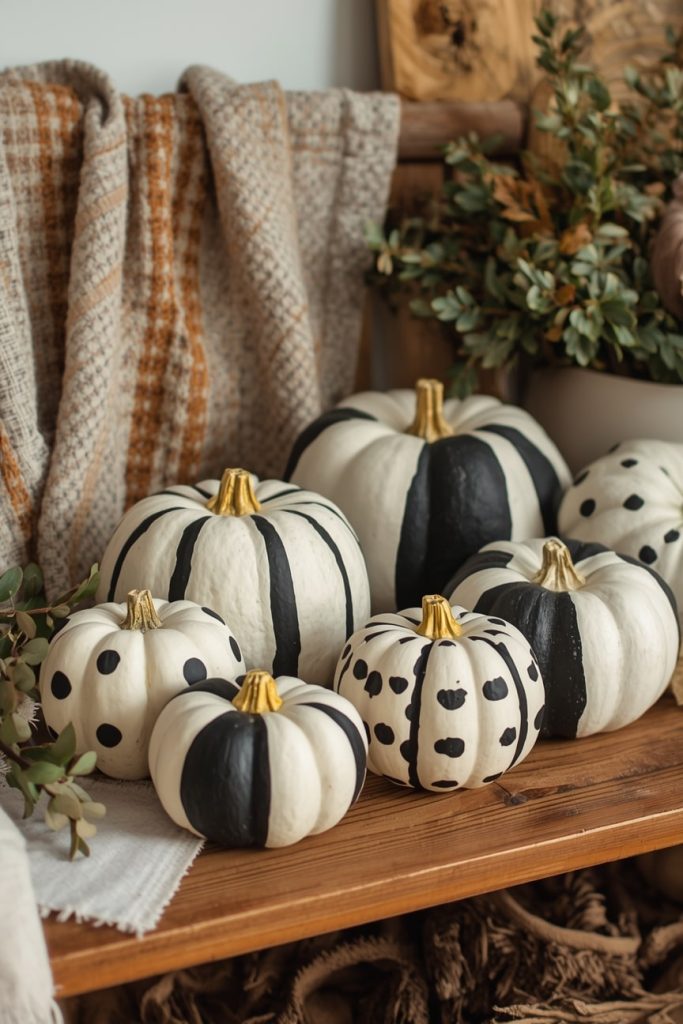
There’s something timeless about black and white — it’s chic, versatile, and works with almost any decor. Black and white painted pumpkins are perfect if you want a modern, minimalist fall vibe, or if you just love clean, bold contrasts.
I often use them as centerpieces or pair them with other neutral decor like wood, linen, and greenery. They also make great statement pieces when grouped in varying sizes.
How I do it:
I start with a white base coat on a smooth pumpkin. Once dry, I decide on a pattern: stripes, dots, half-and-half, or even a bold geometric design. I use black acrylic paint with a small brush for precision. For stripes or geometric patterns, painter’s tape helps keep the edges crisp.
Sometimes, I alternate small and medium pumpkins — one striped, one dotted, and one solid black. When displayed together, they create a cohesive yet visually interesting set.
Pro Tips:
- Glossy paint adds a modern, high-end feel, while matte paint keeps it cozy and understated.
- Mix patterns and sizes to avoid a uniform look — variation makes it more dynamic.
- Mini black and white pumpkins work perfectly on shelves, tables, or windowsills.
7. Galaxy Painted Pumpkins
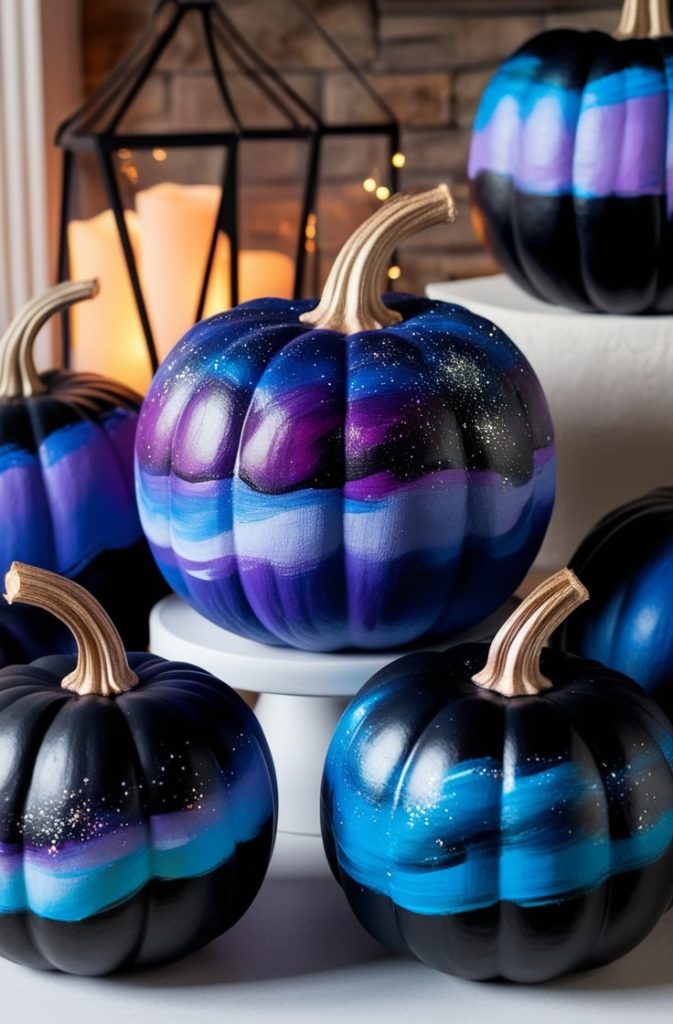
Galaxy pumpkins are pure magic. They’re perfect for anyone who loves celestial or mystical decor and want something unique this fall. I love how the swirling blues, purples, and metallic specks give a pumpkin a dreamy, otherworldly vibe — almost like holding a tiny night sky in your hands. These pumpkins are showstoppers for mantel displays, tablescapes, or Halloween setups.
How I do it:
I start by painting the entire pumpkin black as the base. Once dry, I use a sponge or a crumpled paper towel to layer on deep blues, purples, and hints of pink — blending them softly for a cosmic effect. Next, I flick white paint with a toothbrush to create tiny stars, and sometimes add silver or gold glitter to mimic stardust.
Each galaxy pumpkin comes out slightly different, which is why I love making a small set to display together. You can also add metallic stems for an extra cosmic touch.
Pro Tips:
- Sponge or dab instead of brushing to create soft, cloud-like textures.
- Use white gel pens or fine brushes for tiny star details.
- Metallic or glitter accents make the galaxy shimmer, especially under lights.
8. Gold Geometric Pumpkin
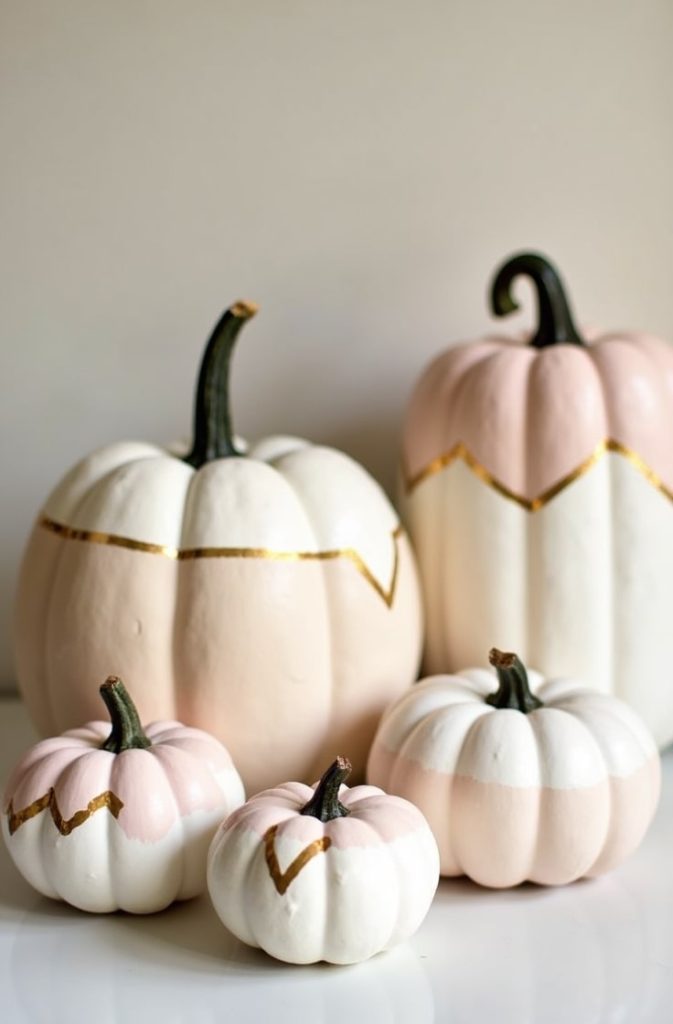
If you love modern, chic decor, gold geometric pumpkins are a must. They combine clean lines with a luxurious metallic touch, instantly elevating any fall display. I love how they look on a dining table, mantel, or even as part of a front porch arrangement — they’re stylish, yet surprisingly easy to create.
How I do it:
I start by painting the pumpkin a neutral base color — white, cream, or soft blush works beautifully. Once it’s dry, I use painter’s tape to mark geometric shapes — triangles, diamonds, or hexagons. Then, I carefully fill in the shapes with metallic gold paint. After the paint dries, I remove the tape to reveal crisp, clean lines.
For a bolder effect, I sometimes layer matte and metallic shades together — the contrast adds depth and sophistication.
Pro Tips:
- Painter’s tape is key for crisp, professional-looking lines.
- Mix small and medium pumpkins with different geometric patterns for visual interest.
- Gold leaf or metallic pens can add extra detail and shimmer for a luxe finish.
9. Hometown Pumpkin
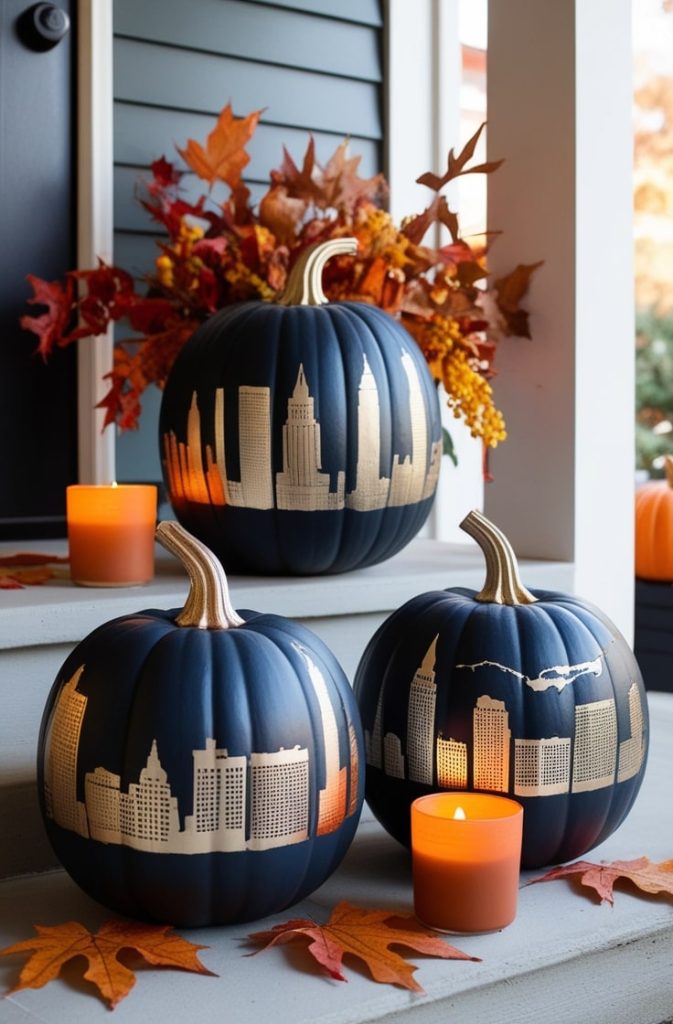
Hometown pumpkins are all about adding a personal, sentimental touch to your fall decor. Painting your city skyline, a map, or a local landmark transforms a simple pumpkin into a meaningful centerpiece. I love this idea because it’s unique, memorable, and perfect for gifting or displaying as a conversation starter on your porch or mantel.
How I do it:
I start with a dark or neutral base coat, like navy, black, or deep gray. Once it’s dry, I lightly sketch my design using a pencil or chalk — it could be a recognizable skyline, a favorite building, or even your state outline. Then, I fill in the details with acrylic paint, using metallic or contrasting colors to make the elements stand out. Finally, I sometimes outline key parts with a fine-tipped paint pen for extra precision.
It’s a design that’s surprisingly simple once broken down, but the result feels professional and heartfelt.
Pro Tips:
- Keep the design simple and recognizable for the best impact.
- Metallic paint adds a striking contrast against dark backgrounds.
- Miniature versions of hometown pumpkins look great when grouped as a small themed display.
10. Rainbow Pumpkin
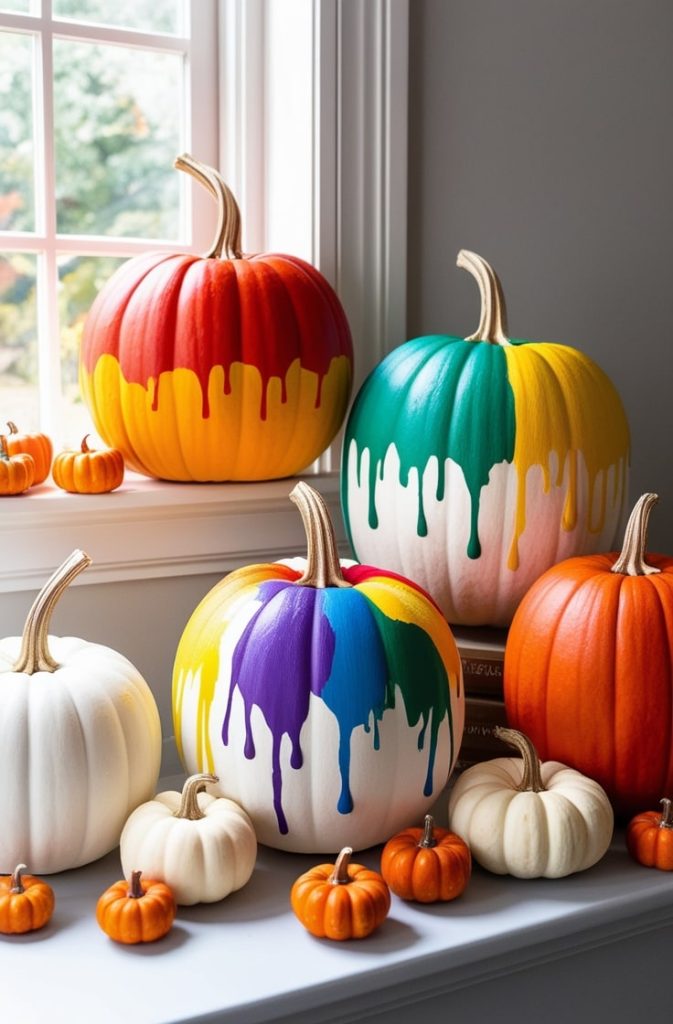
Rainbow pumpkins are bold, cheerful, and impossible to ignore. They bring a pop of color to fall decor and are perfect if you love fun, playful designs. I often use them for kids’ crafts, classroom displays, or brightening up neutral autumn spaces. Whether you go for clean stripes or a dripping paint effect, these pumpkins instantly lift the vibe of any table, shelf, or porch.
How I do it:
I start with a white or light-colored pumpkin as a base. For classic rainbow stripes, I paint even horizontal bands using bright acrylic paints — red, orange, yellow, green, blue, and purple. For a more artistic approach, I thin out the paint slightly and pour it over the pumpkin, letting it drip naturally for a beautiful abstract effect.
Each pumpkin comes out unique, which I love. I sometimes add metallic or glitter accents for an extra playful touch that catches the light.
Pro Tips:
- Use painter’s tape if you want crisp, even stripes.
- Thin your paints slightly for dripping effects, but not too watery — you still want vibrant color.
- Mini rainbow pumpkins are perfect for grouping or lining along a windowsill for maximum color impact.
11. Mini Mixed-Style Pumpkin Set
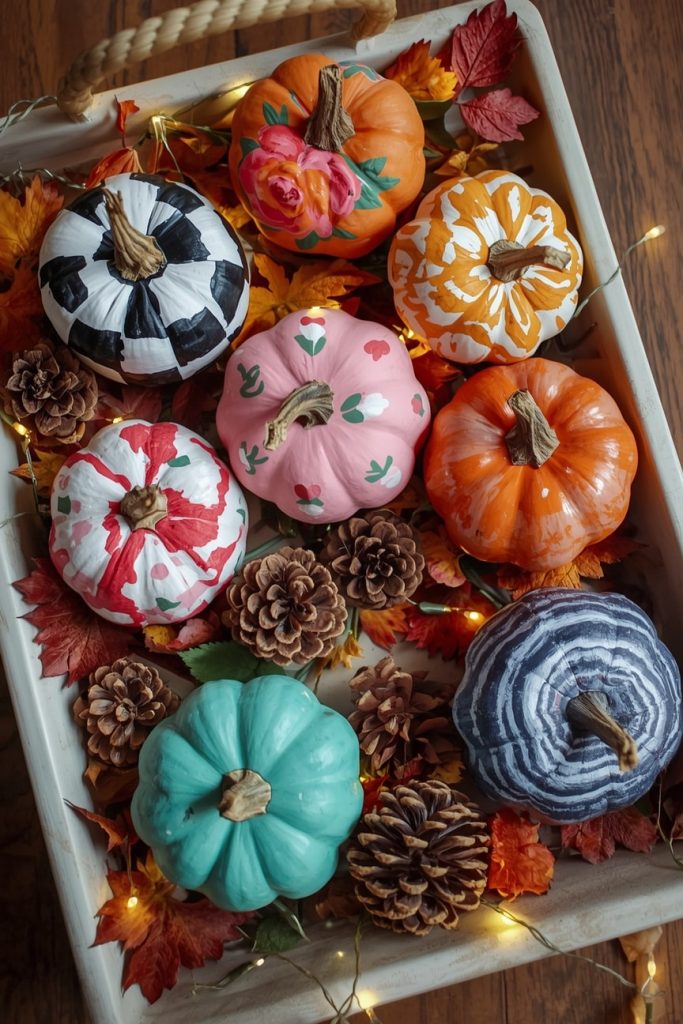
If you can’t pick just one style, why not combine them all? Mini mixed-style pumpkin sets are playful, versatile, and allow you to showcase multiple designs at once. I love arranging these on trays, shelves, or mantels — the mix of patterns, colors, and textures creates a visually dynamic fall display. Plus, they’re perfect for small spaces or table centerpieces.
How I do it:
I start by gathering several mini pumpkins, both real and faux, in varying sizes. Then, I assign a different design to each pumpkin — one checkered, one floral, one abstract pink, maybe a galaxy one for a bit of whimsy. I paint each pumpkin according to its style and let them dry completely.
Once all are finished, I group them together on a tray or in a decorative basket. I sometimes add accents like fairy lights, pinecones, or small autumn leaves to enhance the arrangement. The beauty of this idea is that every display can be completely unique!
Pro Tips:
- Mix different colors, patterns, and sizes for visual interest.
- Use faux mini pumpkins for durability and to reuse them year after year.
- Incorporate natural elements like leaves, twigs, or small gourds to complete the seasonal look.
FAQs: DIY Pumpkin Painting Ideas
1. What kind of paint works best on pumpkins?
Acrylic paint is your best friend here. It dries quickly, sticks beautifully, and gives you bright, solid coverage. You can also use spray paint for base coats if you’re working on multiple pumpkins at once.
2. How do you prepare a pumpkin before painting?
Always start with a clean surface. Wipe off dirt, oils, or residue with a damp cloth and let it dry. If you’re painting a real pumpkin, apply a thin layer of matte Mod Podge or clear acrylic sealer to help the paint grip better.
3. How do I make my painted pumpkins last longer?
Keep them indoors or on a shaded porch, away from direct sunlight and rain. For real pumpkins, a coat of clear sealer adds protection. Faux pumpkins can last for years if you store them in a cool, dry place.
4. Can kids paint pumpkins too?
Absolutely! It’s one of the easiest and most fun fall crafts for kids. I recommend washable, non-toxic paints or even markers. You can skip the mess entirely by using stickers or washi tape.
5. What’s better — real or faux pumpkins?
It depends on your goal. Real pumpkins have that authentic fall charm, but they eventually rot. Faux pumpkins (foam or plastic) are perfect for detailed designs like galaxy or geometric styles, and they’re reusable every year.
6. How do I display painted pumpkins creatively?
You can:
- Line them along your front steps.
- Group them on your dining table as a centerpiece.
- Mix them with candles, pinecones, and dried leaves for a rustic look.
- Or place mini ones on bookshelves and window sills.
Basically, anywhere you want a pop of fall color — a painted pumpkin fits right in.
Final Thoughts
Painting pumpkins has become one of my favorite seasonal rituals — it’s calming, creative, and the results always feel so personal. Whether you go glam with gold accents or whimsical with rainbow splashes, each design adds a little joy to your fall space.
So grab a few brushes, pour yourself a cozy drink, and let’s make this autumn your most colorful one yet.
And if you try any of these DIY pumpkin painting ideas, tag your creations on Pinterest or Instagram — I’d love to see how yours turn out! 🎃💛
Next Reads:

I’m Sloane Everly, the heart and soul behind TheTidyPorch.com, where I pour my love for home decor, interior styling, and curated living into everything I do.
I’m all about turning houses into homes that feel like you—full of warmth, character, and a little bit of magic.
My style? Think cozy charm with a splash of bold, always designed to make your space feel like a hug you never want to leave.