I know how it feels to navigate a tiny kitchen. You’re dodging cramped counters, wrestling with cluttered cabinets, and dreaming of a space that’s both functional and fabulous.
Trust me, I’ve been there. But here’s the good news: your small kitchen is a blank canvas just waiting for some DIY magic and budget-friendly hacks.
With a few clever storage solutions, smart layouts, and stylish touches, you can transform your cozy space into a Pinterest-worthy haven. In this article, I’m sharing 15 affordable, creative ideas tailored for women like you who love DIY projects and thrifty solutions.
Whether you’re a renter or a homeowner, these tips will help you maximize space and style without breaking the bank. Ready to dive in? Let’s make your kitchen shine!
Table of Contents
- Smart Storage Solutions
- Budget-Friendly DIY Hacks
- Clever Layout and Functional Design
- Visual Tricks for a Spacious Feel
- Conclusion
Smart Storage Solutions
Small kitchens demand smart storage. You don’t need a big budget or a complete remodel to make it work. These five ideas are all about using every inch creatively while keeping costs low. Let’s explore some storage hacks that’ll have you saying, “Why didn’t I think of that?”
1. Open Shelving with Thrifted Charm
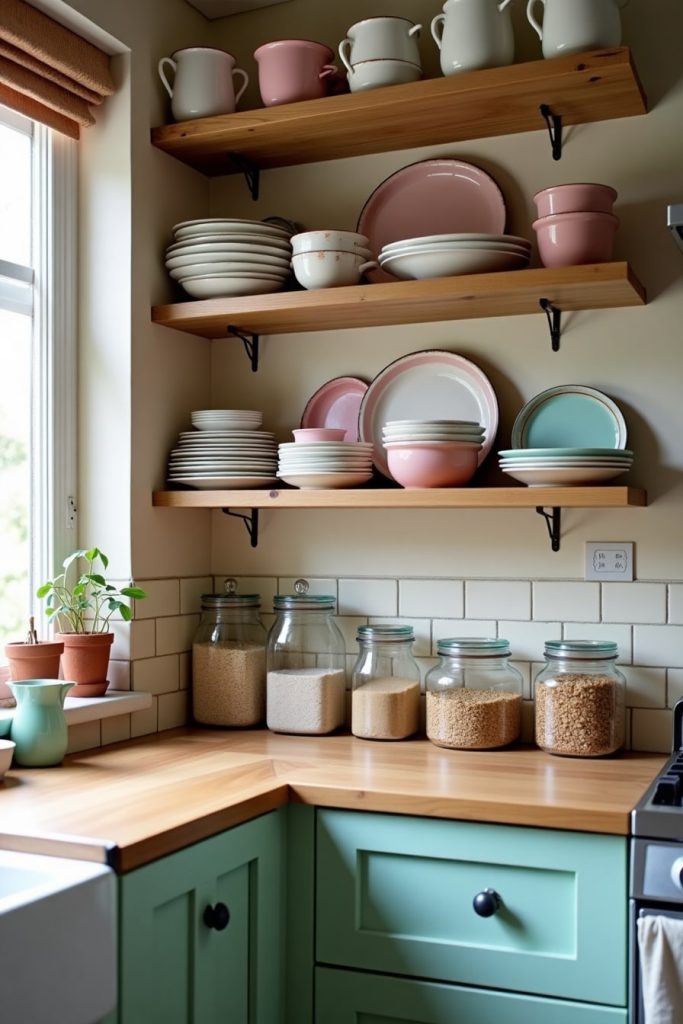
I used to stare at my bulky upper cabinets and feel like they were closing in on me. Then I swapped them out for open shelves, and wow—what a difference!
Open shelving creates a sense of airiness, making your kitchen feel bigger instantly. You can find affordable wood planks at hardware stores or hunt for reclaimed boards at thrift shops for that rustic charm.
I once scored a set of weathered boards for $5 at a flea market, and they’re now the star of my kitchen.
DIY Tip: Paint your shelves in soft pastels like blush pink or mint green for that Pinterest-perfect vibe. Pair them with matching mason jars to store dry goods like pasta, spices, or snacks.
I found a dozen mason jars at a thrift store for $3, and they keep my shelves looking tidy and cohesive. Arrange your jars in a color-coordinated row, and suddenly your storage doubles as decor.
It’s budget-friendly, stylish, and oh-so-functional.
To install, grab some sturdy brackets (around $2 each at hardware stores) and secure your shelves to the wall.
Make sure to use a level—trust me, I learned the hard way when my first shelf tilted! This setup not only frees up space but also lets you show off your prettiest dishes or vintage finds.
Your kitchen will feel open and inviting, perfect for snapping that Instagram shot.
2. Vertical Storage on a Budget
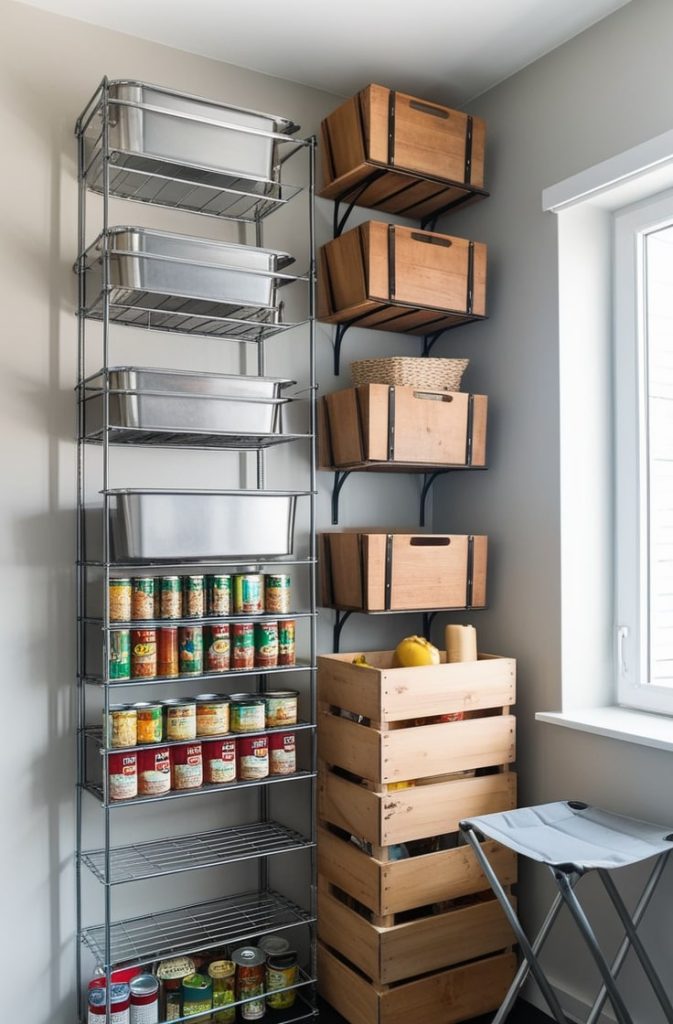
When your kitchen’s square footage is limited, you’ve got to think up. Vertical storage is a game-changer, and it doesn’t have to cost a fortune. I added a tall wire rack from IKEA for just $10, and it holds everything from canned goods to mixing bowls.
You can also stack wooden crates vertically for a farmhouse look—check local thrift stores or online marketplaces for free or cheap ones.
If you’re feeling crafty, try installing tension rods inside a cabinet to create extra “shelves” for lightweight items like cutting boards or baking trays. I found a pack of tension rods at a dollar store for $5, and they’ve been a lifesaver for organizing my pantry.
For taller storage, consider a budget-friendly pull-out pantry from a discount retailer. These slim units slide into narrow spaces and hold tons of snacks or spices.
The key is to use every inch of your wall height. I even hung a small basket on a high shelf to store rarely used items like holiday cookie cutters.
If you’re worried about reaching high spots, a foldable step stool (around $15) tucks neatly into a corner. This approach maximizes space without cluttering your counters, and it’s all doable on a tight budget.
3. DIY Pegboard Wall Organizer
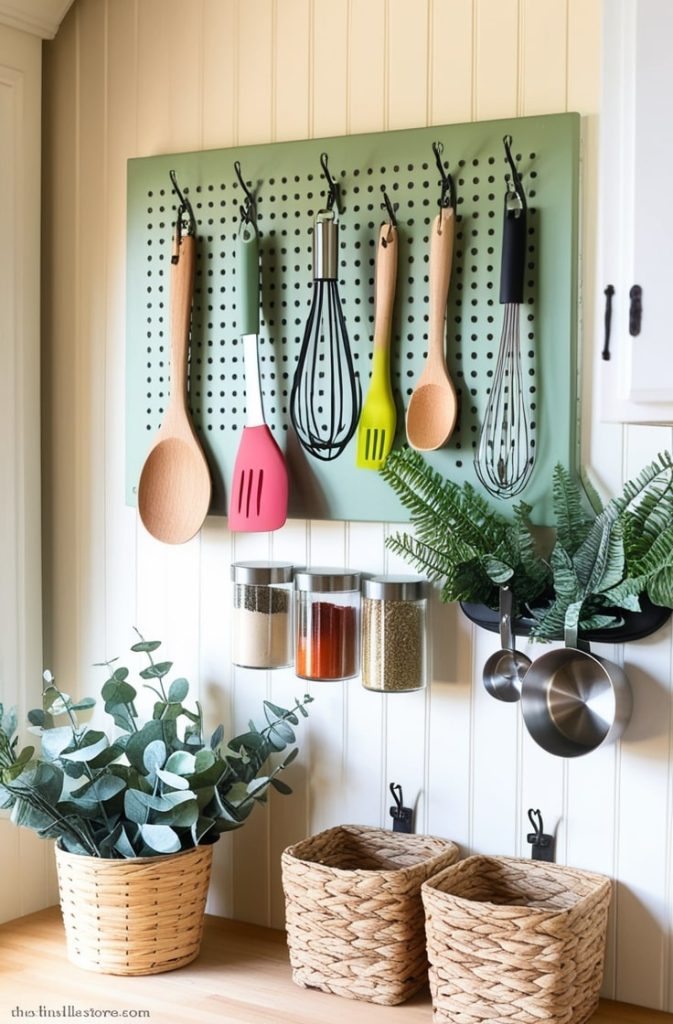
Pegboards are my secret weapon for small kitchens. They’re affordable, customizable, and perfect for keeping your tools within reach.
I picked up a pegboard at a hardware store for $12 and painted it sage green to match my kitchen’s vibe.
Once you hang it, add hooks or baskets to hold utensils, pots, or even spice jars. The best part? You can rearrange everything as your needs change.
Budget Hack: A pack of pegboard hooks costs about $5, and you can find them at any hardware store. I also added small baskets from the dollar store to hold measuring cups and tea towels.
For a Pinterest touch, I hung a few faux greenery sprigs to soften the look. My pegboard now doubles as a focal point and a storage solution.
To install, you’ll need a drill and some wall anchors (total cost under $10). If you’re a renter, check with your landlord first, but many approve pegboards since they’re easy to patch later.
This hack keeps your drawers free and your counters clear, all while adding a pop of personality. Plus, it’s so satisfying to see everything neatly organized!
4. Hanging Racks for Rustic Vibes
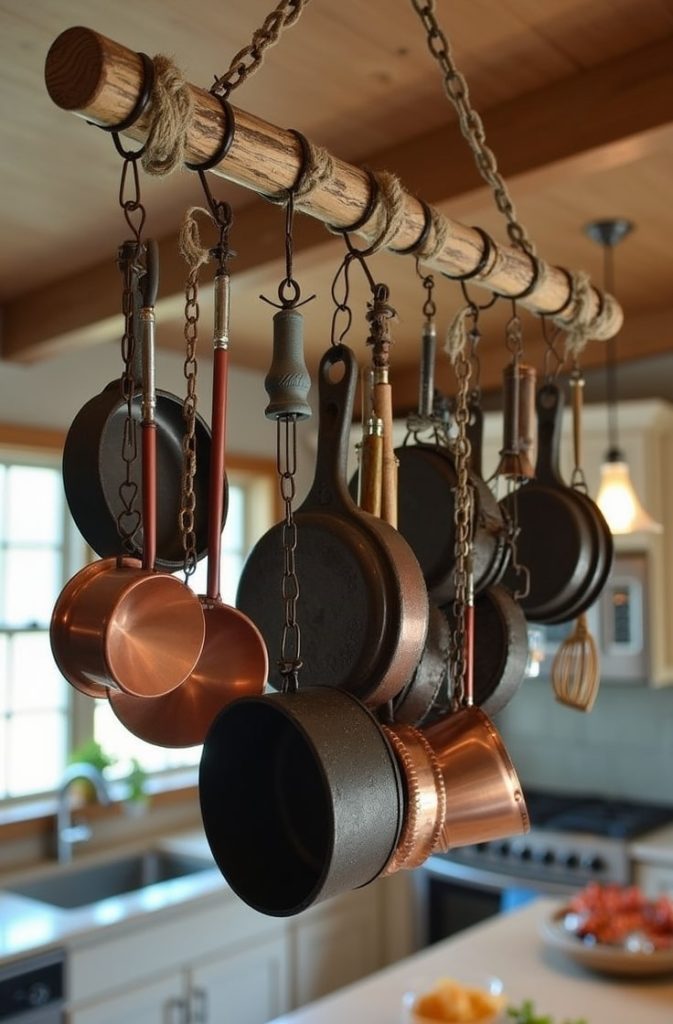
Pots and pans take up so much cabinet space, don’t they? I decided to free up mine by creating a DIY hanging rack.
All you need is a wooden dowel (about $3 at a craft store), some S-hooks ($2 for a pack), and sturdy twine or chain to hang it from the ceiling.
I painted my dowel a creamy white to match my shelves, and it gives my kitchen that cozy, farmhouse feel I love.
If ceiling hanging isn’t an option, try a wall-mounted rack. I saw a gorgeous one made from a repurposed curtain rod at a friend’s place—it cost her $8 total! Hang your prettiest pots and pans to double as decor.
Not only does this save cabinet space, but it also makes cooking easier since everything’s within arm’s reach.
Pro Tip: Check that your ceiling or wall can support the weight, especially if you’re hanging heavy cast-iron pans. A stud finder (around $10) is a small investment for peace of mind. This hack is budget-friendly, stylish, and perfect for showing off your cookware collection.
5. Under-Sink Storage with Dollar Store Bins
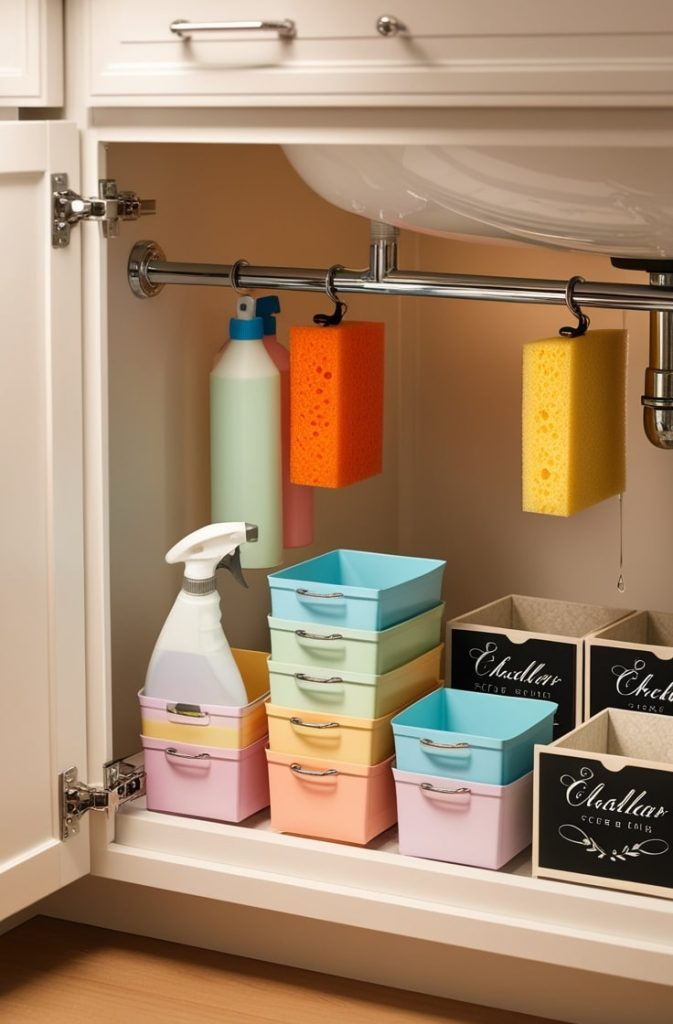
The under-sink area is often a cluttered mess, but it’s prime real estate in a small kitchen. I transformed mine using stackable bins from the dollar store—$1 each!
These bins are perfect for organizing cleaning supplies, dish soaps, or even trash bags. I also added adhesive hooks (a pack of 10 for $2) inside the cabinet door to hang sponges and scrub brushes.
For extra organization, try a tension rod across the cabinet to hang spray bottles. I found this trick online, and it cost me $1 for the rod. If you want a fancier option, look for pull-out drawers at discount stores, but the dollar store bins work just as well for a fraction of the price. This hack keeps your under-sink area tidy and makes cleaning supplies easy to grab.
Label your bins with chalkboard stickers (around $3 for a pack) for a cute, organized look. It’s a small touch that makes a big difference, especially when you’re rushing to clean up before guests arrive. With these budget hacks, your under-sink space will be both functional and photo-ready.
Budget-Friendly DIY Hacks
You don’t need a big budget to make your kitchen feel custom. These DIY hacks are affordable, renter-friendly, and perfect for adding that Pinterest flair you love. Let’s dive into three projects that’ll spark your creativity and save you money.
6. Peel-and-Stick Backsplash Magic
A bold backsplash can transform your kitchen without a major renovation. I was hesitant to commit to permanent tiles as a renter, so I tried peel-and-stick tiles, and I’m obsessed!
You can find packs for under $30 online or at home improvement stores. I chose white subway tiles for a classic look, but geometric or Moroccan patterns are super trendy for that Pinterest vibe.
Pinterest Tip: Lay out your tiles on the counter first to plan the pattern. It took me about an hour to install mine, and the result looks like real tile! They’re easy to cut with scissors for tricky corners, and they peel off without damaging walls—perfect for renters. This hack adds personality and makes your kitchen feel fresh and modern.
If you’re worried about cost, start with a small section, like above the sink. A single pack of tiles can cover a 10-square-foot area, giving you a high-impact upgrade for less.
Pair it with a neutral wall color to let the backsplash shine. Your kitchen will feel like it belongs in a design magazine!
7. Repurposed Crate Shelving
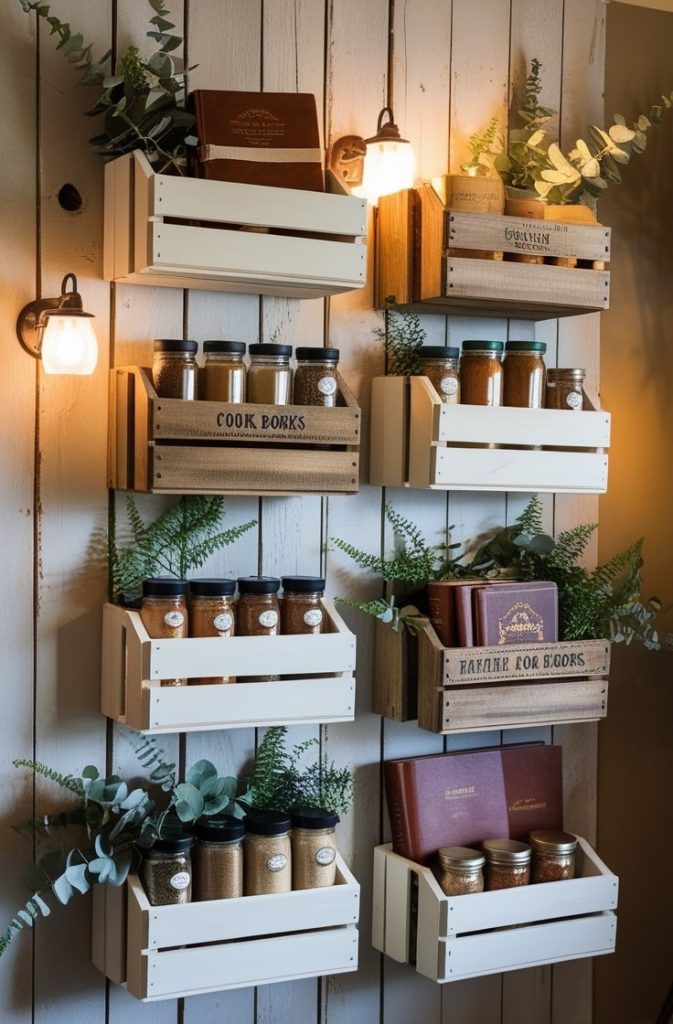
I love hunting for treasures at thrift stores, and wooden crates are a goldmine for DIY storage.
I found three crates for $2 each and turned them into rustic shelves for my spices and cookbooks. Sand them down with sandpaper ($3 for a pack) and stain or paint them to match your decor. I used a leftover can of white paint to give mine a clean, farmhouse look.
Mount the crates on the wall with brackets or stack them on your counter for a portable solution. I screwed two crates together to create a vertical spice rack, and it holds 20 jars perfectly.
The total cost? Under $10, including the crates and hardware. This hack is so versatile—you can use crates for utensils, plants, or even dish towels.
If you can’t find crates, check out garage sales or ask local stores for discarded produce boxes. This project is budget-friendly, eco-conscious, and adds that handcrafted charm Pinterest users adore. Plus, it’s a fun weekend project you can tackle with a cup of coffee in hand.
8. Magnetic Spice Storage

Spices are essential, but their jars can clutter up your cabinets. I came up with a genius hack: magnetic spice storage.
Grab small metal tins or jars (I found a set of 12 for $10 at a thrift store) and glue tiny magnets to the bottoms. Then, stick them to a metal sheet or even the side of your fridge. My fridge now doubles as a spice rack, and it’s so convenient!
DIY Win: If you don’t have a metal sheet, buy one for about $5 at a hardware store and paint it to match your pegboard or shelves. I arranged my jars in a grid pattern for a clean, organized look that screams Pinterest. This hack saves drawer space and makes it easy to grab spices while cooking.
For an extra touch, label the lids with a chalk marker or cute stickers. The whole project cost me $15, and it’s one of my favorite kitchen upgrades. It’s practical, budget-friendly, and looks like something you’d pin to your “Dream Kitchen” board.
Clever Layout and Functional Design
A smart layout can make your small kitchen feel like a dream to work in. These four ideas focus on functionality while keeping costs low and DIY spirit high. Let’s make your kitchen work harder for you.
9. Galley Kitchen on a Dime
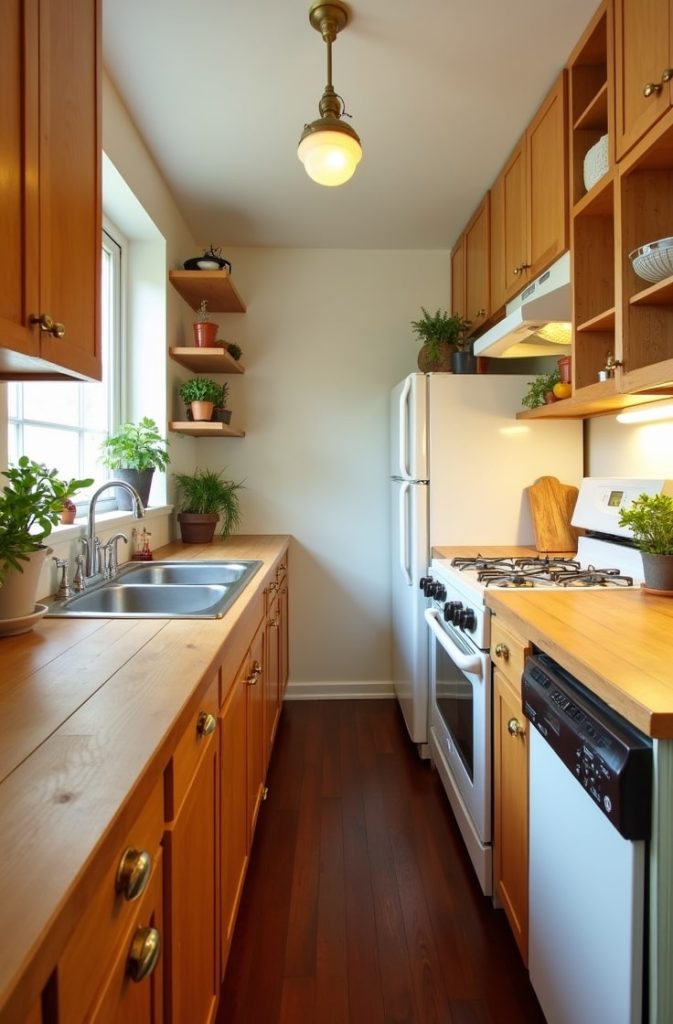
If your kitchen is narrow, a galley layout is your best friend. It places counters on opposite walls, creating an efficient workflow.
I helped a friend set up her galley kitchen using secondhand cabinets from a Habitat for Humanity ReStore. We scored four cabinets for $50 total—such a steal!
Pair them with affordable butcher block counters (around $20 per linear foot at discount stores) for a warm, inviting look.
Budget Tip: If new counters aren’t in your budget, try painting existing ones with appliance paint for a fresh finish. I painted my old laminate counters black for $15, and it looks surprisingly chic. Arrange your appliances to keep the “work triangle” (sink, stove, fridge) tight, so you’re not running laps while cooking. This layout is perfect for studio apartments or cozy homes, and it maximizes every inch without a pricey remodel.
10. Compact Appliances with DIY Covers
Big appliances can overwhelm a small kitchen, so I switched to compact ones. A mini dishwasher (18 inches wide) fits perfectly in my space, and I found a used one for $100 on a local marketplace.
Toaster ovens or all-in-one air fryer-ovens are also great space-savers. But here’s the fun part: I made DIY covers to hide them when not in use.
Grab some fabric scraps or buy a yard of boho-style fabric for $5–$10. I sewed a simple cover for my toaster oven, but you can use fabric glue if sewing isn’t your thing. The cover adds a cozy vibe and blends the appliance into my decor.
You can even make slipcovers for your microwave or coffee maker. This hack keeps your counters looking tidy and adds a custom touch that’s super Pinterestable.
11. Rolling Cart Island Hack
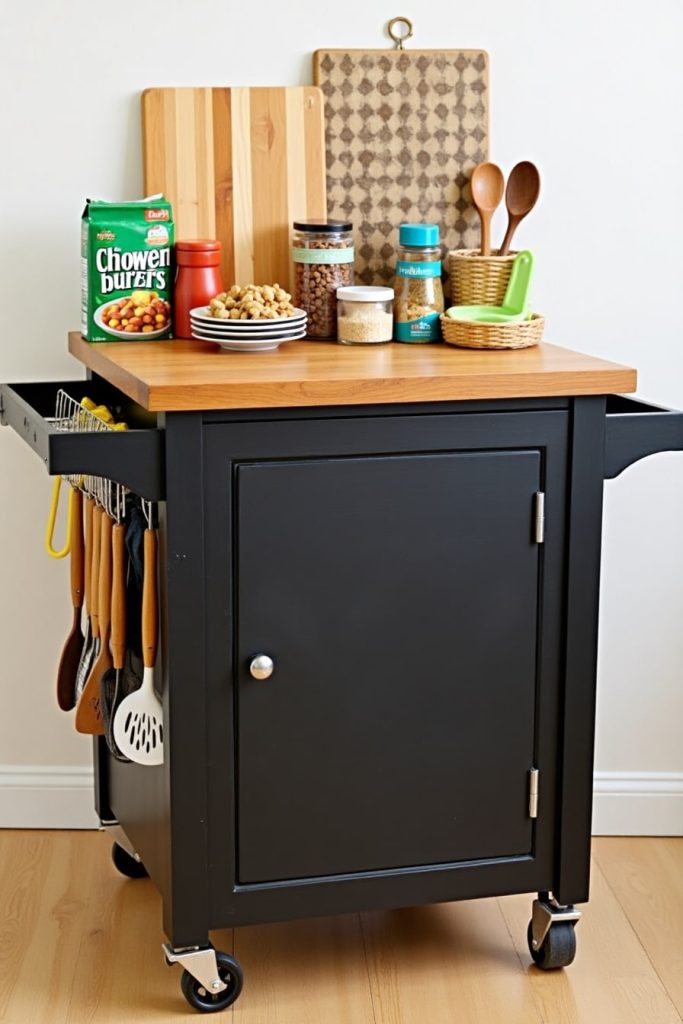
I always dreamed of a kitchen island, but my tiny space said, “No way!” Then I found a thrift store cart for $20 and turned it into a mobile island.
Paint the top with chalkboard paint (around $10) for a fun prep surface, and add hooks to the sides for utensils or towels. I attached a butcher block remnant ($15 from a hardware store) to make it sturdier.
This cart gives me extra counter space for chopping veggies or rolling dough. When I’m done, I roll it into a corner or against the wall. It’s also great for storing mixing bowls or serving snacks when friends come over.
Check thrift stores or online marketplaces for carts—vintage bar carts work beautifully! This hack is affordable, flexible, and perfect for small kitchens.
12. Foldable Dining Nook
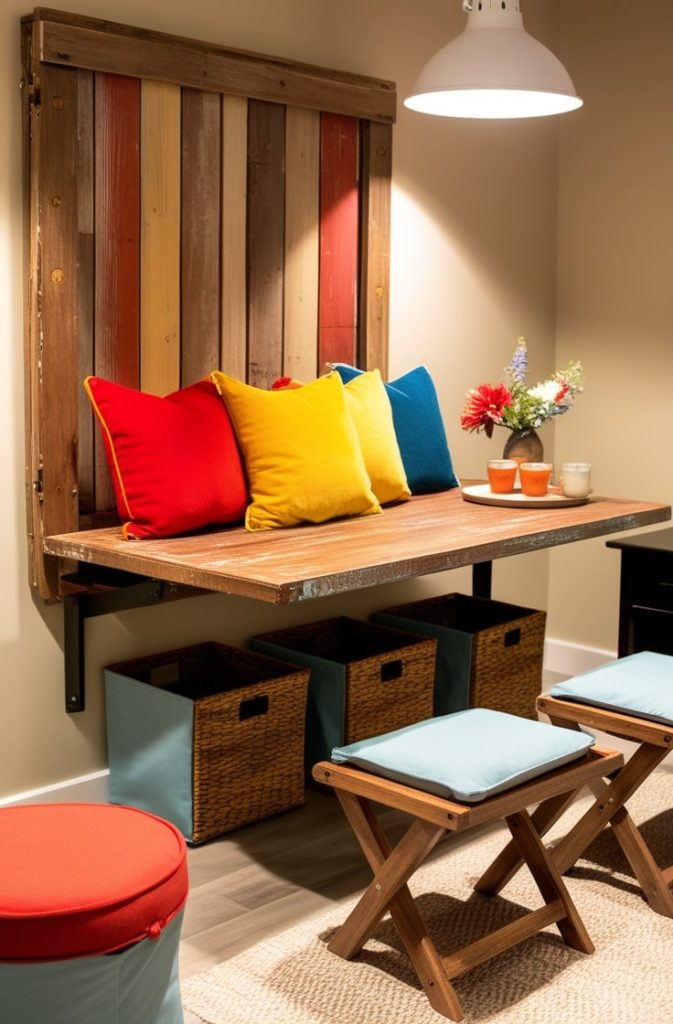
Eating in a small kitchen can feel impossible, but a foldable dining nook saves the day. I built a fold-down table using a piece of plywood ($10) and heavy-duty hinges ($5).
When not in use, it folds flat against the wall, freeing up floor space. I paired it with a thrifted bench ($15) and added cushions from a discount store for a cozy vibe.
DIY Tip: Use storage bins under the bench to hold placemats, napkins, or even extra pantry items. I found cute bins for $3 each at a dollar store. If you don’t have room for a bench, try foldable stools that stack away.
This setup is perfect for enjoying coffee or hosting a small dinner party. It’s budget-friendly, space-saving, and looks like it belongs in a cozy Pinterest board.
Visual Tricks for a Spacious Feel
Your kitchen’s vibe matters just as much as its function. These three ideas use color, light, and texture to make your space feel bigger and brighter. Plus, they’re all affordable and DIY-friendly!
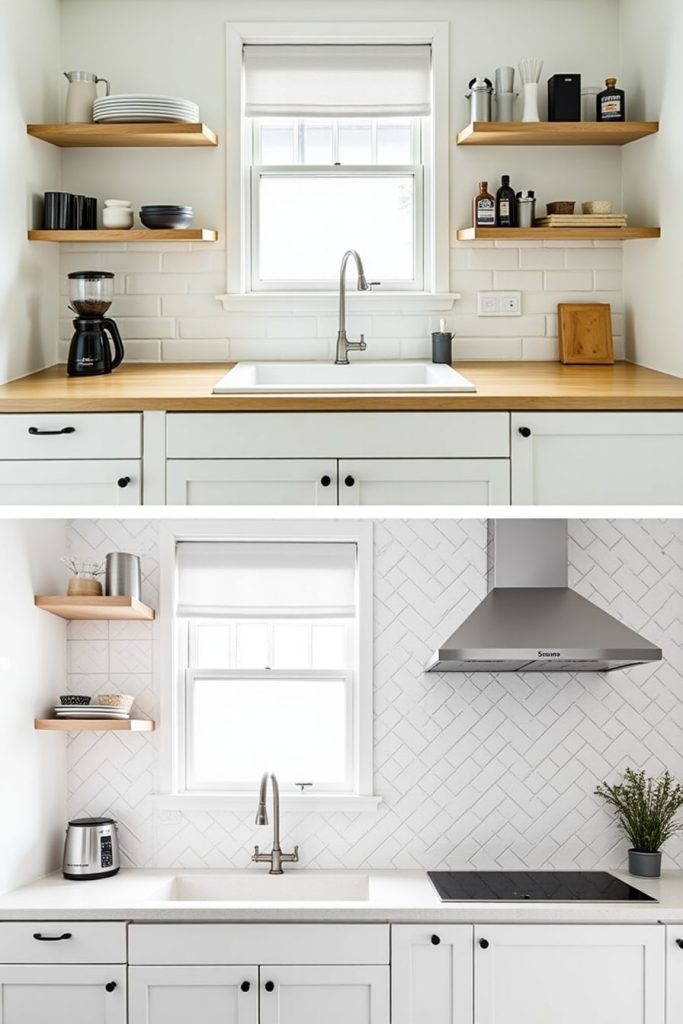
13. Light and Bright Color Palette
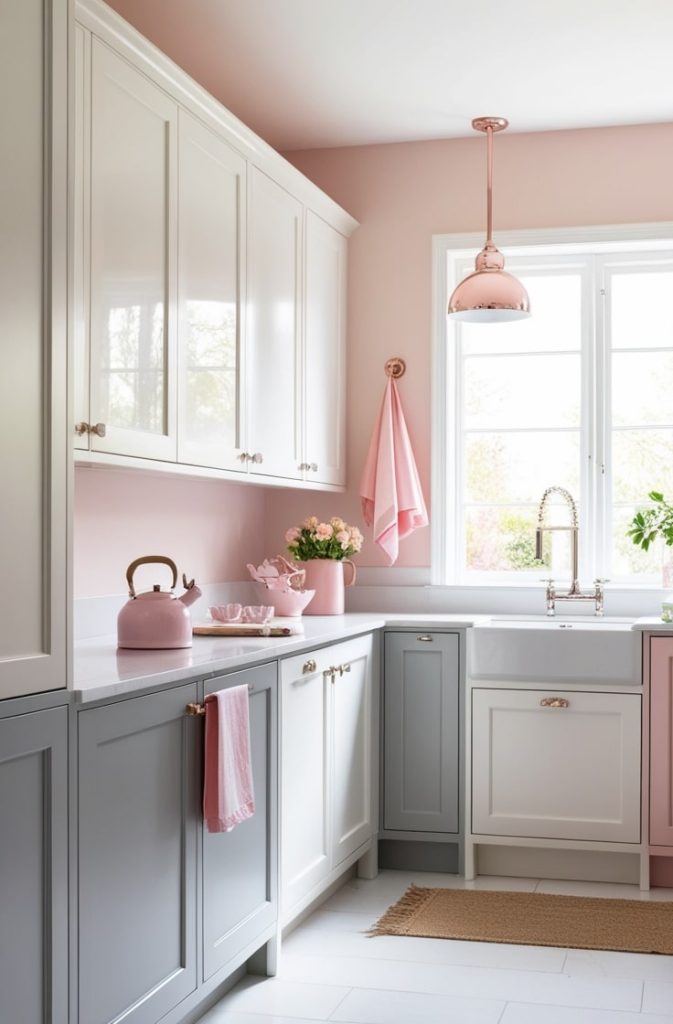
Dark colors can make a small kitchen feel like a cave, so I went for a light palette. I painted my cabinets soft gray using chalk paint ($20 for a quart), which doesn’t require sanding—perfect for beginners!
Whites, creams, or blush pinks also work beautifully. These colors reflect light, making your kitchen feel airy and spacious.
DIY Tip: If painting feels daunting, start with one wall or just the cabinet doors. I used a sample pot of blush pink ($5) to test the look, and it was love at first brushstroke. Pair your light walls with colorful accessories like dish towels or a bright kettle to add personality. This hack is budget-friendly and transforms your kitchen’s mood instantly.
14. Reflective Accents on a Budget
Reflective surfaces are magic in small spaces. I found a mirrored tray at a dollar store for $3 and use it to hold my soap and sponge by the sink. It reflects light and makes my counter feel less cluttered.
For a bigger impact, try metallic contact paper (around $8 a roll) on cabinet edges or drawer fronts. It mimics expensive finishes without the cost.
If you’re feeling bold, hang a small mirror on a blank wall. I scored a round one for $5 at a thrift store, and it makes my kitchen feel twice as big. These reflective accents are affordable and add a touch of glamour that’s perfect for Pinterest.
They’re also easy to remove if you’re renting, so you can experiment without worry.
15. DIY Under-Cabinet Lighting
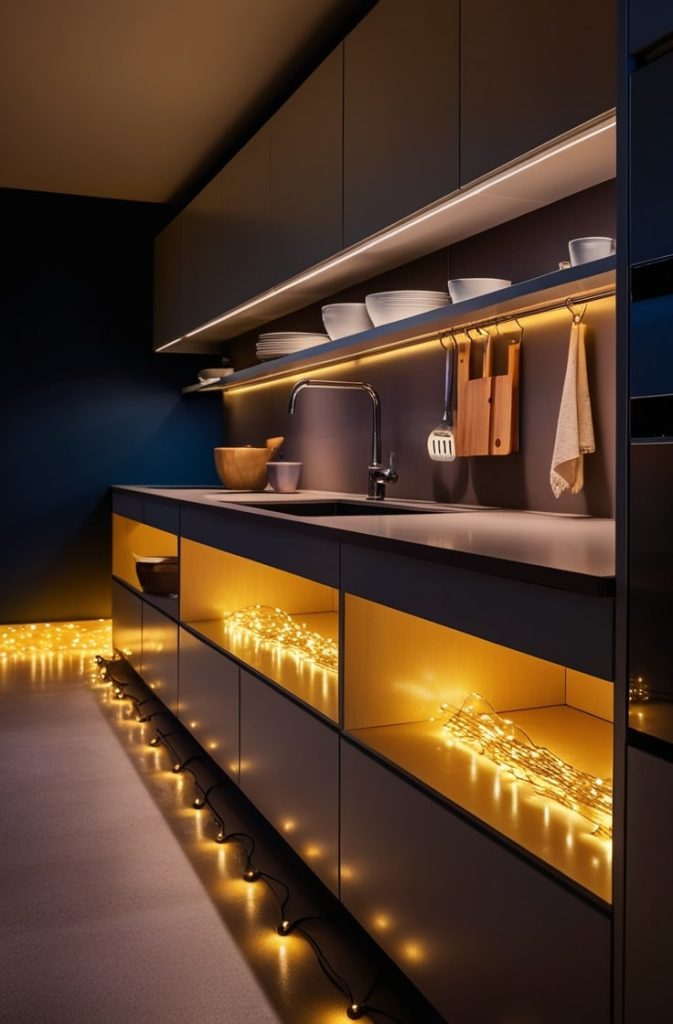
Dark corners can make your kitchen feel smaller, so I added under-cabinet lighting to brighten things up. Battery-powered LED puck lights are a renter’s dream—mine cost $8 for a pack of four.
Stick them under your cabinets, and suddenly your counters are ready for their close-up. I use them for late-night baking sessions, and they make everything feel cozy.
Pinterest Hack: For extra charm, weave battery-powered fairy lights (around $5) along your shelves or under cabinets. They add a warm glow that’s perfect for sipping wine or hosting friends. No electrician needed, and the effect is pure magic. This hack is cheap, easy, and makes your kitchen feel like a cozy café.
Conclusion
I know small kitchens can feel overwhelming, but they’re full of potential.
With these 15 DIY and budget-friendly hacks, you can create a space that’s organized, stylish, and uniquely you. Start with something simple, like a peel-and-stick backsplash or a painted pegboard, and watch your kitchen come to life.
Each of these ideas is affordable, renter-friendly, and designed to spark your creativity. So grab your paintbrush, hit the thrift store, and get ready to fall in love with your kitchen! Which tip is your favorite?
Pin it to your “Dream Kitchen” board or share your makeover on Pinterest—I can’t wait to see what you create!
Next Reads:
| 13 Apartment Small Kitchen Ideas to Maximize Space & Style |
| 11 Small Kitchen Ideas With Island to Maximize Space |

I’m Sloane Everly, the heart and soul behind TheTidyPorch.com, where I pour my love for home decor, interior styling, and curated living into everything I do.
I’m all about turning houses into homes that feel like you—full of warmth, character, and a little bit of magic.
My style? Think cozy charm with a splash of bold, always designed to make your space feel like a hug you never want to leave.