
Learning the alphabet becomes much more exciting when children can create something with their own hands. That’s why I love making this B for Bear craft with preschoolers.
It combines letter recognition with a fun animal theme, helping children remember that B is for Bear while practicing cutting, gluing, and following simple directions.
This craft is made with just a few basic supplies that are easy to find at home or in the classroom. We start with a hand-drawn uppercase letter B, then transform it into an adorable brown bear using simple construction paper shapes.
The finished project is perfect for alphabet lessons, preschool bulletin boards, homeschool activities, or woodland animal units.
Let’s gather our supplies and make this cute Letter B bear together!
Materials You’ll Need
- Pink construction paper (background)
- Dark brown construction paper
- Light brown construction paper
- Black construction paper
- White construction paper
- Marker
- Scissors
- Glue stick
- Pencil
- Hand-drawn uppercase B template (cut out)
How to Make a B for Bear Craft
Step 1: Prepare the Letter B
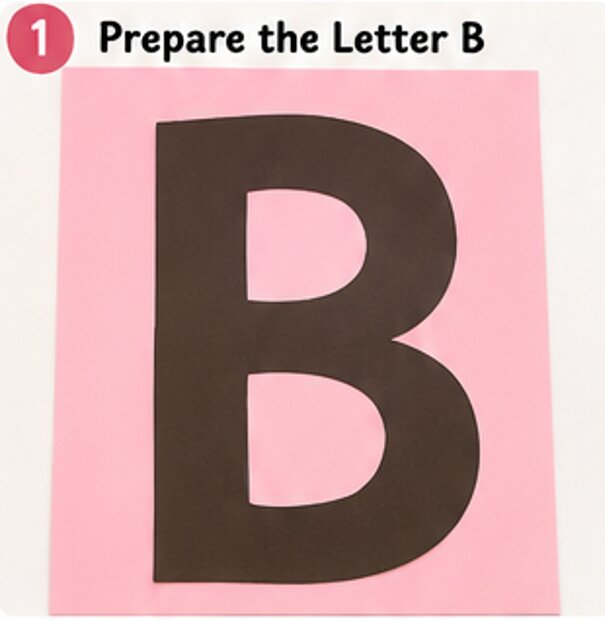
I begin by drawing a large uppercase B on dark brown construction paper. I make it big enough to become the bear’s body, taking up most of the page.
After drawing the letter, I carefully cut it out along the outline. Since this letter is the foundation of the entire craft, I try to make the edges as smooth as possible.
Next, I glue the large letter B in the center of a pink construction paper sheet. I leave enough space around the letter for the bear’s ears, paws, and other features.
Once the letter is glued down, the bear’s body is already taking shape.
Step 2: Cut Out the Bear’s Ears
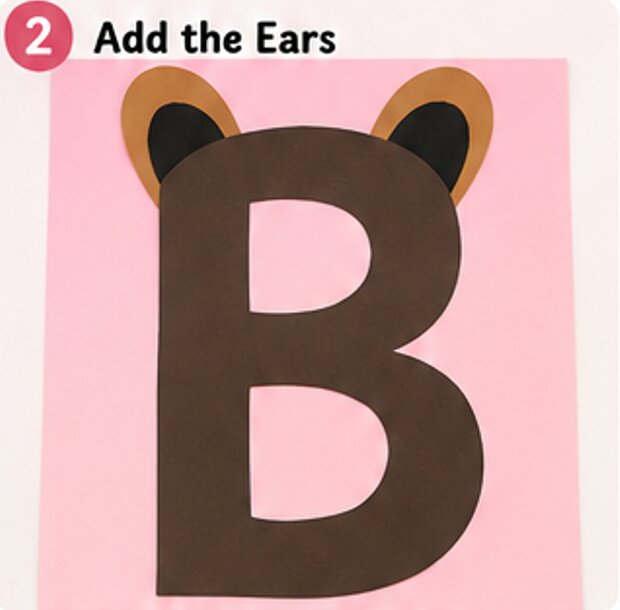
Now I make the bear’s ears.
Using light brown construction paper, I cut out two large oval shapes. These will be the outer ears. I keep them about the same size so the bear looks balanced.
Next, I cut two slightly smaller black ovals to create the inner ears.
I glue each black oval onto the center of a light brown oval, leaving a brown border around the edges.
Finally, I glue the completed ears behind the top corners of the uppercase B. Only part of each ear should stick out, making it look like the ears are attached to the bear’s head.
Already, the letter B is starting to look like a friendly bear.
Step 3: Make the Bear’s Eyes
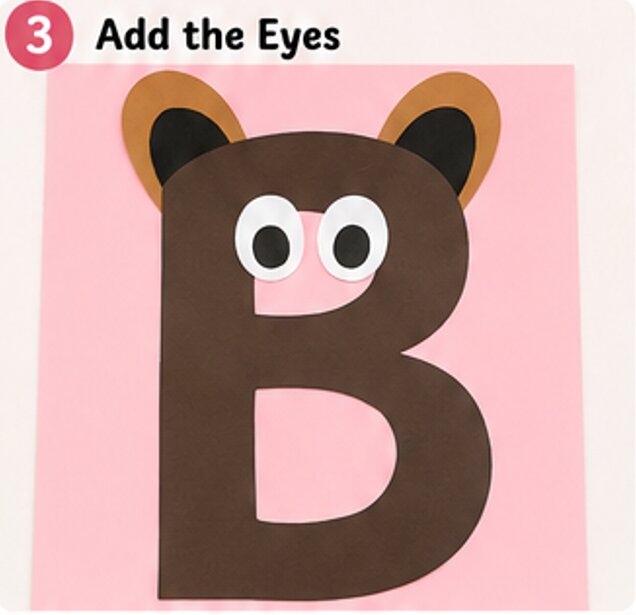
The eyes help give the bear a playful expression.
I cut two white oval shapes from white construction paper. Then I cut two small black circles for the pupils.
I glue one black circle onto each white oval.
Next, I place the eyes near the top center of the letter B, slightly above the middle opening of the letter.
I make sure the eyes are evenly spaced. Keeping both eyes at the same height helps the bear look neat and cheerful.
Even with just the eyes attached, the bear already has plenty of personality.
Step 4: Create the Bear’s Nose and Muzzle
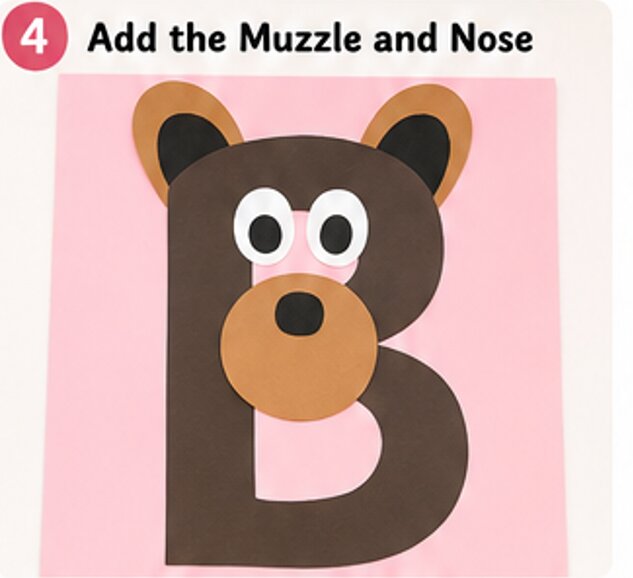
The muzzle is one of my favorite parts because it makes the bear’s face come to life.
I cut one medium-sized oval from light brown construction paper. This becomes the muzzle.
Then I cut a small black oval from black construction paper for the nose.
I glue the black nose near the top center of the light brown muzzle.
After that, I glue the entire muzzle directly below the eyes so it slightly overlaps the middle section of the letter B.
The placement is important because it creates the bear’s face while still allowing the shape of the letter B to remain visible.
Step 5: Draw the Bear’s Face
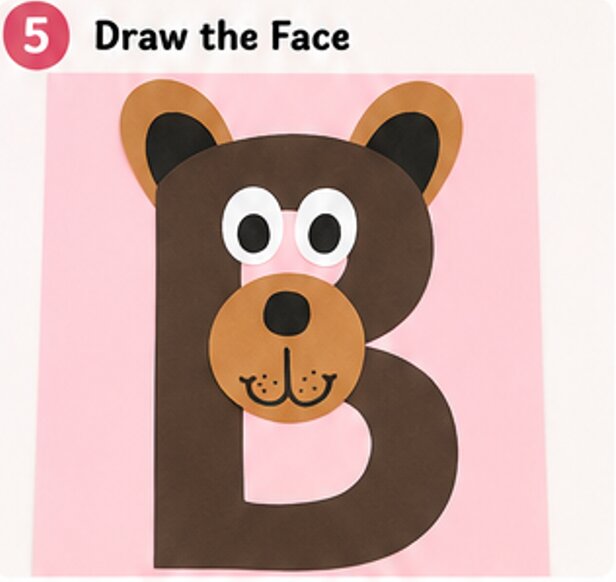
Now it’s time to add the facial details.
Using a black marker, I draw a straight line extending downward from the nose.
At the bottom of the line, I draw two curved smiles that connect to form the bear’s mouth.
Then I add several tiny dots on each side to create whisker spots.
These simple lines completely transform the paper pieces into a cute bear face.
Children can also draw happy, surprised, or smiling expressions to make each bear unique.
Step 6: Cut Out the Bear’s Front Paws
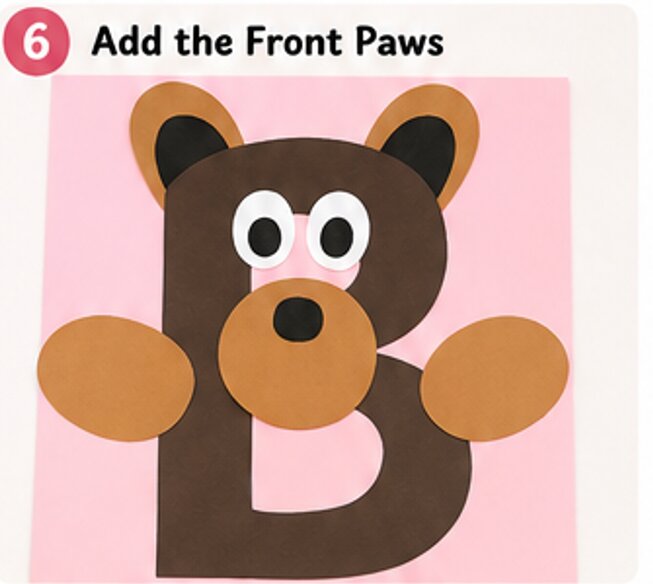
Next, I create the bear’s front paws.
Using light brown construction paper, I cut out two oval shapes.
I glue one paw on each side of the letter B around the middle section. I let each paw overlap the edge of the letter slightly so it looks like the bear is reaching out for a hug.
Once both paws are glued down, I use a black marker to draw three short curved lines near the outside edge of each paw.
These simple lines represent the bear’s claws.
Because the claws are only small details, they don’t make the bear look scary. Instead, they give the craft a realistic but friendly appearance.
Step 7: Add the Bear’s Feet
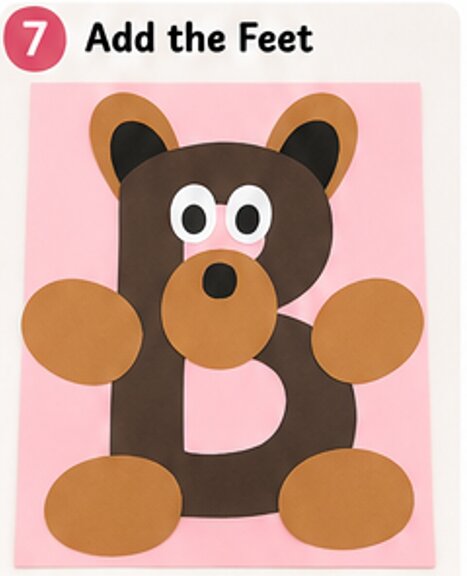
Every bear needs sturdy feet.
I cut two larger oval shapes from light brown construction paper. These are slightly bigger than the front paws.
I glue one foot near the bottom left corner of the letter B and the other near the bottom right corner.
Both feet overlap the bottom of the letter so they appear attached to the bear’s body.
Using my marker again, I draw three curved claw lines on each foot.
Now the bear has all four paws, making it look complete from head to toe.
Step 8: Finish the Bear’s Details
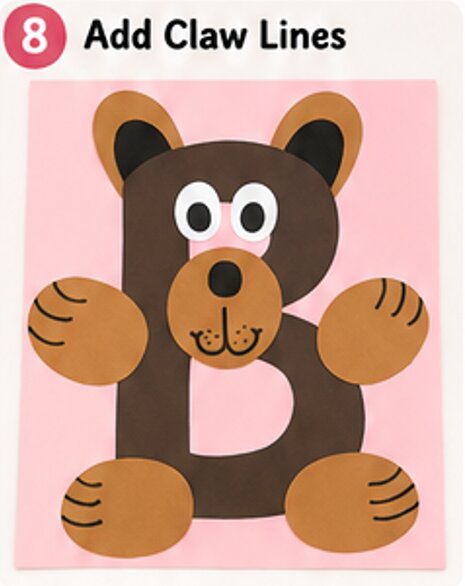
Before calling the craft finished, I take a moment to check everything.
If any paper edges are lifting, I press them down firmly with a little extra glue.
I make sure the ears, eyes, muzzle, paws, and feet are securely attached.
If I want, I can slightly adjust the position of the eyes or paws before the glue dries completely.
Keeping all the pieces evenly placed gives the finished bear a clean and polished appearance.
Step 9: Write “B is for Bear”
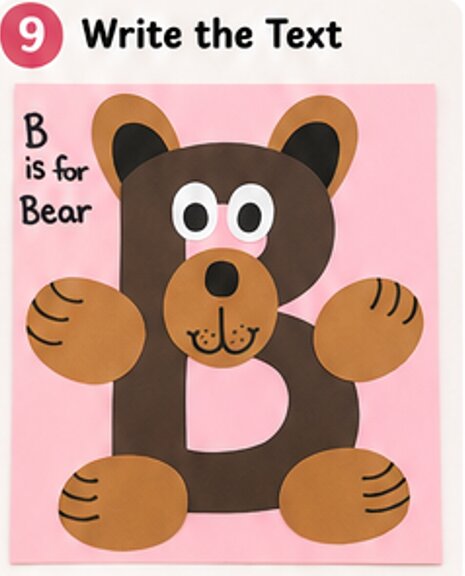
To reinforce letter recognition, I use a black marker to write “B is for Bear” in the top left corner of the paper.
This simple sentence helps preschoolers connect the uppercase letter with a familiar animal.
As children repeat the phrase aloud while pointing to the letter, they strengthen both letter recognition and vocabulary.
Teachers can also encourage children to practice saying the beginning /b/ sound together.
Step 10: Display Your Finished Craft
Once everything is dry, the adorable bear is ready to display.
I like hanging these crafts on a classroom bulletin board, placing them on an alphabet wall, or displaying them at home.
Since every child cuts and glues the pieces a little differently, each bear has its own personality. Some bears have bigger paws, while others have funny-looking eyes or smiling faces. That’s part of what makes this project so much fun.
Children always enjoy pointing to their finished work and proudly saying, “B is for Bear!”
Why I Love This B for Bear Craft
This simple alphabet craft teaches much more than just the letter B.
As children cut out each shape, they strengthen their hand muscles and improve scissor skills. Gluing the pieces onto the letter helps them practice visual placement and following directions. Drawing the bear’s face with a marker encourages creativity while improving pencil control.
Most importantly, children repeatedly see and use the uppercase letter B, helping them remember both its shape and its sound.
Because the entire bear is built around the letter itself, children naturally connect the alphabet with something fun and memorable.
Conclusion
This B for Bear craft is a simple preschool activity that turns an ordinary uppercase letter into an adorable woodland animal.
With only construction paper, a hand-drawn letter B, a few cut-out shapes, and a marker, children can create a fun alphabet craft they’ll be proud to display.
Whether you’re teaching at home, in preschool, or in a kindergarten classroom, this easy project provides a hands-on way to practice letter recognition while encouraging creativity and fine motor skills.
Best of all, the finished bear reminds children that learning the alphabet can be both educational and fun. Every time they see their completed project, they’ll remember one important lesson: B is for Bear!
Read Also:

Sohel Rana is the writer, editor, publisher, and founder of The Tidy Porch. He is the man who is responsible for the craft (my wife created) being converted into a written piece. He also helps her wife (Sumona) by capturing videos of each craft. In short, he brings each craft created by her wife in front of you by transforming it into an article and a video.
