Let’s start with why a backsplash matters. It’s one of those magical home updates that’s both practical and beautiful. A backsplash shields your walls from water, grease, and those inevitable pasta sauce splatters (we’ve all been there!).
But it’s also a canvas for your style. Want a sleek, modern vibe? A cozy, rustic feel? Or maybe something bold and artistic? There’s a backsplash for every aesthetic.
From budget-friendly peel-and-stick tiles to luxurious marble, the variety of materials, patterns, and finishes is endless. And if you’re eco-conscious, you’ll love knowing there are sustainable options too.
I’m excited to share these ideas with you, complete with cost estimates, maintenance tips, and DIY advice. Ready to explore? Let’s get started.
Table of Contents
- Classic & Timeless Backsplashes
- Bold & Modern Backsplashes
- Creative & Budget-Friendly Backsplashes
- Backsplashes for Small Kitchens
- Trend Spotlight for 2025
- Considerations Before Choosing a Backsplash
- Step-by-Step Guide: Kitchen Backsplash Installation Tips
- Take Action
Classic & Timeless Backsplashes
If you love a kitchen that feels timeless—never out of style—these classic backsplash ideas are for you. They’re versatile, elegant, and work in almost any kitchen. Let’s take a look.
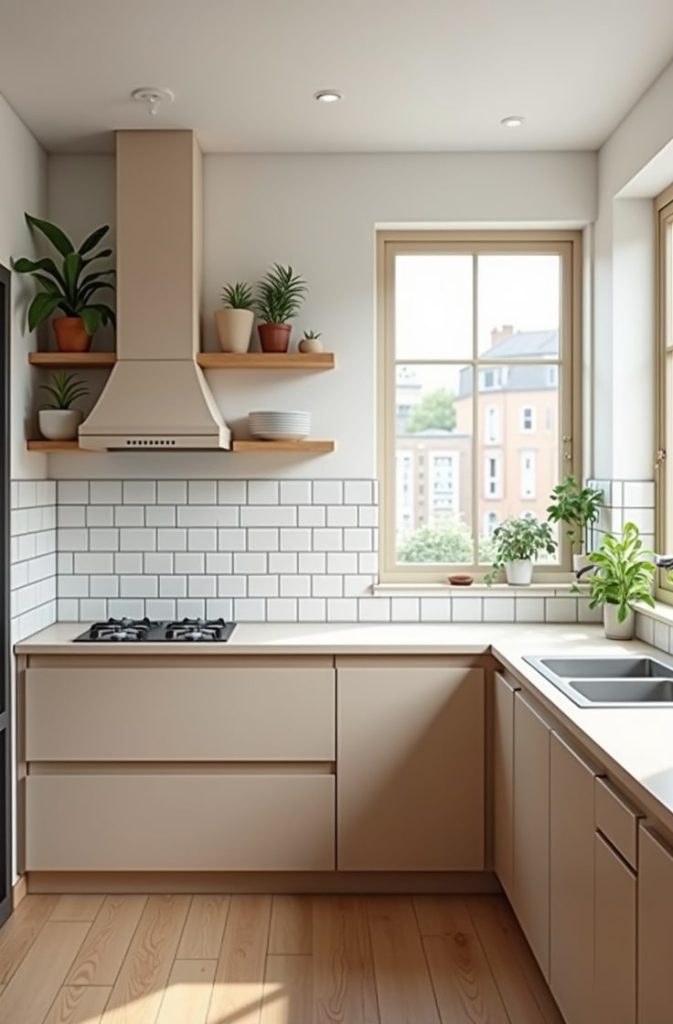
1. Subway Tile
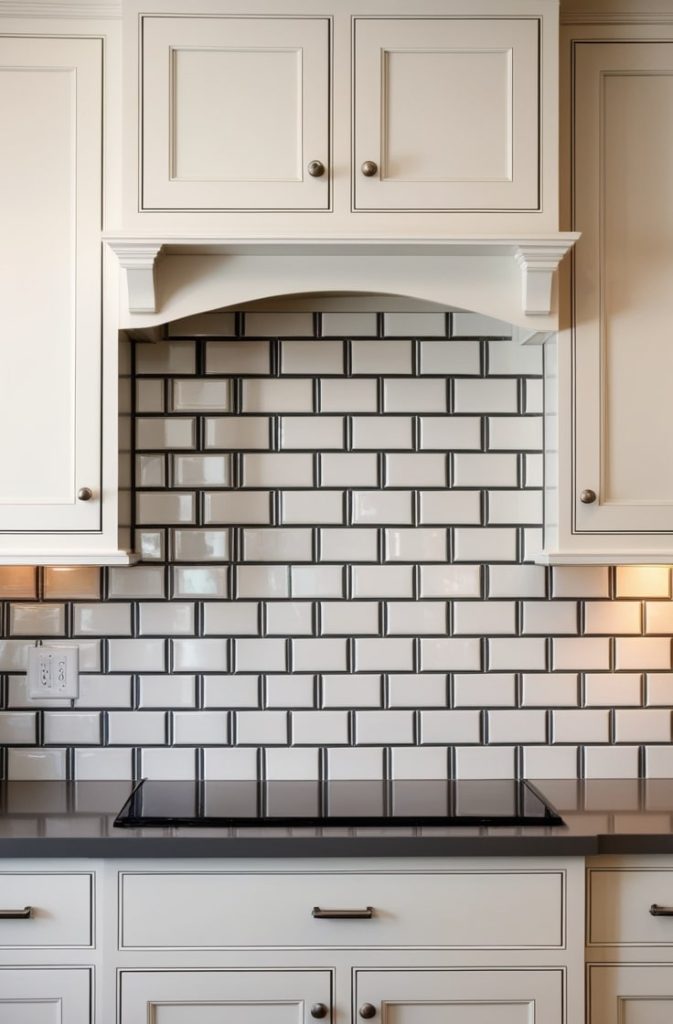
I can’t talk about backsplashes without starting with the MVP: subway tile. It’s timeless, versatile, and oh-so-budget-friendly. These rectangular tiles, typically 3×6 inches, have been a kitchen staple for decades, and for good reason.
They’re clean, simple, and fit any style—modern, farmhouse, or traditional. You can find them in countless colors, from crisp white to soft gray, and finishes like glossy or matte. Want to shake things up?
Try a bold grout color, like black or navy, for a modern twist. I recently saw a kitchen with white subway tiles and charcoal grout—it was stunning! The best part? Subway tiles are affordable, often costing $5–$15 per square foot.
They’re easy to install too, making them a great choice if you’re watching your budget.
2. Marble Elegance
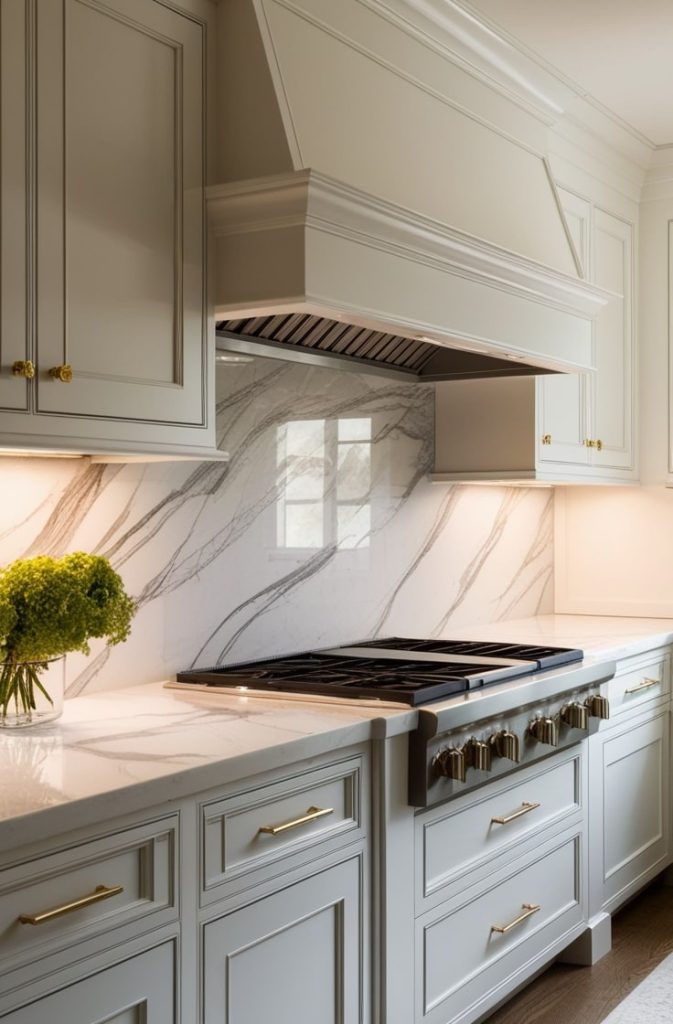
If you’re dreaming of a luxurious kitchen, marble is your go-to. There’s something about marble’s soft veining and upscale vibe that elevates any space. I’m obsessed with Carrara marble for its subtle gray veins—it’s classic yet fresh.
Or, if you want drama, Calacatta marble with its bold veining is a showstopper. Marble works beautifully in classic, modern, or transitional kitchens. Imagine it paired with white cabinetry and gold hardware—pure elegance!
Now, a quick heads-up: marble is high-end, so expect to spend $20–$50 per square foot. It’s also porous, so you’ll need to seal it regularly to prevent stains. I learned this the hard way after a red wine spill in a friend’s marble-clad kitchen! But with proper care, it’s worth every penny.
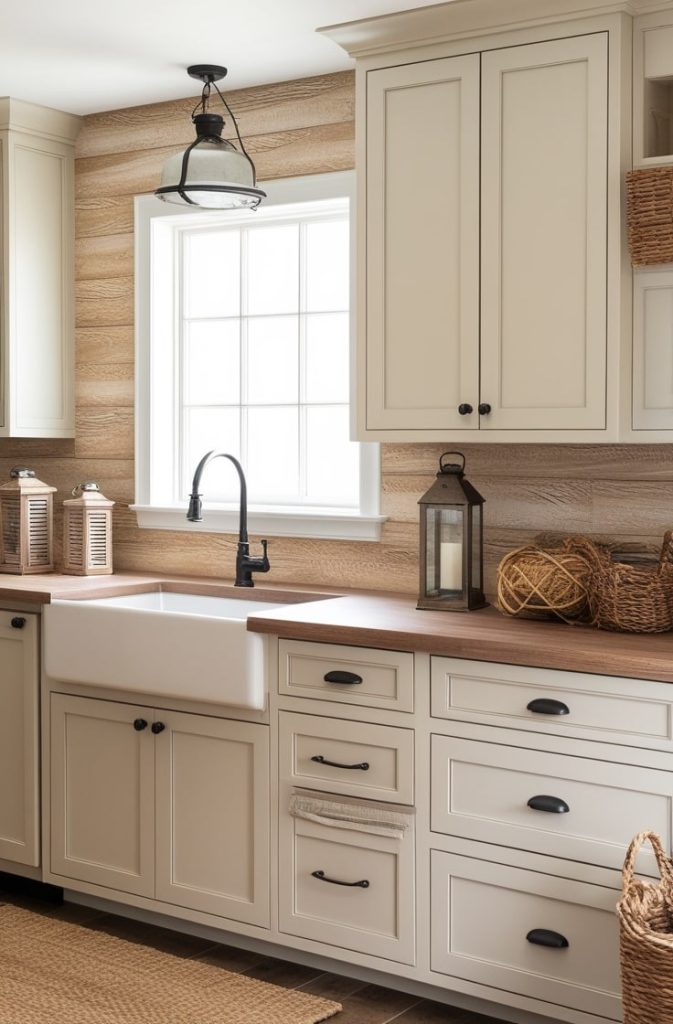
3. Natural Stone
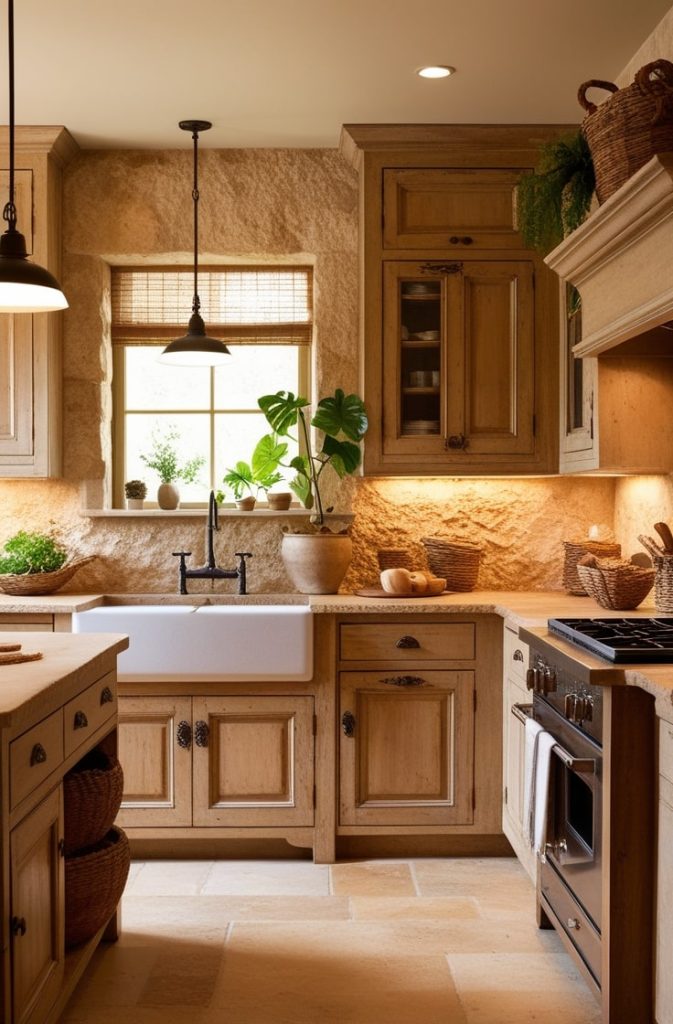
For a warm, organic feel, natural stone is a fantastic choice. Think slate, travertine, or limestone—each brings unique texture and earthy tones to your kitchen.
I love how slate’s deep grays add a rustic touch, while travertine’s creamy hues feel soft and inviting. These stones are perfect for kitchens with a cozy, natural vibe, like a cottage or farmhouse style. They’re durable but, like marble, need sealing to resist stains.
Costs typically range from $15–$40 per square foot, depending on the stone. I saw a travertine backsplash in a friend’s home paired with wooden cabinets—it felt like a warm hug every time I walked in. If you want texture and character, natural stone is a winner.
Bold & Modern Backsplashes
Ready to make a statement? These bold and modern backsplash ideas are perfect for kitchens that crave a contemporary edge. Let’s explore some showstoppers.
4. Geometric Patterns
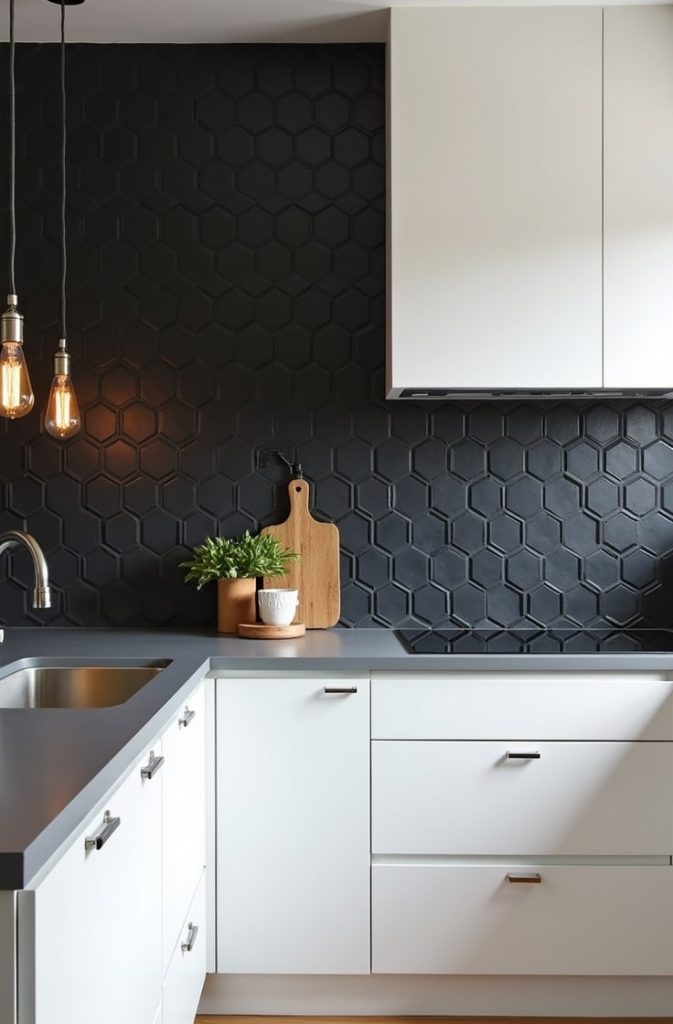
Geometric tiles are having a major moment, and I’m here for it. Hexagons, chevrons, or arabesque shapes add dynamic movement to your kitchen. These patterns feel fresh and modern, perfect for eclectic or contemporary spaces.
I recently saw a hexagon tile backsplash in matte black—it was bold yet sophisticated. You can play with scale too—small hexagons for intricate detail or larger ones for a graphic punch. These tiles are moderately priced, around $10–$25 per square foot, and they’re a top trend for 2025.
Pair them with simple cabinets to let the pattern shine. Trust me, this is a great way to add personality without overwhelming your space.
5. Large-Format Tiles
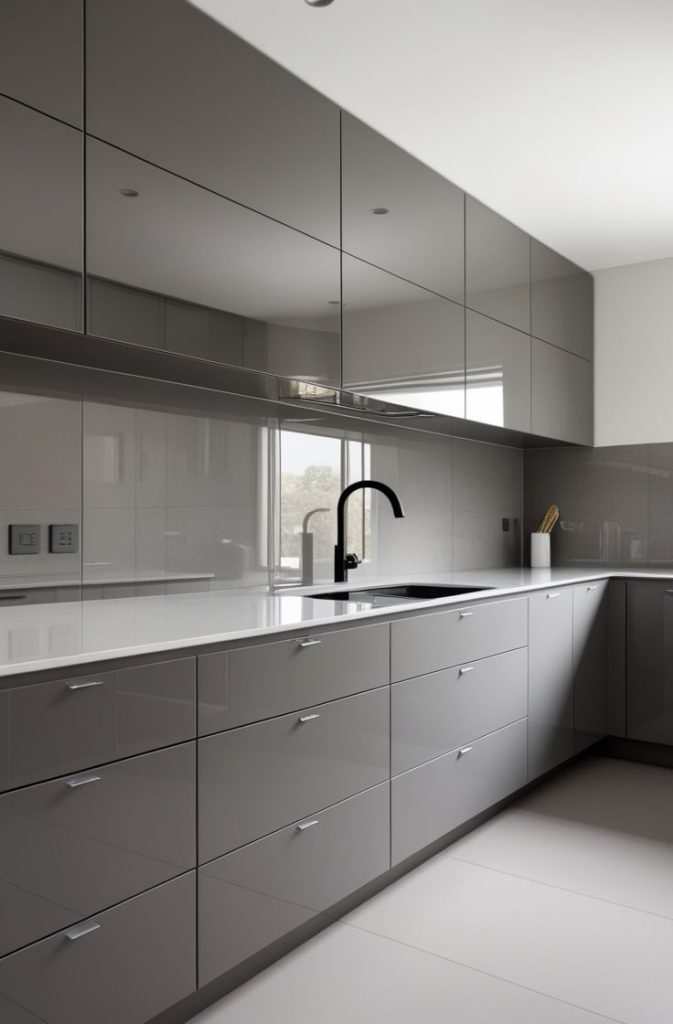
If you love a clean, seamless look, large-format tiles are your best friend. These oversized tiles—think 12×24 inches or larger—have fewer grout lines, creating a sleek, modern vibe.
I saw a kitchen with large-format gray porcelain tiles, and it felt so polished and airy. They’re perfect for minimalist or modern kitchens where less is more. Plus, fewer grout lines mean easier cleaning—a win in my book!
Expect to spend $10–$30 per square foot, depending on the material. If you want a bold, uncluttered statement, large-format tiles deliver every time.
6. Glass Tiles
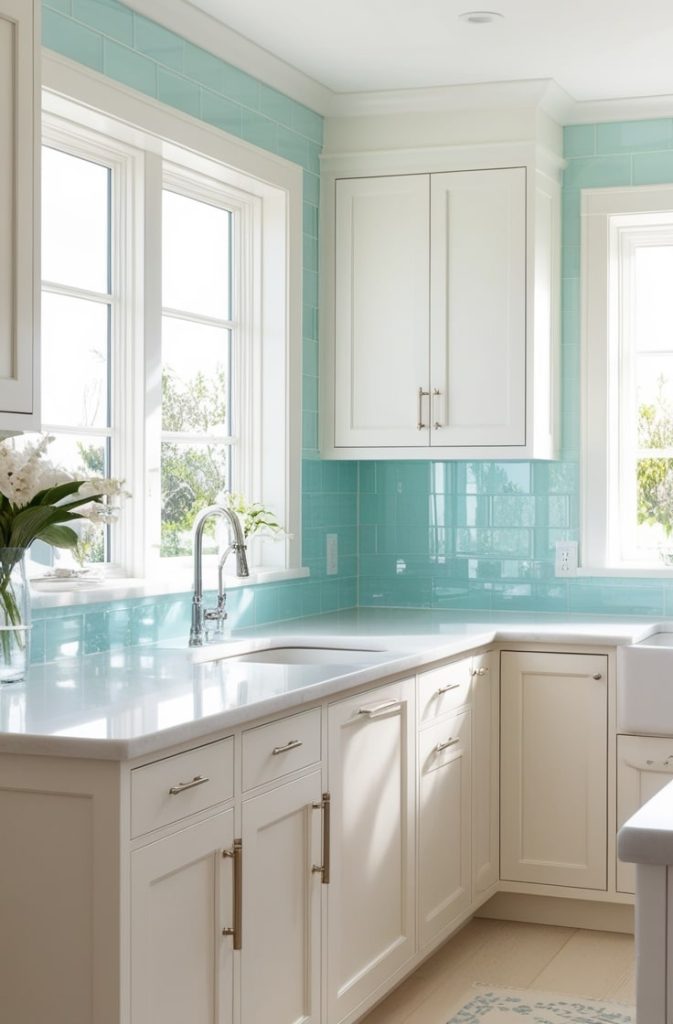
Glass tiles are all about shine and light. They reflect light beautifully, making your kitchen feel brighter and more open. I love how versatile they are—you can go bold with vibrant blues or greens, or keep it subtle with soft neutrals.
A friend of mine installed glass tiles in a soft aqua shade, and her kitchen sparkles every time the sun hits it. They’re great for modern or coastal kitchens and cost around $10–$25 per square foot.
One tip: use a non-abrasive cleaner to keep them smudge-free. If you want a backsplash that feels fresh and luminous, glass tiles are a fantastic pick.
7. Metallic Accents
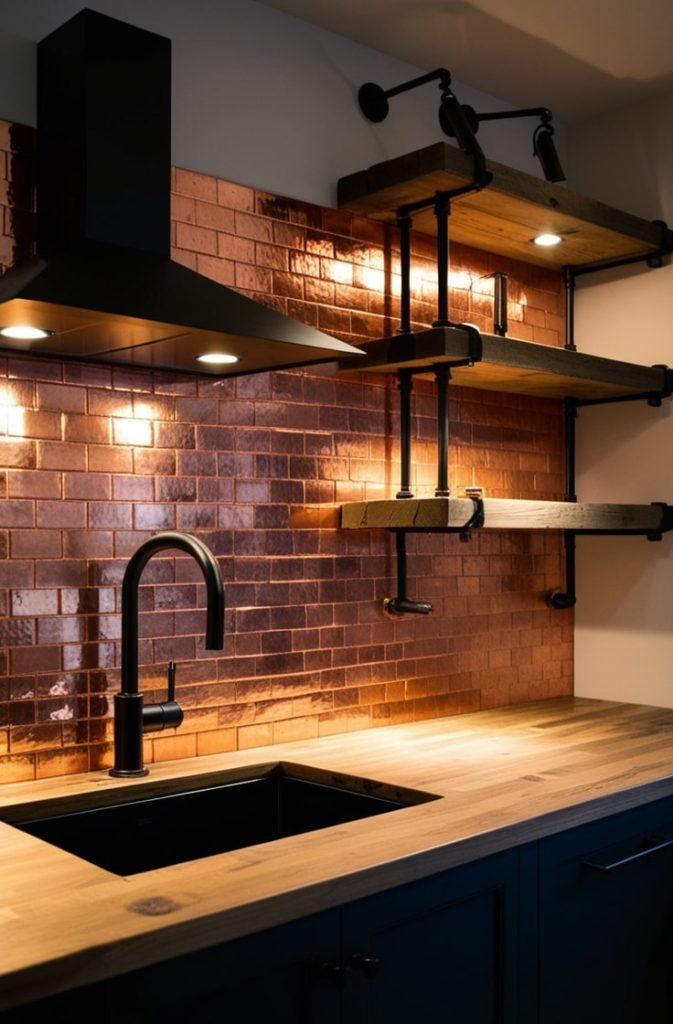
For a touch of glamour, metallic tiles are a game-changer. Think brushed brass, copper, or stainless steel—they add sophistication and a hint of sparkle. I saw a copper tile backsplash in an industrial-style kitchen, and it was pure wow.
These tiles work in modern or industrial spaces and pair beautifully with matte black fixtures or warm wood tones. They’re on the pricier side, around $20–$40 per square foot, but the luxe effect is worth it. If you want your kitchen to feel like a high-end restaurant, metallic tiles are the way to go.
Creative & Budget-Friendly Backsplashes
On a tight budget or renting? No problem! These creative, budget-friendly backsplash ideas are affordable, easy to install, and full of charm.
8. Peel-and-Stick Tiles
Peel-and-stick tiles are a renter’s dream. They’re affordable, easy to install, and look surprisingly high-end.
I helped a friend install peel-and-stick subway tiles in her apartment, and it transformed her kitchen in an afternoon! These tiles mimic ceramic, stone, or glass but cost just $5–$15 per square foot.
They’re perfect for quick upgrades or temporary spaces. My tip? Make sure your wall is clean and flat for the best adhesion. If you want a budget-friendly refresh without the commitment, peel-and-stick tiles are a lifesaver.
9. Wood-Look Tiles
Love the warmth of wood but worried about moisture?
Wood-look tiles are the answer. These ceramic or porcelain tiles mimic the grain and texture of wood but are durable and water-resistant. I saw a farmhouse kitchen with wood-look tiles in a weathered oak finish—it was cozy and practical.
They’re great for rustic or Scandinavian styles and cost $8–$20 per square foot. If you want a warm, inviting kitchen without the upkeep of real wood, these tiles are a smart choice.
10. Recycled Mosaic Tiles
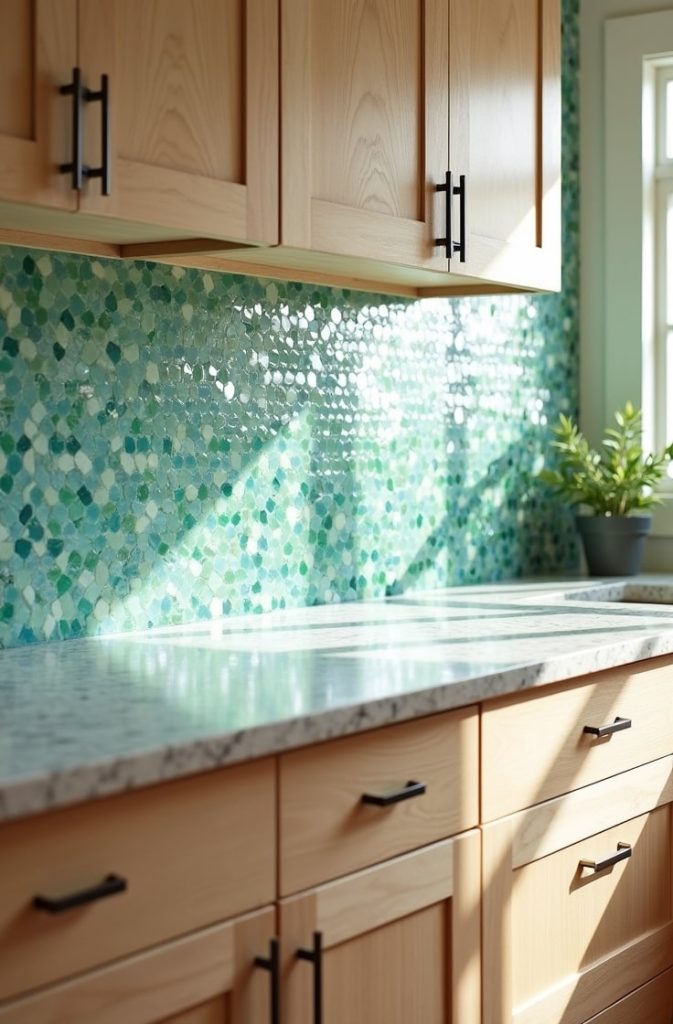
Mosaic tiles are tiny bursts of creativity, and when they’re made from recycled glass or ceramic, they’re eco-friendly too.
I love how mosaics let you play with patterns—think intricate designs or random color mixes. They’re perfect for adding personality to a neutral kitchen. A friend used recycled glass mosaics in soft greens, and it gave her space a serene, sustainable vibe.
These tiles cost around $10–$25 per square foot and align with 2025’s green design trends. If you want a unique, eco-conscious backsplash, mosaics are a fantastic option.
Backsplashes for Small Kitchens
Got a compact kitchen? These backsplash ideas are designed to make your space feel bigger, brighter, and more open. Let’s make that small kitchen shine.
11. Reflective Glass or Mirror Tiles
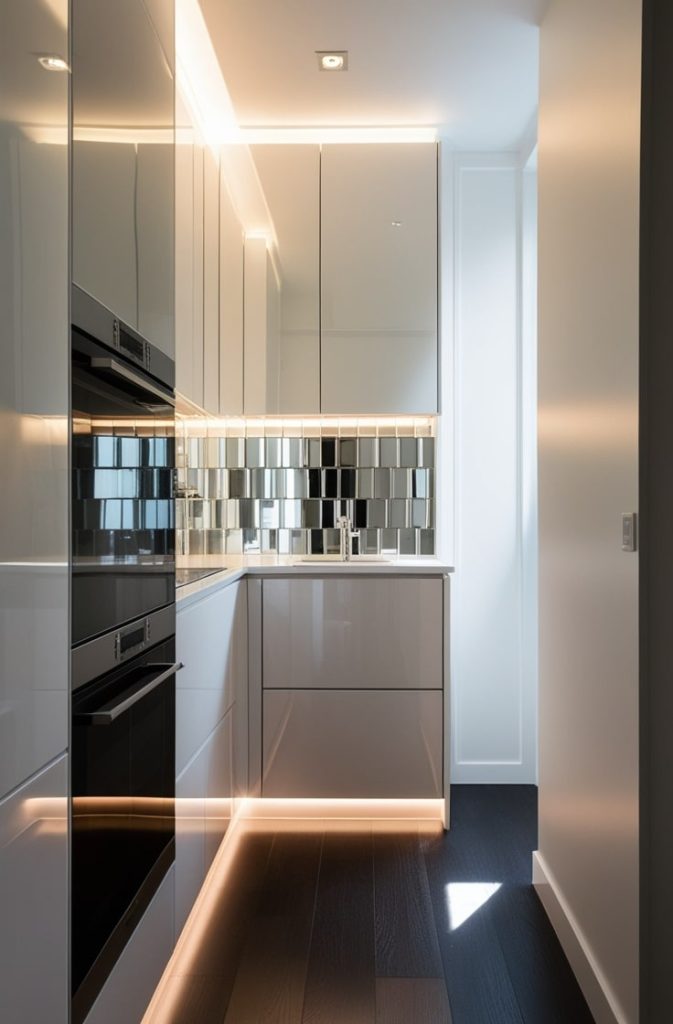
Reflective surfaces are a small kitchen’s secret weapon. Glass or mirror tiles bounce light around, making your space feel larger and airier. I saw a galley kitchen with mirrored tiles, and it felt twice as big!
They’re perfect for windowless or cramped kitchens and cost $15–$30 per square foot. Pair them with under-cabinet lighting for extra sparkle. If your kitchen feels tight, reflective tiles are a game-changer.
12. Monochromatic Tiles
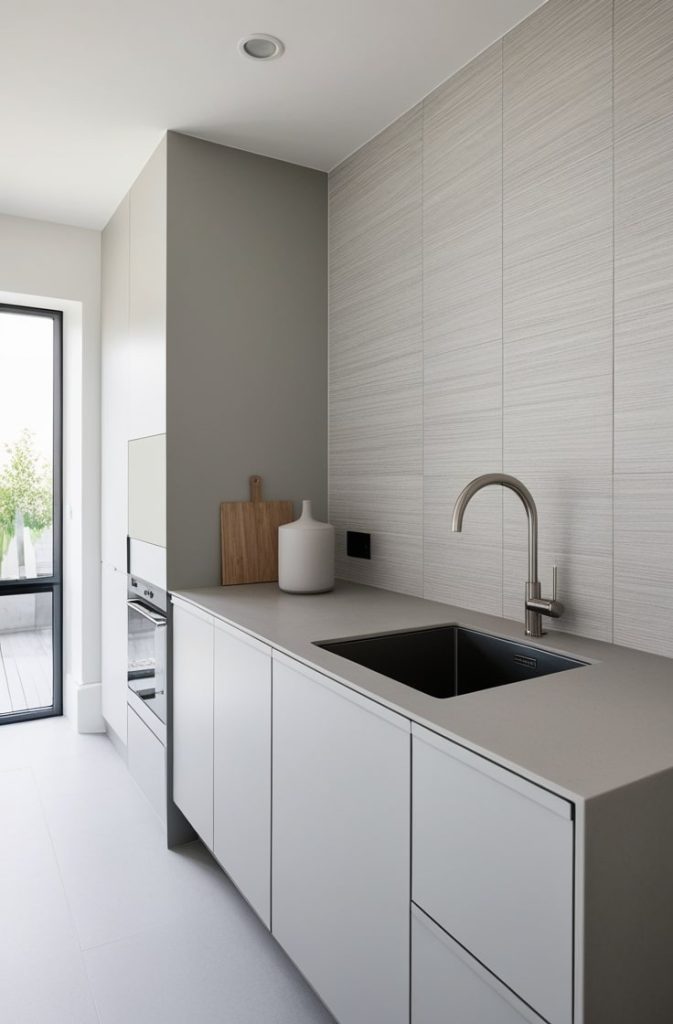
Want your small kitchen to feel seamless? Go monochromatic. Matching your backsplash to your countertop or cabinet tones creates a cohesive, open look.
I helped a friend pick soft gray tiles to match her countertops, and her tiny kitchen felt so much bigger. This approach works with any color—white, beige, or even soft blues.
Costs range from $5–$20 per square foot, depending on the material. For a clean, spacious vibe, monochromatic tiles are a must-try.
13. Vertical Tile Layouts

Here’s a trick to make your small kitchen feel taller: vertical tile layouts. Stacked or herringbone patterns draw the eye upward, elongating your walls.
I saw a vertical subway tile backsplash in a narrow kitchen, and it made the space feel so much grander. These layouts work with budget-friendly tiles, costing $5–$15 per square foot.
If you want to add height and style to your small kitchen, vertical tiles are a clever choice.
Trend Spotlight for 2025
Let’s talk about trends! These two backsplash ideas are hot for 2025, bringing fresh, modern flair to your kitchen.
14. Ombre Tiles
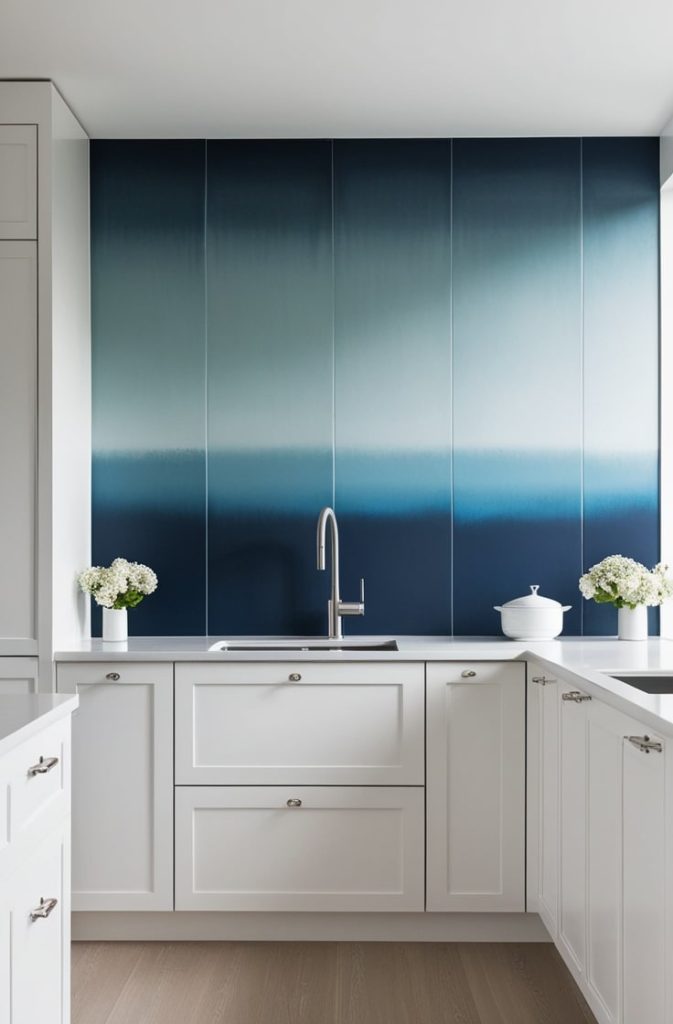
Ombre tiles are pure artistry. They feature a gradual color transition—say, from deep navy to soft blue—that adds depth and drama. I saw an ombre backsplash in a modern kitchen, and it was breathtaking against simple white cabinets.
These tiles are perfect for contemporary spaces and cost $15–$35 per square foot. Keep the rest of your kitchen minimal to let the ombre effect shine. If you want a bold, trendy look, this is it.
15. Textured Eco-Friendly Tiles
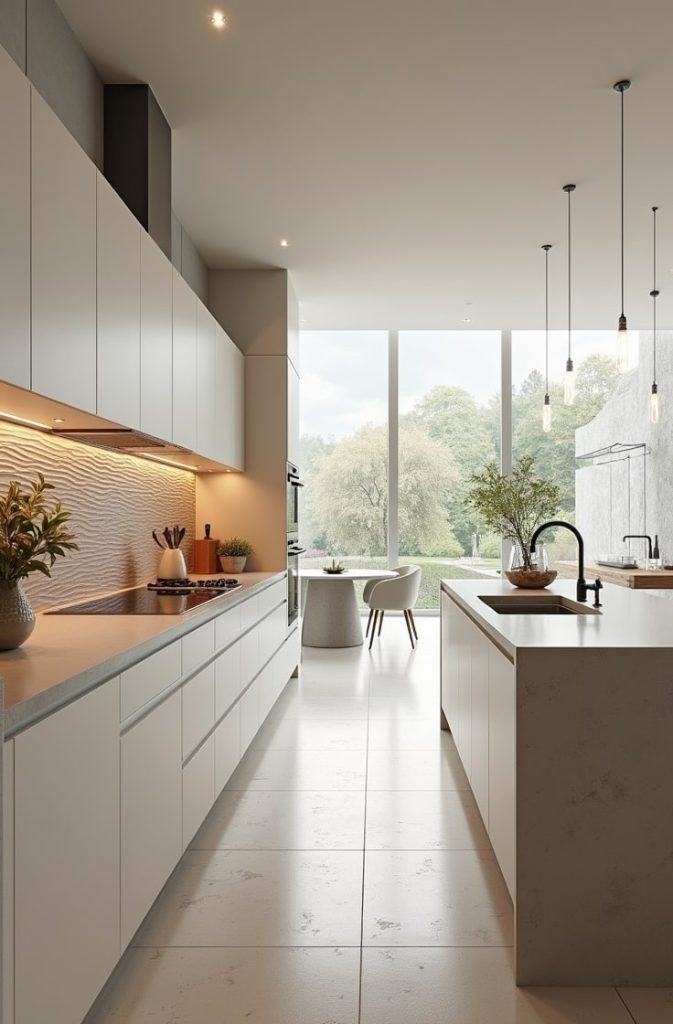
Textured tiles are making waves in 2025, especially when they’re made from sustainable materials like recycled ceramic. Think ribbed, wavy, or sculpted surfaces that add dimension without bold colors.
I love how these tiles bring subtle elegance to a kitchen. They’re eco-friendly, aligning with green design trends, and cost $10–$25 per square foot. If you want a modern, sustainable backsplash with tactile appeal, textured tiles are a fantastic pick.
Considerations Before Choosing a Backsplash
Choosing the right backsplash isn’t just about looks — it also affects your kitchen’s functionality, maintenance, and budget. Here are the key factors to keep in mind:
1. Match the Backsplash to Your Kitchen’s Style
- Identify your kitchen’s overall aesthetic — is it modern, rustic, industrial, farmhouse, or minimalist?
- A sleek glass or geometric tile suits modern kitchens, while brick or wood-look tile may suit rustic or industrial spaces.
- Stick to materials, colors, and patterns that enhance the existing cabinetry, countertops, and lighting.
2. Set a Budget That Works for You
- Backsplashes can be surprisingly affordable — or a major splurge. Know your limits before shopping.
- Budget-friendly options include:
- Peel-and-stick tiles
- Basic ceramic or porcelain tiles
- Peel-and-stick tiles
- Higher-end materials include:
- Natural stone (marble, slate, travertine)
- Waterjet mosaic tiles or custom designs
- Natural stone (marble, slate, travertine)
- Keep in mind: larger or more intricate tiles may also increase installation costs.
3. Evaluate Maintenance & Cleaning Needs
- Low-maintenance materials (ideal for busy households):
- Ceramic
- Porcelain
- Glass (wipes clean easily)
- Ceramic
- Higher-maintenance materials:
- Marble and natural stone (require regular sealing to prevent stains and damage)
- Textured tiles or grout-heavy designs (can trap grease and require extra scrubbing)
- Marble and natural stone (require regular sealing to prevent stains and damage)
4. Consider Durability and Functionality
- Your backsplash must hold up against daily kitchen activities like heat, steam, moisture, and grease.
- Choose materials that are:
- Heat-resistant (especially behind cooktops)
- Moisture-resistant (for areas near sinks or windows)
- Scrub-friendly (to withstand frequent cleaning)
- Heat-resistant (especially behind cooktops)
- Avoid porous materials unless they are sealed and maintained properly.
5. Think About Sustainability
- If you’re eco-conscious, look into:
- Recycled glass tiles
- Reclaimed wood-look tiles
- Sustainably sourced stone
- Recycled glass tiles
- Many brands now offer green-certified backsplash products that balance aesthetics with environmental impact.
6. Make a List of Your Priorities
- Before browsing, write down what matters most to you:
- Is it style, ease of cleaning, durability, or budget?
- Is it style, ease of cleaning, durability, or budget?
- This short list will keep you focused and prevent overwhelm when faced with too many options.
- Example: If you have a small kitchen and love bold style but hate scrubbing, you might prioritize glass tiles with a geometric design.
Step-by-Step Guide: Kitchen Backsplash Installation Tips
Installing a kitchen backsplash can be a rewarding DIY project—if you’re prepared. Follow these detailed steps to ensure a smooth and stylish finish.
✅ Step 1: Gather Your Tools and Materials
Before you begin, make sure you have all the necessary supplies on hand. You’ll need:
- Level – to ensure straight lines and even tile placement
- Tape measure & pencil – for accurate measuring and marking
- Tile cutter or wet saw – to cut tiles to fit edges and corners
- Tile adhesive or mortar – to secure the tiles to the wall
- Grout & float – to fill in spaces between tiles (not needed for peel-and-stick)
- Sponge & bucket – for wiping away excess grout
- Trowel – for spreading adhesive evenly
- Painter’s tape & drop cloths – to protect your countertops and walls
- Safety gear – gloves and goggles for protection
✅ Step 2: Prep the Wall Surface
Good prep = great results. Don’t skip this step!
- Clean the wall thoroughly with soap and water to remove grease or dust
- Sand the surface lightly to help the adhesive stick better
- Check for bumps or uneven patches – fill or sand them down
- If you’re tiling over drywall, make sure it’s moisture-resistant, especially near sinks
✅ Step 3: Measure & Plan Your Layout
This step can save you from headaches later.
- Measure the area twice, then mark your guidelines using a level
- Dry-lay a row of tiles on the counter to see how they’ll fit
- Plan your tile cuts in advance to avoid thin slivers on edges
- Start in the center and work outward for symmetry
💡 Pro Tip: “Measure twice, cut once.” It saves time, money, and frustration!
✅ Step 4: Apply the Adhesive & Start Tiling
Time to stick those tiles!
- Use a notched trowel to spread tile adhesive in small sections
- Press each tile firmly into place with a slight twist
- Use spacers to keep grout lines even and tiles straight
- Check with your level often to make sure tiles aren’t shifting
⏱️ Work in small areas—adhesive dries quickly!
✅ Step 5: Let the Tiles Set
After installing, let the tiles cure before grouting.
- Wait at least 24 hours (check adhesive packaging for exact time)
- Don’t press, wipe, or bump tiles during this time
- Carefully remove any excess adhesive that oozes through gaps
✅ Step 6: Apply the Grout (If Applicable)
If you used traditional tiles (not peel-and-stick), this step locks everything in place.
- Remove spacers, then spread grout using a grout float
- Push grout into gaps between tiles, holding the float at a 45° angle
- Wipe away excess grout with a damp sponge, rinsing frequently
- Let the grout cure, then buff tiles with a dry cloth to remove haze
✅ Step 7: Seal (Optional but Recommended)
Protect your hard work!
- Apply a grout sealer to prevent moisture, grease, and stains
- Especially important for natural stone, marble, or porous grout
✅ Bonus Tips for Success
- 🟡 If you’re a beginner, try peel-and-stick tiles for an easy first project
- 🟡 Be patient! Rushing can lead to uneven tiles, poor adhesion, or cracked grout
- 🟡 Hire a pro for intricate layouts like mosaics, curved designs, or waterjet tiles
- 🟡 Use painter’s tape to define edges or cover outlets for cleaner cuts
Take Action
Your dream kitchen is just a backsplash away! Start by sketching your design or creating a mood board—I love using Pinterest for inspiration.
Head to a home improvement store or browse online retailers to check out material samples and pricing.
If you’re feeling stuck, consult a local designer for personalized advice. I can’t wait for you to see how a new backsplash transforms your kitchen. Let’s make it happen!

I’m Sloane Everly, the heart and soul behind TheTidyPorch.com, where I pour my love for home decor, interior styling, and curated living into everything I do.
I’m all about turning houses into homes that feel like you—full of warmth, character, and a little bit of magic.
My style? Think cozy charm with a splash of bold, always designed to make your space feel like a hug you never want to leave.