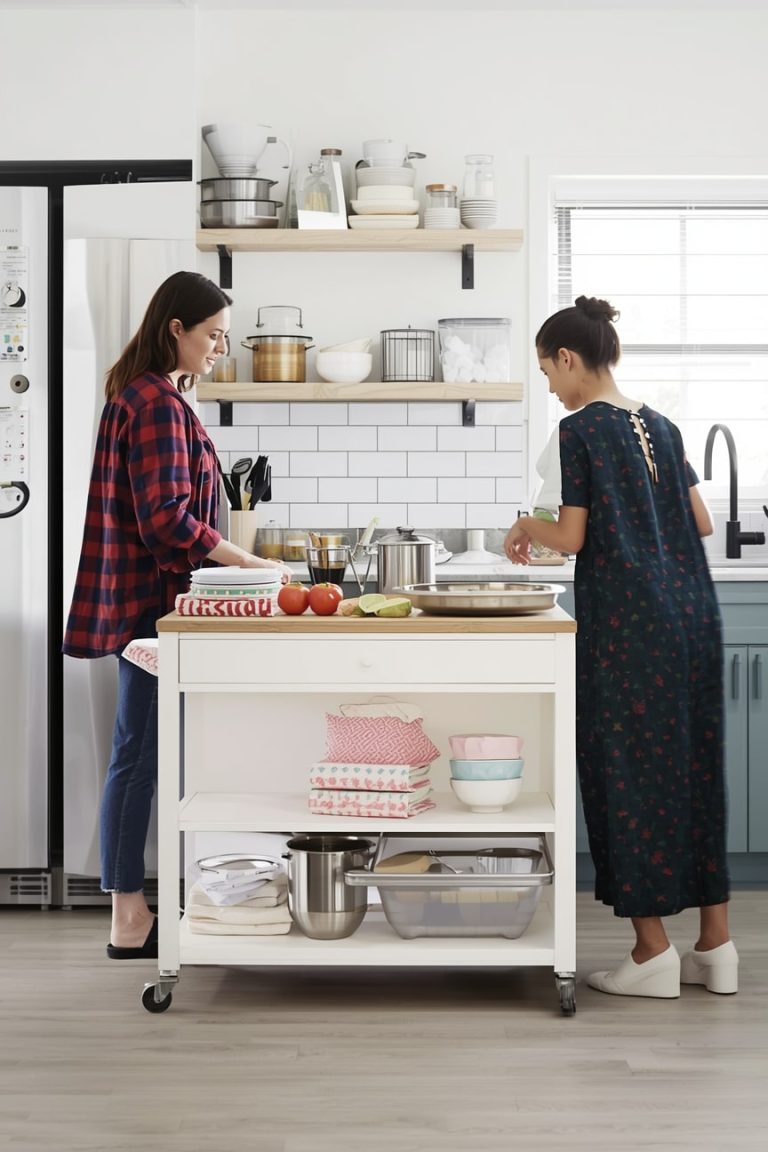
If your kitchen cabinets are anything like mine used to be, opening them feels like a game of Jenga—one wrong move and everything tumbles.
Pots clatter, spices vanish, and you’re left wondering where that one lid went.
Sound familiar? Don’t worry, I’ve been there, and I’m here to help you transform that chaos into calm with 15 practical, budget-friendly ideas.
These aren’t just random tips—they’re organized semantically into three groups:
- Upper Cabinets for lightweight, everyday items
- Lower Cabinets for heavy, functional gear
- Drawers & Specialty for precision and multi-use hacks.
Whether you’ve got a tiny apartment kitchen or a sprawling chef’s paradise, these solutions will save your space, time, and sanity.
Let’s dive in!
Upper Cabinets – Lightweight & Accessible Ideas
Your upper cabinets are prime real estate for everyday essentials—dishes, glasses, snacks, and spices. But they’re also where clutter loves to hide. These five ideas will help you maximize vertical space, reduce reaching strain, and make your daily kitchen flow smoother than ever.
1. Shelf Risers for Stacked Plates and Glasses
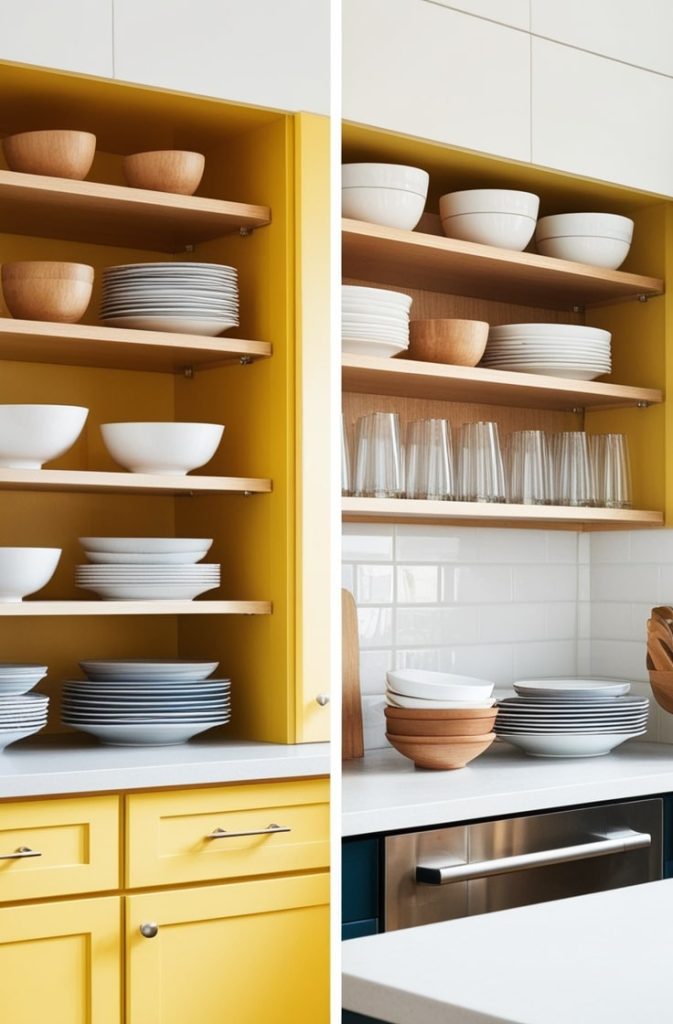
I used to stack my plates so high they’d wobble every time I grabbed one. Not anymore! Shelf risers are a game-changer. These tiered acrylic or wire platforms create multiple levels in a single shelf, doubling your storage without drilling or permanent changes. They’re perfect for plates, bowls, or glasses, keeping them organized and chip-free.
How to Do It: Measure your shelf depth first—most risers are 8–12 inches deep. Place the riser on the shelf, then arrange your items by frequency of use. Daily dishes go up front; that fancy platter you use once a year? Tuck it in the back. I spent about $15 on a set of clear acrylic risers from Amazon, and they blend right into my white cabinets, keeping the space airy.
Pro Tip: If your shelves aren’t perfectly even, sketch a quick layout to avoid wobbly risers. Trust me, it’s worth the extra minute.
Cost: $10–20. Visual Idea: Snap a Before/After photo of your neatly tiered plates to see the difference.
2. Pull-Out Wire Baskets for Snacks and Pasta
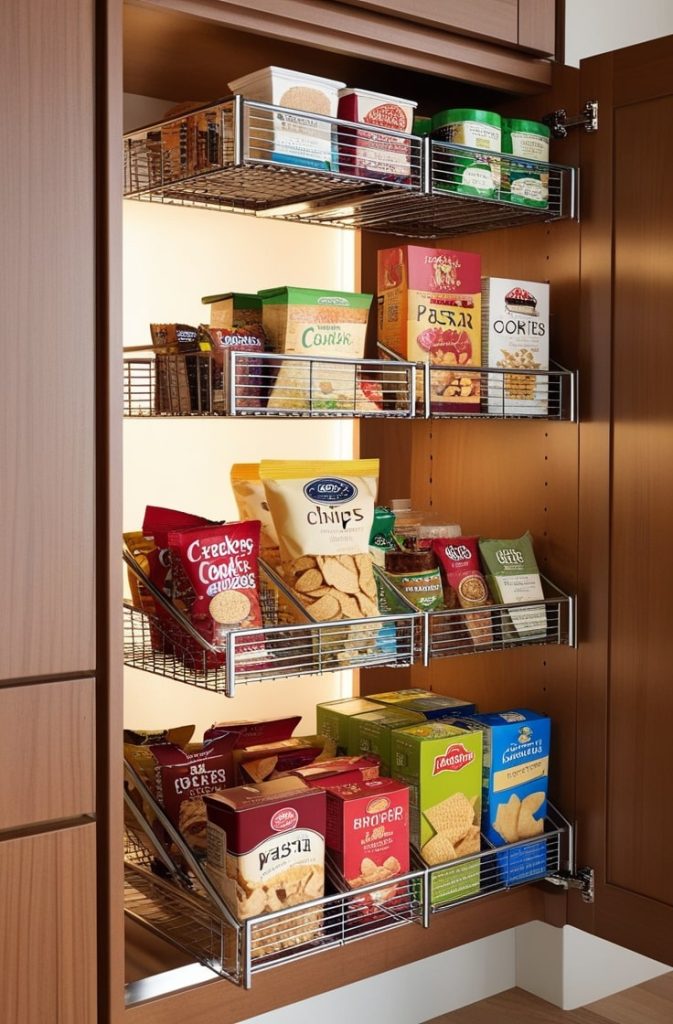
Ever dig through a cabinet for that one box of pasta, only to knock over three bags of chips? Pull-out wire baskets are your new best friend. These sliding baskets extend fully, so you can see and grab snacks, pasta, or boxed goods without playing hide-and-seek. They’re a lifesaver for those high, hard-to-reach shelves.
How to Do It: Pick baskets with side-mount tracks for easy installation—most fit standard cabinets. Measure your cabinet width, screw in the tracks (renters, check for adhesive options), and load up by category. I keep grains in one basket and treats in another for quick grabs. Labeling the basket fronts makes it even easier, especially if kids are raiding the snacks.
Pro Tip: Spend a little extra for sturdy baskets—mine cost $20 and have lasted years. They’re perfect for family kitchens.
Cost: $15–30. Visual Idea: Show a basket sliding out to reveal neatly grouped snacks.
3. Over-the-Door Spice Racks
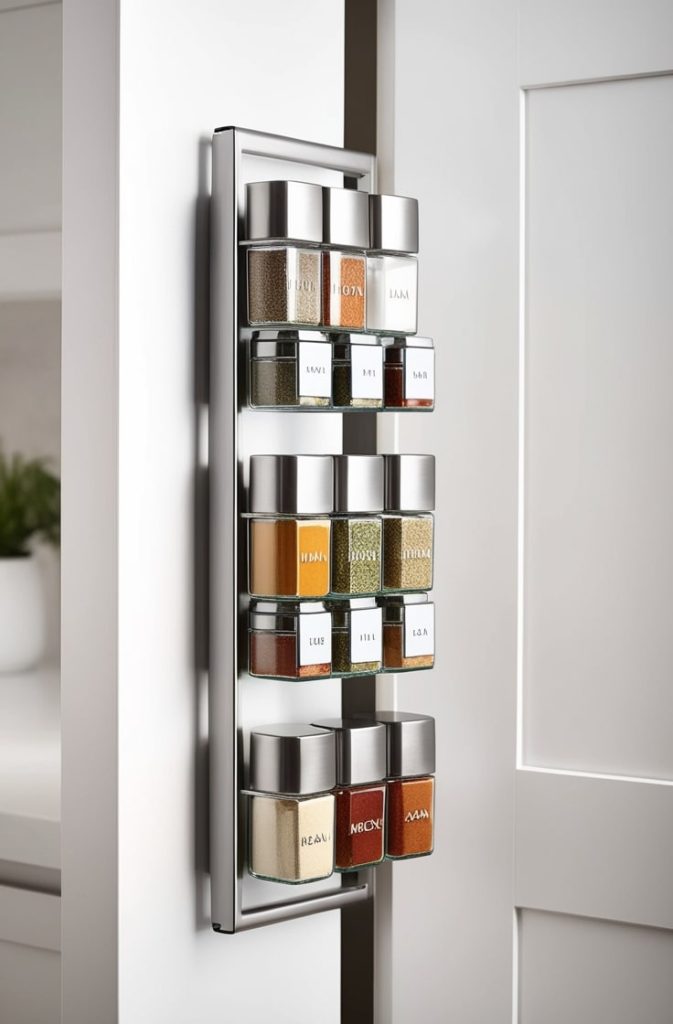
Spices are tiny but mighty cabinet hogs. I used to lose mine in a jumbled pile until I discovered over-the-door spice racks. These adhesive-mounted racks stick to the inside of your cabinet door, freeing up shelf space and keeping every jar or packet visible. Plus, they make your spices look like a chef’s dream.
How to Do It: Clean your cabinet door with rubbing alcohol to ensure the adhesive sticks. Apply the rack’s hooks, then hang your spices, organizing them by cuisine (Italian herbs in one row, baking spices in another). I got a 20-jar rack for $10, and it’s been a total game-changer.
Pro Tip: If your cabinets are metal, try magnetic racks to avoid sticky residue—perfect for renters like me.
Cost: $5–15. Visual Idea: A close-up of alphabetized spices gleaming on the door.
4. Tension Rod Dividers for Baking Sheets
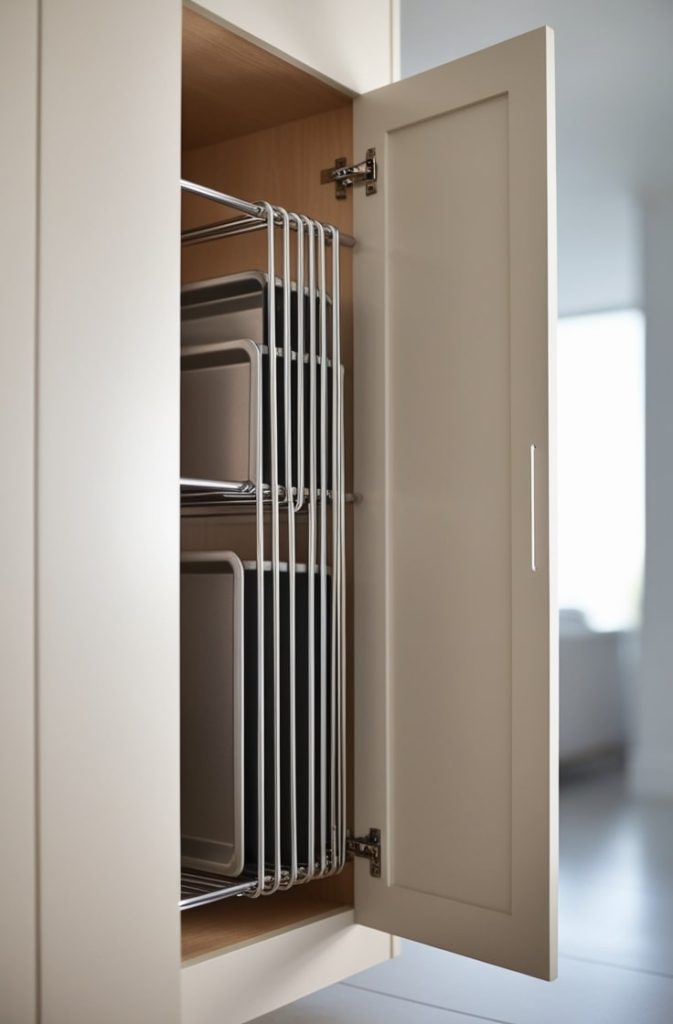
Baking sheets and trays used to lean precariously in my cabinets, taking up way too much space. Tension rods changed that. These spring-loaded rods stretch across your cabinet width, creating vertical slots for flat items like cookie sheets or pizza pans. No more leaning towers!
How to Do It: Measure your cabinet’s width, then twist the rod to fit snugly—no tools needed. Slide your baking sheets in vertically, handles facing out for easy grabs. I spent $8 on a set of rods and now my trays are organized like a pro.
Pro Tip: Pair rods with a shelf riser for mixed-height items, but give the rods a gentle tug to ensure they’re secure.
Cost: $5–10. Visual Idea: A side-angle shot of neatly slotted baking sheets.
5. Clear Stackable Bins for Dry Goods
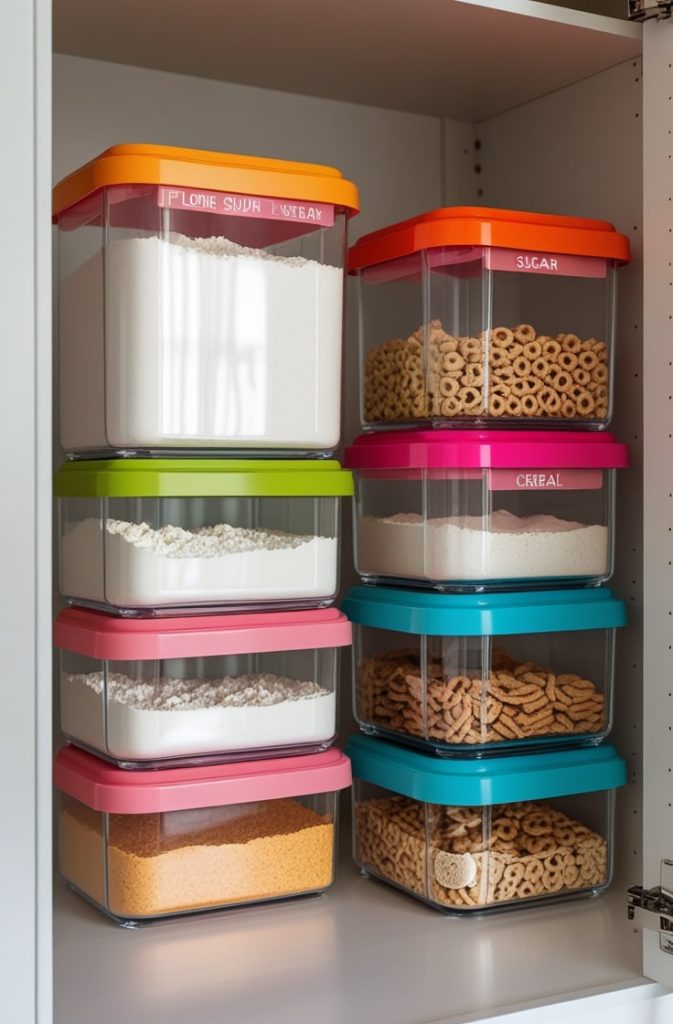
Dry goods like flour, sugar, and cereal can turn your cabinets into a mess of half-open bags. Clear stackable bins are the fix. These transparent plastic bins with lids keep everything visible, fresh, and neatly stacked, so you’re not buying duplicates of stuff you already have.
How to Do It: Sort your dry goods by size, then choose bins that fit your shelf height. Label the lids (I use a label maker for fun) and rotate stock using the FIFO method—first in, first out—to keep things fresh. My $12 set of bins holds everything from rice to granola.
Pro Tip: Add a small scoop inside each bin for mess-free measuring—it’s a small touch that feels luxurious.
Cost: $10–25 per set. Visual Idea: A stack of clear bins with colorful labels, showing off your pantry staples.
Lower Cabinets – Heavy & Functional Ideas
Lower cabinets are the workhorses of your kitchen, holding heavy pots, pans, and bulk items. But they’re also prone to becoming black holes of clutter. These five ideas focus on sturdy, ergonomic solutions that handle weight while keeping your cabinets functional and durable.
6. Pull-Out Tray Organizers for Pots and Lids
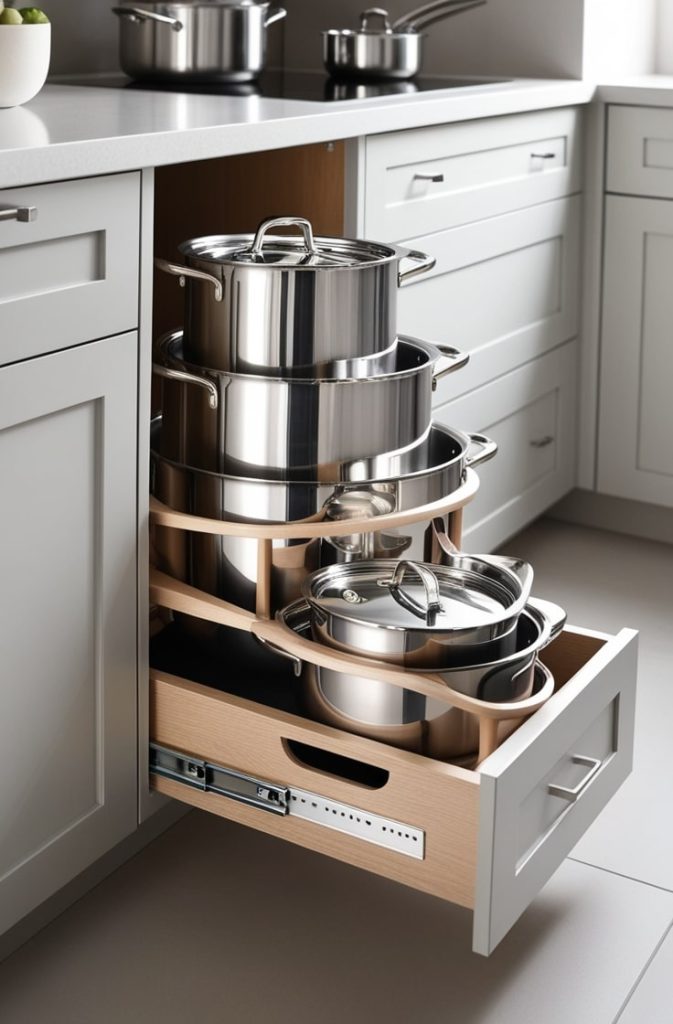
I used to dread grabbing a pot from the back of my lower cabinet—it was like diving into a metal jungle. Pull-out tray organizers fixed that. These full-extension glides with dividers let you nest cookware and lids without the avalanche. They make heavy lifting a breeze.
How to Do It: Measure your cabinet width and depth, then secure the tray’s tracks to the sides (screw or adhesive options work). Match lids to pots for quick pairing. I spent $25 on a soft-close tray, and the quiet glide feels so fancy.
Pro Tip: If you have an open-concept kitchen, soft-close trays are a must to avoid clanging during dinner parties.
Cost: $20–40. Visual Idea: A tray sliding out to reveal perfectly nested pots and lids.
7. Lazy Susan Turntables for Corner Storage
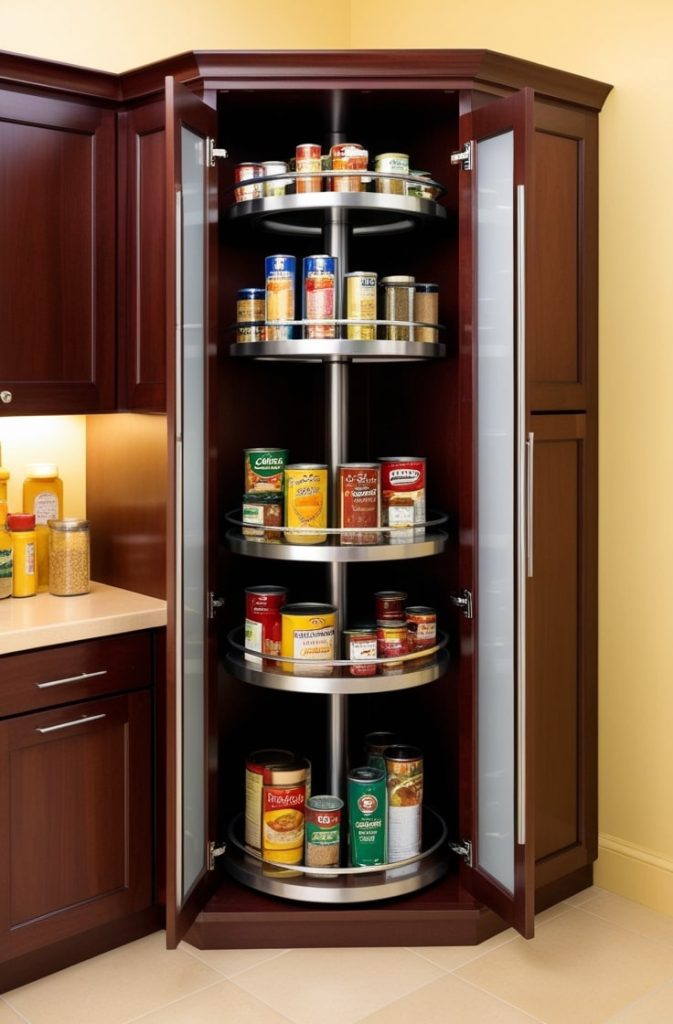
Corner cabinets are the Bermuda Triangle of kitchens—stuff goes in and never comes out. Lazy Susan turntables are the answer. These rotating platforms make canned goods or small appliances easy to reach with a simple spin. No more crawling into the cabinet!
How to Do It: Place the Susan on your shelf base, then load items radially, sorting by expiration date to keep things fresh. I got a $15 two-tier Susan that holds all my canned goods.
Pro Tip: Grease the bearings lightly for a smoother spin, and consider tiered Susans for extra vertical storage.
Cost: $15–30. Visual Idea: A Susan spinning to reveal neatly arranged cans.
8. Door-Mounted Pegboards for Utensils
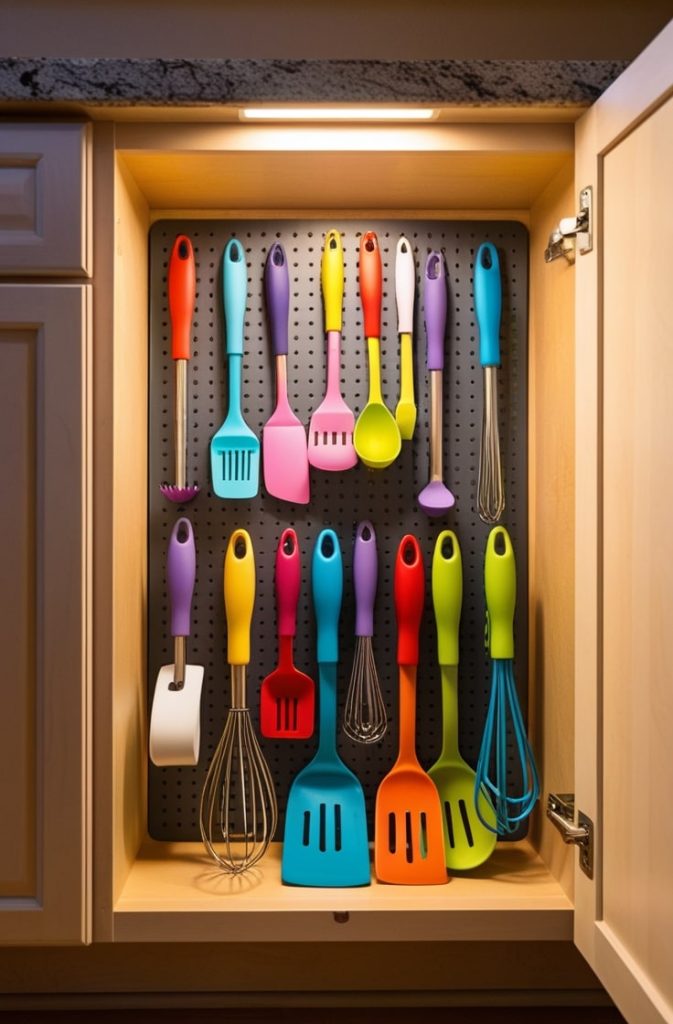
Lower cabinet doors are often wasted space, but not anymore. Door-mounted pegboards with hooks let you hang spatulas, whisks, or other utensils in a customizable layout. It’s like a mini workshop for your kitchen tools.
How to Do It: Adhere a perforated panel to the door’s interior (clean it first for stickiness). Add pegs or hooks, then group utensils by task—baking tools in one section, grilling in another. My $12 pegboard holds 15 tools and looks so tidy.
Pro Tip: Color-code hooks for each family member, or use removable adhesive for rentals.
Cost: $10–20. Visual Idea: A pegboard loaded with colorful utensils, perfectly spaced.
9. Stackable Modular Bins for Pantry Staples
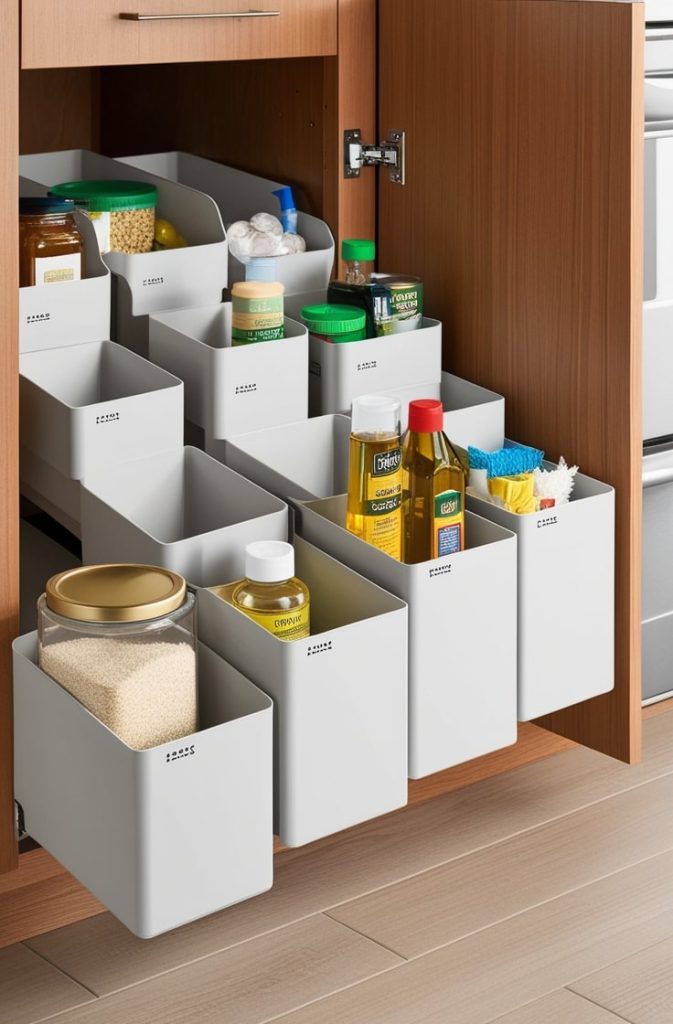
Bulk items like rice, oils, or cleaning supplies can overwhelm lower cabinets. Stackable modular bins are the solution. These interlocking bins create a custom “staircase” of storage, containing spills and keeping everything accessible.
How to Do It: Build your stack to fit your cabinet height, labeling the sides for quick identification. I use wide-mouth bins for easy scooping and ventilate them for perishables like onions. My $20 set holds everything from olive oil to dish soap.
Pro Tip: Pair with a Lazy Susan for corner cabinets to maximize every inch.
Cost: $15–35 per set. Visual Idea: A “staircase” of bins with clear labels, holding pantry essentials.
10. Under-Sink Sliding Caddies
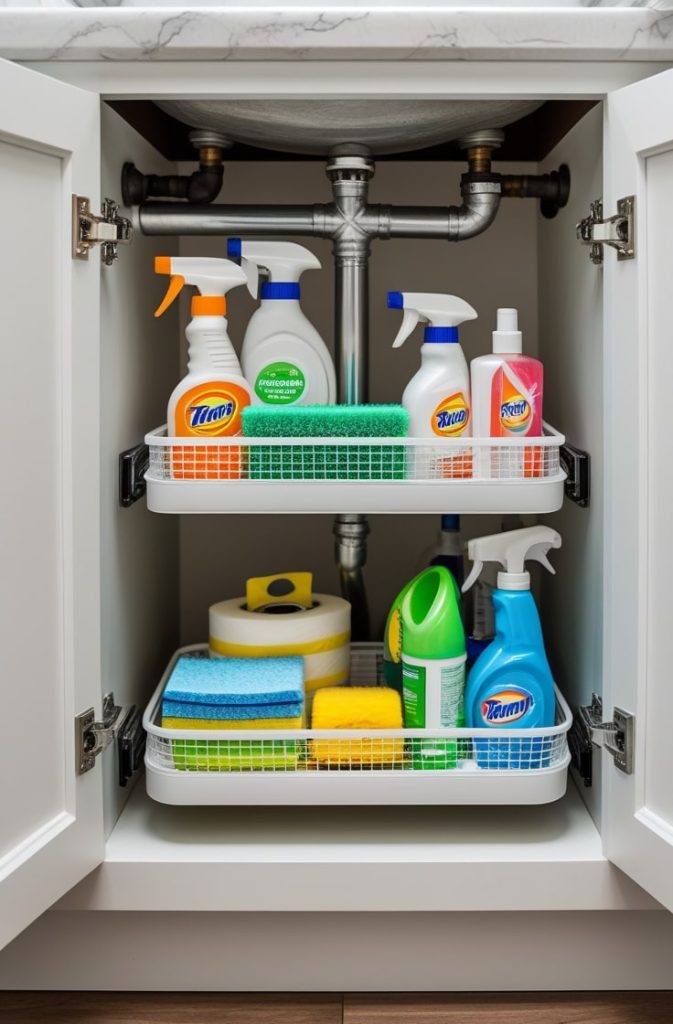
Under-sink cabinets are a nightmare—pipes, cleaners, and trash bags all jumbled together. Sliding caddies fix that. These tiered trays slide around pipes, giving you quick access to cleaning supplies or bags while keeping things tidy.
How to Do It: Choose a caddy that fits your sink base, secure it with bumpers, and categorize items (toxic cleaners on one tier, eco-friendly on another). My $25 caddy even has a handle for easy pulling.
Pro Tip: Line the trays with waterproof mats and add a safety lock if you have kids or pets.
Cost: $20–40. Visual Idea: A caddy sliding out to show organized cleaning supplies.
Drawers & Specialty – Precision & Multi-Use Ideas
Drawers and specialty spaces are where small items and high-use tools live, but they can become a tangled mess. These five hacks focus on precision and multi-functionality, turning your drawers into efficient, clever storage zones.
11. Expandable Drawer Dividers for Cutlery
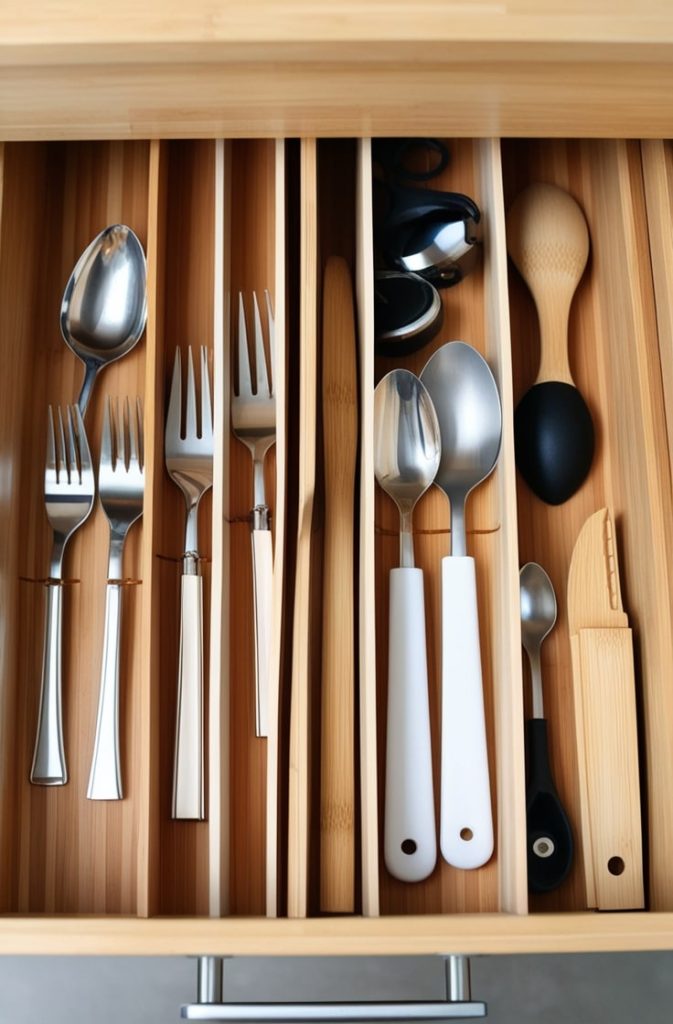
My cutlery drawer used to be a jigsaw puzzle of forks and spoons. Expandable dividers changed that. These bamboo or plastic inserts adjust to fit any drawer, keeping your cutlery and gadgets neatly separated.
How to Do It: Measure your drawer’s dimensions, then snap the dividers into place. Sort items by hand size—big spoons in one slot, small forks in another. My $15 bamboo set feels so luxe.
Pro Tip: Add non-slip liners to keep dividers in place, and reconfigure seasonally if you swap tools.
Cost: $10–20. Visual Idea: A drawer with crisp, divided sections for shiny cutlery.
12. Magnetic Strips for Knives and Clips
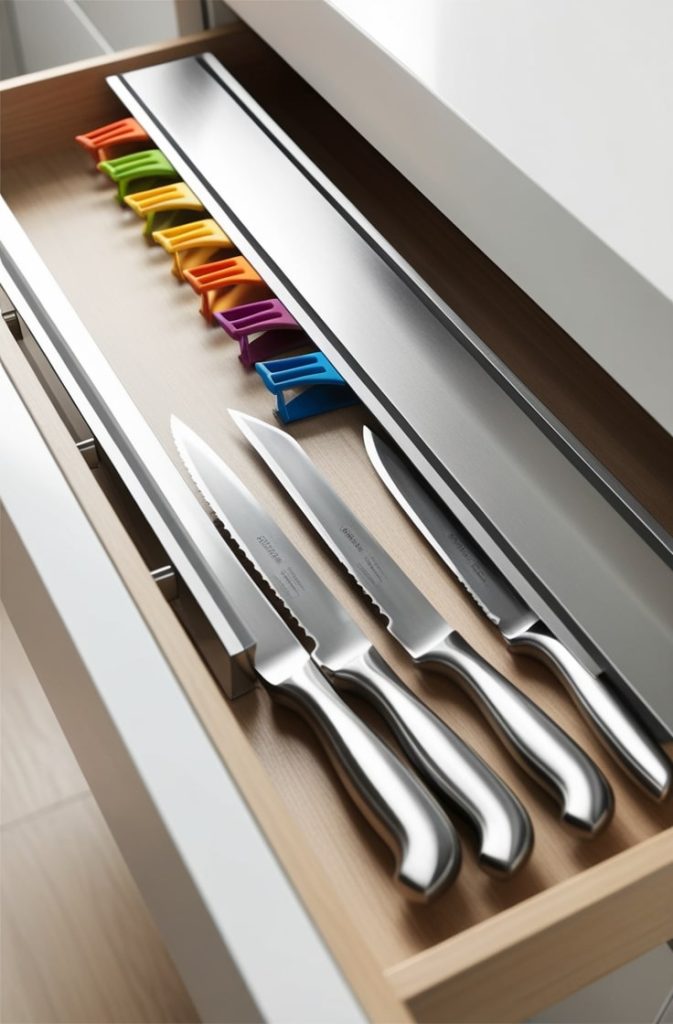
Knives and bag clips were always cluttering my drawers until I tried magnetic strips. These adhesive-backed bars stick inside drawer sides, holding blades and clips securely while saving space. They’re also safer when mounted high.
How to Do It: Stick the strip to your drawer’s side, test the magnet’s strength, and place knives blade-down. I spent $10 on a strip that holds six knives and a few clips.
Pro Tip: Use a second strip for spice packets or herb scissors, and hone your knives every few months.
Cost: $5–15. Visual Idea: A sleek magnetic strip with knives aligned perfectly.
13. Hanging Mug Hooks Under Shelves
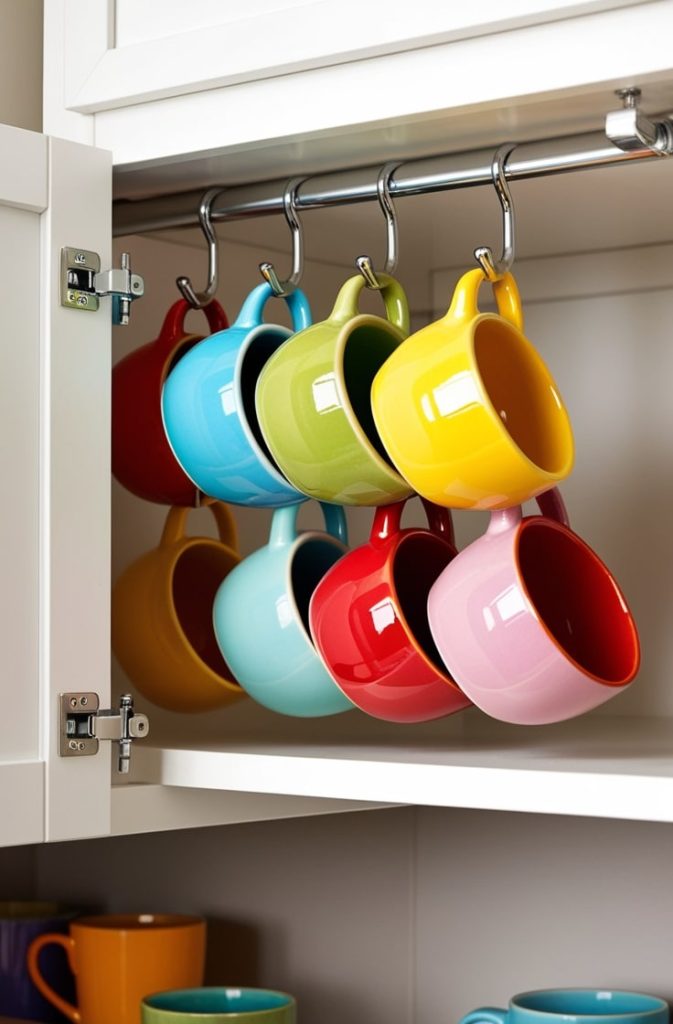
Mugs were eating up my shelf space until I discovered under-shelf hooks. These screw-in hooks hang mugs by their handles from the underside of your cabinets, freeing up shelves and adding a cute display vibe.
How to Do It: Space hooks 3–4 inches apart under the shelf, then hang mugs by their handles. I got a $7 set of hooks and now my mugs double as decor.
Pro Tip: Mix in S-hooks for keys or small tools, and dust weekly to keep them sparkling.
Cost: $5–10 per set. Visual Idea: A row of colorful mugs hanging neatly under a shelf.
14. Vertical File Sorters for Trays and Boards

Cutting boards and platters used to flop around in my drawers, but vertical file sorters fixed that. These upright slots hold flat items securely, preventing warping and making them easy to grab.
How to Do It: Insert a sorter into your drawer, then lean boards or trays upright. Label the slots for extra clarity. My $12 acrylic sorter holds four boards and looks so sleek.
Pro Tip: Pair with dividers for mixed sizes, and choose acrylic for better visibility.
Cost: $10–20. Visual Idea: A drawer with upright boards in a tidy sorter.
15. Custom Foam Inserts for Small Appliances
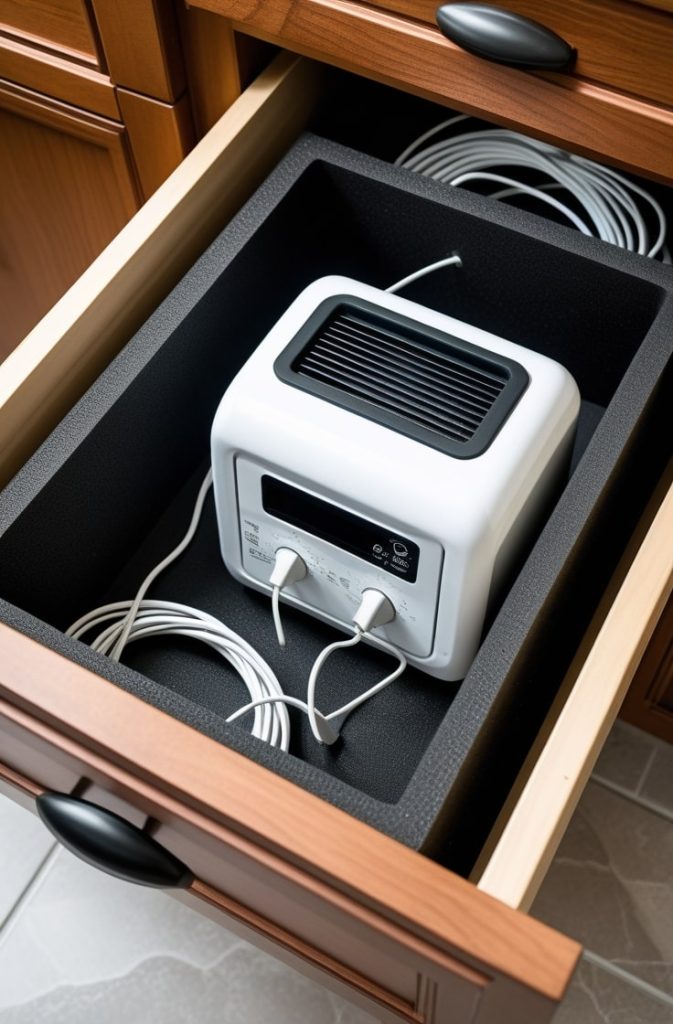
Small appliances like blenders or mixers can slide around in cabinets, scratching surfaces and tangling cords. Custom EVA foam inserts are the fix. You cut them to fit your appliance, creating a snug cradle that protects and organizes.
How to Do It: Trace your appliance’s outline on EVA foam, then cut with a utility knife. Nestle the appliance in the foam inside your cabinet. I made one for my blender for $15, and it feels so pro.
Pro Tip: Add Velcro strips for cord management, and use recycled foam for a budget-friendly DIY.
Cost: $10–25. Visual Idea: A foam insert cradling a blender, with cords neatly tucked.
Conclusion: Your Kitchen, Transformed
There you have it—15 ideas to take your kitchen cabinets from chaos to calm. I’ve used every one of these tricks in my own space, and trust me, they save time and stress every day.
Studies show organized kitchens can cut meal prep time by up to 30%—imagine what you could do with those extra minutes!
Your Next Steps: Pick three ideas that tackle your biggest pain points—maybe shelf risers, a Lazy Susan, and drawer dividers. Set a one-month “Organization Challenge”: Week 1 for upper cabinets, Week 2 for lower, and Week 3 for drawers.
By Week 4, you’ll be showing off your kitchen like a pro. Want more? Check out online resources for printable labels or video tutorials, and let me know in the comments what worked for you. Your kitchen’s about to become your favorite room—let’s make it happen!
Read Also:

I’m Sloane Everly, the heart and soul behind TheTidyPorch.com, where I pour my love for home decor, interior styling, and curated living into everything I do.
I’m all about turning houses into homes that feel like you—full of warmth, character, and a little bit of magic.
My style? Think cozy charm with a splash of bold, always designed to make your space feel like a hug you never want to leave.