
The paper hat lasted about four seconds. It slid off my kid’s head, folded in half, and landed on the floor. I had made it flat, like most winter hat crafts I found online.
It looked cute on the table and useless on the head. So I tried something new. I built a simple band, sized it to a real head, and attached the hat to that. It stayed on all afternoon.
Now I use one band for every hat. You can too. Here are 11 ideas, plus the easy fit method.
What You Need for All 11 Winter Hat Crafts
You need seven supplies. Every hat below uses only these, plus scissors and a pencil.
- Construction paper, 12 x 18 inches: Get white, blue, black, and orange. A big assorted pack from the school supply aisle costs the least.
- Cotton balls: The pharmacy or dollar store has big bags.
- Washable glue: Dollar stores and back-to-school sales are good bets.
- Clear tape: This is your main fastener.
- Washable markers or crayons: Check your drawers first. Include brown, black, and orange.
- Googly eyes: One bag from a craft store covers every hat.
- Soft measuring tape or string, plus a ruler: Use what you have.
Safety matters here. Googly eyes and cotton balls are small parts and choking hazards for very young children. Supervise closely. For ages 2-3, draw the eyes with a marker instead. Use kid-safe scissors, and stay nearby while kids cut.
How to Make a Paper Hat Band That Fits Your Child
A good fit starts with a real measurement. Every hat below sits on the same band, so you only learn this once.
Measure the head first
Wrap string around your child’s forehead, just above the ears. Pinch where it meets and hold it against a ruler. If your child won’t sit still, use these starting lengths. The real measurement always wins.
- Ages 2-3: about 19 inches
- Ages 4-5: about 20 inches
- Ages 6-7: about 21 inches
Add 1 inch for the overlap.
Cut and join the strips
Cut strips 2 inches wide from the 18-inch side of your paper. One sheet gives you six strips, but one strip is too short for a head. Tape two strips end to end with a 1-inch overlap. Loop the band, then tape the overlap on the outside so tape never touches hair.
Check the fit
One finger should slide under the band. If the band feels tight, tape in a short extra piece. If it slips, trim a little and re-tape. Ask your child to shake their head to test it.
Make the band sturdier
Glue a second strip inside the band, then let it dry for 10 minutes. A doubled band holds heavier hats better. It also resists bending during rough play.
Add an arch strip
Cut an arch strip 1.5 inches wide and about 14 inches long. Tape one end inside the front of the band. Bend it over the head and tape the other end inside the back. Trim any extra after a fit check.
Easy Winter Hat Crafts for Toddlers (Ages 2-3)
Toddlers do best with hats that have one or two big pieces. Pick any of these three, and expect to do the cutting yourself.
Polar Bear Ears Hat
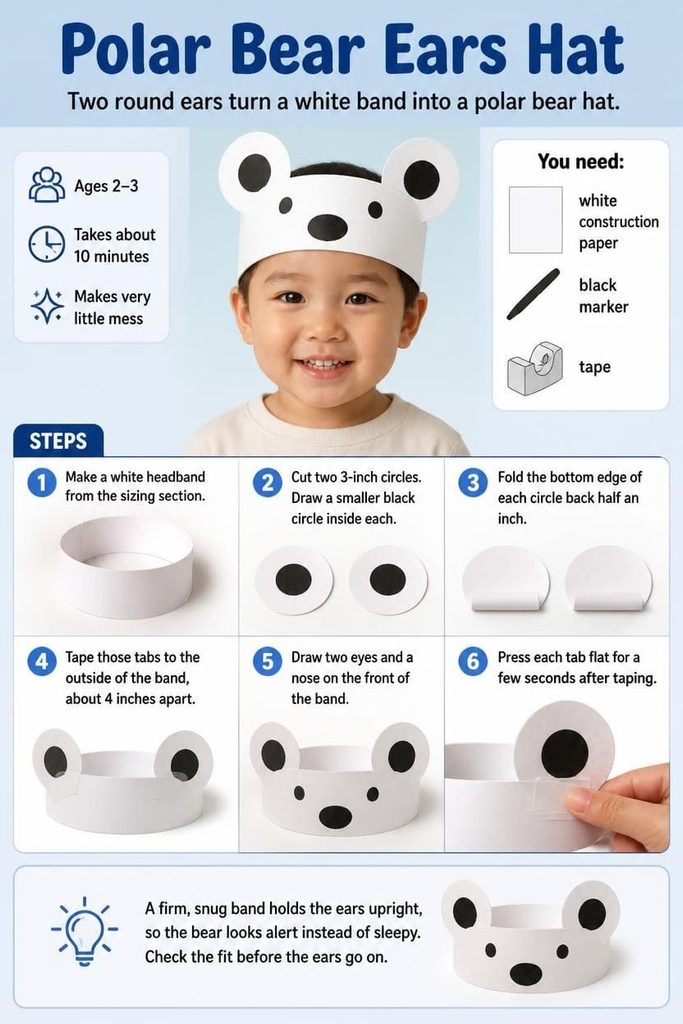
Two round ears turn a white band into a polar bear hat. It suits ages 2-3, takes about 10 minutes, and makes very little mess.
You need: white construction paper, a black marker, and tape.
Steps:
- Make a white headband from the sizing section.
- Cut two 3-inch circles. Draw a smaller black circle inside each.
- Fold the bottom edge of each circle back half an inch. Tape those tabs to the outside of the band, about 4 inches apart.
- Draw two eyes and a nose on the front of the band.
Press each tab flat for a few seconds after taping. A firm, snug band holds the ears upright, so the bear looks alert instead of sleepy. Check the fit before the ears go on.
Penguin Beak Hat
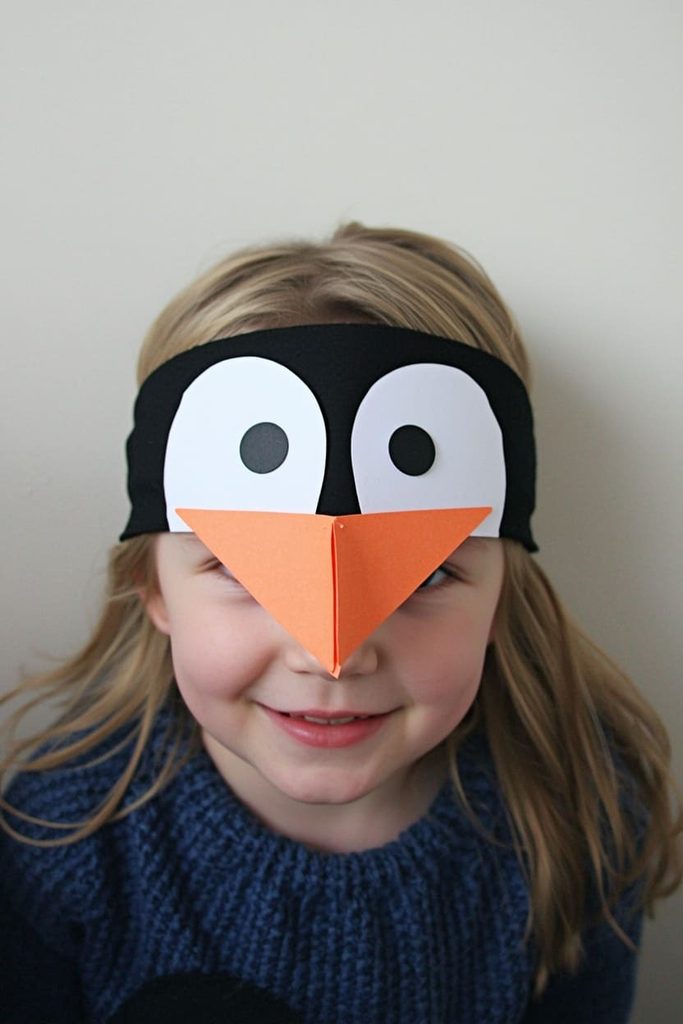
A pointy orange beak gives this black band a penguin face. It suits ages 2-3, takes about 15 minutes, and stays low on mess.
You need: black, white, and orange construction paper, a marker, glue, and tape.
Steps:
- Make a black headband from the sizing section.
- Cut a white oval, 4 by 3 inches. Glue it to the front of the band and draw two eyes.
- Cut an orange triangle, 3 inches wide and 3 inches tall. Fold the wide edge back half an inch.
- Tape the folded edge to the band below the eyes so the beak sticks out.
A folded tab lets the beak point out instead of drooping. Tape it under the oval so the tape stays hidden, and press from the back for a strong hold.
Snowman Top Hat Band
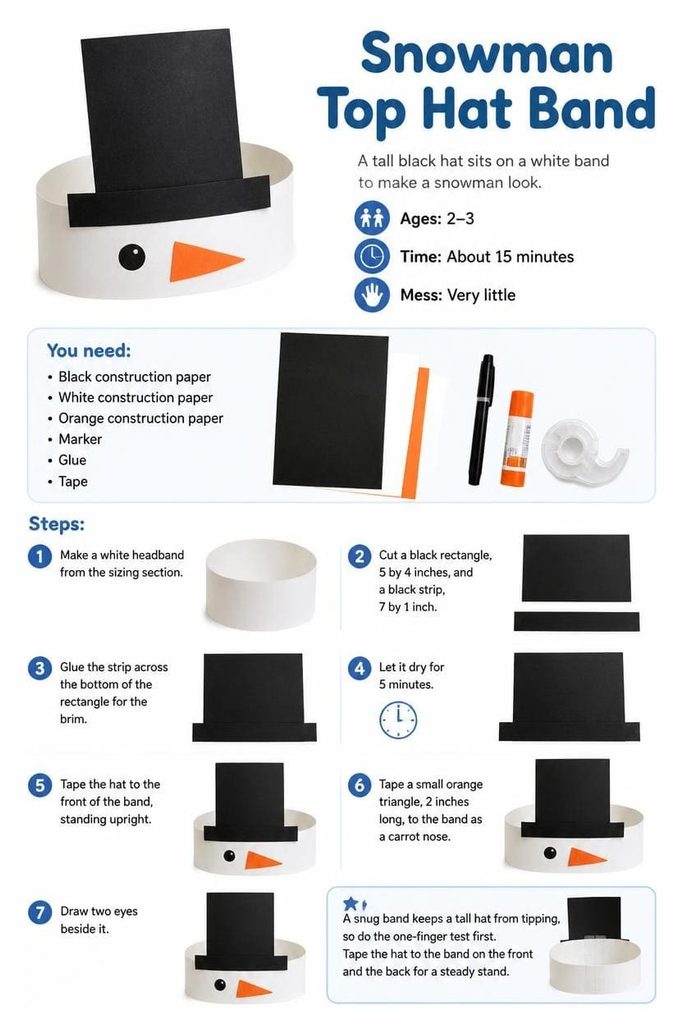
A tall black hat sits on a white band to make a snowman look. It suits ages 2-3, takes about 15 minutes, and makes very little mess.
You need: black, white, and orange construction paper, a marker, glue, and tape.
Steps:
- Make a white headband from the sizing section.
- Cut a black rectangle, 5 by 4 inches, and a black strip, 7 by 1 inch.
- Glue the strip across the bottom of the rectangle for the brim. Let it dry for 5 minutes.
- Tape the hat to the front of the band, standing upright.
- Tape a small orange triangle, 2 inches long, to the band as a carrot nose. Draw two eyes beside it.
A snug band keeps a tall hat from tipping, so do the one-finger test first. Tape the hat to the band on the front and the back for a steady stand.
Winter Hat Crafts for Preschoolers (Ages 3-5)
Preschoolers can handle simple cutting and longer steps. These four give them room to build and decorate.
Cotton Ball Pom-Pom Beanie Band
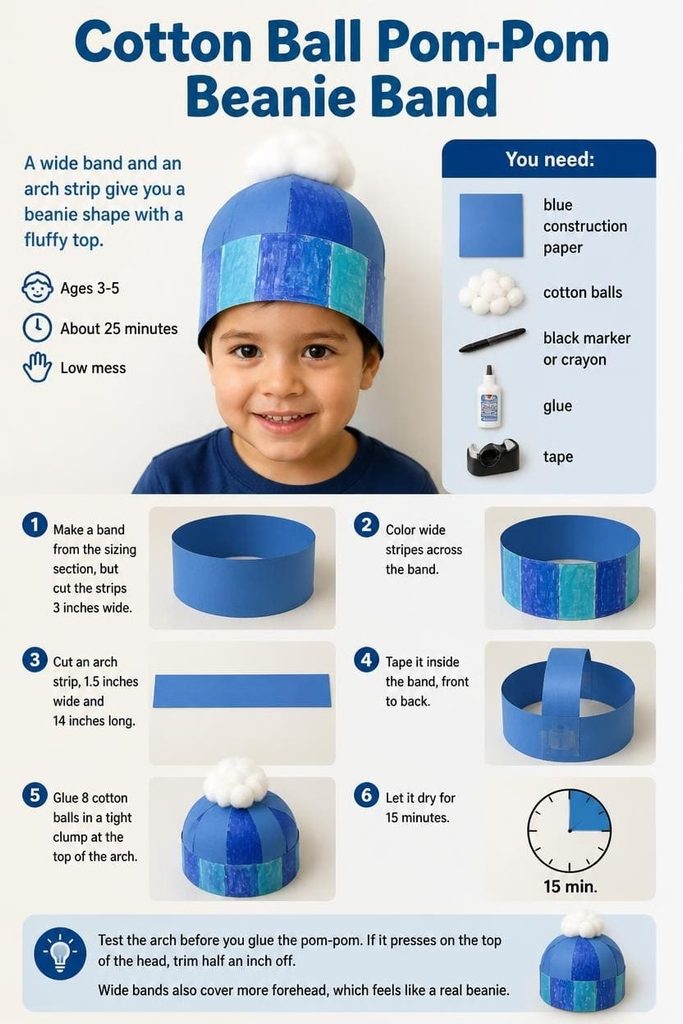
A wide band and an arch strip give you a beanie shape with a fluffy top. It suits ages 3-5, takes about 25 minutes, and stays low on mess.
You need: blue construction paper, cotton balls, a black marker or crayon, glue, and tape.
Steps:
- Make a band from the sizing section, but cut the strips 3 inches wide.
- Color wide stripes across the band.
- Cut an arch strip, 1.5 inches wide and 14 inches long. Tape it inside the band, front to back.
- Glue 8 cotton balls in a tight clump at the top of the arch. Let it dry for 15 minutes.
Test the arch before you glue the pom-pom. If it presses on the top of the head, trim half an inch off. Wide bands also cover more forehead, which feels like a real beanie.
Arctic Fox Ears Hat
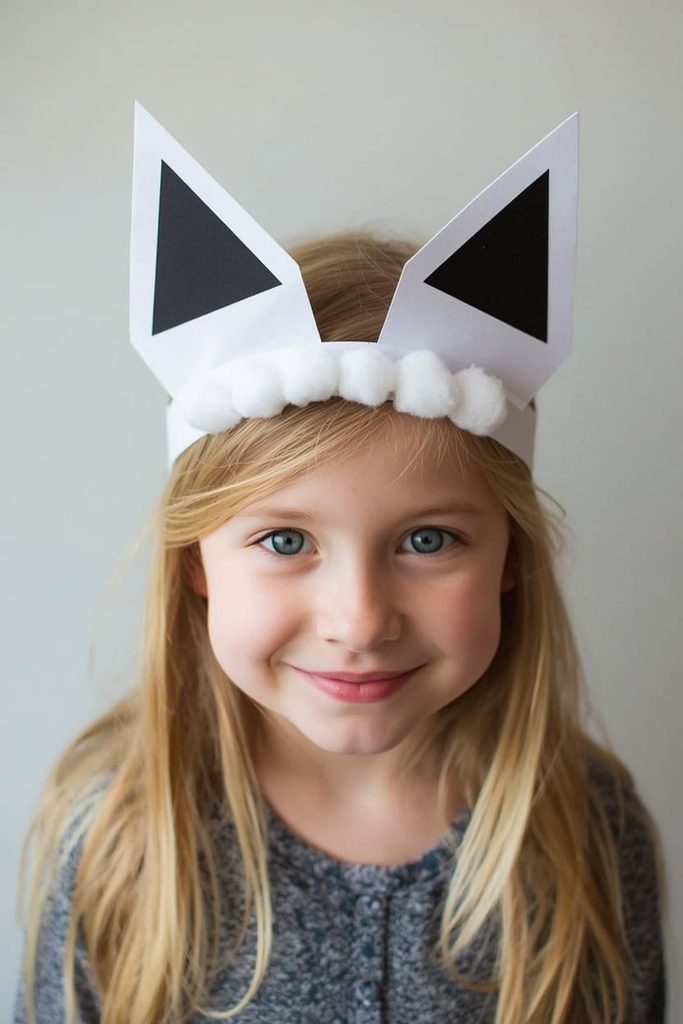
Tall pointed ears and a white band make an arctic fox. It suits ages 3-5, takes about 20 minutes, and has very little mess.
You need: white and black construction paper, cotton balls, glue, and tape.
Steps:
- Make a white headband from the sizing section.
- Cut two white triangles, 4 inches tall, and two black triangles, 2 inches tall. Glue a black one inside each white one.
- Fold the base of each ear back half an inch. Tape the tabs to the band, 3 inches apart.
- Glue a row of cotton balls along the front of the band for fluffy fur.
Space the ears about 3 inches apart. Ears set wider tip sideways on small heads, and ears set closer together look pinched. Press the tabs down well and hold them for a count of ten.
Zigzag Ice Crown
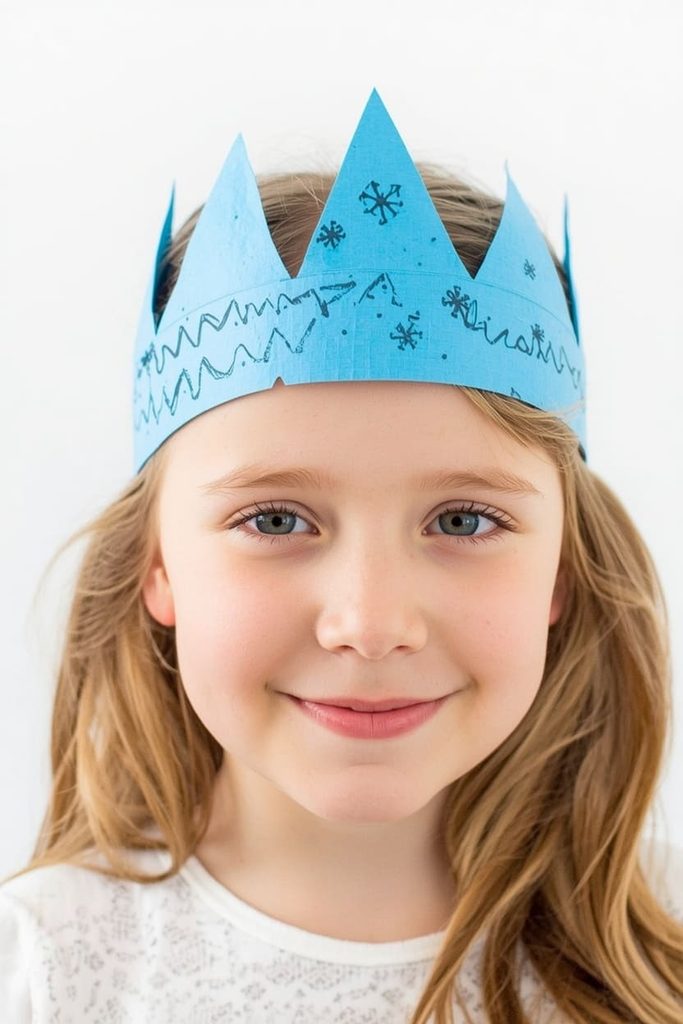
Sharp zigzag points make an icy crown that feels fancy. It suits ages 3-5, takes about 15 minutes, and stays low on mess.
You need: blue construction paper, a black marker, and tape.
Steps:
- Make a band from the sizing section, but cut the strips 4 inches wide. Do not loop it yet.
- Draw a zigzag along one long edge, with points about 1.5 inches tall and 2 inches apart.
- Cut along the zigzag.
- Draw small snowflakes or diamonds on the crown.
- Loop the crown to fit, and tape the overlap on the outside.
Draw the points before you loop the band. Cutting a flat strip is much easier than cutting a curved one, and your child gets cleaner points with fewer slips.
Earflap Trapper Hat

Two ear flaps and a cotton trim give this hat a cozy trapper look. It suits ages 3-5, takes about 25 minutes, and has a low mess.
You need: blue construction paper, cotton balls, a marker, glue, and tape.
Steps:
- Make a blue headband from the sizing section.
- Cut two rounded rectangles, 5 by 3 inches, for the flaps. Draw stripes on them.
- Tape the top edge of each flap inside the band, over the ear spots, so they hang down.
- Glue a row of cotton balls along the front edge of the band and the bottom of each flap. Let it dry for 15 minutes.
Mark the ear spots before you tape the flaps. Put the band on your child and draw a dot just above each ear. Flaps then hang right where they should.
Winter Hat Crafts for Kindergarten to Grade 2 (Ages 5-7)
Older kids can trace, measure, and fold. Expect more steps here, and let them do the building.
Moose Antler Hat
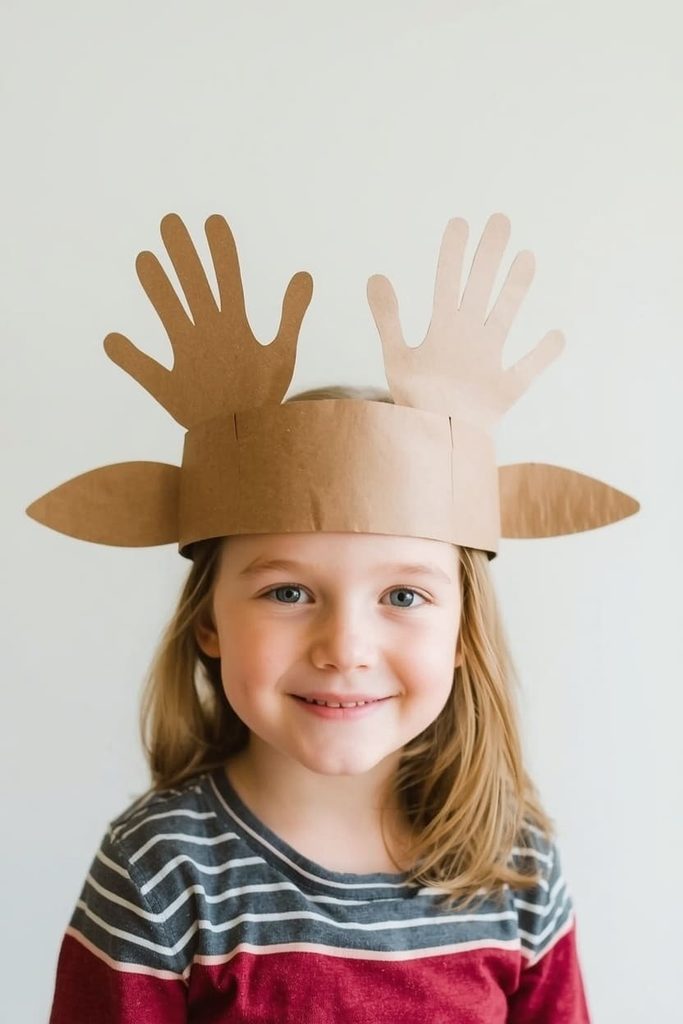
Your child’s own traced hands become the antlers on this moose hat. It suits ages 5-7, takes about 30 minutes, and has a low mess.
You need: white construction paper, a brown marker or crayon, scissors, and tape.
Steps:
- Color two sheets of white paper brown, one for the band and one for the antlers.
- Make the headband from the first sheet, using the sizing section.
- Trace each hand on the second sheet, fingers spread, and cut out both. Add half an inch at the wrist for a tab.
- Fold each tab back and tape it to the outside of the band, with fingers pointing up and slightly out.
Angle the antlers outward a little. Straight-up antlers lean into each other, while angled ones stay apart. Tracing hands also gives older kids a chance to practice careful cutting around fingers.
Striped Arch Beanie

Two arch strips cross over the head to make a beanie shape. It suits ages 5-7, takes about 35 minutes, and has very little mess.
You need: blue construction paper, cotton balls, an orange marker, glue, and tape.
Steps:
- Make a band from the sizing section, 3 inches wide.
- Cut two arch strips, 1.5 inches wide and 14 inches long. Draw stripes on all three pieces.
- Tape one arch inside the band from front to back. Tape the second from ear to ear, crossing the first. Trim it after a fit check.
- Tape the strips together where they cross. Glue a clump of 8 cotton balls on top, and let it dry for 15 minutes.
Fit-check the ear-to-ear arch on your child’s head before you tape it. It’s usually a bit shorter than the front-to-back arch, and a loose arch makes the beanie wobble.
Tall Gnome Cone Hat
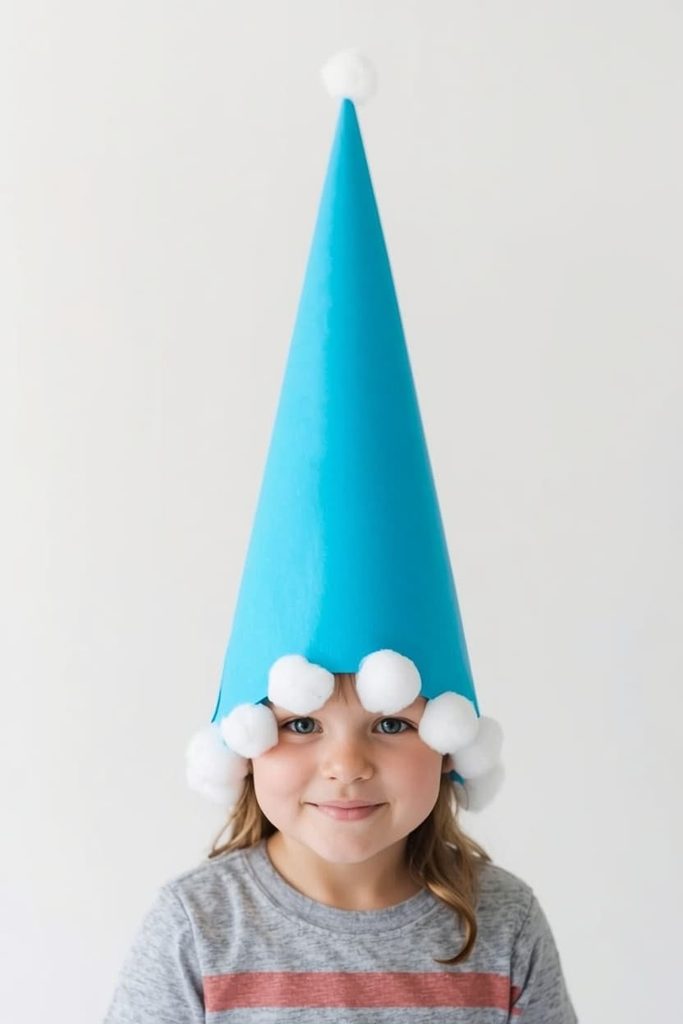
One big sheet rolls into a tall, pointy gnome hat. It suits ages 5-7, takes about 40 minutes, and has a low mess.
You need: blue construction paper, cotton balls, glue, tape, and scissors.
Steps:
- Make a doubled headband from the sizing section.
- Roll a 12 x 18 inch sheet into a cone, starting at one corner. Test it on your child’s head and tighten or loosen it.
- Tape the seam inside and outside. Trim the bottom edge flat.
- Tape the band inside the cone’s bottom edge so the hat holds its size.
- Glue cotton balls around the bottom edge and one on the tip. Let it dry for 15 minutes.
If the cone sits too high, loosen the roll a little. A wider opening sits lower on the head. Test the fit before taping the seam, since a taped cone is hard to change.
Shaggy Yeti Hat
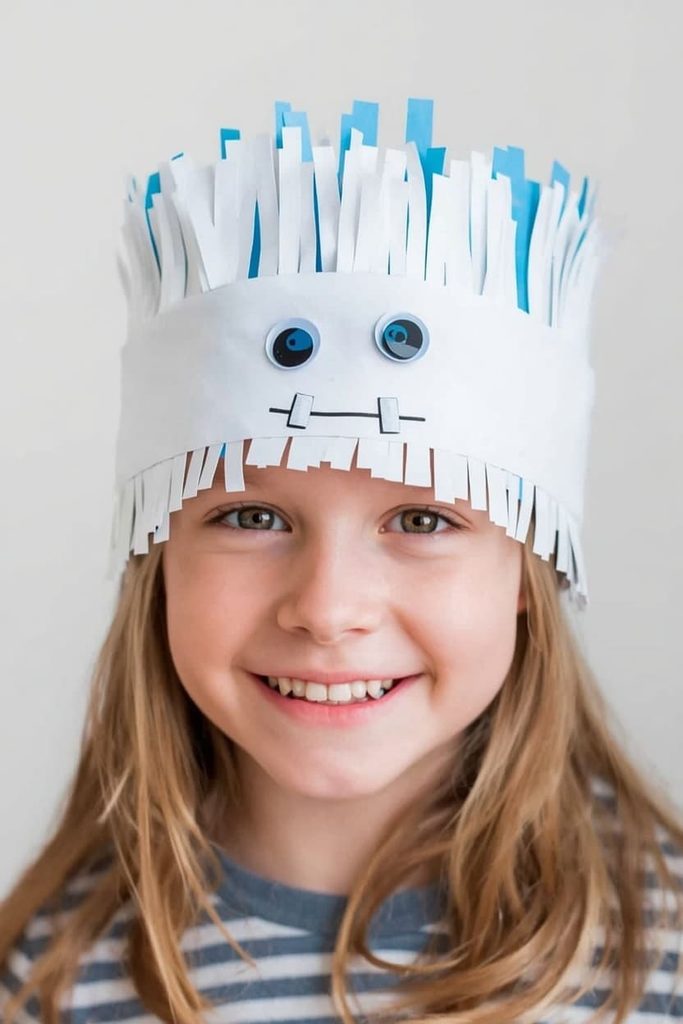
A fringe of paper strips makes this band look like shaggy yeti fur. It suits ages 5-7, takes about 40 minutes, and has a medium mess.
You need: white and blue construction paper, googly eyes, a black marker, glue, and tape.
Steps:
- Make a white headband from the sizing section.
- Cut a white strip, 4 inches tall and 18 inches long. Snip a fringe along one edge, cutting 2 inches deep every half inch.
- Glue the plain edge along the top of the band, so the fringe sticks up. Add a blue fringe strip the same way.
- Glue two googly eyes on the front of the band and draw a toothy grin with the marker.
Short fringe stands up better than long fringe. Keep the cuts about 2 inches deep so the top doesn’t flop. Cutting fringe is also great scissor practice for steady hands.
Winter Hat Crafts FAQs
How do I make a paper hat fit my child’s head?
Measure the head with string, add 1 inch, and cut a band to that length. Test it with one finger under the band. A paper hat fits best when you size the band first and attach every decoration to it. Flat, one-size hats almost always slip.
Can I use regular printer paper instead of construction paper?
Yes, but the band will be weaker. Tape two or three strips of printer paper end to end, then double the band by gluing a second layer inside. The hat will bend more easily, so choose lighter hats like the bear ears or the crown.
How do I keep a paper hat from falling off or tearing?
Start with a snug band and tape the overlap on the outside. Double the band for strength, and press tape flat for a few seconds. Skip tall or heavy designs for little ones. Fit and light weight matter more than extra decoration.
What age can make these hats?
Ages 2-3 can press, scribble, and help glue while you do the cutting. Ages 3-5 can do simple cutting and taping. Ages 5-7 can trace, fold, and build the bigger hats on their own. Match the hat to the age tag in each section.
How long do winter hat crafts take?
Most take 10 to 40 minutes. Toddler hats run 10 to 15, preschool hats 15 to 25, and the older kid hats 25 to 40. Add 10 to 15 minutes if glue needs to dry before wearing. Tape finishes faster than glue.
Hat Shop Play: What to Do After You Make the Hats
Don’t let the hats sit on a shelf. Turn your kitchen into a hat shop. Line the hats up on a table with paper price tags. Your child plays the shopkeeper, and you play the customer who needs a very warm hat. Swap roles after a few turns.
Kids practice counting, talking, and taking turns without noticing. Teachers can set this up as a classroom center with a play mirror. If you only make one hat today, start with the polar bear ears. It takes ten minutes, and it’s easy to fit.
Older kids can jump to the moose antlers or the gnome cone. Pin this post to your winter hat crafts board so you can find it again next January. And tell me which hat your child wears first.

Sohel Rana is the writer, editor, publisher, and founder of The Tidy Porch. He is the man who is responsible for the craft (my wife created) being converted into a written piece. He also helps her wife (Sumona) by capturing videos of each craft. In short, he brings each craft created by her wife in front of you by transforming it into an article and a video.
