
B for Butterfly Craft is another hands-on alphabet activity that helps preschoolers learn the letter B in a fun and creative way.
This easy paper craft uses simple materials you likely already have at home, including construction paper, glue, scissors, and a marker.
As children trace, cut, and assemble the butterfly, they also practice letter recognition, fine motor skills, and hand-eye coordination.
Whether you’re teaching at home or in the classroom, this colorful butterfly craft makes learning the alphabet both exciting and memorable.
Materials Needed
Before you begin, gather these supplies:
- Construction paper in different colors
- Hand-drawn uppercase B letter (cut out)
- Butterfly wing cutouts
- Butterfly body cutout
- Two antennae cutouts
- Glue stick or school glue
- Black marker
- Kid-safe scissors
- Pencil (optional)
How to Make a B for Butterfly Craft
Step 1: Prepare the Uppercase B
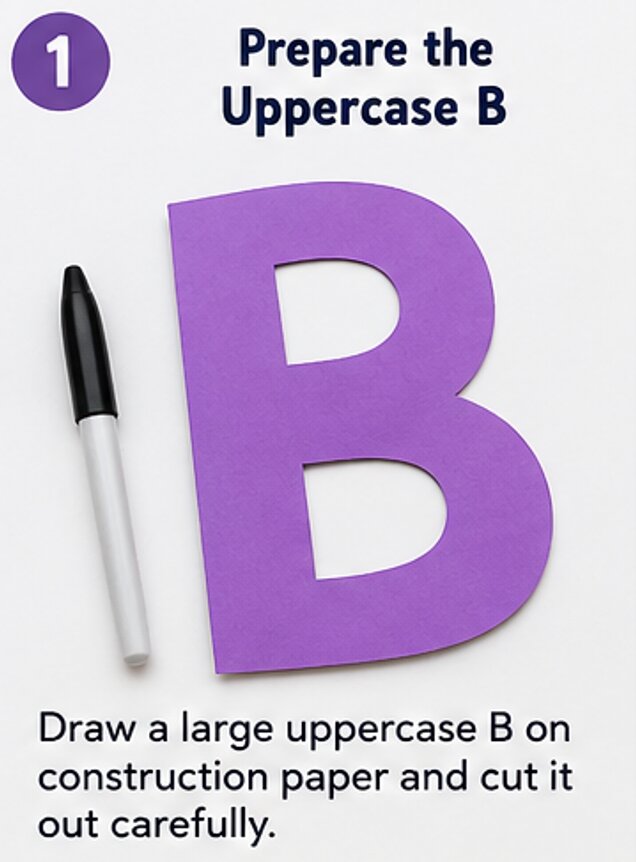
Begin by drawing a large uppercase B on a piece of construction paper. Make the letter large enough to serve as the main part of your butterfly.
Carefully cut along the outline with kid-safe scissors until the letter is completely separated from the paper.
If you’re crafting with younger preschoolers, you can prepare the uppercase B ahead of time so they can focus on assembling the butterfly.
Older children can trace and cut their own letter, giving them extra practice with scissor skills and helping them recognize the shape of the capital B.
Once you’ve finished cutting, place the letter on your work surface. It will be the foundation for the rest of the butterfly craft.
Step 2: Cut Out the Butterfly Pieces
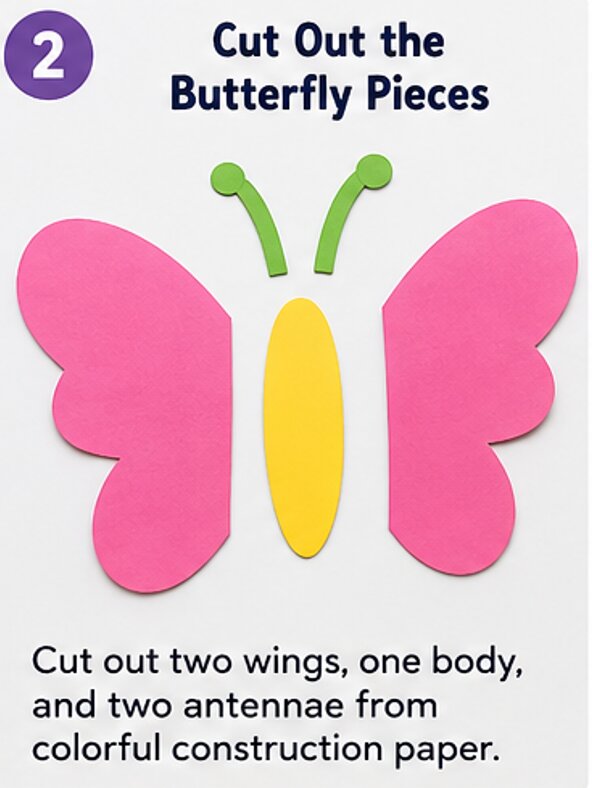
Next, prepare all the butterfly parts from colorful construction paper. Cut out:
- Two butterfly wings
- One butterfly body
- Two antennae
Choose bright or contrasting colors to make your butterfly stand out. You can use matching wing colors for a classic look or combine different shades to create a unique design.
As you cut each piece, encourage children to look at the shape of the butterfly wings. Explain that butterflies have two wings on each side that are nearly the same shape, making them symmetrical. This simple observation adds an educational element while children practice cutting curved lines.
Arrange all the paper pieces on the table before moving on. Having everything ready will make the assembly process smooth and enjoyable.
Step 3: Glue the Wings Behind the Letter
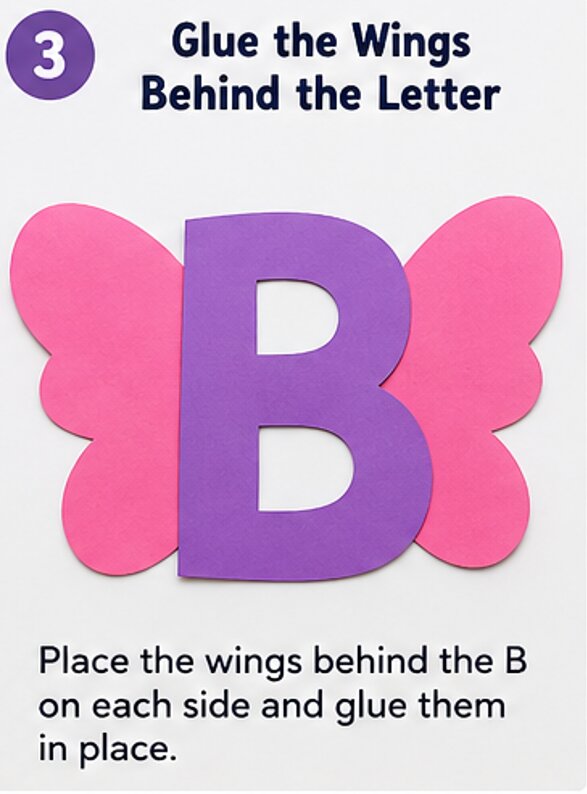
Take one butterfly wing and position it behind the left side of the uppercase B. Place the second wing behind the right side so both wings extend evenly from the letter.
Before adding glue, move the wings slightly until they look balanced. When you’re satisfied with the placement, apply a thin layer of glue to the back of one wing and press it firmly behind the letter. Repeat with the second wing.
Hold each wing in place for a few seconds to help the glue stick properly.
When both wings are attached, lift the craft and check that they are even. If needed, gently adjust them before the glue dries completely. A balanced butterfly will give the finished craft a neat and polished appearance.
Step 4: Attach the Butterfly Body
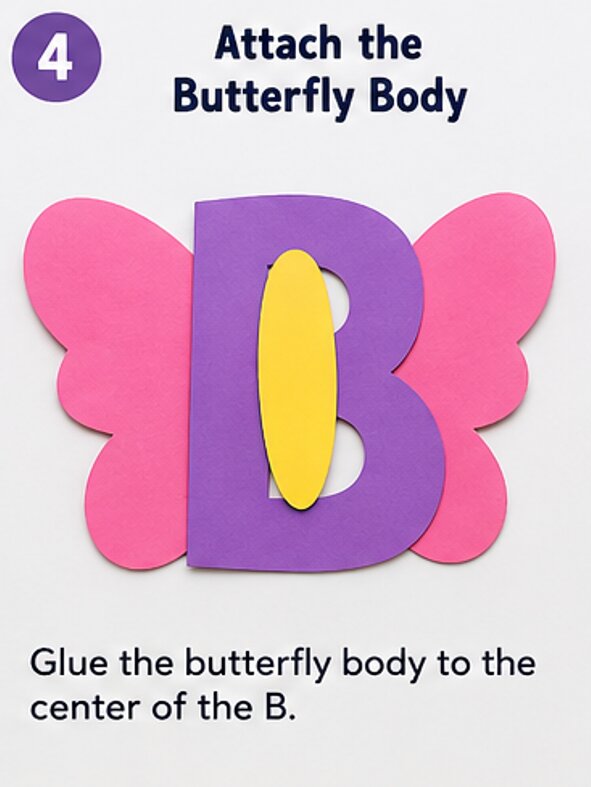
Now it’s time to add the butterfly’s body.
Apply glue to the back of the body cutout and carefully place it in the center of the uppercase B. The body should follow the middle of the letter while leaving enough of the B visible so children can easily recognize it.
Press gently across the entire body to make sure it sticks evenly.
Take a quick look to ensure the wings haven’t shifted while attaching the body. If everything is centered and flat, you’re ready for the next step.
Step 5: Add the Antennae
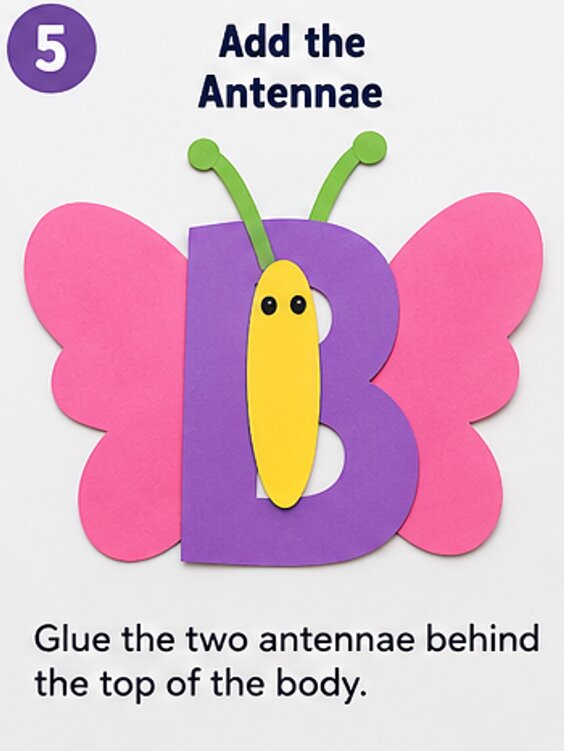
Spread a small amount of glue on one end of each antenna.
Slide the antennae behind the top of the butterfly body so they extend upward. Angle them slightly outward to give the butterfly a cheerful and realistic appearance.
Press each antenna firmly for several seconds until it stays in place.
Small details like the antennae help transform the paper letter into a recognizable butterfly while giving children another opportunity to practice careful placement.
Step 6: Draw the Butterfly’s Face
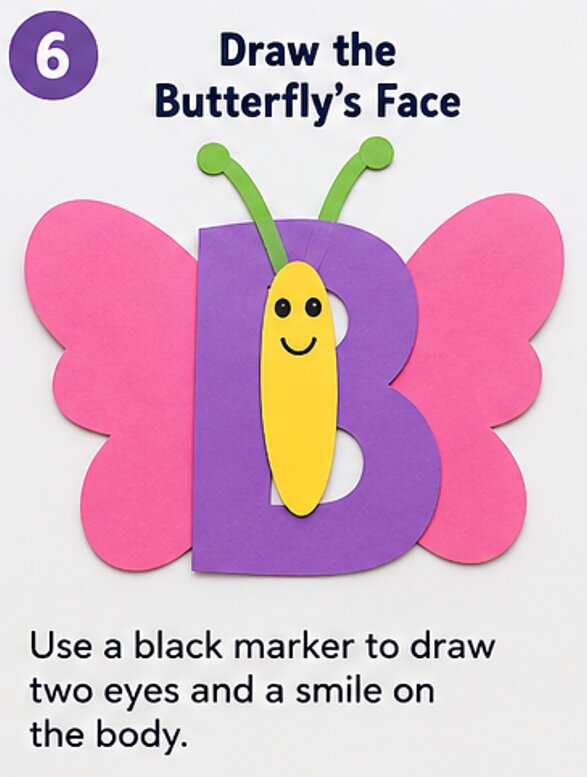
Using a black marker, draw two small eyes near the top of the butterfly body. Then add a simple curved smile underneath.
Keep the face easy to draw so preschoolers can copy it independently. If children want to personalize their butterfly, they can add rosy cheeks, eyelashes, eyebrows, or a larger smile.
This simple step gives each butterfly its own personality while encouraging creativity and confidence.
Step 7: Decorate the Butterfly Wings
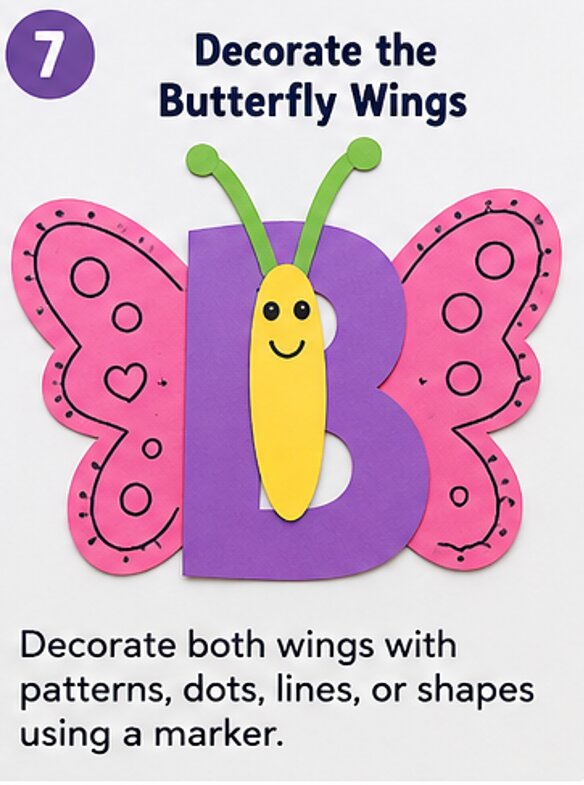
Now it’s time to decorate your butterfly.
Use the black marker to draw fun patterns across both wings. Add circles, dots, stripes, swirls, hearts, zigzags, or curved lines. Encourage children to create similar patterns on both sides while still making their butterfly unique.
If you’d like to add more color, cut small shapes from leftover construction paper and glue them onto the wings. Layering colorful paper circles or ovals creates beautiful wing patterns without needing extra craft supplies.
This decorating step allows children to express their creativity while observing that real butterflies often have repeating designs on both wings.
When you’re happy with the decorations, let the glue dry completely before moving the craft.
Step 8: Display Your Finished Butterfly
Your B for Butterfly Craft is now complete!
Hold up the finished butterfly and point to the uppercase B. Say the letter aloud together and repeat, “B is for Butterfly.” This simple review reinforces letter recognition and helps children connect the beginning sound with a familiar word.
Display the finished butterfly on a classroom bulletin board, refrigerator, bedroom wall, or alphabet learning center. You can also add it to a preschool alphabet book or hang it with other letter crafts to create a colorful alphabet display that children will enjoy looking at every day.
Give It A Try
This B for Butterfly Craft is a simple and engaging way to help preschoolers learn the letter B while enjoying a fun hands-on activity.
With just construction paper, glue, a marker, and a few paper cutouts, children can create a bright butterfly that proudly showcases the uppercase letter. Along the way, they’ll strengthen fine motor skills, practice letter recognition, and build confidence through creative play.
Whether you’re a parent, teacher, or homeschool educator, this easy alphabet craft is a wonderful addition to your letter B lesson. Gather your supplies and give this colorful butterfly craft a try today!

Sohel Rana is the writer, editor, publisher, and founder of The Tidy Porch. He is the man who is responsible for the craft (my wife created) being converted into a written piece. He also helps her wife (Sumona) by capturing videos of each craft. In short, he brings each craft created by her wife in front of you by transforming it into an article and a video.
