
Last week my son handed me a paper hedgehog with googly eyes glued upside down. He grinned like he’d built a house.
That’s when it hit me — we were already on H. Seven letters in, and I still didn’t have a system. So I sat down with scissors, construction paper, and a cup of coffee that went cold twice.
What came out of it is this list. Seven H crafts. All paper. All done in one sitting. You don’t need a craft cabinet for any of these — just what’s already in your drawer.
Top 5 Amazon Picks for Letter H Crafts
- Crayola Construction Paper (48-count, assorted colors) gives you every shade you’ll need for hedgehogs, houses, and hearts without a mid-project store run.
- Elmer’s Disappearing Purple Glue Sticks (6-pack) go on visible so little hands can see exactly where they’ve covered, then dry clear.
- Fiskars Blunt-Tip Kid Scissors cut construction paper cleanly while staying safe enough for a 3-year-old to hold unsupervised for a few minutes.
- Googly Eyes Assorted Sizes (100-pack) turn a flat paper shape into a character in about two seconds, which matters when attention spans are short.
- Black Fine-Tip Washable Markers (Crayola, 10-pack) are what you’ll reach for to add whiskers, windows, and letter outlines without bleeding through the paper.
Why Letter Crafts Help With Early Literacy
Letter crafts work because they connect a shape to a sound before a child can read fluently. When your child cuts, folds, and glues an “H,” their hand is doing the learning their eyes alone can’t.
Occupational therapists point to this repeatedly: fine motor practice through cutting and pasting builds the same hand control kids later use for writing.
So this isn’t just an activity to fill twenty minutes. It’s early handwriting prep disguised as a hedgehog.
Letter H Craft #1: Paper Hedgehog
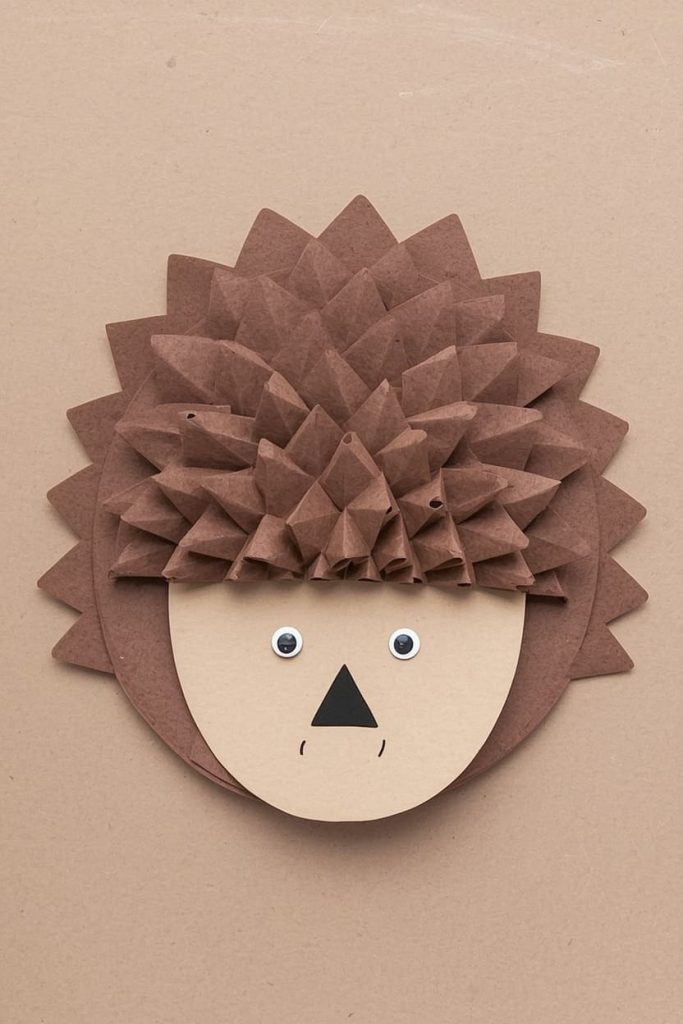
This is the craft that started it all for us. It’s simple, it’s textured, and it actually looks like a hedgehog — spikes and all.
Materials Needed
- 1 sheet brown construction paper
- 1 sheet tan or cream construction paper
- Black fine-tip marker
- Glue stick
- Scissors
- 2 small googly eyes
How To Make
- Fold the brown paper in half and draw half an oval along the fold, about 6 inches long and 4 inches wide at its widest point, with one end coming to a gentle point for the nose. Cut along your line and unfold — you’ll have a symmetrical body shape.
- Cut a smaller oval from the tan paper, about 2 inches long, and trim one end to a slight point so it mirrors the nose end of the body.
- Apply glue stick to the back of the tan oval and press it onto the pointed end of the brown body, lining up the points so they overlap.
- From leftover brown paper, cut 15–20 small triangles, each about 1.5 inches long and a half-inch wide at the base. Cutting a stack of 3–4 layers at once speeds this up.
- Starting at the rounded back of the body, glue a row of triangles along the bottom edge, angling each one slightly backward like a fan.
- Add a second row just above the first, overlapping the base of each new triangle over the tips of the row below. Repeat until you reach the tan face section.
- Glue two googly eyes onto the tan face, spaced about a half-inch apart.
- Use the black marker to draw a small triangle nose at the tip of the tan oval and a short curved line beneath it for a mouth.
Tips Precut the triangle spikes yourself if your child is under 4 — the gluing is the fun part, not the cutting.
Letter H Craft #2: Paper House
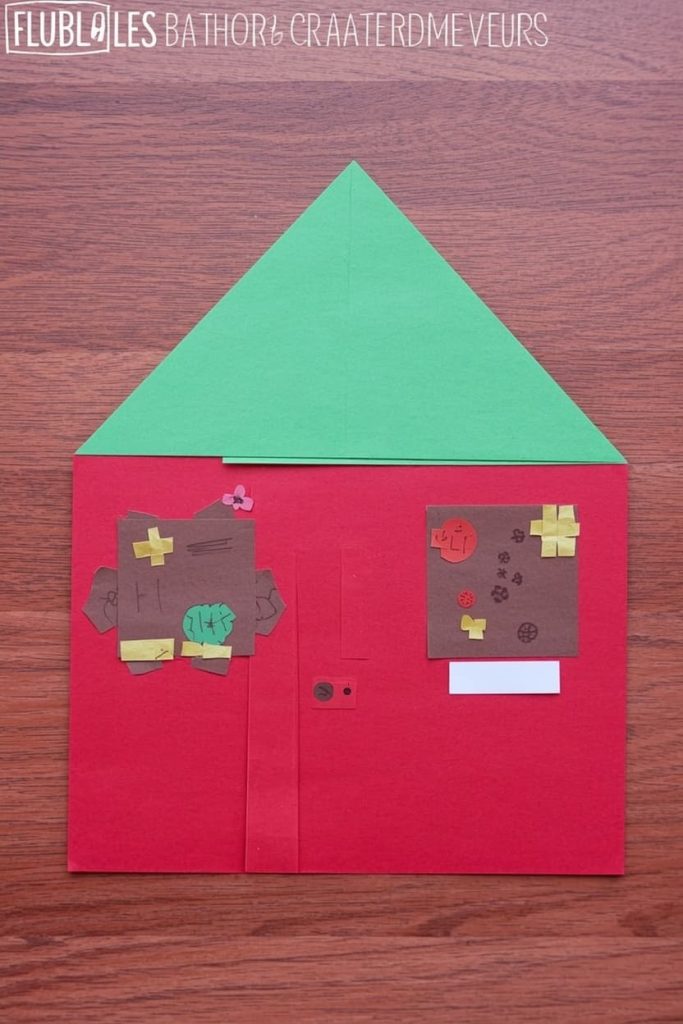
This one doubles as a math lesson if you want it to — shapes becoming a structure.
Materials Needed
- 1 sheet red or brown paper (walls)
- 1 sheet contrasting paper (roof)
- Scraps for windows and door
- Glue stick
- Scissors
How To Make
- Fold the wall-color paper into a manageable size and measure a 5-inch by 5-inch square using a ruler or the corner of another paper as a guide. Cut it out — this is the wall of the house.
- On the roof-color paper, draw a triangle with a 6-inch base and sides angled up to a peak about 3 inches tall. Cut it out.
- Apply glue stick along the top edge of the square wall piece and press the triangle roof on top, lining up the base of the triangle with the top edge of the square so it overhangs slightly on both sides.
- Cut a rectangle about 1 inch wide and 2 inches tall from a scrap for the door. Glue it centered along the bottom edge of the square, so the bottom of the door lines up with the bottom of the house.
- Cut two small squares, about 1 inch by 1 inch, from a contrasting scrap for windows. Glue one on each side of the house, above the door and roughly centered between the door and the outer edges.
- Using the marker, draw a small circle or dot on the door for a doorknob, then draw a plus sign (one vertical line, one horizontal line) inside each window to create four panes.
- Optional: cut a small rectangle strip and glue it to the top of the roof for a chimney.
Tips Let your child choose the roof color. It’s a small decision, but it makes the craft feel like theirs.
Letter H Craft #3: Paper Hat
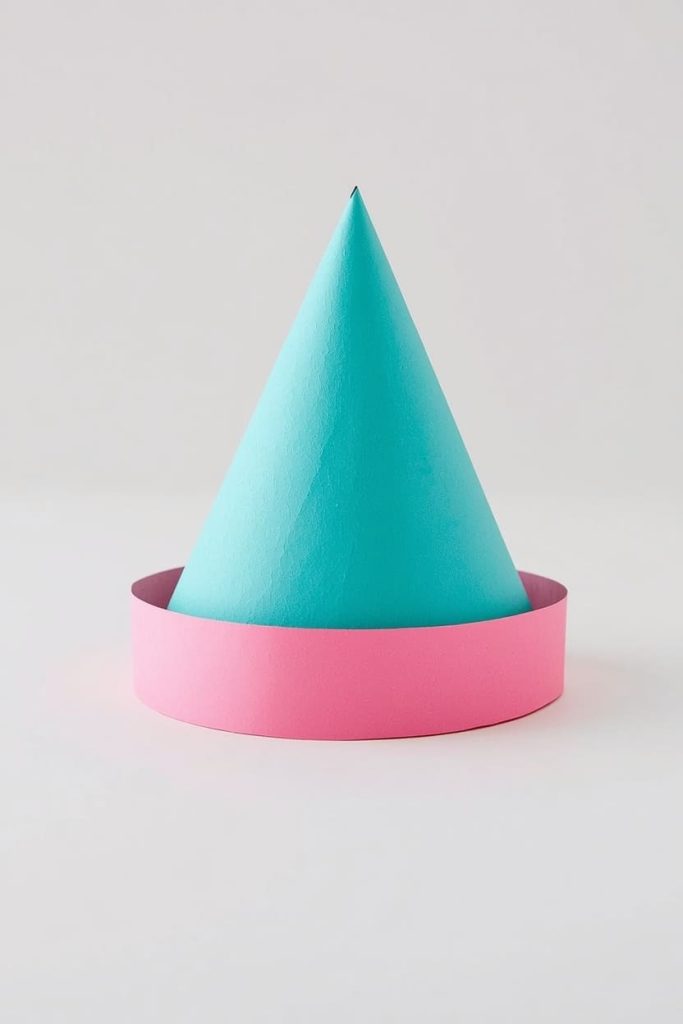
Kids love wearing what they make. This hat is flat, but it still gets tried on.
Materials Needed
- 1 sheet colored construction paper
- Scissors
- Glue stick
- Stapler (adult-handled)
How To Make
- Using a ruler, mark a strip 2 inches wide along the long edge of your first sheet of paper. Cut along the line so you have one long strip the full length of the page.
- On a second sheet, draw a half-circle about 8 inches across (use a plate or bowl as a tracing guide if you have one). Cut it out.
- Roll the flat edge of the half-circle into a cone shape, overlapping the two straight edges by about a half-inch until the point closes at the top.
- Hold the overlap in place and run glue stick along the inside of the overlapping edge, then press and hold for about 10 seconds so it sets.
- Apply glue stick to the base rim of the cone and press it onto the center of the headband strip, holding for a few seconds until secure.
- Wrap the headband strip around your child’s head to check the fit, marking where the two ends meet with a light pencil dot.
- Remove the strip and staple the ends together at the marked spot (adult step — keep the stapler pointed away from your child).
- Let your child decorate the cone with markers, stickers, or paper scraps before or after assembly.
Tips Measure the headband before decorating. It’s easier to trim paper than to add more.
Letter H Craft #4: Paper Heart
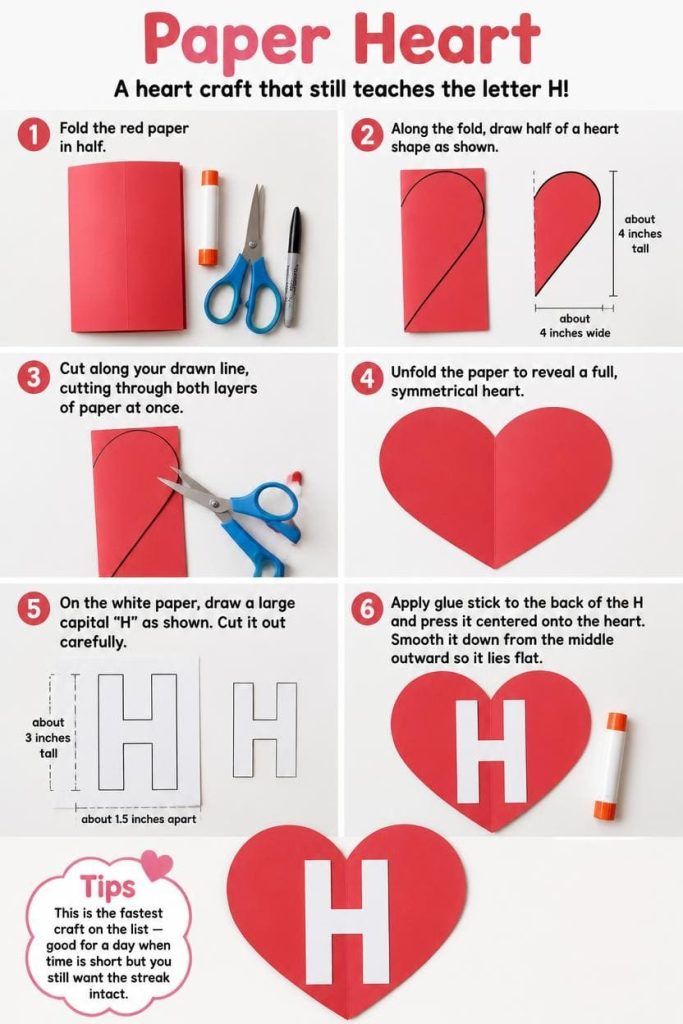
A heart craft that still teaches the letter H — because “heart” starts with H too, and it’s a nice bridge into Valentine’s season crafts later.
Materials Needed
- 1 sheet red or pink paper
- 1 sheet white paper
- Glue stick
- Scissors
- Marker
How To Make
- Fold the red paper in half so you have a straight crease down the middle.
- Along the fold, draw half of a heart shape: starting at the top of the fold, curve outward and down to form the top lobe, then angle back in to a point at the bottom, ending on the fold. The finished heart should be about 4 inches tall and 4 inches wide.
- Cut along your drawn line, cutting through both layers of paper at once.
- Unfold the paper to reveal a full, symmetrical heart.
- On the white paper, draw a large capital “H” about 3 inches tall, with the two vertical lines about 1.5 inches apart and a horizontal crossbar in the middle.
- Cut out the H carefully, cutting into the inside corners first to make the turns easier.
- Apply glue stick to the back of the H and press it centered onto the heart, smoothing from the middle outward so it lies flat.
Tips This is the fastest craft on the list — good for a day when time is short but you still want the streak intact.
Letter H Craft #5: Paper Horse
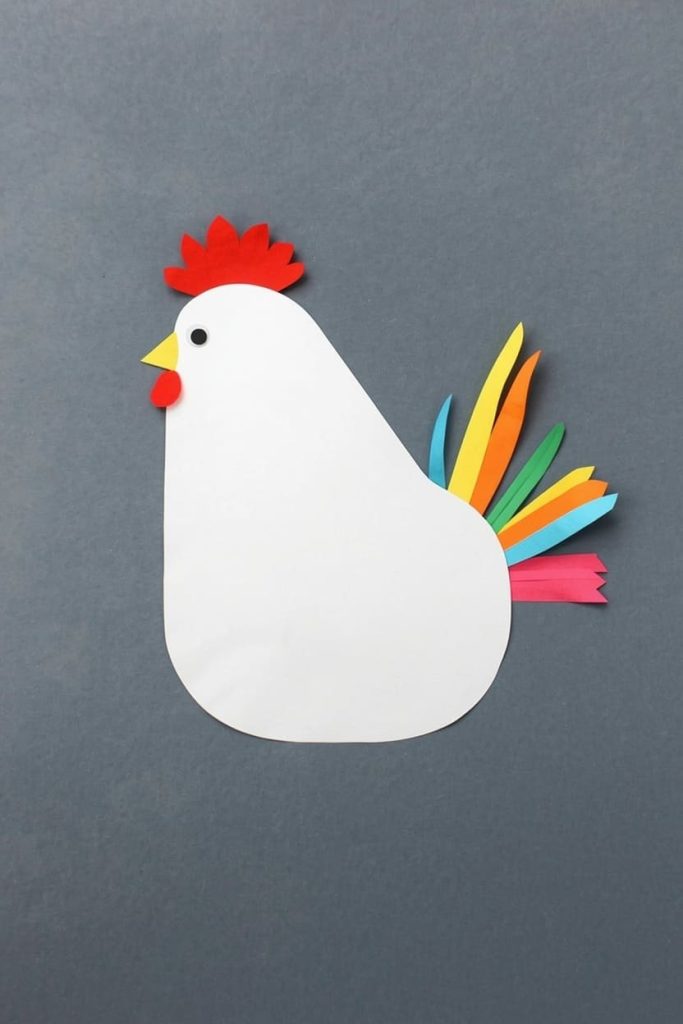
This one takes a little longer, so save it for a day with more time on the clock.
Materials Needed
- 1 sheet brown paper
- 1 sheet black or dark paper (mane)
- Glue stick
- Scissors
- Marker
How To Make
- On the brown paper, lightly sketch a horse head shape about 6 inches tall: a long rounded rectangle for the face that narrows and curves outward at the bottom into a snout.
- Cut along your pencil line to create the head silhouette.
- From the dark paper, cut 6–8 thin strips, each about a half-inch wide and 3 inches long, for the mane.
- Apply a thin line of glue stick along the back edge of the head (the top and curved neck area, opposite the snout).
- Press the mane strips onto the glued edge one at a time, overlapping each strip slightly over the last, letting the loose ends hang free for texture.
- Cut two small triangles, about 1.5 inches tall, from the remaining brown paper for ears. Glue them to the top of the head, points facing up, just in front of where the mane starts.
- Using the marker, draw a curved line near the bottom of the snout for the mouth and two small nostril dots above it.
- Glue on two googly eyes above the snout, spaced evenly on either side of the head.
Tips Draw the head shape lightly in pencil first if your child is nervous about cutting freehand.
Letter H Craft #6: Paper Helicopter
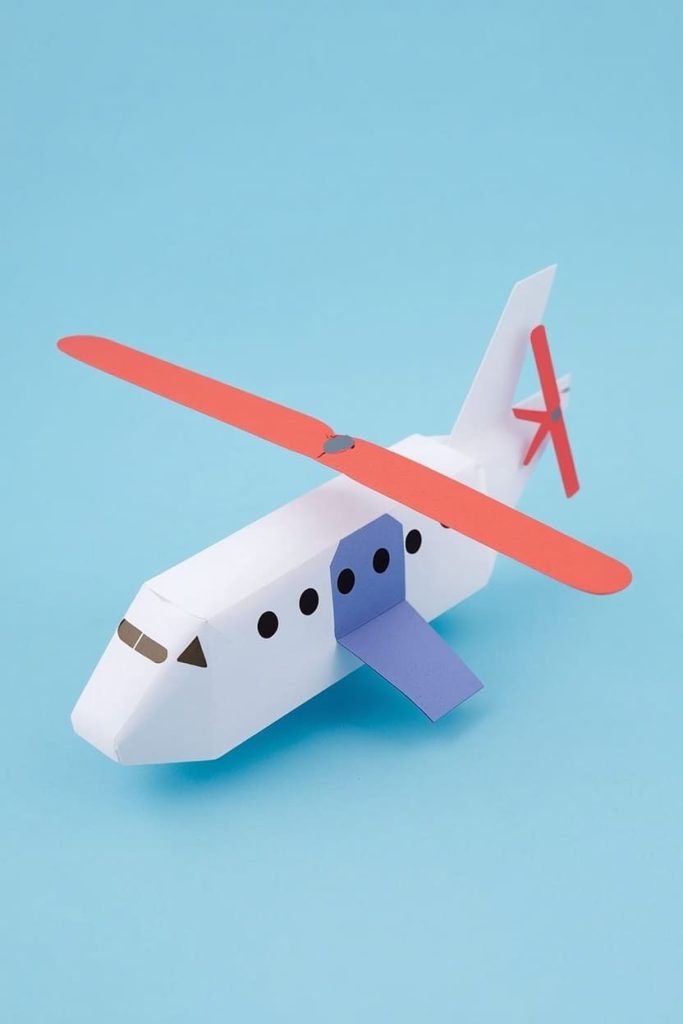
This craft holds attention because it moves — sort of. The blades spin if you attach them loosely.
Materials Needed
- 1 sheet paper (body)
- 1 strip paper (blades)
- Brass fastener
- Glue stick
- Scissors
How To Make
- Draw and cut an oval body about 5 inches long and 2.5 inches wide from your main sheet of paper.
- Cut a rectangle 1 inch wide and 3 inches long for the tail boom.
- Apply glue stick to one inch of the short end of the tail rectangle and press it onto the back end of the oval body, so the tail extends outward like a stick.
- Cut a small triangle, about 1.5 inches, for the tail fin and glue it upright at the far end of the tail boom.
- Cut a strip 4 inches long and 1 inch wide from a contrasting color for the top blades.
- Find and mark the exact center of the blade strip, then use the tip of a pencil or a hole punch to carefully poke a small hole through it.
- Poke a matching small hole in the top-center of the helicopter body, just above where the tail meets the body.
- Push the brass fastener through the hole in the blade strip, then through the hole in the body.
- Spread the two prongs of the fastener flat against the underside of the body to secure it, leaving it loose enough that the blade strip can still spin freely on top.
Tips The brass fastener is the one non-paper item on this list, and it’s worth it — the spinning motion is what makes this craft memorable.
Letter H Craft #7: Paper Hen
A hen rounds out the barnyard theme nicely if you’ve done other animal letters already.
Materials Needed
- 1 sheet white or brown paper (body)
- 1 sheet yellow paper (beak, feet)
- 1 sheet red paper (comb)
- Glue stick
- Scissors
How To Make
- On the white or brown paper, draw a rounded body shape about 5 inches tall, like a teardrop standing upright with a slightly narrower top for the head. Cut it out.
- Cut a small triangle, about 1 inch wide, from the yellow paper for the beak.
- Apply a dot of glue stick to the flat edge of the beak triangle and press it onto the side of the head, pointing outward, about a third of the way down from the top.
- On the red paper, draw a small zigzag comb shape about 2 inches wide with 3–4 points. Cut it out.
- Glue the comb along the top edge of the head, centered, so the points stick up like a crown.
- Cut two thin strips from the yellow paper, each about 2 inches long, and snip one end of each into a shallow V to look like feet.
- Glue the straight end of each foot to the bottom edge of the body, spaced about an inch apart, so the V-ends stick out below.
- Glue one googly eye onto the head, just above and behind the beak.
- From scrap paper in 2–3 colors, cut 4–5 thin curved strips about 3 inches long for tail feathers. Glue them in a fan shape to the back of the body, opposite the head.
Tips Save your feather scraps from other crafts for this one — it’s a good end-of-week project that uses up leftovers.
How to Prep These Crafts for a Group of Kids
If you’re prepping for a classroom or co-op, precut the small pieces the night before.
Cutting is the slowest part for young hands, and having pieces ready in labeled bags per craft keeps the actual session moving.
Set out one glue stick per two kids and keep markers in a shared bin at the center of the table. This keeps the activity focused on assembly, which is where the learning happens anyway.
FAQ
What age is best for these crafts? Ages 3–7. Younger kids may need pieces precut; older kids can cut everything themselves.
Do I need any special supplies? No. Everything here is paper, glue sticks, scissors, and markers you likely already own, except for one brass fastener in the helicopter craft.
How long does each craft take? Most take 15–20 minutes. The heart is the fastest; the horse and helicopter take a bit longer.
Can I use liquid glue instead of a glue stick? You can, but glue sticks dry faster and make less mess, which matters with younger kids.
What if my child can’t cut a straight line yet? Draw the shape lightly in pencil and let them cut along it, or precut the harder pieces yourself and let them handle gluing and decorating.
Can these be turned into a bulletin board display? Yes. All seven crafts are flat, so they pin or tape to a board easily and hold up well next to a printed letter H banner.

Sohel Rana is the writer, editor, publisher, and founder of The Tidy Porch. He is the man who is responsible for the craft (my wife created) being converted into a written piece. He also helps her wife (Sumona) by capturing videos of each craft. In short, he brings each craft created by her wife in front of you by transforming it into an article and a video.
