
My daughter asked me why “fish” and “frog” both start the same way. I didn’t have a great answer, so I grabbed paper instead.
We made a fish that afternoon, then a flower the next day, and by the weekend we’d built a whole F collection stuck to the fridge. That’s how this list started.
Seven crafts. All paper. All things she could actually finish without me taking over halfway through. If you’re on letter F this week, here’s everything you need, already worked out for you.
Top 5 Amazon Picks for Letter F Crafts
- Crayola Construction Paper (48-count, assorted colors) covers every shade you’ll need for fish, foxes, and flowers without a store run mid-project.
- Elmer’s Disappearing Purple Glue Sticks (6-pack) go on visible so kids can see their coverage, then dry clear and dry fast.
- Fiskars Blunt-Tip Kid Scissors cut construction paper cleanly and stay safe enough for a preschooler to manage most of the cutting alone.
- Googly Eyes Assorted Sizes (100-pack) turn a flat cutout into a fox or a fish in seconds, which keeps momentum going.
- Crayola Fine-Tip Washable Markers (10-pack) are what you’ll use for scales, petals, and letter outlines without the ink bleeding through.
Why Letter Crafts Help With Early Literacy
Letter crafts work because your child’s hands do the learning before their eyes fully catch up. Cutting a curve, folding a petal, and placing glue exactly where it needs to go all build the fine motor control kids later use to hold a pencil and form letters on their own.
Occupational therapists back this up — hand strength and control developed through cutting and pasting transfer directly to handwriting. So when you sit down for one of these F crafts, you’re not just filling twenty minutes. You’re building the muscle memory for writing itself.
Letter F Craft #1: Paper Fish
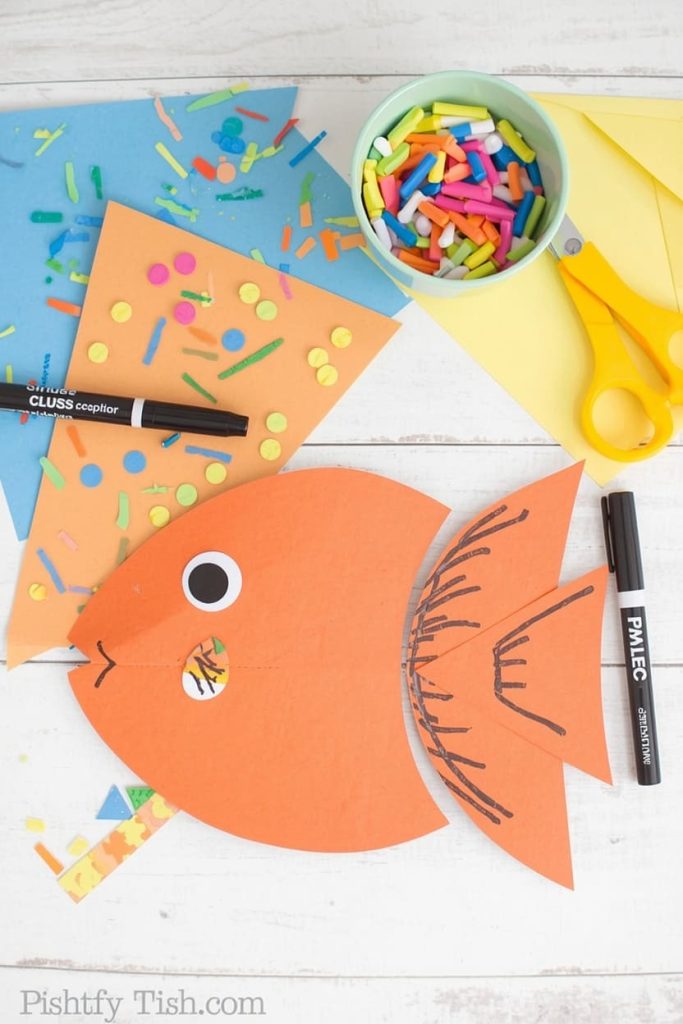
This is the easiest craft on the list, and it’s a good one to start your F week with because it builds confidence fast.
Materials Needed
- 1 sheet orange or blue construction paper
- 1 sheet contrasting paper for the tail and fins
- 1 googly eye
- Glue stick
- Scissors
- Black marker
How To Make
- Fold your main sheet of paper in half so you have a crease down the middle. Draw half an oval body along the fold, about 5 inches long and 3 inches tall at its widest point.
- Cut along your line while the paper is still folded, then unfold it to reveal a symmetrical oval body.
- On the contrasting paper, draw a triangle about 3 inches tall for the tail. Cut it out.
- Apply glue stick to the short straight edge of the tail triangle and press it onto the back end of the fish body, so the tail points outward like it’s swimming.
- Cut two small triangles, each about 1.5 inches, from the contrasting paper for the top and bottom fins.
- Glue one fin centered on the top edge of the body and the other centered on the bottom edge, angled slightly toward the tail.
- Glue the googly eye near the front of the body, about an inch back from the rounded nose.
- Use the black marker to draw 3–4 short curved lines near the tail for scale texture, and a small curved line for the mouth.
Tips Let your child pick two totally different colors for the body and fins — the more contrast, the more the fish pops once it’s finished.
Letter F Craft #2: Paper Flower
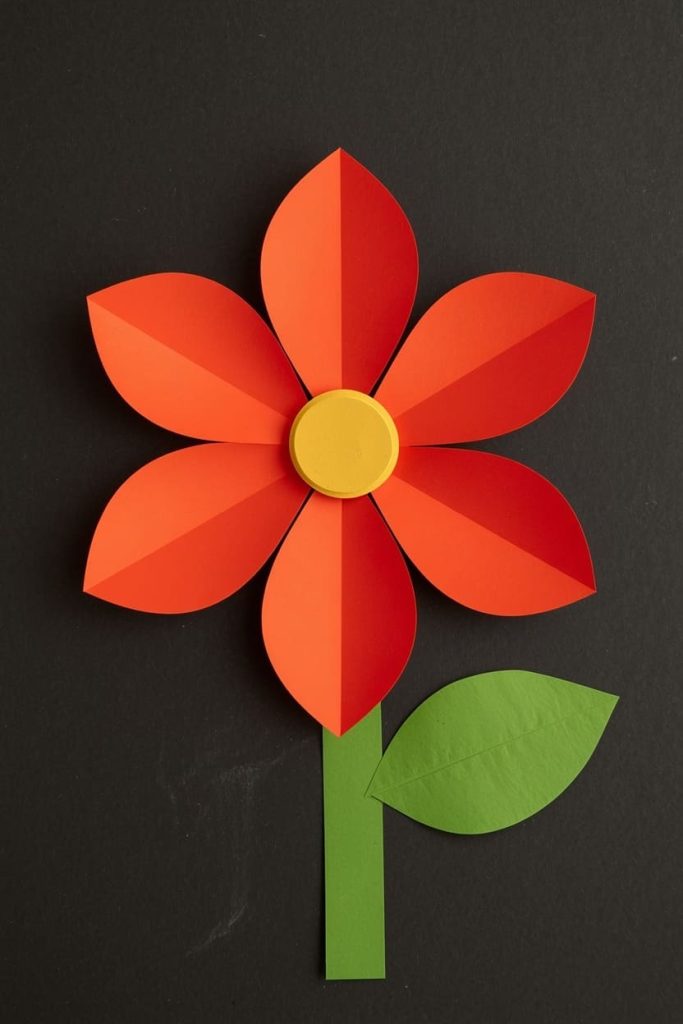
This one is satisfying because it looks complicated but takes about ten minutes start to finish.
Materials Needed
- 1 sheet paper for petals (any bright color)
- 1 small square of yellow or brown paper for the center
- 1 sheet green paper for the stem
- Glue stick
- Scissors
How To Make
- Cut five ovals from your petal-color paper, each about 3 inches long and 1.5 inches wide at the center.
- Cut a circle about 2 inches across from the yellow or brown paper for the flower center.
- Arrange the five petals in a circle on your work surface, with the narrow ends all pointing toward the middle and touching.
- Glue each petal down at its narrow end, one at a time, pressing firmly so they hold their spread-out position.
- Apply glue stick to the back of the yellow circle and press it centered over the spot where all five petal ends meet.
- Cut a strip from the green paper, about 1 inch wide and 8 inches long, for the stem.
- Glue the top of the stem to the back of the flower, centered, so it hangs straight down.
- Cut two small leaf shapes, each about 2 inches long, from the green paper and glue them to the sides of the stem, one about a third of the way down and one about two-thirds of the way down.
Tips Curl the petal tips slightly around a pencil before gluing them down — it gives the flower a bit of dimension even though it’s fully flat.
Letter F Craft #3: Paper Fox
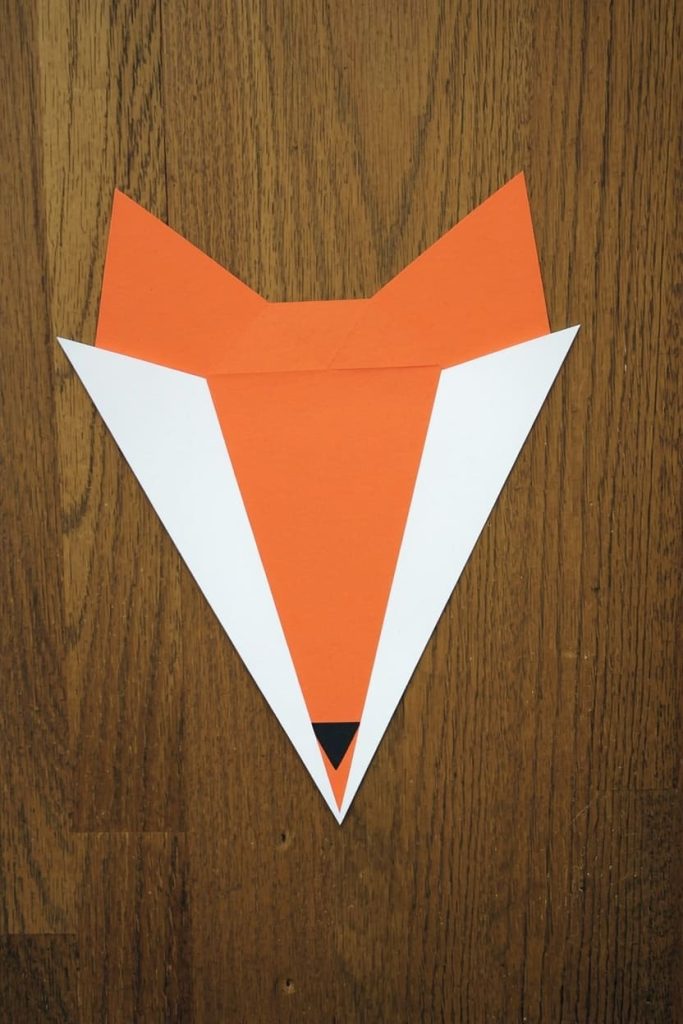
Foxes are a favorite because the pointed ears and face make this craft instantly recognizable.
Materials Needed
- 1 sheet orange paper
- 1 small square white paper
- 1 small scrap black paper
- Glue stick
- Scissors
- Black marker
How To Make
- On the orange paper, draw a triangle shape for the head, about 5 inches tall and 5 inches wide at the base, with slightly rounded corners at the bottom two points.
- Cut out the triangle head shape.
- Cut two smaller triangles, about 2 inches tall, from the same orange paper for the ears.
- Glue the ears to the top two corners of the head, pointing upward and slightly outward.
- Cut an oval about 2 inches wide from the white paper for the muzzle patch.
- Glue the white oval centered on the lower half of the face, so the bottom point of the orange triangle still peeks out slightly below it.
- Cut a tiny black triangle, about a half-inch, for the nose and glue it at the bottom tip of the white muzzle.
- Use the black marker to draw two small triangle eyes above the muzzle and a thin curved line for the mouth beneath the nose.
Tips Save the orange scraps from this craft — they’re perfect for the tail feathers on your letter H hen if you’ve already made that one, or for future fox crafts.
Letter F Craft #4: Paper Fire Truck
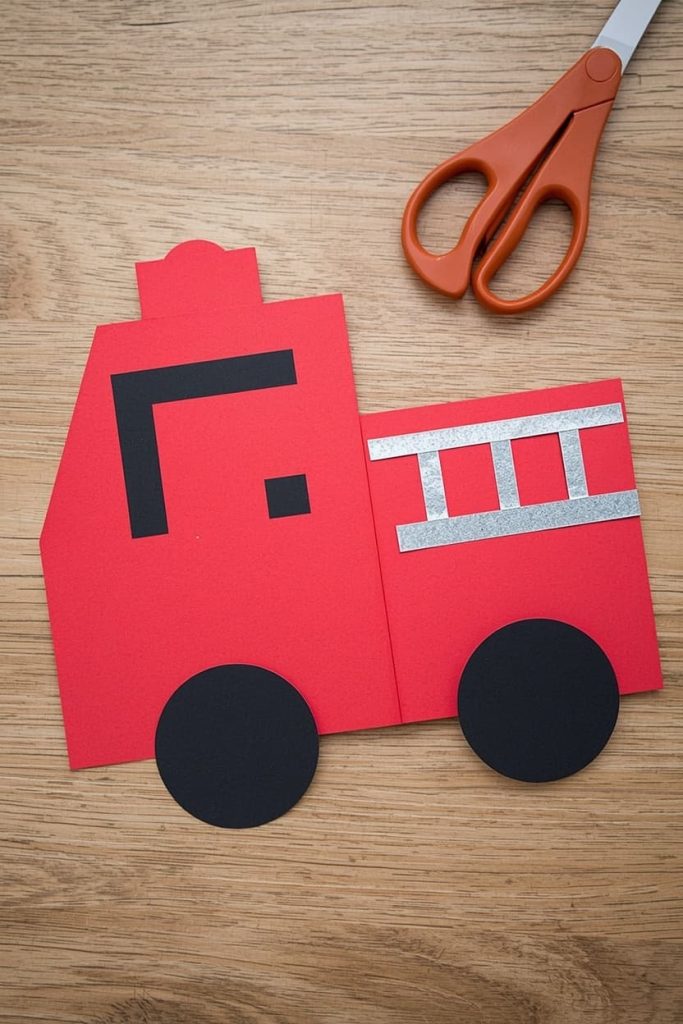
This is the most detailed craft on the list, so it’s a good one to save for a day with more time.
Materials Needed
- 1 sheet red paper
- 1 small square black paper
- 1 small square gray or silver paper
- Glue stick
- Scissors
- Black marker
How To Make
- Cut a rectangle from the red paper, about 6 inches long and 3 inches tall, for the truck body.
- Cut a smaller rectangle, about 2 inches long and 2 inches tall, for the cab, and glue it to one end of the body so it sits flush with the top and side edge.
- Cut two circles, each about 1.5 inches across, from the black paper for the wheels.
- Glue the wheels to the bottom edge of the truck body, one near each end, so half of each circle hangs below the body line.
- Cut a small rectangle, about 1 inch by 1 inch, from the gray paper for the window and glue it onto the cab section.
- Cut a thin strip, about a half-inch wide and 5 inches long, from the gray paper for the ladder, and glue it diagonally across the top of the truck body.
- Use the marker to draw short horizontal rungs across the ladder strip, spaced about a half-inch apart.
- Draw small circles for headlights near the front of the cab and a rectangle outline around the body for the truck’s side panel.
Tips Precut the wheels and window ahead of time if you’re doing this with a younger child — the straight cuts on the body and ladder are enough of a challenge on their own.
Letter F Craft #5: Paper Feather
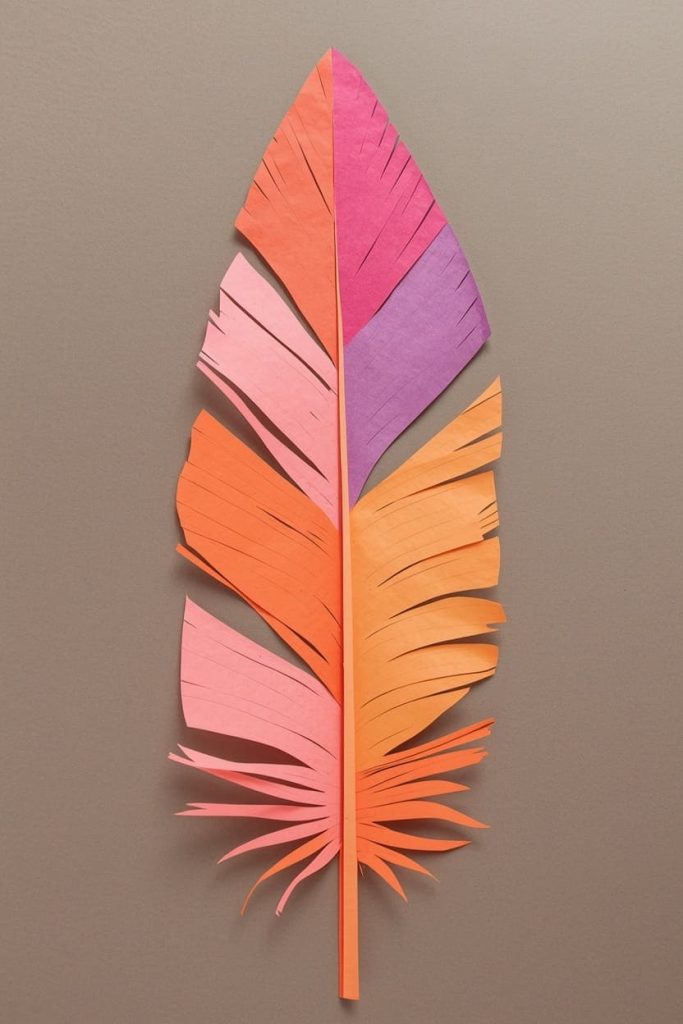
This craft is quick, and the fringing technique is one your child will want to use again on other projects.
Materials Needed
- 1 sheet paper (any color)
- Glue stick (optional, for mounting)
- Scissors
How To Make
- Cut a long oval or teardrop shape from your paper, about 7 inches long and 2.5 inches wide at the widest point, tapering to a point at one end.
- Starting at the wide end, make a series of straight cuts inward from each side edge toward the center, spaced about a quarter-inch apart, stopping just short of the centerline each time.
- Continue this fringing pattern down both sides of the shape, all the way to the pointed tip.
- Gently bend each fringe strip slightly upward or backward with your fingers to give the feather some texture and lift.
- If mounting on paper, apply a thin line of glue stick down the center spine and press it onto your background sheet.
Tips Try two-tone feathers by gluing a thin strip of a second color down the center spine before you start fringing.
Letter F Craft #6: Paper Flag
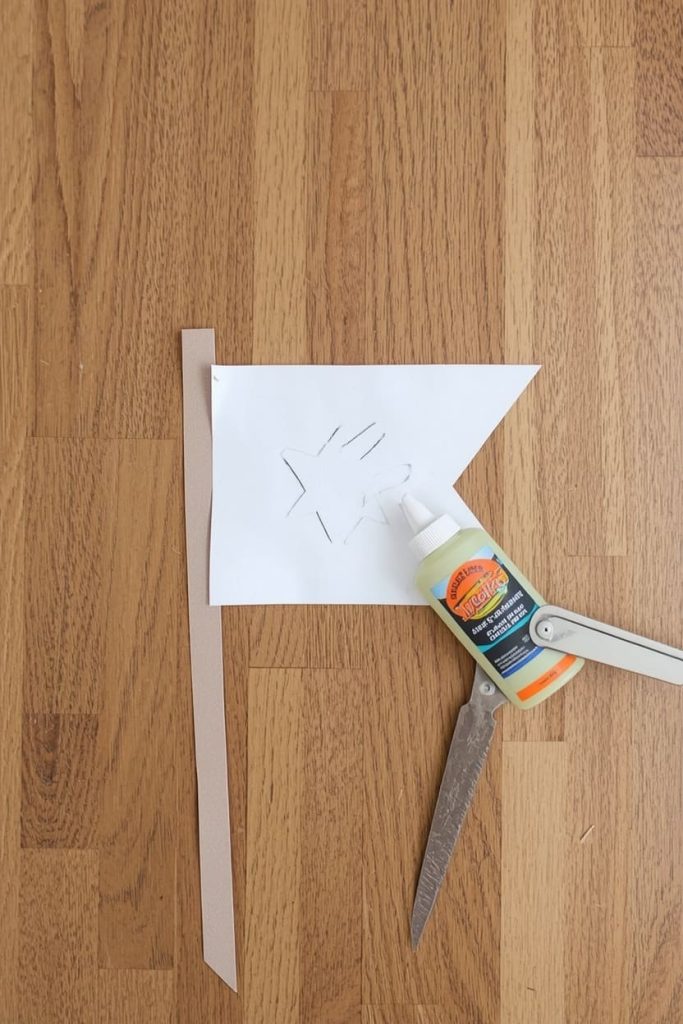
A flag craft is a nice change of pace, and it opens the door to talking about colors, patterns, and where flags show up in daily life.
Materials Needed
- 1 sheet paper for the flag
- 1 sheet brown paper for the pole
- Glue stick
- Scissors
- Marker or extra paper scraps for a pattern
How To Make
- Cut a rectangle from your flag-color paper, about 5 inches wide and 3.5 inches tall.
- Cut a thin strip from the brown paper, about a half-inch wide and 8 inches long, for the flagpole.
- Apply glue stick along one short edge of the flag rectangle, about a half-inch wide strip.
- Press that glued edge onto the top portion of the brown flagpole strip, so the flag stands out to one side like it’s flying.
- Add a pattern to the flag using markers or small cutout shapes — stripes, a star, or simple stripes work well and are easy for small hands.
- Cut a small triangle from scrap paper for a pole topper and glue it to the very top of the flagpole strip, if desired.
Tips This is a good craft to personalize — let your child design their own “family flag” pattern instead of copying an existing one.
Letter F Craft #7: Paper Frog
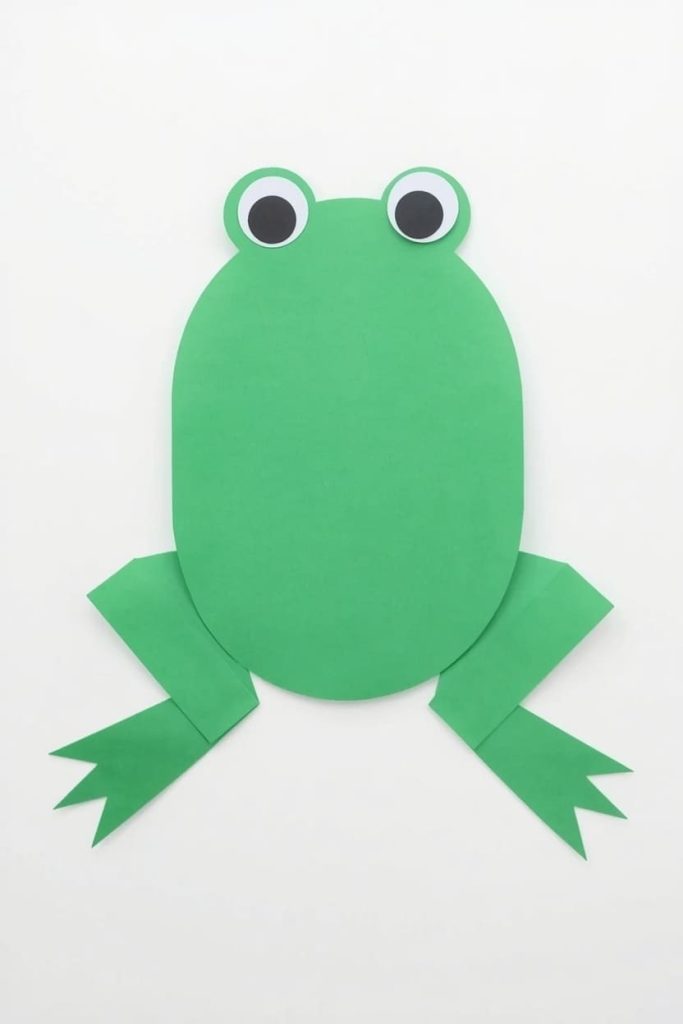
Frogs are a crowd favorite because the fold-out legs give this craft some movement.
Materials Needed
- 1 sheet green paper
- 1 small square white paper
- 2 small googly eyes
- Glue stick
- Scissors
- Black marker
How To Make
- Cut an oval body from the green paper, about 4 inches long and 3 inches wide.
- Cut two smaller ovals, about 1.5 inches each, also from green paper, for the top of the head bumps where the eyes will sit.
- Glue the two smaller ovals to the top edge of the body, side by side, so they overlap slightly with the main body shape.
- Cut two white circles, about 1 inch each, and glue one onto each of the small green head bumps for the eye backgrounds.
- Glue a googly eye onto the center of each white circle.
- Cut four thin strips of green paper, each about 3 inches long and a half-inch wide, for the legs.
- Fold each strip into a zigzag accordion pattern, making a fold every half inch, so the strip compresses into a spring shape.
- Glue one end of each accordion leg to the underside of the body, two on each side, so the legs can spring outward when pressed down and released.
Tips The accordion-fold legs work best if you crease each fold firmly with your fingernail before gluing them in place.
How to Prep These Crafts for a Group of Kids
If you’re prepping for a classroom or homeschool co-op, precut the small or tricky pieces the night before.
Cutting takes the longest for young hands, especially on the fire truck and frog. Sort precut pieces into labeled bags per craft so kids can grab what they need and move straight to assembly.
Set out shared glue sticks and markers at the center of each table to keep the workspace simple and the session moving.
FAQ
What age is best for these crafts? Ages 3–7. Younger kids may need pieces precut; older kids can handle most of the cutting themselves.
Do I need any special supplies? No. Everything here is paper, glue sticks, scissors, and markers you likely already have on hand.
How long does each craft take? Most take 10–15 minutes. The fish and flag are the fastest; the fire truck and frog take a bit longer.
Can I use liquid glue instead of a glue stick? You can, but glue sticks dry faster and are far less messy for young kids working with small paper pieces.
What if my child can’t cut a straight line yet? Draw the shape lightly in pencil first and let them cut along it, or precut the harder pieces yourself and let them handle the gluing and decorating.
Can these be turned into a bulletin board display? Yes. All seven crafts are flat, so they pin or tape to a board easily and work well alongside a printed letter F banner.

Sohel Rana is the writer, editor, publisher, and founder of The Tidy Porch. He is the man who is responsible for the craft (my wife created) being converted into a written piece. He also helps her wife (Sumona) by capturing videos of each craft. In short, he brings each craft created by her wife in front of you by transforming it into an article and a video.
