
We were deep into the alphabet by the time we hit T, and I was running low on new ideas. My son solved it for me.
He pointed at his toothbrush on the bathroom counter and said “T!” like he’d cracked a code.
That gave me an idea, and one craft turned into seven. All paper. All things he finished without me stepping in halfway through. If you’re on letter T this week, here’s the full list, already worked out for you.
Top 5 Amazon Picks for Letter T Crafts
Crayola Construction Paper (48-count, assorted colors) covers every shade you’ll need for turtles, trains, and tigers without a mid-project store run.
Elmer’s Disappearing Purple Glue Sticks (6-pack) go on visible so kids can see their coverage, then dry clear and dry fast.
Fiskars Blunt-Tip Kid Scissors cut construction paper cleanly and stay safe enough for a preschooler to handle most of the cutting solo.
Googly Eyes Assorted Sizes (100-pack) turn a flat shape into a turtle or tiger in seconds, which keeps young attention spans engaged.
Crayola Fine-Tip Washable Markers (10-pack) are what you’ll reach for on stripes, scales, and letter outlines without bleeding through the paper.
Why Letter Crafts Help With Early Literacy
Letter crafts work because your child’s hands do the learning before their eyes catch up on their own. Cutting a shell shape, folding a tree trunk, and gluing pieces in the right spot all build the fine motor control kids later use to hold a pencil and write.
Occupational therapists back this up — hand strength developed through cutting and pasting transfers directly to handwriting skills. So this isn’t just an afternoon filler. It’s early writing prep wearing a turtle shell.
Letter T Craft #1: Paper Turtle
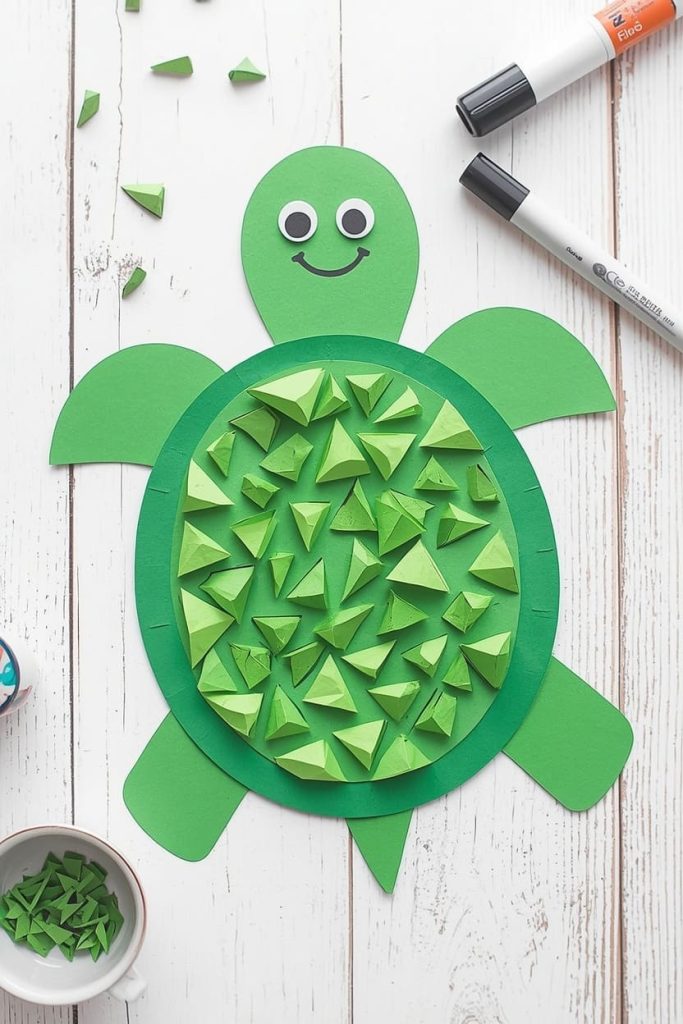
This is the craft to start your T week with. It’s simple, and the shell pattern is genuinely fun for kids to fill in.
Materials Needed
- 1 sheet green paper (body)
- 1 sheet brown or dark green paper (shell)
- 2 small googly eyes
- Glue stick
- Scissors
- Black marker
How To Make
- On the green paper, draw a rounded body shape about 5 inches wide, with a small head bump extending from one side and four short leg bumps along the bottom edges. Cut it out.
- On the brown paper, draw a large oval about 4 inches wide and 3 inches tall for the shell. Cut it out.
- Apply glue stick to the back of the shell oval and press it centered onto the middle of the turtle’s body, covering the area between the head and the legs.
- Cut 5–6 small triangles, each about a half-inch wide, from a scrap of the green paper for shell texture.
- Glue the triangles in a scattered pattern across the shell, or line them up in rows if you’d rather keep it neat.
- Glue the two googly eyes onto the head bump, spaced close together near the front tip.
- Use the black marker to draw a small curved smile beneath the eyes.
Tips Let your child draw their own shell pattern with the marker instead of gluing on triangles — it’s a good option if you’re short on time.
Letter T Craft #2: Paper Tree
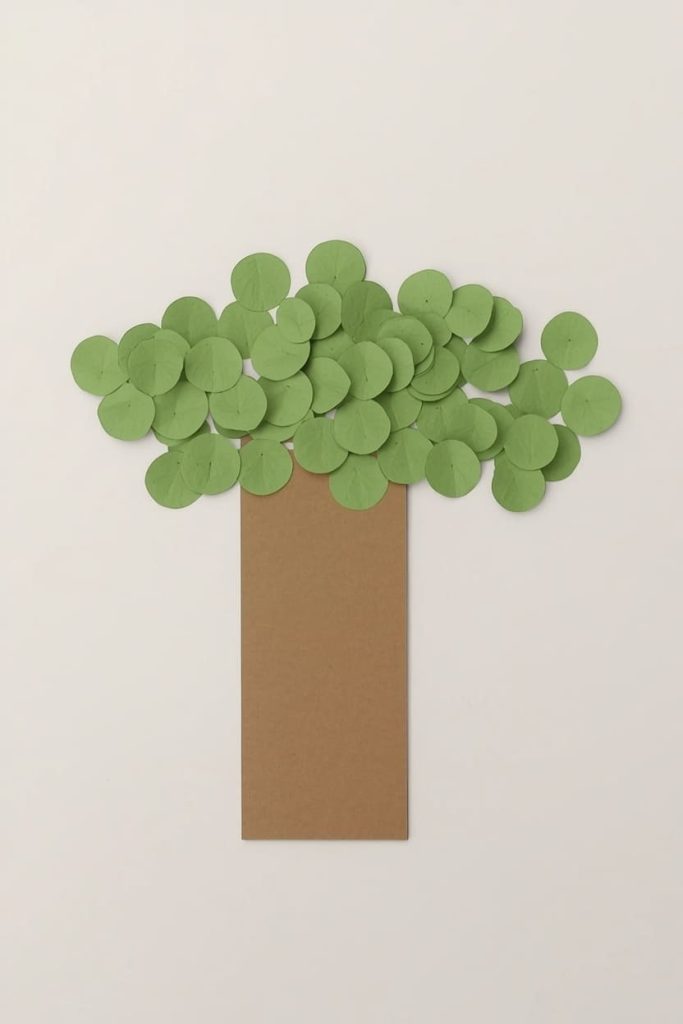
This one doubles as a seasonal craft. Change the leaf color and it works for fall, spring, or summer.
Materials Needed
- 1 sheet brown paper (trunk)
- 1 sheet green paper (leaves)
- Glue stick
- Scissors
How To Make
- Cut a rectangle from the brown paper, about 1.5 inches wide and 6 inches tall, for the trunk. This rectangle is also your literal capital T stroke, so keep the edges straight.
- Glue the trunk centered on your background paper, standing upright.
- Cut a second, shorter strip from the brown paper, about 1.5 inches wide and 3 inches long, and glue it horizontally across the top of the trunk to complete the T shape before adding leaves.
- Cut 15–20 small circles, each about 1 inch across, from the green paper for the leaves.
- Starting at the top of the trunk, glue the circles in overlapping clusters, working outward and downward until you’ve built a full, rounded canopy shape.
- Leave the bottom few inches of the trunk bare so it still reads clearly as a tree trunk.
Tips Punch the leaf circles with a 1-inch hole punch instead of cutting them by hand if you have one — it speeds this craft up a lot.
Letter T Craft #3: Paper Train
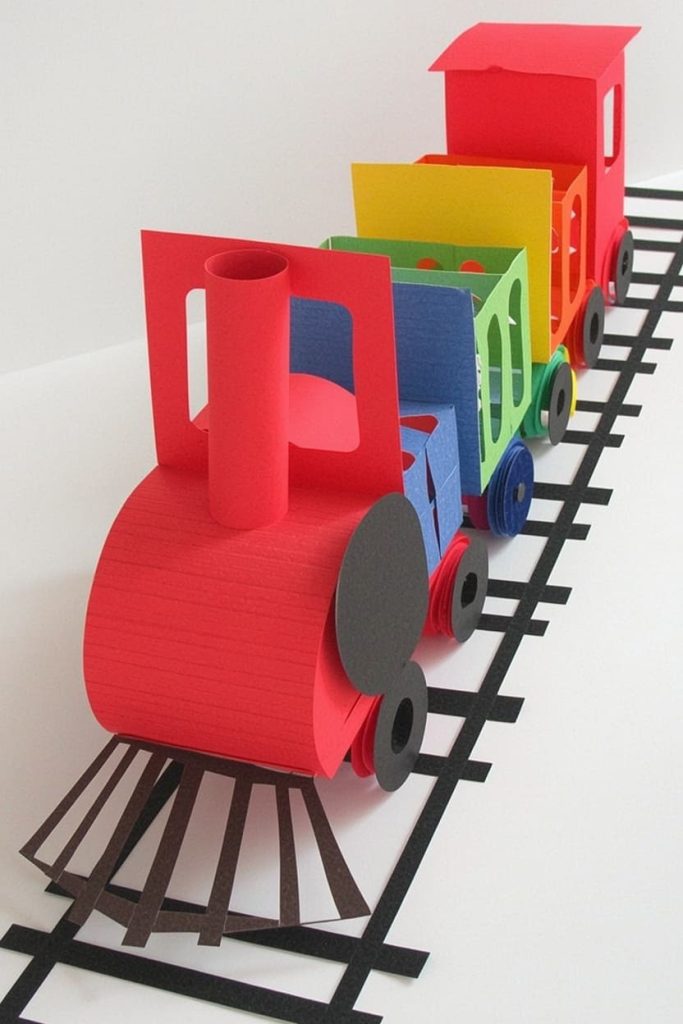
This is the most detailed craft on the list, so save it for a day with a bit more time on the clock.
Materials Needed
- 1 sheet red paper (engine)
- 2–3 sheets in different colors (cars)
- 1 small square black paper (wheels)
- Glue stick
- Scissors
- Black marker
How To Make
- Cut a rectangle from the red paper, about 3 inches wide and 2.5 inches tall, for the engine body.
- Cut a smaller square, about 1.5 inches, from the same red paper and glue it to the top of the engine body, offset toward one side, to form the cab.
- Cut 2–3 rectangles from your other colored papers, each about 2.5 inches wide and 2 inches tall, for the train cars.
- Line up the engine and the cars in a row on your background paper, leaving about a half-inch gap between each piece, and glue them down one at a time.
- Cut small circles, about 1 inch each, from the black paper for wheels — you’ll need 2 per car and engine.
- Glue two wheels under each car and under the engine, so half of each circle hangs below the bottom edge.
- Cut short thin strips, about 2 inches long, from black paper to connect each car as a coupling line, and glue one between each pair of cars.
- Use the marker to add a window on the engine cab and simple details on each car, like stripes or a number.
Tips Precut the wheels and couplings ahead of time if you’re working with a younger child — the straight cuts on the cars are enough of a challenge on their own.
Letter T Craft #4: Paper Tiger
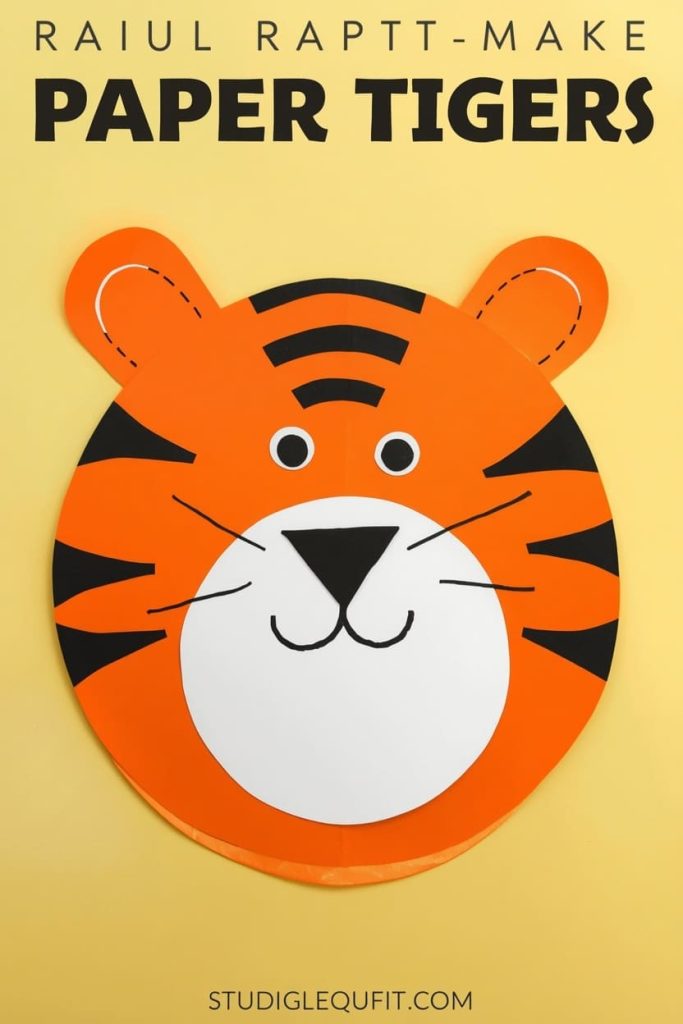
Tigers are a favorite because the stripes give kids a chance to really personalize the craft.
Materials Needed
- 1 sheet orange paper
- 1 small square white paper
- 1 scrap black paper
- Glue stick
- Scissors
- Black marker
How To Make
- Cut a rounded head shape from the orange paper, about 5 inches wide, with two small rounded ear bumps at the top corners.
- Cut an oval about 2.5 inches wide from the white paper for the muzzle area.
- Glue the white oval centered on the lower half of the orange head, leaving the top portion of the face still orange.
- Cut 6–8 thin curved strips from the black paper, each about 1 to 2 inches long, for stripes.
- Glue the stripes across the top and side portions of the face, angling them slightly to look like fur, avoiding the white muzzle area.
- Cut a small black triangle for the nose and glue it at the top center of the white muzzle.
- Use the marker to draw two oval eyes above the muzzle, a curved mouth line beneath the nose, and a few whisker lines extending out from each side of the muzzle.
Tips Let your child place the stripes freehand instead of measuring them out — real tiger stripes are irregular, so this craft is forgiving.
Letter T Craft #5: Paper Truck
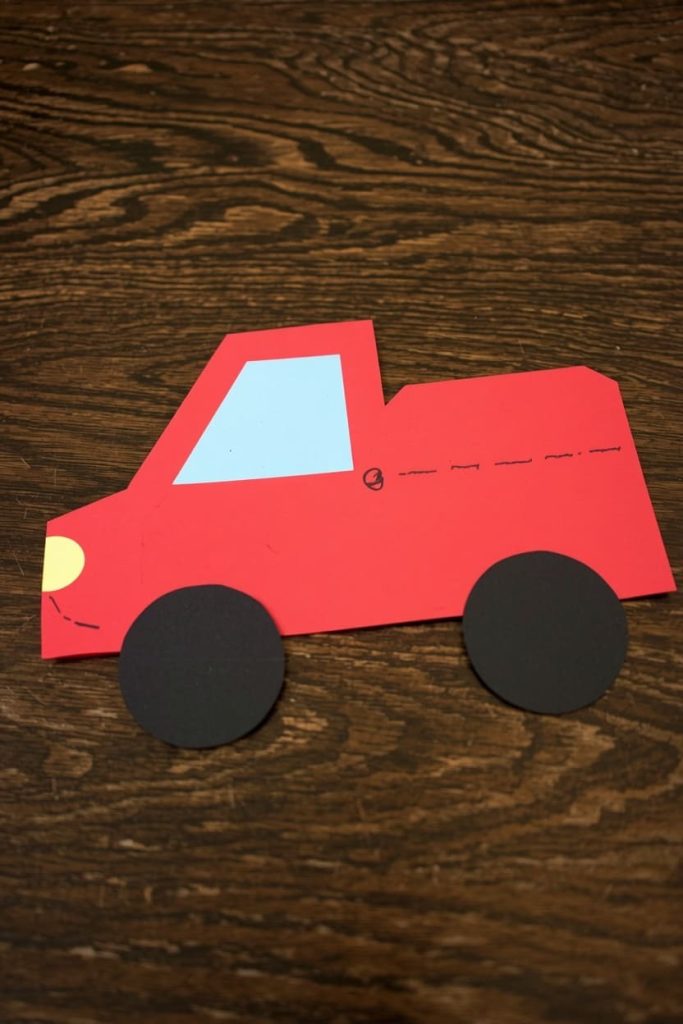
A simple truck craft rounds out your transportation crafts nicely if you’ve already made a train or car for another letter.
Materials Needed
- 1 sheet paper for the truck body (any color)
- 1 small square black paper (wheels)
- 1 small square gray or silver paper (window)
- Glue stick
- Scissors
- Black marker
How To Make
- Cut a rectangle from your main paper, about 5 inches wide and 2.5 inches tall, for the truck bed and cab combined.
- Cut a smaller square, about 2 inches, from the same paper and glue it to one end of the rectangle, so it stands up slightly taller than the rest of the body, forming the cab.
- Cut two circles, about 1.5 inches each, from the black paper for wheels.
- Glue the wheels to the bottom edge of the truck body, one near each end, so half of each wheel hangs below the body.
- Cut a small square, about 1 inch, from the gray paper for the window and glue it onto the cab section.
- Use the marker to draw a small circle headlight near the front of the cab and a straight line across the body to separate the cab from the truck bed.
Tips This craft pairs well with the fire truck from a letter F project if you’ve made one — the steps are similar, so kids pick it up fast the second time around.
Letter T Craft #6: Paper Turkey
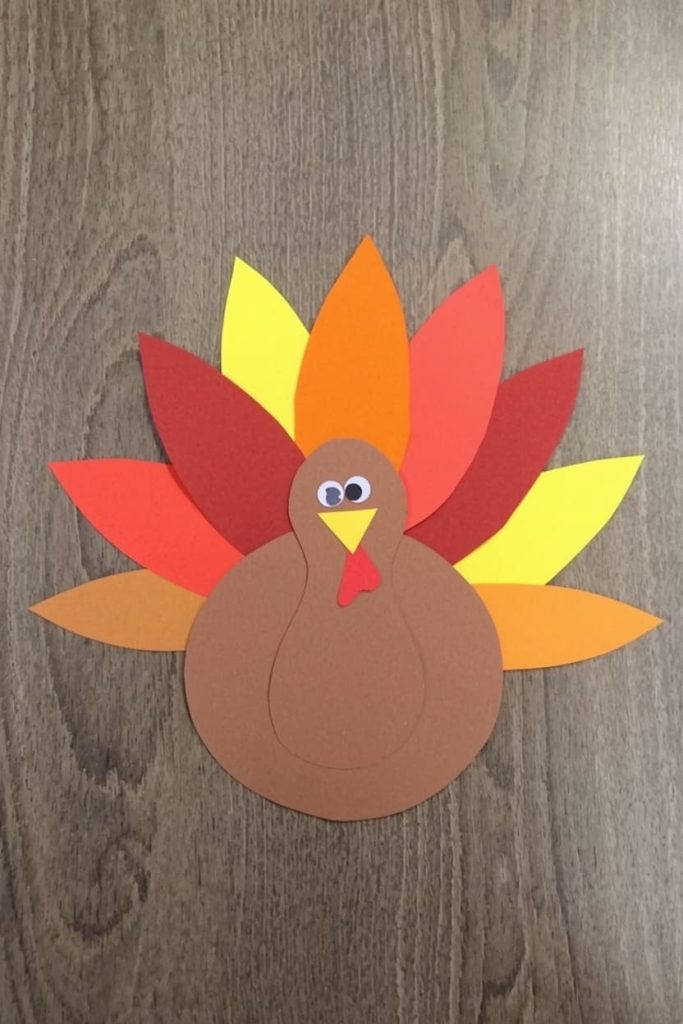
If your letter T week lands near fall, this craft ties in nicely with the season.
Materials Needed
- 1 sheet brown paper (body)
- 3–4 sheets in fall colors (feathers)
- 1 small square yellow or orange paper (beak)
- 1 googly eye
- Glue stick
- Scissors
How To Make
- Cut a rounded oval body from the brown paper, about 4 inches tall and 3 inches wide.
- Cut 6–8 teardrop-shaped feathers from your fall-colored papers, each about 4 inches long and 1.5 inches wide at the rounded end.
- Arrange the feathers in a fan shape behind the top edge of the body, overlapping each one slightly, and glue them down one at a time.
- Glue the brown body on top of the feather fan, centered, so the pointed ends of the feathers stick out around the edges like a tail.
- Cut a small triangle from the yellow or orange paper for the beak and glue it to the front of the head area.
- Glue the googly eye just above the beak.
Tips This is a great craft for using up small paper scraps left over from other letter projects — the feathers don’t need to be perfectly uniform.
Letter T Craft #7: Paper Toothbrush
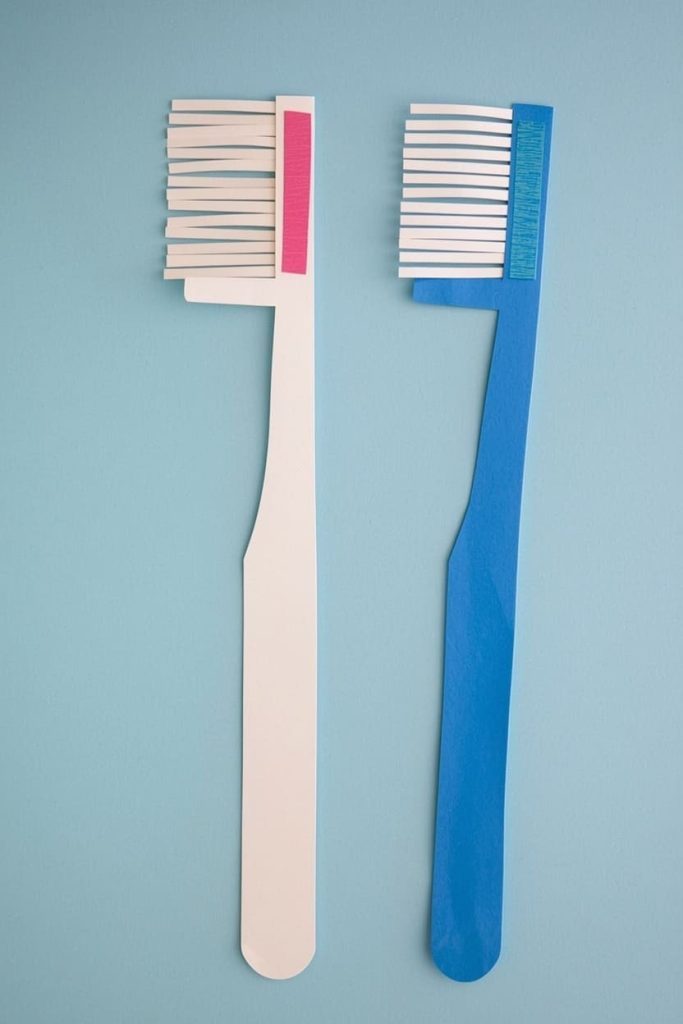
This craft is a nice change of pace, and it opens up an easy conversation about dental hygiene.
Materials Needed
- 1 sheet white or light blue paper (handle)
- 1 small strip white paper (bristles)
- Glue stick
- Scissors
- Marker
How To Make
- Cut a long rectangle from your main paper, about 6 inches long and 1 inch wide, for the toothbrush handle.
- Round off one end of the rectangle slightly to look like the brush head, keeping the other end straight for the handle grip.
- Cut a strip of white paper, about 2 inches wide and a half-inch tall, and snip straight cuts into it about a quarter-inch apart, stopping just short of the top edge each time, to create bristle fringe.
- Glue the uncut edge of the bristle strip across the rounded end of the toothbrush shape, so the fringe stands up above the brush head.
- Use the marker to add a colored stripe or pattern along the handle for decoration.
Tips: Make a few of these and line them up in a toothbrush holder cutout for a bathroom-themed bulletin board display.
How to Prep These Crafts for a Group of Kids
If you’re prepping for a classroom or homeschool co-op, precut the small or tricky pieces the night before. Cutting takes the longest for young hands, especially on the train and truck.
Sort precut pieces into labeled bags per craft so kids can move straight to assembly. Set out shared glue sticks and markers at the center of each table to keep the session simple and moving.
FAQ
What age is best for these crafts? Ages 3–7. Younger kids may need pieces precut; older kids can handle most of the cutting themselves.
Do I need any special supplies? No. Everything here is paper, glue sticks, scissors, and markers you likely already have on hand.
How long does each craft take? Most take 10–15 minutes. The toothbrush and turtle are the fastest; the train and truck take a bit longer.
Can I use liquid glue instead of a glue stick? You can, but glue sticks dry faster and stay far less messy for young kids working with small paper pieces.
What if my child can’t cut a straight line yet? Draw the shape lightly in pencil first and let them cut along it, or precut the harder pieces yourself and let them handle the gluing and decorating.
Can these be turned into a bulletin board display? Yes. All seven crafts are flat, so they pin or tape to a board easily and work well alongside a printed letter T banner.

Sohel Rana is the writer, editor, publisher, and founder of The Tidy Porch. He is the man who is responsible for the craft (my wife created) being converted into a written piece. He also helps her wife (Sumona) by capturing videos of each craft. In short, he brings each craft created by her wife in front of you by transforming it into an article and a video.
