
I used to own the same beige shoe rack everyone else had. It worked fine, but it bored me every time I walked past it. One weekend, I dragged an old wooden ladder in from the garage on a whim and leaned it against my wall. My sneakers looked like art on those rungs.
That small experiment changed how I think about shoe storage. It doesn’t have to be boring furniture hiding in a corner. It can be something you enjoy looking at every day.
Here are 5 complete ideas you can follow start to finish, plus a few products that make each one easy to pull off this weekend.
Top 3 Products for Creative Shoe Storage
Pegboard Organizer System — This wall-mounted pegboard lets you rearrange hooks and shelves anytime, making it perfect for a custom shoe display that grows with your collection.
Clear Acrylic Sneaker Display Shelf — This clear shelf shows off each pair like a museum piece, ideal for collectors who want their sneakers seen instead of tucked away in a closet.
Modular Wire Cube Shelving Set — This stackable cube set lets you build a totally custom shape, perfect for DIY shoe storage in any room, corner, or odd-shaped nook.
A Leaning Ladder Turned Into a Shoe Display
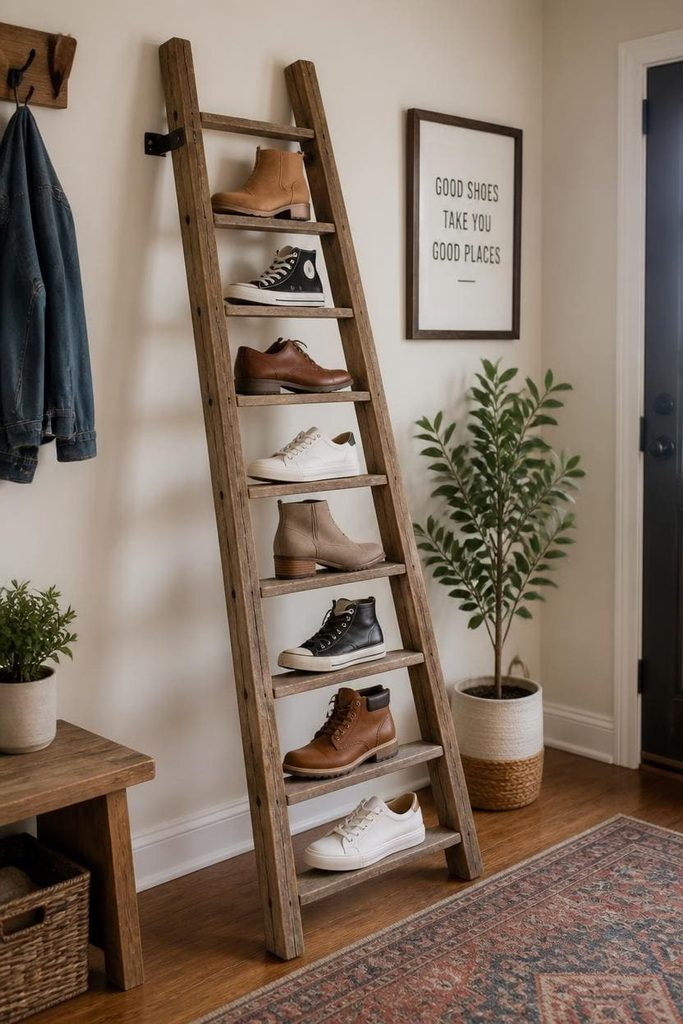
This idea works best if you love a rustic or eclectic look and already have an old ladder sitting around. A leaning ladder turns each rung into a shelf for a pair of shoes, giving even a plain hallway some instant character.
What you’ll need:
- An old wooden ladder (or a new decorative one)
- A wall anchor strap, for safety
- A soft cloth, to clean the rungs
Steps:
- Wipe down the ladder with a soft cloth to remove dust or splinters.
- Lean the ladder against a clear section of wall at a slight angle.
- Secure the top of the ladder to the wall with a strap, so it can’t tip forward.
- Rest one shoe per rung, alternating direction so pairs don’t touch.
- Add a small plant or framed print nearby to finish the look.
- Swap shoes out seasonally so the display always reflects what you’re actually wearing.
This works because it turns an everyday object into a display piece, giving your shoes a spot that doubles as decor instead of hiding them away. Guests notice it before they notice anything else in the room.
A Pegboard Wall That Rearranges Anytime
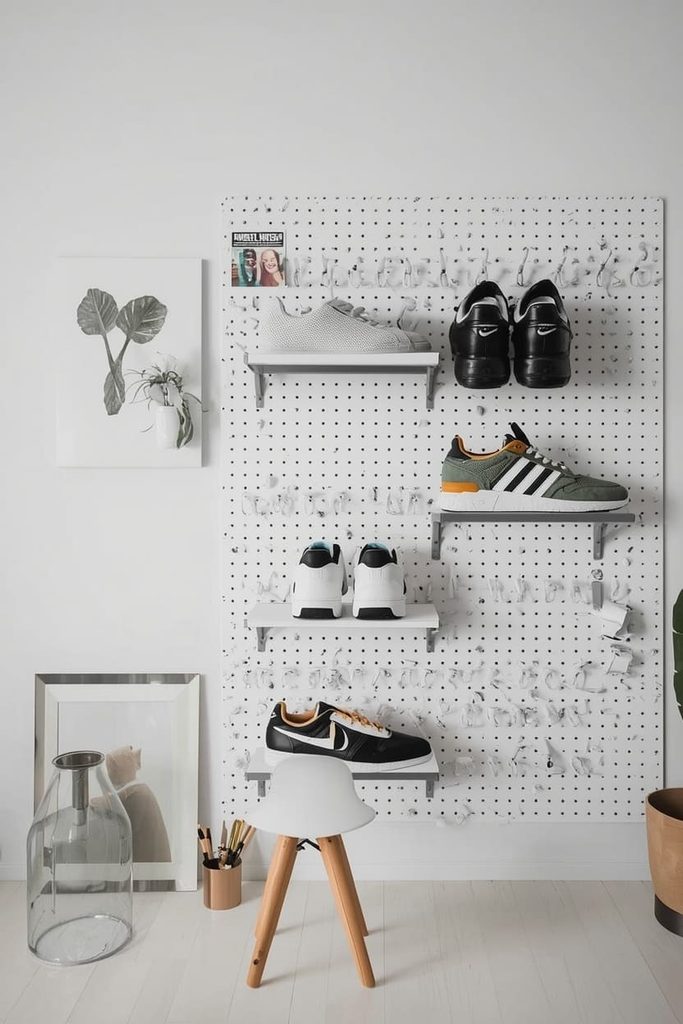
This idea suits you if your shoe collection keeps growing and changing, whether you’re adding new sneakers or rotating through seasons. A pegboard wall lets you move hooks and shelves around instead of being stuck with a fixed layout that never quite adapts to what you actually own.
What you’ll need:
- A pegboard panel
- Pegboard hooks and small shelf brackets
- A drill
- A level
Steps:
- Choose a wall near your entry or closet with enough space for the pegboard panel.
- Use a level to mark a straight line before mounting the board.
- Drill the pegboard into the wall, making sure it sits flush and secure.
- Add hooks for hanging sneakers by the heel and small shelves for flats or slides.
- Rearrange the layout anytime your collection grows or your style changes.
- Step back and check the spacing between hooks so the wall doesn’t feel too tight or too sparse.
This works because it flexes with you. As your shoe collection shifts throughout the year, the pegboard adjusts instead of forcing everything into fixed cubbies that never quite match what you own.
A Clear Acrylic Shelf for Your Sneaker Collection
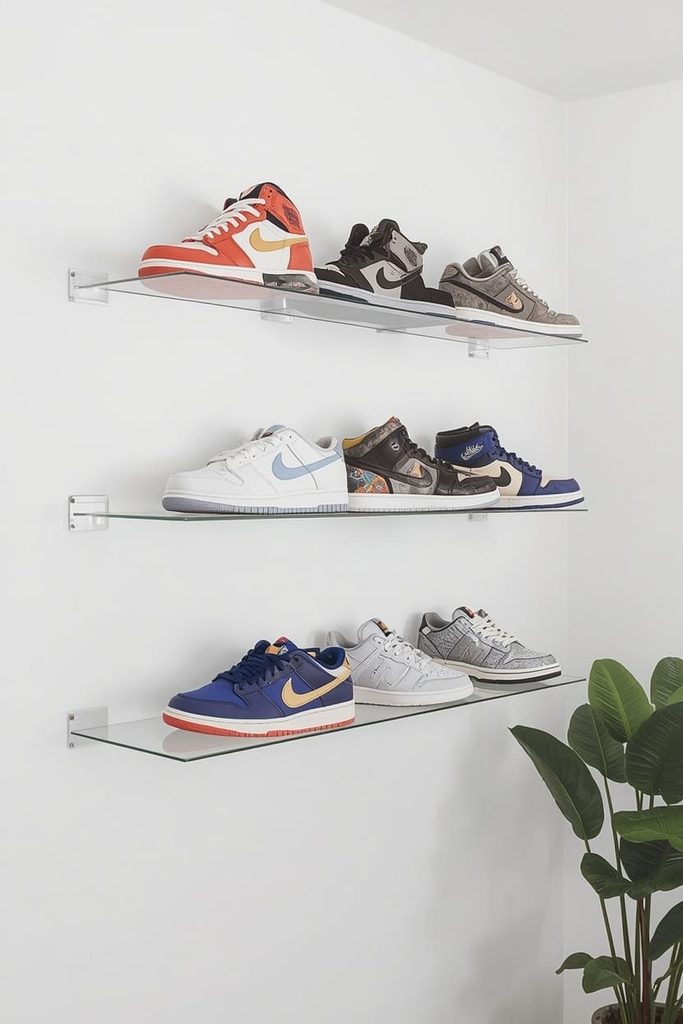
This idea is perfect if you collect sneakers and want them seen, not stored away in a box. A clear acrylic shelf puts your favorite pairs on display like a gallery wall, turning a functional need into a real style statement.
What you’ll need:
- Clear acrylic display shelves
- A drill
- A level
- Wall anchors
Steps:
- Pick a wall with good lighting, since acrylic shelves show off shoes best when they catch some light.
- Mark shelf spacing about 8-10 inches apart, enough room for most sneaker heights.
- Use a level to keep each shelf straight across the wall.
- Mount each shelf with wall anchors for a secure hold.
- Arrange your favorite pairs by color or style, front-facing, so the design shows fully.
- Leave a little breathing room between pairs instead of packing the shelf edge to edge.
This works because clear shelves almost disappear, making it look like your sneakers are floating on the wall instead of sitting on furniture. It’s the kind of setup that makes a small collection look intentional and curated.
Stacked Crates for a DIY Cubby Wall
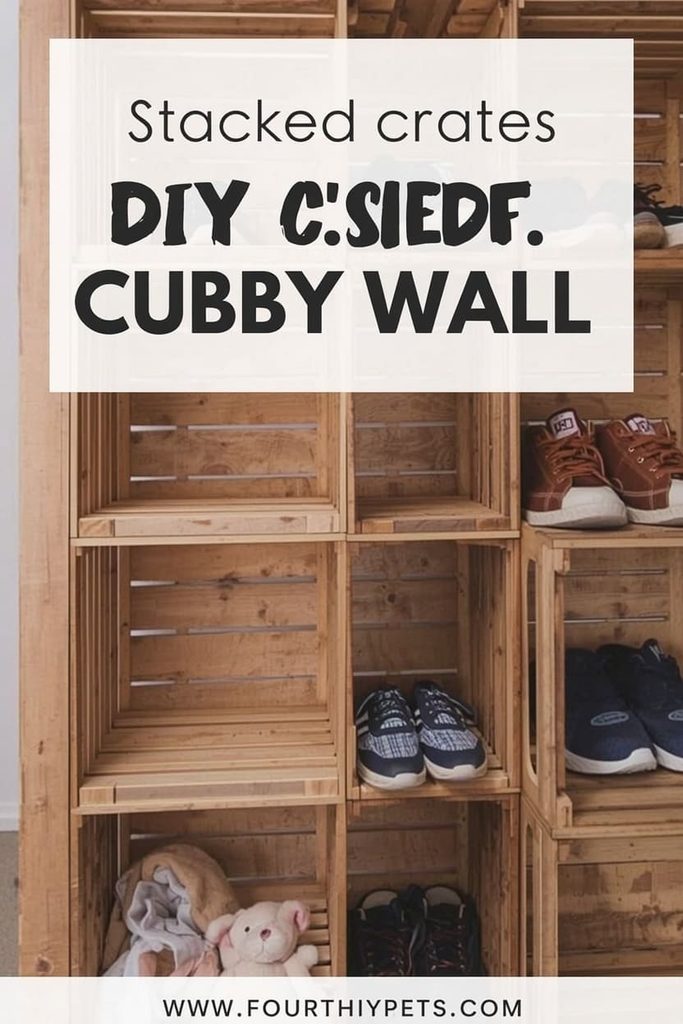
This idea fits you if you love a hands-on project and want something budget-friendly. Wooden crates stacked and secured together create custom cubbies for any space, and the project costs far less than most store-bought furniture.
What you’ll need:
- 4-6 wooden crates (new or repurposed)
- Wood screws
- A drill
- Sandpaper, if using old crates
- Paint or stain, optional
- A wall strap or bracket, for securing the top row
Steps:
- Sand any rough edges if you’re using old or reclaimed crates.
- Paint or stain the crates if you want a finished, cohesive look.
- Stack the crates into a shape that fits your wall, like a 2×3 or 3×2 grid.
- Screw the crates together where they touch, so the stack stays sturdy.
- Secure the top row to the wall with a strap or bracket for extra safety.
- Slide one or two pairs of shoes into each crate opening.
This works because it turns cheap, simple materials into a custom piece that fits your exact space, something you can’t buy off a shelf. It also gives you a project you can proudly say you built yourself.
A Modular Wire Cube Build for Any Room Shape
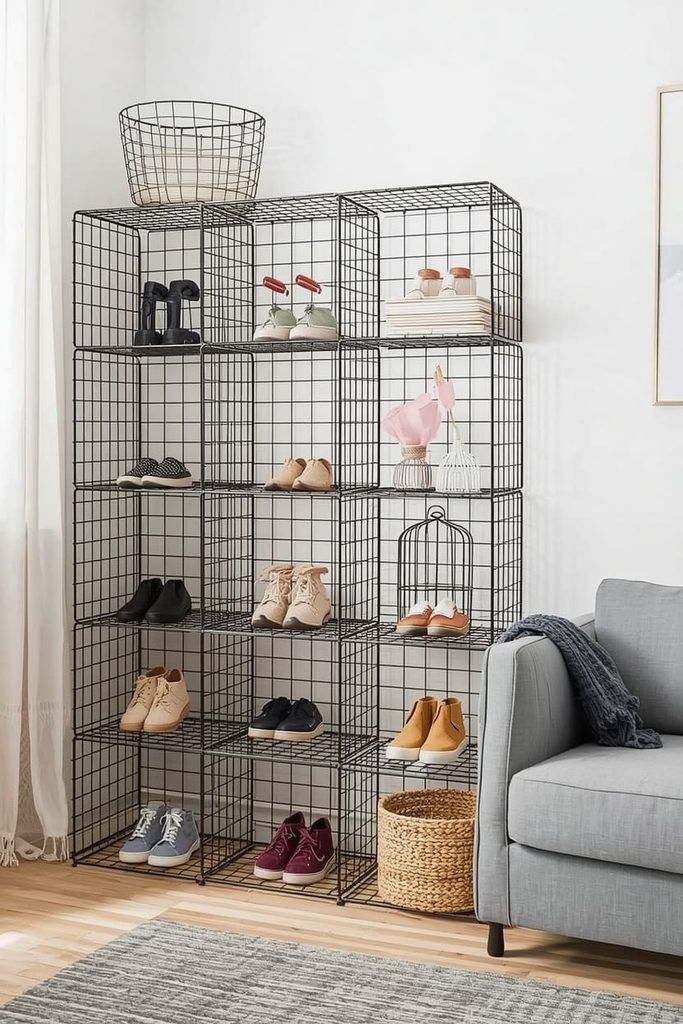
This idea works well if your space is an odd shape and standard furniture never quite fits. Wire cubes snap together into whatever configuration your room actually needs, corners and all.
What you’ll need:
- A modular wire cube shelving set
- Zip ties or included connectors
Steps:
- Measure your available space, noting any corners, angles, or tight spots.
- Lay out your cube pieces on the floor first to plan the shape before assembling.
- Snap or connect the cubes together following the kit’s instructions.
- Adjust the shape into an L, a square, or a tall tower, whatever fits your room.
- Slide one pair of shoes into each cube opening.
- Add a small basket to one cube for socks, laces, or shoe cleaning supplies.
This works because it bends to your room’s shape instead of forcing your room to work around a fixed piece of furniture. That flexibility makes it one of the easiest ideas to adapt if you ever move.
How to Pick a Creative Shoe Storage Idea That Fits Your Space
The right pick depends on what you want your shoes to do: disappear or show off. If you want them seen, choose a display option like acrylic shelves or a pegboard. If you’d rather they stay tucked away, crates or cubes work better.
Think about your style too. A rustic ladder fits a farmhouse or eclectic room, while acrylic shelves suit a sleek, modern space. Match the material to the rest of your decor so the piece feels intentional, not random.
Also factor in your actual shoe count. A small display works great for a curated sneaker collection of ten pairs, but a family of five needs something with real capacity, like stacked crates or a full cube build that can grow over time.
Finally, consider how much time you want to spend building it. A ladder takes minutes to set up, while a crate wall takes a full afternoon. Pick a project that matches the time you actually have this weekend, rather than starting something you won’t finish.
Creative Shoe Storage Mistakes to Avoid
The biggest mistake is skipping safety steps for the sake of style. A leaning ladder or stacked crates can tip if they’re not secured to the wall, especially in homes with kids or pets running through the room.
Another common mistake is overcrowding a display shelf. A cluttered acrylic shelf loses its clean, gallery-like effect fast. Stick to your favorite pairs instead of trying to fit your whole collection onto one small shelf.
People also often forget about dust and cleaning. Open, display-style storage collects more dust than a closed cabinet, so it needs more frequent wiping to stay looking sharp week to week.
One more mistake is choosing a material that clashes with the room. A bright, industrial pegboard can look out of place in a soft, romantic bedroom, just as a delicate acrylic shelf might feel wrong in a rugged garage entry.
How to Keep a Display-Style Shoe Storage Looking Good
The simplest habit is a quick weekly dusting. Open shelves and pegboards collect dust faster than closed storage, so a few minutes each week keeps the display looking fresh instead of dull.
Rotate your shoes seasonally, even on a display shelf. Swapping out sandals for boots keeps the display feeling current instead of showing shoes you haven’t worn in months.
Keep only your best-looking pairs on display. Scuffed or worn-out shoes belong in a closet, not on a shelf meant to show off your collection at its best.
Frequently Asked Questions
How do I display my sneaker collection at home? Clear acrylic shelves or a pegboard wall both work well for showing off sneakers. Arrange pairs by color or style so the display feels organized, not cluttered. Good lighting also makes a big difference in how the collection looks, so pick a wall that gets some natural light if possible.
What household items can I repurpose for shoe storage? Old ladders, wooden crates, and wire cube shelving are all easy to repurpose for creative shoe storage. Each one can be secured to a wall or stacked into a custom shape. Choose based on the style you already have in your home, and don’t be afraid to mix materials for a more personal look.
Is a pegboard a good option for shoe storage? Yes, a pegboard works well because you can rearrange hooks and shelves anytime your collection changes. It’s a flexible option for growing or shifting shoe collections. Just make sure it’s mounted securely into wall studs, since a loaded pegboard carries more weight than most people expect.
How do I keep a creative shoe display from looking cluttered? Limit the display to your favorite or most-worn pairs, not your entire collection. Group shoes by color or style for a cleaner look. Rotate seasonal pairs out to keep the display feeling curated, and store the rest in a closet where they’re out of sight but still easy to grab.
Are DIY shoe storage ideas safe for homes with kids or pets? Yes, as long as you secure taller or leaning pieces to the wall with anchors or straps. Ladders, crates, and cube shelving can tip if left unsecured. Always test the stability of a DIY build before loading it with shoes, and check the anchors again every few months to be sure they’re still holding.

Sohel Rana is the writer, editor, publisher, and founder of The Tidy Porch. He is the man who is responsible for the craft (my wife created) being converted into a written piece. He also helps her wife (Sumona) by capturing videos of each craft. In short, he brings each craft created by her wife in front of you by transforming it into an article and a video.
