
I sat at my kitchen table last week with a blank sheet of paper, trying to plan letter J week. I wrote “jellyfish.”
Then I stared at the page for a solid five minutes. My daughter walked by and asked, “What starts with J, Mom?” I didn’t have a good answer for her right away.
J is one of those letters that makes you go quiet. It doesn’t hand you options the way other letters do.
But I promise you, there are enough good J crafts to fill a whole week — you just haven’t found them yet. Here are 7 that actually work, plus the exact supplies to grab before you start.
Top 5 Amazon Products for These Crafts
- Cardstock Paper Pack, 100 Sheets, Assorted Colors — Holds its shape through folding and curving without going floppy.
- Elmer’s Disappearing Purple Glue Sticks (30-Pack) — Goes on purple so kids can see their coverage, then dries clear.
- Fiskars Blunt-Tip Kids Scissors — Cuts cleanly through cardstock without slipping in small hands.
- Wiggle Googly Eyes, 100-Piece Assorted Sizes — Turns a flat shape into a character in seconds.
- Black Fine-Tip Washable Markers Pack — Adds detail lines, faces, and texture without needing paint.
Why Is Letter J So Hard to Craft For?
J is hard because most J words don’t have a simple shape a preschooler can build from basic paper pieces. Letters like O or S hand you obvious round shapes. J makes you dig.
That’s why this list exists. I tested a stack of J ideas at my own kitchen table and kept only the ones that came together easily and looked like what they were supposed to be.
J For Paper Jellyfish Craft
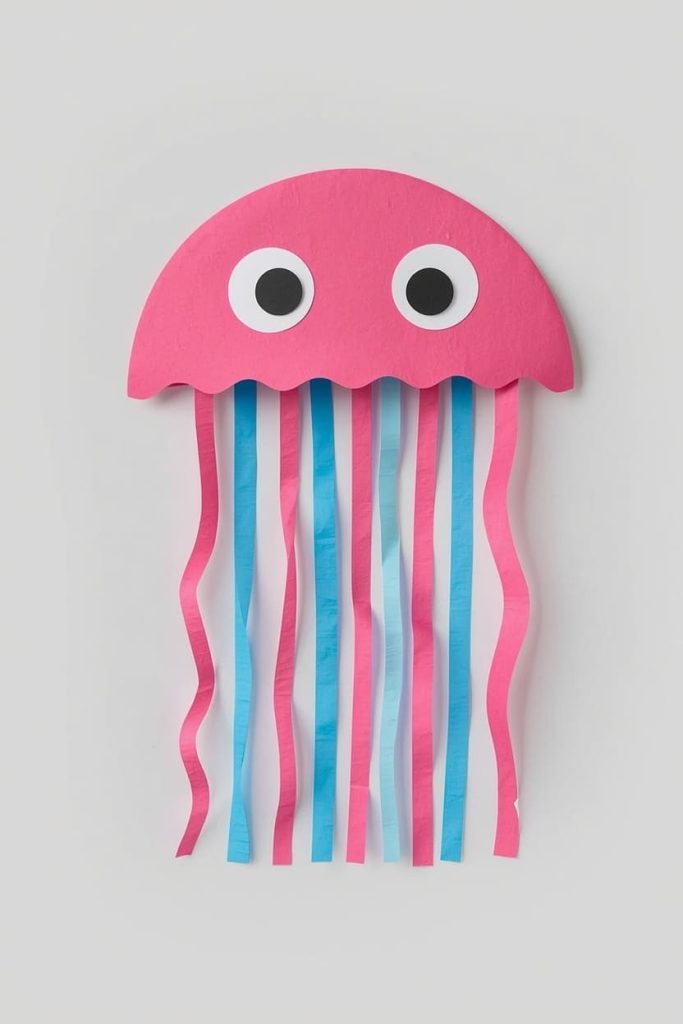
You make a paper jellyfish with a rounded dome-shaped head and a row of wavy paper strip tentacles glued underneath.
This is the most obvious J craft, and it earns its spot because it’s easy and looks great every time. The dome shape is forgiving, and the tentacles hide uneven cutting.
Materials Needed
- 1 pink or blue paper half-circle (dome), 5 inches wide
- 6 paper strips, 0.5 x 7 inches (tentacles)
- 2 white circles, 1 inch wide (eyes)
- 2 black circles, 0.5 inch wide (pupils)
How to Make It
- Lay the dome shape flat, straight edge down, curved edge up.
- Pinch small folds along one tentacle strip, about half an inch apart, for a loose wavy texture — gentle bends, not tight accordion folds.
- Repeat the light waving on all 6 strips.
- Cover the top inch of one tentacle strip with glue and press it onto the underside of the dome’s straight edge, letting the rest hang free.
- Repeat with the remaining 5 strips, spacing them evenly across the edge like a curtain.
- Flip the dome over so the curved side faces up.
- Glue the two white eye circles side by side near the top-center of the dome, then glue a black pupil onto each.
- Lay the finished jellyfish flat with tentacles spread out and let it sit a few minutes until every glue point sets.
Tips
- Use two colors of strips for a layered look.
- Curl the tentacle tips around a pencil for extra movement.
- Tape this one to a window so light shines through it.
J For Paper Jaguar Craft
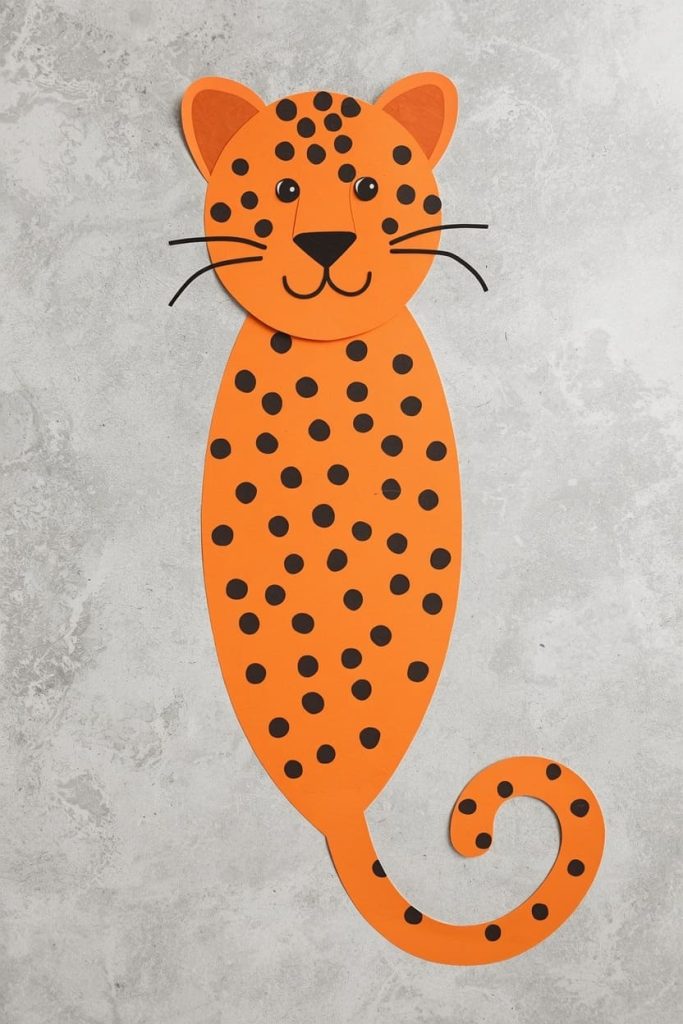
You make a paper jaguar with an oval body and head, rounded ears, and small black paper-punched spots glued across the body.
Jaguars are a great pick because the spots do all the visual work. You don’t need a detailed face — a plain oval covered in spots reads as “jaguar” right away.
Materials Needed
- 1 orange/tan oval, 4.5 inches long (body)
- 1 smaller orange/tan oval, 2.5 inches long (head)
- 2 small tan triangles, 1.5 inches wide (ears)
- 8–10 small black paper circles, 0.5 inch wide (spots)
- 1 thin tan strip, 3 inches long (tail)
How to Make It
- Lay the larger oval flat — this is the body — long side running left to right.
- Cover one edge of the smaller oval (the head) with glue.
- Press that edge onto the left end of the body so the head overlaps slightly, like the jaguar is looking forward.
- Glue the base of each ear triangle to the top of the head, one per side, points up.
- Cover one end of the tail strip with glue and press it under the right end of the body, letting the rest curve out to the side.
- Glue black spot circles across the body and down the tail, spacing them randomly the way real jaguar spots scatter.
- Add two small dot eyes and a triangle nose on the head with a black marker.
- Let the craft lie flat until the spots and tail are fully set.
Tips
- Let kids place the spots themselves — there’s no wrong pattern.
- A hole punch makes fast, uniform spots if you have one.
- Curl the tail around a pencil for a more playful pose.
J For Paper Jack-in-the-Box Craft
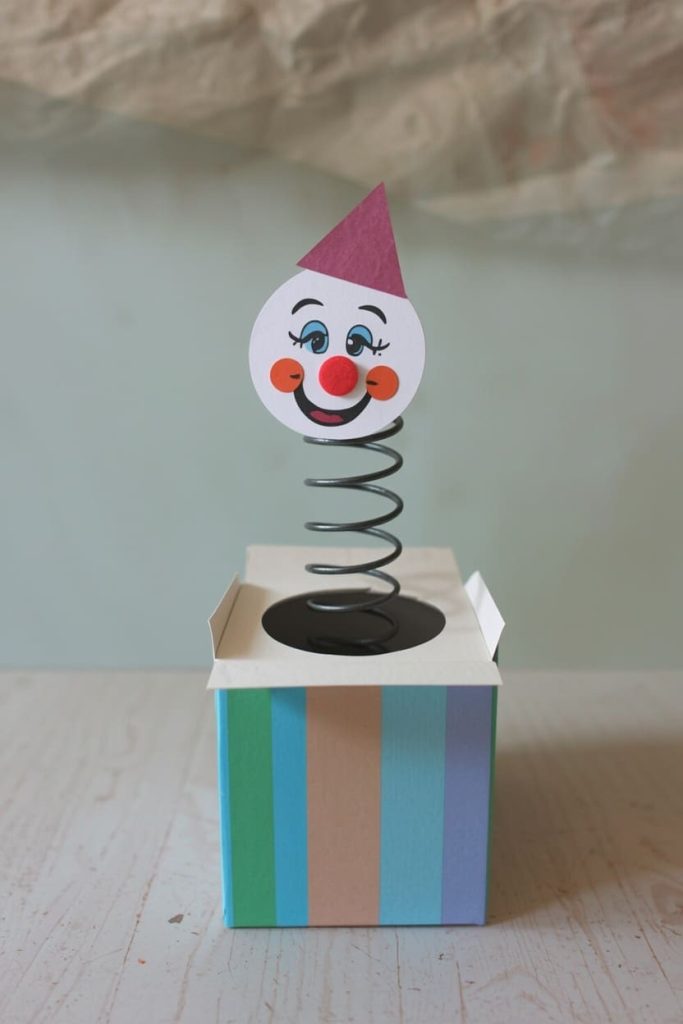
You make a jack-in-the-box with a square paper box shape on the bottom and a circle clown face popping out the top on a zigzag paper spring.
This one is a favorite because the zigzag spring makes it look bouncy and 3D, even though it’s completely flat.
Materials Needed
- 1 colorful square, 4 x 4 inches (box)
- 1 paper strip, 1 x 8 inches (spring)
- 1 round face circle, 3 inches wide
- 1 small paper triangle hat, 2 inches wide
- 2 small circles for cheeks, 0.5 inch wide
How to Make It
- Lay the square flat — this is the box.
- Fold the long strip forward about an inch from one end, then flip and fold backward the same distance, right next to the first fold.
- Keep flipping and folding down the strip until it’s fully accordion-folded into a tight zigzag — this is your spring.
- Cover the bottom inch of the spring with glue and press it onto the center-top edge of the box, so the spring stands up.
- Cover the back of the face circle with glue and press it onto the top end of the spring, so the face sits above the box.
- Glue the small triangle hat onto the top of the face, point up.
- Glue the two cheek circles onto the lower half of the face, then add eyes and a smile with marker.
- Let the craft lie flat a few minutes so the spring holds its zigzag shape before standing it up.
Tips
- Pull the spring open after it dries for extra bounce.
- Decorate the box with marker stripes before attaching the spring.
- Younger kids can skip the hat and cheeks for a simpler version.
J For Paper Jester Hat Craft
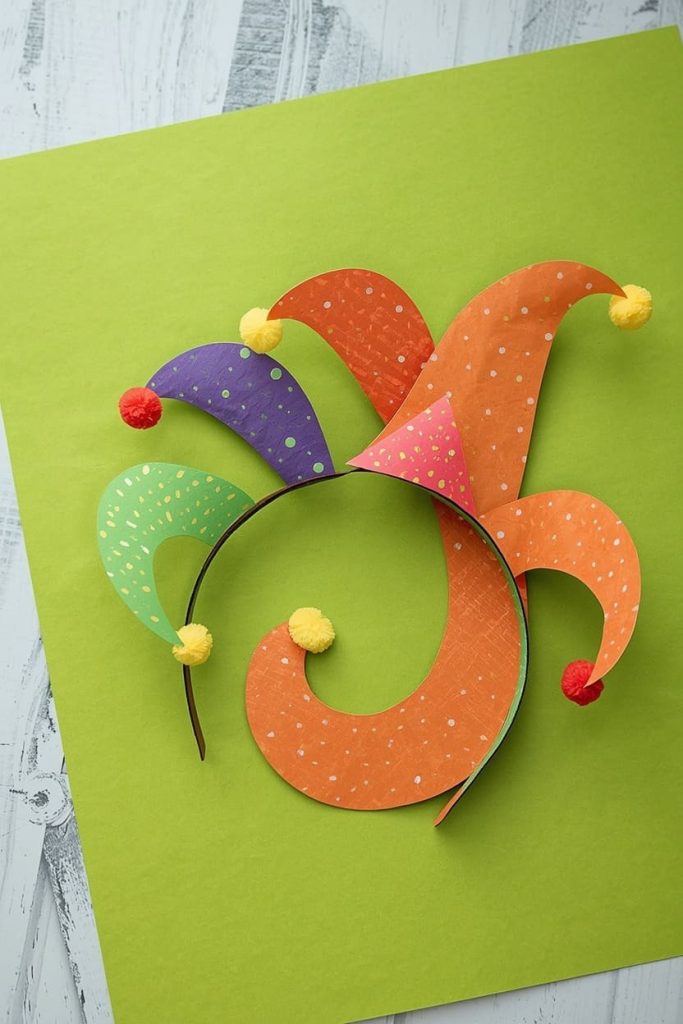
You need a wide paper band for the base, three pointed triangle “tails,” and small pom-pom circles glued to each tip.
The jester hat is an underused J idea, but it’s simple — just triangles and circles arranged along a strip.
Materials Needed
- 1 paper strip, 2 x 10 inches (headband base)
- 3 triangles in different colors, 3 inches tall (points)
- 3 small paper circles, 1 inch wide (pom-poms)
- Optional: small paper gems or star stickers
How to Make It
- Lay the long strip flat — this is the headband.
- Cover the base of one triangle with glue and press it onto the top edge of the strip near the left side, point up.
- Repeat with the second triangle at the center of the strip.
- Repeat with the third triangle near the right side, so all three points face up along the band.
- Glue one small circle “pom-pom” onto the tip of each triangle.
- If using gems or stickers, decorate the band between the triangles now.
- Let the strip lie flat until everything is fully set.
- Once dry, measure the strip around your child’s head and, with an adult’s help, glue or tape the two short ends together into a loop.
Tips
- Measure the strip around your child’s head before the final glue.
- Use bright, mismatched colors for a true jester look.
- This doubles as a dress-up prop after craft time.
J For Paper Jet Craft
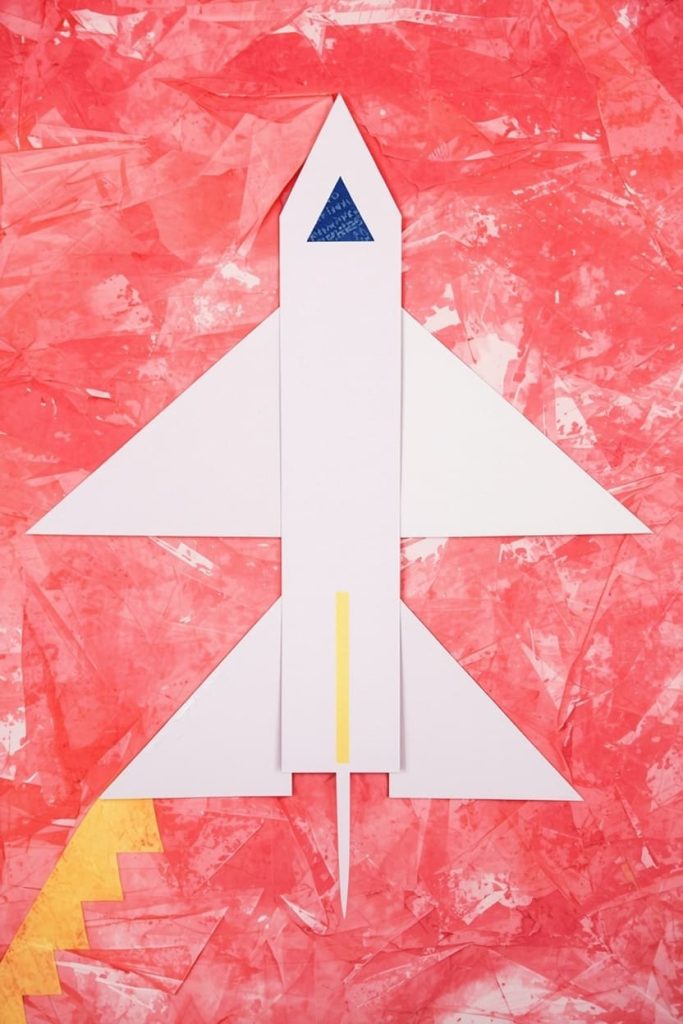
You make a paper jet with a long triangle-based body, two angled wing shapes, and a small tail fin.
Jets are a strong J pick because the shapes are straight lines and triangles, easy for small hands to cut and place.
Materials Needed
- 1 long triangle, 6 inches long (body)
- 2 smaller triangles, 3 inches long (wings)
- 1 small triangle, 1.5 inches long (tail fin)
- 1 thin yellow strip, 1 inch long (nose stripe)
How to Make It
- Lay the long body triangle flat, point facing left — this is the jet’s nose.
- Cover the back edge of one wing triangle with glue along its longest side.
- Press that wing onto the top of the body, angled back toward the tail, so it looks swept.
- Repeat with the second wing on the underside of the body, mirroring the angle.
- Cover the base of the small tail fin with glue.
- Press the fin onto the back-top edge of the body, point facing up.
- Glue the yellow strip across the nose end of the body.
- Let the craft lie flat until the wings and fin are fully set, then draw a few window circles along the body.
Tips
- Angle both wings the same direction for a sense of motion.
- Add a thin white strip behind the tail for a “cloud trail.”
- Pairs well with a simple sky-and-clouds background scene.
J For Juice Box Craft
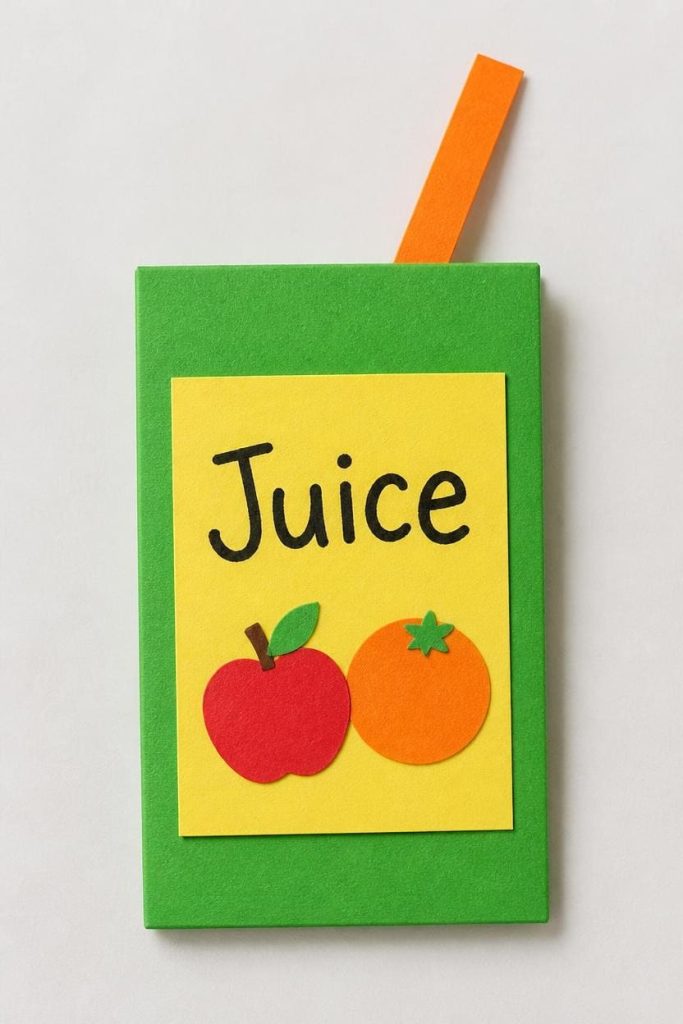
You make a juice box craft with a rectangle body, a small triangle straw, and a paper label glued to the front.
This one is great because it’s something kids see daily, which makes it an easy shape for them to recognize.
Materials Needed
- 1 rectangle, 3 x 4 inches (box body)
- 1 small thin rectangle, 0.5 x 2 inches (straw)
- 1 smaller rectangle, 2 x 2.5 inches (label)
- Optional: small fruit shapes cut from paper (for label decoration)
How to Make It
- Lay the large rectangle flat, short side up — this is the juice box body.
- Cover the back of the label rectangle with glue.
- Press the label onto the center-front of the box, leaving an even border.
- If using fruit shapes, glue one or two onto the label now.
- Cover the bottom half-inch of the straw rectangle with glue.
- Press that end onto the top-back edge of the box at an angle, so the straw sticks up and slightly to one side.
- Write “Juice” across the label, or let your child scribble their own design.
- Let the craft lie flat until the label and straw are fully set.
Tips
- Cut several boxes in different colors for a “collection” display.
- Let kids design their own label — a great open-ended step.
- Skip the straw angle and glue it straight up for younger kids.
J For Paper Jewel or Gem Craft
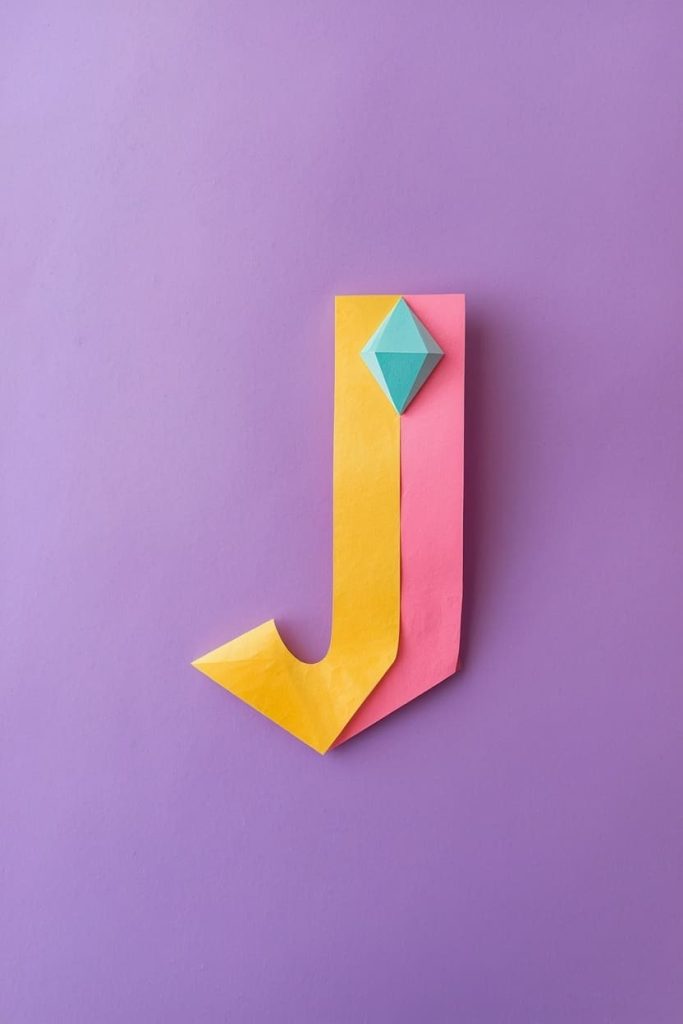
You make a paper jewel by cutting a diamond shape, adding angled paper facet lines, and layering a smaller diamond on top in a contrasting color.
Gems are an easy win because kids love bright colors, and the shape is just angled lines — no curves, no folding.
Materials Needed
- 1 large diamond shape, 4 inches tall (base)
- 1 smaller diamond shape, 2.5 inches tall (top layer)
- 3–4 thin paper strips, 0.25 x 2 inches (facet lines)
- Optional: glitter paper or metallic paper scraps
How to Make It
- Lay the large diamond flat, point facing up and down.
- Cover the back of the smaller diamond with glue and center it on top of the larger one, leaving an even border of the base color.
- Glue one facet strip diagonally across the top point of the smaller diamond, angling toward one side.
- Glue a second strip angling toward the opposite side, so the two form a peak like a real cut gem.
- Glue one or two more short strips lower on the diamond for extra facet detail.
- If using glitter or metallic paper, cut small triangle scraps and glue them along the edges for shine.
- Let the craft lie flat until every strip is fully set before handling it.
Tips
- Use jewel-tone colors — purple, teal, ruby red — for the best look.
- String a hole-punched gem onto yarn for a wearable necklace.
- Make a set of colored gems for a simple sorting activity.
Frequently Asked Questions
Why does letter J feel harder to find craft ideas for than other letters? J simply has fewer common words with a clear, simple shape kids can recreate. Letters like O give you round, obvious shapes, while J words tend to be more abstract.
What age group are these letter J crafts best for? Ages 3 to 6. The jellyfish and juice box are the easiest starting points; the jack-in-the-box and jester hat suit slightly older preschoolers.
Do I need any special tools for these crafts? No. You only need paper, a glue stick, kid-safe scissors, and a marker. Every craft here works at a kitchen table.
Can these crafts be pre-cut for a classroom of kids? Yes, and I recommend it for larger groups. Pre-cutting keeps kids focused on gluing and assembling instead of waiting on scissors.
How long does each craft take to make? Most take 15 to 20 minutes once pieces are pre-cut. The jack-in-the-box and jaguar take a bit longer because of folding and spot placement.
Can I turn these into a letter-of-the-week bulletin board? Yes. Group the finished crafts on a bulletin board with a big letter “J” in the center. Mixing an animal, an object, and a food craft makes for good variety.

Sohel Rana is the writer, editor, publisher, and founder of The Tidy Porch. He is the man who is responsible for the craft (my wife created) being converted into a written piece. He also helps her wife (Sumona) by capturing videos of each craft. In short, he brings each craft created by her wife in front of you by transforming it into an article and a video.
