
Last week my kitchen table turned into an owl factory. My daughter cut seven orange circles before landing on one she liked.
My son glued googly eyes upside down on purpose, just to see me laugh. That’s the thing about letter O crafts — you’re not scraping the bottom of the barrel.
O gives you owls, octopuses, oranges, ostriches, orcas, otters, onions. So many options. Grab your construction paper and a glue stick, and let’s make something cute today.
Top 5 Amazon Products for These Crafts
- Cardstock Paper Pack, 100 Sheets, Assorted Colors — Sturdy enough to hold its shape but easy for little hands to cut.
- Elmer’s Disappearing Purple Glue Sticks (30-Pack) — Goes on purple, dries clear, and won’t soak through thin paper.
- Fiskars Blunt-Tip Kids Scissors — Safe grip and a clean cut, even for a first-time snipper.
- Wiggle Googly Eyes, 100-Piece Assorted Sizes — Instant personality on any animal face, no painting required.
- Black Fine-Tip Washable Markers Pack — Perfect for adding feather lines, freckles, or a beak outline.
Paper Owl Craft for Letter O
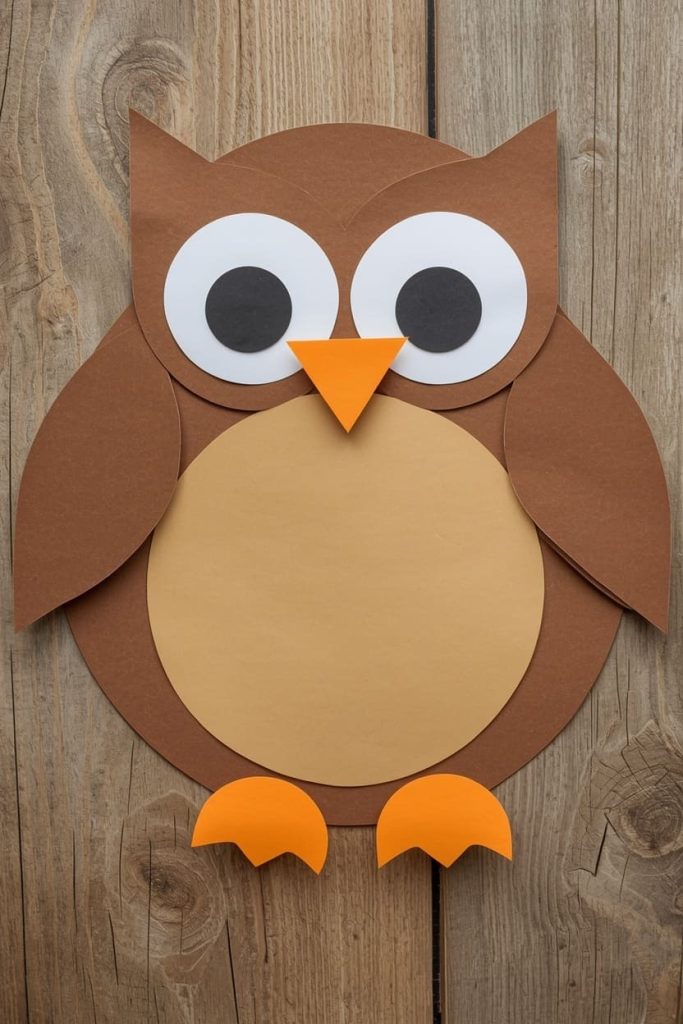
You make a paper owl by layering circles and triangles into a round face and body. It’s the most recognizable O craft there is.
Owls have big, round features, which makes them easy for small hands to assemble from basic circles.
Materials Needed
- 1 brown paper circle, 5 inches wide (body)
- 1 tan paper circle, 3 inches wide (belly)
- 2 white paper circles, 1.5 inches wide (eyes)
- 2 black paper circles, 0.75 inches wide (pupils)
- 1 small orange triangle, 1 inch wide (beak)
- 2 brown triangles, 2 inches wide (ears)
How to Make It
- Lay the brown body circle flat in front of you, like a clock face.
- Rub a glue stick over the back of the tan belly circle, covering the whole surface.
- Press the belly circle onto the center of the body circle, leaving an even brown border all the way around.
- Flip the body circle over so the back is facing up.
- Glue the pointed end of each brown ear triangle to the top-back edge of the circle, one on the left corner and one on the right, points aimed upward.
- Flip the craft back over to the front.
- Glue the two white eye circles side by side, just above the top edge of the belly patch, leaving a small gap between them.
- Glue one black pupil circle onto the center of each white eye.
- Glue the orange beak triangle directly below and between the two eyes, point facing down.
- Let the craft sit flat for a minute so all the glue sets before picking it up.
Tips
- Let toddlers use pre-cut shapes; older kids can trace and cut their own.
- Swap the tan belly for a striped or polka-dot paper for variety.
- Add a tree-branch strip of brown paper underneath for a simple scene.
O for Orange Craft
An orange paper craft is the easiest option, because it only needs two shapes and zero fine detail work.
Toddlers do best with big, forgiving shapes. An orange is just a circle with a stem and a leaf.
Materials Needed
- 1 orange paper circle, 5 inches wide
- 1 small brown rectangle, 0.5 x 1 inch (stem)
- 1 green leaf shape, 1.5 inches long
How to Make It
- Set the orange circle down in front of you.
- Cover the back of the small brown stem rectangle with glue.
- Press the stem onto the top edge of the orange circle, letting about half of it stick up above the circle’s edge.
- Cover the back of the green leaf shape with glue.
- Press the leaf against the base of the stem, angling it out to one side so it looks like it’s growing from the stem.
- Once the glue sets, hand your child a marker and let them dot small texture marks across the orange for a realistic peel look.
- Let the craft dry flat for a few minutes before moving it.
Tips
- Pre-cut the circle so toddlers only handle gluing.
- Group several oranges together for a “fruit basket” bulletin board.
- Use this as a warm-up craft before a trickier project.
O For Octopus Craft
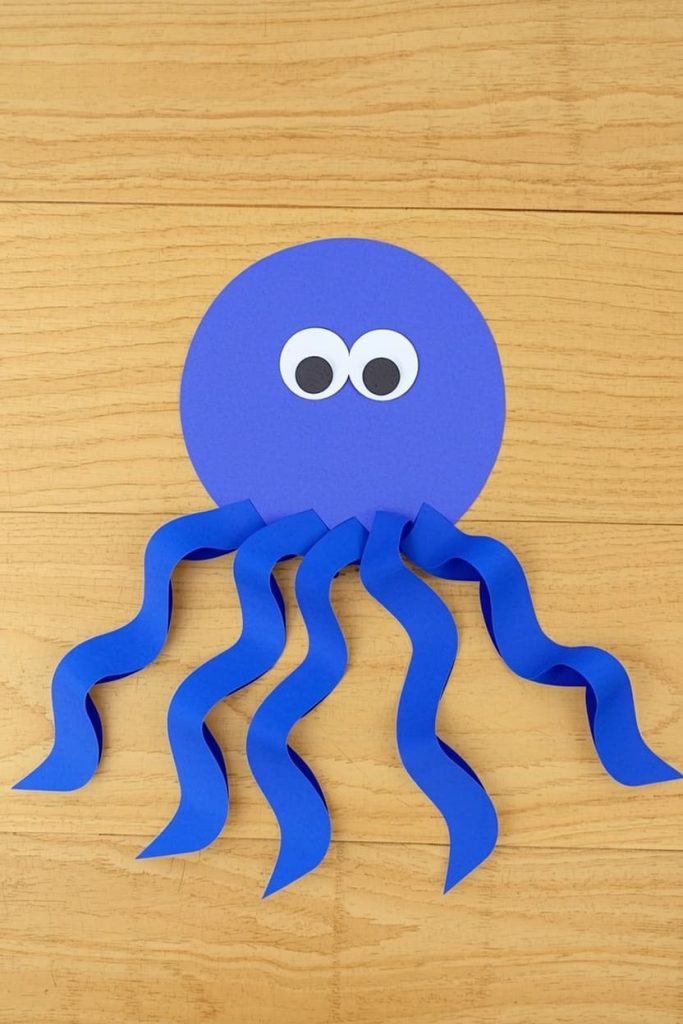
You make a paper octopus with one round head and eight strip legs folded into a wavy pattern.
This one teaches folding and cutting, and the accordion legs are genuinely satisfying to make.
Materials Needed
- 1 purple or blue paper circle, 5 inches wide (head)
- 8 paper strips, 0.75 x 6 inches (legs)
- 2 white circles, 1 inch wide (eyes)
- 2 black circles, 0.5 inch wide (pupils)
How to Make It
- Take one paper strip and fold it forward about half an inch from the end.
- Flip the strip over and fold it backward the same amount, right next to the first fold.
- Keep flipping and folding all the way down the strip, back and forth, until the whole strip is accordion-folded into a zigzag stack.
- Repeat this folding process with all 8 strips.
- Lay the head circle flat and picture it as a clock — you’ll be spacing the 8 legs evenly around the bottom half, like numbers on a clock face.
- Glue the top end of one folded leg to the bottom-back edge of the head circle.
- Continue gluing the remaining 7 legs along the same bottom edge, spacing them evenly so they fan out slightly when you flip the octopus over.
- Once all 8 legs are attached and the glue has set, flip the octopus face-up.
- Glue the two white eye circles side by side on the upper half of the head.
- Glue one black pupil onto the center of each white eye.
- Gently fluff the accordion legs apart so they don’t overlap, then let the craft lie flat until fully dry.
Tips
- Pre-fold strips for younger kids; let ages 5+ fold their own.
- Use two shades of the same color for a two-toned octopus.
- Trim leg strips shorter for a tidier, less chaotic look.
O For Ostrich Craft
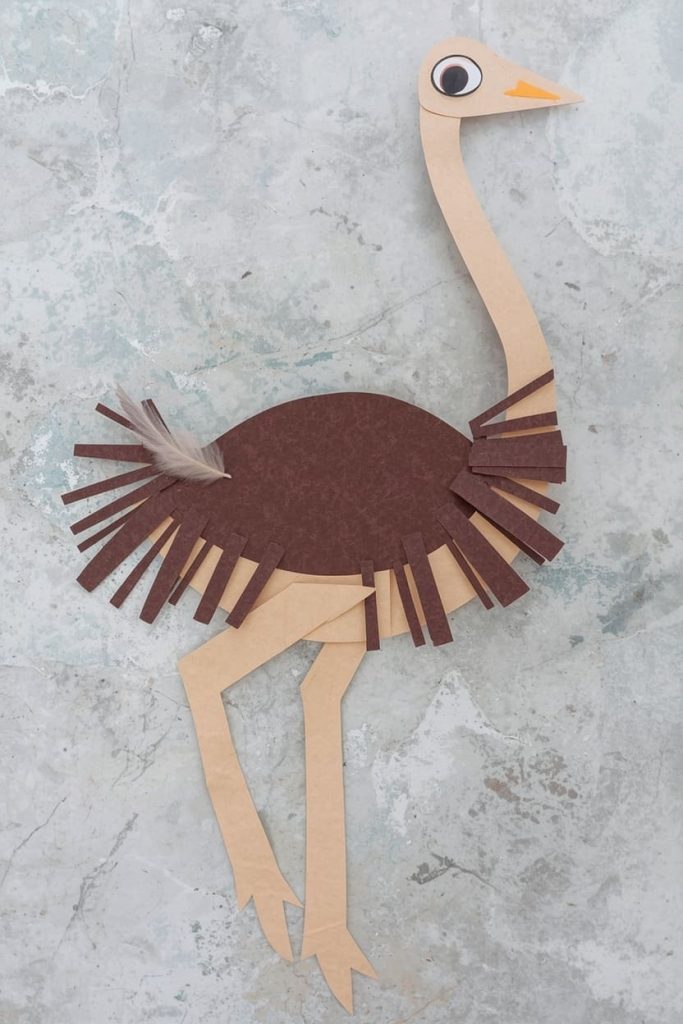
You need an oval body, a long curved neck strip, and a few feather shapes cut from paper.
The ostrich stands out because of its long neck, and kids love exaggerating how tall they make it.
Materials Needed
- 1 brown or tan oval, 4 inches long (body)
- 1 tan strip, 1 x 6 inches (neck)
- 1 small oval, 2 inches long (head)
- 2 thin yellow strips, 3 inches long (legs)
- 3-4 small feather cutouts (any color)
How to Make It
- Lay the body oval flat with the longer side running left to right.
- Gently roll the tan neck strip around a pencil for a few seconds to give it a soft curve, then slide the pencil out.
- Glue the bottom inch of the curved neck strip to the top-center edge of the body oval, letting the rest of the strip curve upward and slightly forward.
- Glue the small head oval to the top end of the neck strip, so the head sits at the very top of the curve.
- Flip the body oval over.
- Glue the top end of each yellow leg strip to the underside of the body, spacing them a couple of inches apart so the ostrich can “stand.”
- Flip the craft back over.
- Glue the feather cutouts one at a time along the back edge of the body oval, overlapping them slightly like real feathers.
- Let the neck and legs rest flat until the glue fully sets before standing the craft up.
Tips
- Curve the neck by gently folding it over a pencil before gluing.
- Add a small orange triangle beak for extra detail.
- This craft pairs well with an “animals that can’t fly” lesson.
O For Orca Craft
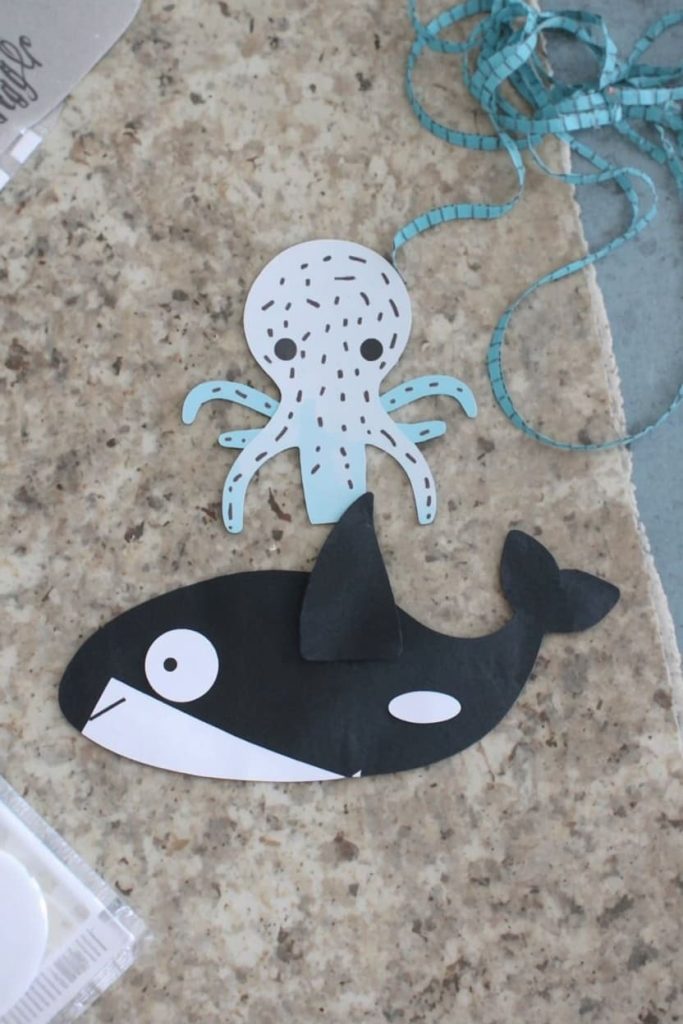
You make a paper orca by cutting a black oval body, adding a white belly patch, and a triangle fin.
Orcas are a favorite because the black-and-white contrast makes the craft pop with no extra effort.
Materials Needed
- 1 black oval, 5 inches long (body)
- 1 white oval, 3 inches long (belly patch)
- 1 black triangle, 2 inches tall (fin)
- 1 small white oval, 0.5 inch (eye patch)
How to Make It
- Lay the black body oval flat with the long side running left to right — this will be the orca swimming sideways.
- Cover the back of the white belly oval with glue.
- Press the belly oval onto the lower-middle section of the black body, leaving a black border along the top, bottom, and sides.
- Cover the base edge of the black triangle fin with glue.
- Press the fin onto the top-center of the body, standing straight up like a sail.
- Glue the small white eye patch near the front end of the body, just above the belly patch.
- Once the glue sets, use a black marker to draw a small dot pupil inside the white eye patch.
- Draw one curved line near the front tip of the body for the mouth.
- Let the craft dry flat before displaying it.
Tips
- Use a white gel pen on black paper if you want extra pop.
- Add small wave shapes underneath for an ocean scene.
- Great pairing craft with the octopus for an under-the-sea display.
O For Otter Craft
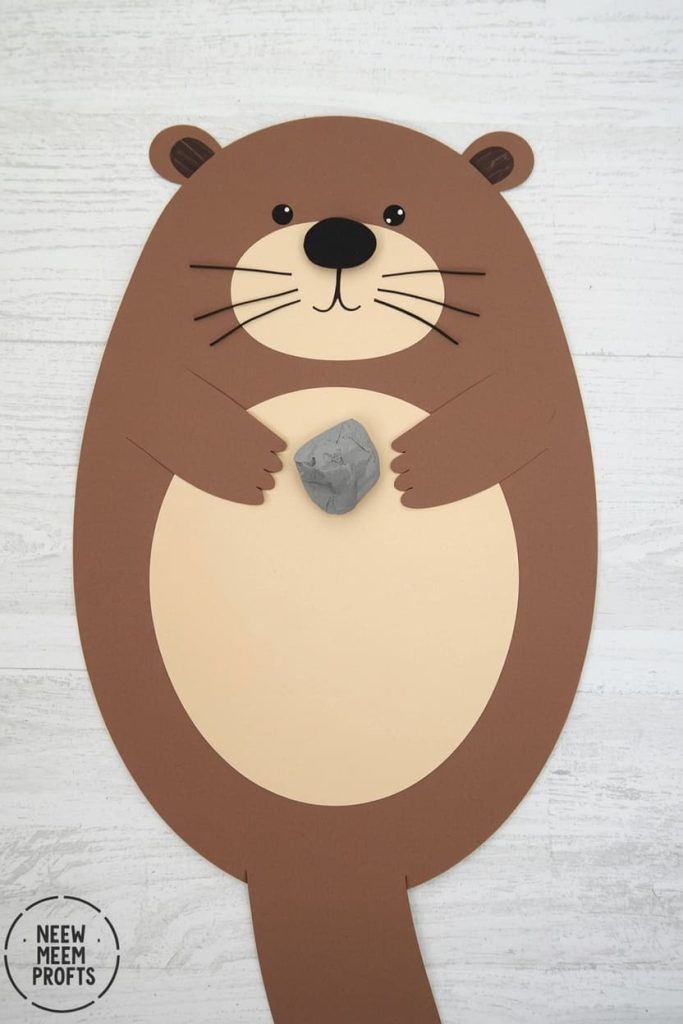
An otter craft uses a round brown body, a lighter belly patch, and small circle paws holding a tiny paper “rock.”
Otters are less common in classroom crafts, which makes this one feel fresh.
Materials Needed
- 1 brown oval, 4 inches long (body)
- 1 tan oval, 2.5 inches long (belly)
- 2 small brown circles, 1 inch wide (paws)
- 1 small gray circle, 1 inch wide (rock)
How to Make It
- Lay the brown body oval flat in front of you, long side running left to right.
- Cover the back of the tan belly oval with glue.
- Press the belly oval onto the center-front of the body, leaving an even brown border around it.
- Glue the two small brown paw circles side by side at the top edge of the belly patch, near what will be the otter’s chest.
- Cover the back of the gray rock circle with glue.
- Press the rock circle on top of the two paw circles, overlapping the bottom half of each paw so it looks like the rock is resting in the otter’s hands.
- Once the glue sets, use a black marker to draw two small dot eyes and a triangle nose above the paws.
- Add three short whisker lines on each side of the nose.
- Let the craft dry flat before moving it.
Tips
- Lay the otter on its back for the classic floating-otter pose.
- Add a second otter for a “otter family” bulletin board.
- Skip the rock for younger kids who need fewer steps.
O For Onion Craft
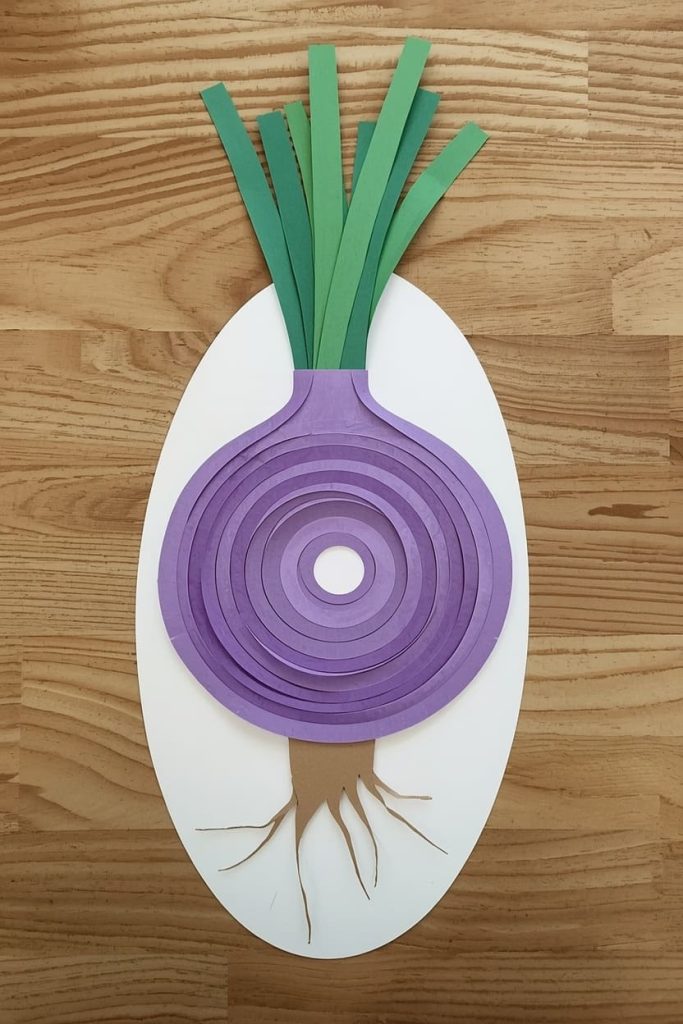
You make a paper onion by layering thin curved strips over an oval base, then topping it with green sprout strips.
This is the most unexpected O craft on the list, and a great way to talk about vegetables.
Materials Needed
- 1 white or purple oval, 4 inches long (base)
- 3-4 thin curved paper strips, 0.5 x 4 inches (layers)
- 2 green strips, 0.5 x 3 inches (sprouts)
- 1 small tan strip, 0.5 x 1 inch (root)
How to Make It
- Lay the oval base flat with the pointed ends facing up and down.
- Gently curve each paper layer strip by pulling it across the edge of a scissor blade or table edge, so it bows slightly like a real onion layer.
- Starting near the bottom of the oval, glue the first curved strip across the width of the oval, letting the curve bow outward.
- Glue the next curved strip slightly higher, overlapping the bottom of the first strip by about a quarter inch.
- Repeat with the remaining 1–2 strips, working your way up the oval so each new strip overlaps the one below it.
- Glue the tan root strip to the very bottom point of the oval, letting it stick out slightly like little roots.
- Glue the two green sprout strips to the very top point of the oval, fanning them apart slightly so they don’t overlap.
- Let the craft dry flat for a few minutes before picking it up, since the curved layers take a moment to hold their shape.
Tips
- Purple paper makes a red-onion version for variety.
- Pair with the orange craft for a simple “fruits and veggies” set.
- This works well as a quick five-minute filler craft.
Frequently Asked Questions
What age group are these letter O crafts best for? Ages 3 to 6. Toddlers handle the simpler ones, like the orange, while older preschoolers manage the octopus legs and ostrich neck.
Do I need any special tools for these crafts? No. You only need paper, a glue stick, kid-safe scissors, and a marker. Everything works at a kitchen table.
Can I turn these into a letter-of-the-week bulletin board? Yes. Group the finished crafts on a bulletin board or hallway display with a big letter “O” in the center.
How long does each craft take to make? Most take 10 to 15 minutes once the pieces are pre-cut. The octopus and ostrich take a bit longer because of the folding and curving.
Can these crafts be pre-cut for a classroom of kids? Yes, and I recommend it for larger groups. Pre-cutting keeps the activity focused on gluing and assembling, which speeds things up.

Sohel Rana is the writer, editor, publisher, and founder of The Tidy Porch. He is the man who is responsible for the craft (my wife created) being converted into a written piece. He also helps her wife (Sumona) by capturing videos of each craft. In short, he brings each craft created by her wife in front of you by transforming it into an article and a video.
