
I spent twenty minutes staring at a blank notepad trying to think of K words for craft time. Kite. Koala. Then… nothing. My mind just stopped. My daughter was already sitting at the table with her scissors out, waiting.
That blank-page moment is exactly why I sat down and built out this whole list properly, once, so I’d never have to scramble again.
K is one of those letters that doesn’t hand you options the way letters like R or L do. So here are 7 letter K crafts I’ve actually made, tested, and fine-tuned after a few messy first tries. Every one is paper-only, and you’ll have everything you need to finish it today.
- Colored cardstock multipack covers the blues, browns, grays, and reds you’ll need across nearly every craft on this list.
- Washable glue sticks (multi-pack) hold paper flat without the warping liquid glue causes on thinner cardstock.
- Kid-safe blunt-tip scissors let toddlers practice cutting without you hovering over every snip.
- Wiggle eyes variety pack turns a flat shape into a character in seconds, which buys extra patience minutes with younger kids.
- Pre-cut paper shape assortment pack saves the day when precision cutting isn’t happening and the craft still needs to get done.
Paper Kite Craft for Letter K
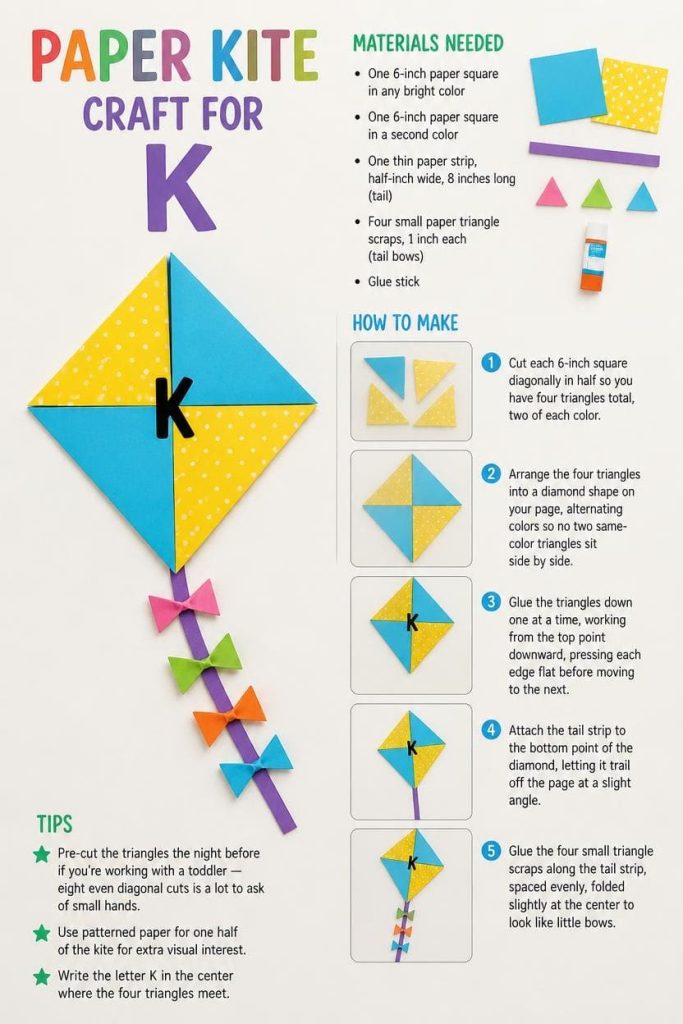
This is the craft that usually comes to mind first for letter K, and it’s a good opener because the diamond shape is simple enough for almost any age to manage.
Materials Needed
- One 6-inch paper square in any bright color
- One 6-inch paper square in a second color
- One thin paper strip, half-inch wide, 8 inches long (tail)
- Four small paper triangle scraps, 1 inch each (tail bows)
- Glue stick
How To Make
- Cut each 6-inch square diagonally in half so you have four triangles total, two of each color.
- Arrange the four triangles into a diamond shape on your page, alternating colors so no two same-color triangles sit side by side.
- Glue the triangles down one at a time, working from the top point downward, pressing each edge flat before moving to the next.
- Attach the tail strip to the bottom point of the diamond, letting it trail off the page at a slight angle.
- Glue the four small triangle scraps along the tail strip, spaced evenly, folded slightly at the center to look like little bows.
Tips
- Pre-cut the triangles the night before if you’re working with a toddler — eight even diagonal cuts is a lot to ask of small hands.
- Use patterned paper for one half of the kite for extra visual interest.
- Write the letter K in the center where the four triangles meet.
Paper Koala Craft for Letter K
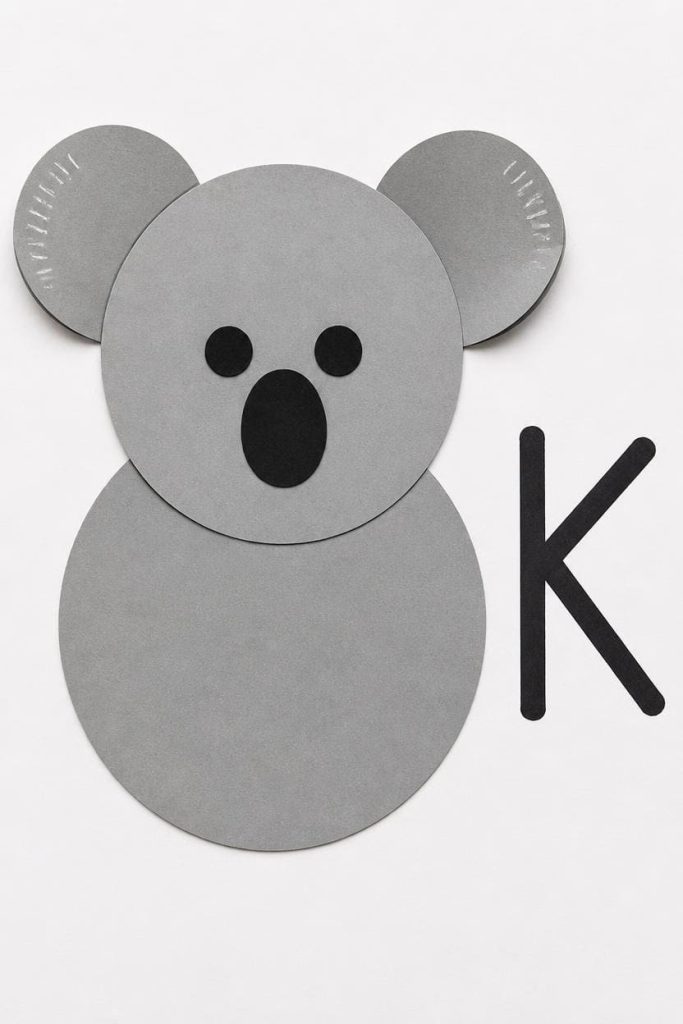
Koalas are round and forgiving, which makes this one of the easier crafts on the list for younger toddlers still building scissor skills.
Materials Needed
- One 5-inch gray paper circle (head)
- One 6-inch gray paper circle (body)
- Two 3-inch gray paper circles (ears)
- One small black oval (nose)
- Two small black circles (eyes)
How To Make
- Glue the 6-inch body circle flat on your page first as the base.
- Attach the 5-inch head circle overlapping the top of the body by about an inch, centered.
- Fold each ear circle slightly in half before gluing, then attach one to each upper side of the head so the fold gives a slight cupped shape.
- Glue the two black eye circles side by side in the upper-middle of the face.
- Attach the black oval nose just below and between the eyes, then write the letter K beside the koala.
Tips
- Add a few short white paper scribble-marks near the ears to suggest fuzzy texture without adding any 3D material.
- Let toddlers skip the fold step on the ears if it’s too tricky — flat ears still read clearly as a koala.
- This shape doubles well as a paper plate craft using the plate as the body base.
Paper Kangaroo Craft for Letter K
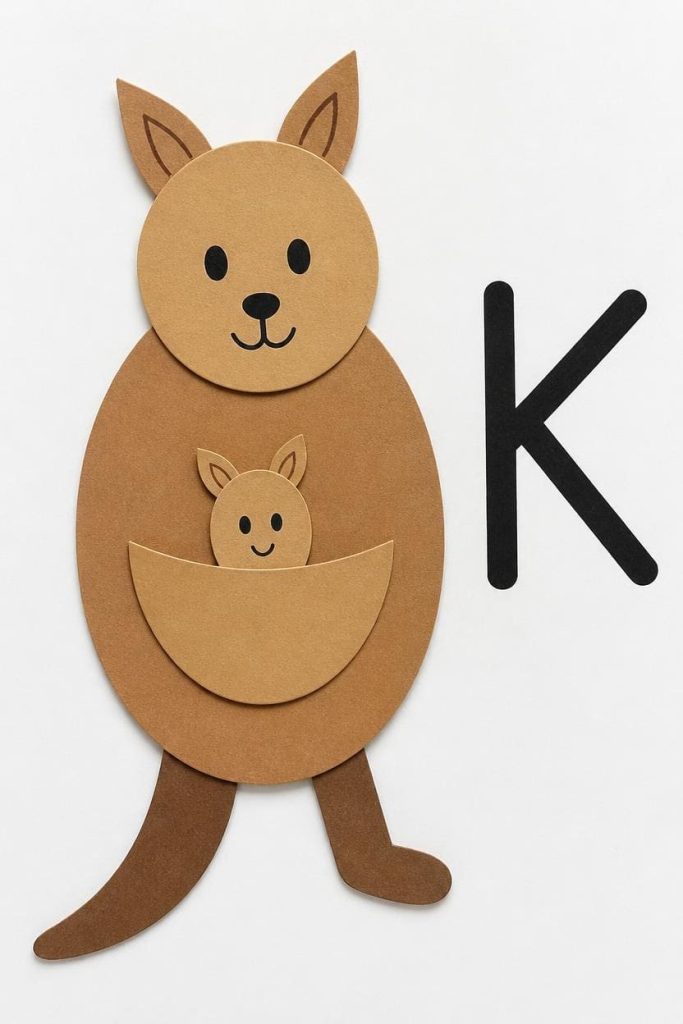
The pouch is what makes this craft fun, and it comes together with one simple layering trick that kids enjoy because it feels like a hiding-spot reveal.
Materials Needed
- One 6-inch brown or tan paper oval (body)
- One 3-inch tan paper circle (head)
- One 3-by-2-inch tan paper semicircle (pouch)
- One 1-inch tan paper oval (baby joey)
- Two thin brown strips, 4 inches long (legs/tail)
How To Make
- Glue the 6-inch body oval vertically on your page as the base shape.
- Attach the 3-inch head circle to the top of the body, overlapping by about half an inch.
- Glue the flat edge of the semicircle pouch to the lower-middle of the body so it curves outward like a pocket, leaving the top edge unglued.
- Slide the small joey oval partway into the open top edge of the pouch and glue just the bottom tip so it looks tucked inside.
- Attach the two brown strips at the base of the body — one curving down for the tail, one shorter one for a leg — then write K beside the kangaroo.
Tips
- Draw a small triangle ear on the head before adding facial details.
- Younger toddlers can skip the joey and just focus on the body, head, and pouch shape.
- This craft is a nice chance to talk about baby animals alongside the letter lesson.
Paper Key Craft for Letter K
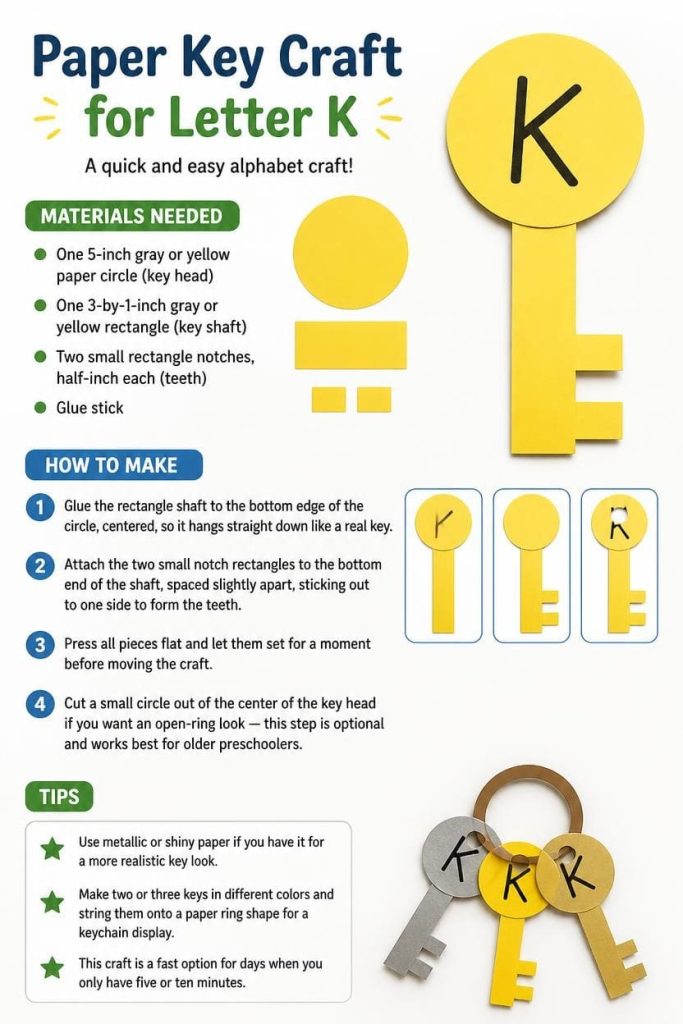
This is the simplest craft on the list, which makes it a good pick for a quick activity between other tasks or for a first-time crafter.
Materials Needed
- One 5-inch gray or yellow paper circle (key head)
- One 3-by-1-inch gray or yellow rectangle (key shaft)
- Two small rectangle notches, half-inch each (teeth)
- Glue stick
How To Make
- Glue the rectangle shaft to the bottom edge of the circle, centered, so it hangs straight down like a real key.
- Attach the two small notch rectangles to the bottom end of the shaft, spaced slightly apart, sticking out to one side to form the teeth.
- Press all pieces flat and let them set for a moment before moving the craft.
- Cut a small circle out of the center of the key head if you want an open-ring look — this step is optional and works best for older preschoolers.
- Write a bold K across the center of the key head.
Tips
- Use metallic or shiny paper if you have it for a more realistic key look.
- Make two or three keys in different colors and string them onto a paper ring shape for a keychain display.
- This craft is a fast option for days when you only have five or ten minutes.
Paper King’s Crown Craft for Letter K
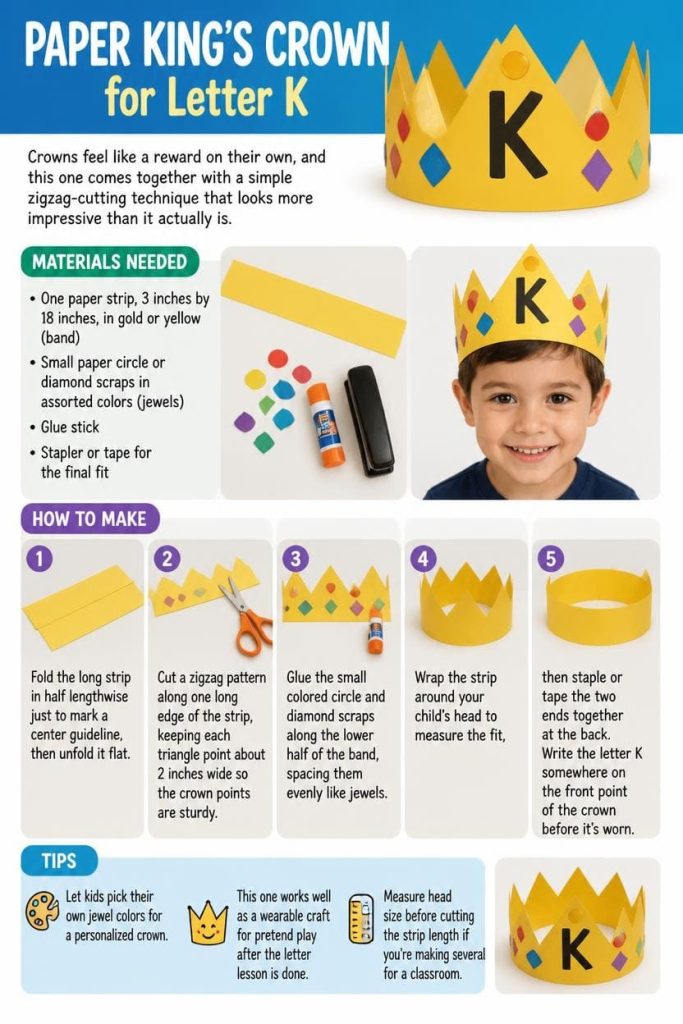
Crowns feel like a reward on their own, and this one comes together with a simple zigzag-cutting technique that looks more impressive than it actually is.
Materials Needed
- One paper strip, 3 inches by 18 inches, in gold or yellow (band)
- Small paper circle or diamond scraps in assorted colors (jewels)
- Glue stick
- Stapler or tape for the final fit
How To Make
- Fold the long strip in half lengthwise just to mark a center guideline, then unfold it flat.
- Cut a zigzag pattern along one long edge of the strip, keeping each triangle point about 2 inches wide so the crown points are sturdy.
- Glue the small colored circle and diamond scraps along the lower half of the band, spacing them evenly like jewels.
- Wrap the strip around your child’s head to measure the fit, then staple or tape the two ends together at the back.
- Write the letter K somewhere on the front point of the crown before it’s worn.
Tips
- Let kids pick their own jewel colors for a personalized crown.
- This one works well as a wearable craft for pretend play after the letter lesson is done.
- Measure head size before cutting the strip length if you’re making several for a classroom.
Paper Ketchup Bottle Craft for Letter K
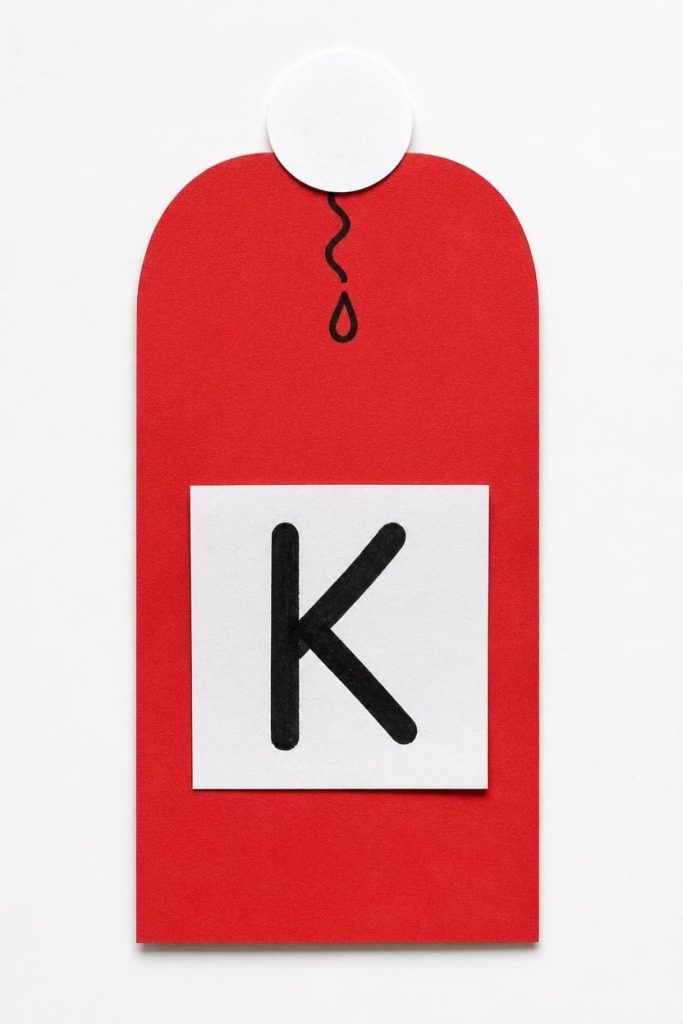
This is a fun one for kids who like food-themed crafts, and it’s a good example of finding a K word in an everyday object instead of an animal.
Materials Needed
- One 5-by-3-inch red rectangle with rounded top corners (bottle body)
- One 1-inch white paper rectangle (label background)
- One small white paper circle (cap)
- Black marker for label details
How To Make
- Glue the red rectangle vertically on your page as the bottle base.
- Round the top two corners of the rectangle with scissors before gluing if you haven’t already, so it reads clearly as a bottle shape.
- Attach the small white circle at the very top center of the bottle to form the cap.
- Glue the white label rectangle onto the lower-middle section of the red bottle body.
- Write the letter K in bold marker on the white label area.
Tips
- Draw a small squiggle line coming from the cap to suggest a drop of ketchup for extra detail.
- This craft pairs well with a quick chat about other K foods, like kiwi, for extended vocabulary practice.
- Swap red for yellow to make a mustard bottle variation using the same steps.
Paper Kiwi Craft for Letter K
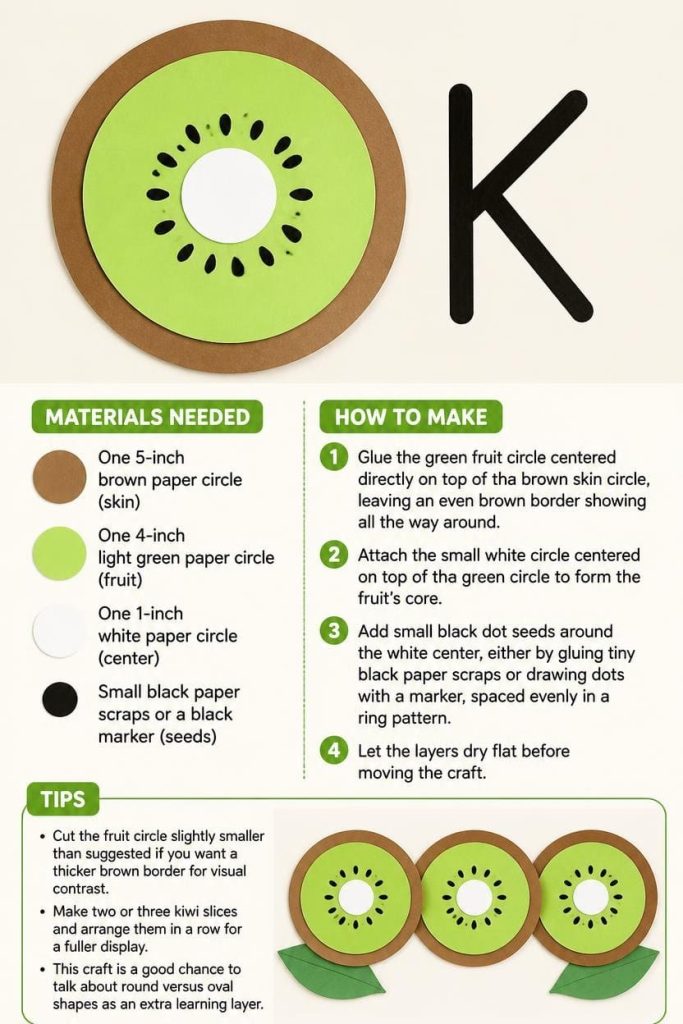
This is a good closing craft because the layered circle technique reinforces a skill kids will reuse in plenty of other letter crafts down the road.
Materials Needed
- One 5-inch brown paper circle (skin)
- One 4-inch light green paper circle (fruit)
- One 1-inch white paper circle (center)
- Small black paper scraps or a black marker (seeds)
How To Make
- Glue the green fruit circle centered directly on top of the brown skin circle, leaving an even brown border showing all the way around.
- Attach the small white circle centered on top of the green circle to form the fruit’s core.
- Add small black dot seeds around the white center, either by gluing tiny black paper scraps or drawing dots with a marker, spaced evenly in a ring pattern.
- Let the layers dry flat before moving the craft.
- Write the letter K beside the finished kiwi slice.
Tips
- Cut the fruit circle slightly smaller than suggested if you want a thicker brown border for visual contrast.
- Make two or three kiwi slices and arrange them in a row for a fuller display.
- This craft is a good chance to talk about round versus oval shapes as an extra learning layer.
FAQ
Is this craft list appropriate for toddlers, or just preschoolers?
Most of these work for both age groups. The key and koala crafts are the easiest starting points for toddlers. The crown and kangaroo involve more precise cutting and layering, so pre-cutting the pieces helps for kids under 3.
How do I use these crafts to reinforce the K sound specifically?
Stretch the K sound out loud while your child glues each piece — “kkkkite,” “kkkkoala.” Pointing at the letter K on the page while saying it out loud connects the sound to the shape more than the craft alone.
Why does this list include things like a ketchup bottle instead of just animals?
K has fewer natural craft subjects than most letters, so mixing in everyday objects like a ketchup bottle or key keeps the list full without repeating the same animal ideas over and over.
Can I turn these into a full letter-of-the-week unit?
Yes. Spread two or three crafts across separate days instead of doing all seven at once. This keeps momentum going without overwhelming a short attention span, and it gives you built-in review days.
What’s the best way to display finished letter K crafts?
A string with clothespins works well for a rotating home gallery. In a classroom, a bulletin board titled “K is for…” with each craft labeled underneath turns the display into a review tool later on.

Sohel Rana is the writer, editor, publisher, and founder of The Tidy Porch. He is the man who is responsible for the craft (my wife created) being converted into a written piece. He also helps her wife (Sumona) by capturing videos of each craft. In short, he brings each craft created by her wife in front of you by transforming it into an article and a video.
