
I’ll be honest with you. Every other letter in our alphabet unit took me twenty minutes to plan. X took me three days. I sat with a blank notebook, googled “letter X craft,” and got the same five X-ray ideas over and over.
Nothing else.
My daughter was waiting at the table, ready to craft, and I had nothing real to give her. So I did what any stuck parent does. I got creative.
I leaned on the words that end in X, not just start with it. Turns out that’s exactly how real teachers solve this letter too.
Here’s what we made, step by step, so you don’t have to hit the same wall I did.
Supplies That Make These Crafts Easier
- Crayola Construction Paper 240-Count Variety Pack — gives you every color you need across five different crafts without running short.
- Elmer’s Disappearing Purple School Glue Sticks (6-Pack) — goes on purple so kids can see their coverage, then dries clear and mess-free.
- Fiskars Blunt-Tip Kid Scissors — sized right for small hands cutting bone shapes, fox ears, and box flaps with clean edges.
- Googly Eyes Assorted Size Pack (100-Count) — adds instant character to the fox face without adding any bulk or 3D parts.
- Black Fine-Tip Washable Markers (Crayola, 10-Pack) — perfect for bone outlines, xylophone bars, and writing a big letter X on every finished piece.
Paper X-Ray Craft
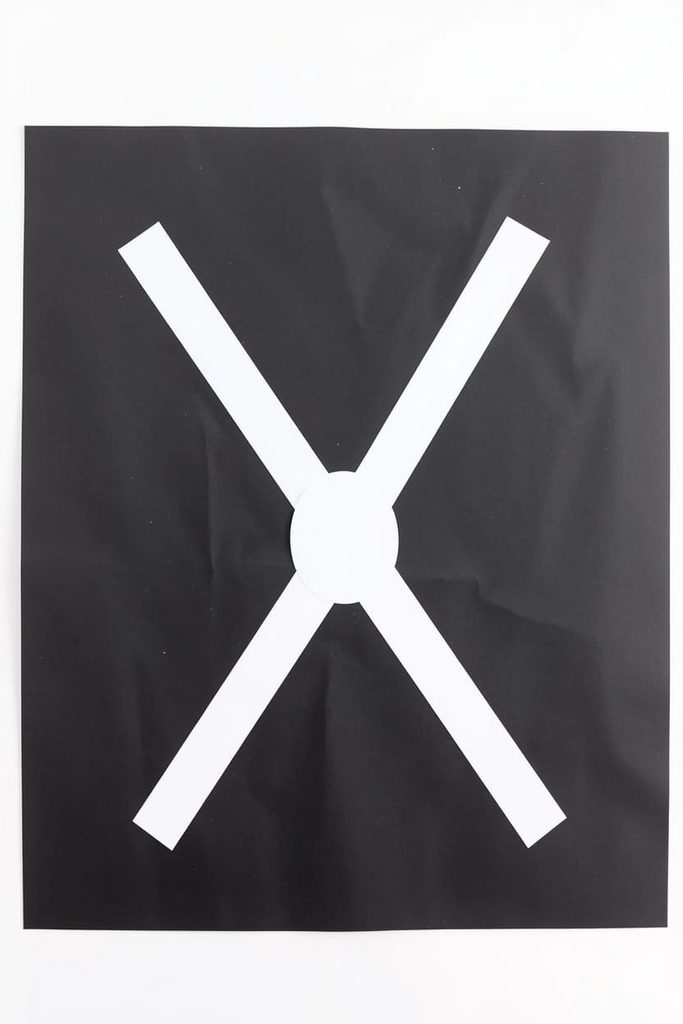
An X-ray is the most direct way into letter X, and this flat paper version turns bones into a simple layering project any kid can finish.
How to make it:
- Cut a large rectangle, about 9×12 inches, from black paper as the X-ray background.
- Cut a long curved rectangle from white paper for the arm bone shape, about 8 inches long.
- Round both ends of the bone shape slightly to mimic a joint.
- Cut two smaller white ovals for hand bones and glue them near one end of the long bone.
- Cut four thin white rectangles for finger bones and glue them fanning out from the hand ovals.
- Arrange all bone pieces on the black background before gluing anything down.
- Glue each bone piece flat, pressing from the center outward.
- Use a white marker or crayon to add joint lines where bones connect.
- Let dry flat for 10 minutes before displaying.
Materials Needed:
- Black construction paper
- White construction paper
- Glue stick
- White marker or crayon
Tips:
- Pre-cut the finger bones for kids under 4 — the thin strips are hard to cut evenly.
- Hold up a real hand and count bones together before you start gluing.
Paper Xylophone Craft
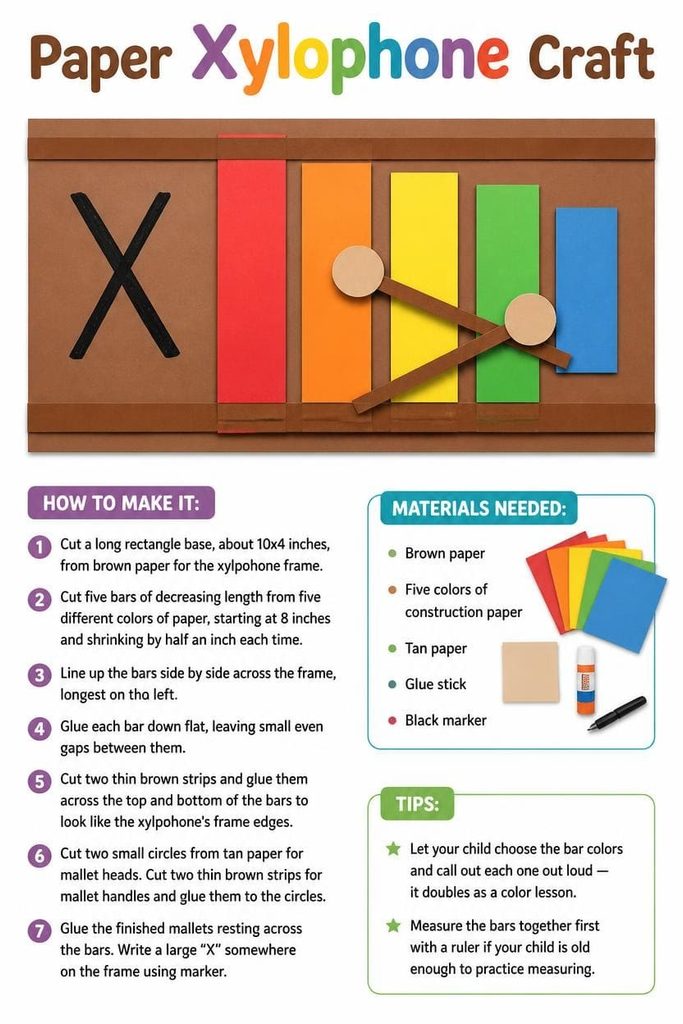
A xylophone gives kids a real X-start word with a bold, colorful shape that’s satisfying to build in layers.
How to make it:
- Cut a long rectangle base, about 10×4 inches, from brown paper for the xylophone frame.
- Cut five bars of decreasing length from five different colors of paper, starting at 8 inches and shrinking by half an inch each time.
- Line up the bars side by side across the frame, longest on the left.
- Glue each bar down flat, leaving small even gaps between them.
- Cut two thin brown strips and glue them across the top and bottom of the bars to look like the xylophone’s frame edges.
- Cut two small circles from tan paper for mallet heads.
- Cut two thin brown strips for mallet handles and glue them to the circles.
- Glue the finished mallets resting across the bars.
- Write a large “X” somewhere on the frame using marker.
Materials Needed:
- Brown paper
- Five colors of construction paper
- Tan paper
- Glue stick
- Black marker
Tips:
- Let your child choose the bar colors and call out each one out loud — it doubles as a color lesson.
- Measure the bars together first with a ruler if your child is old enough to practice measuring.
Paper Fox Craft
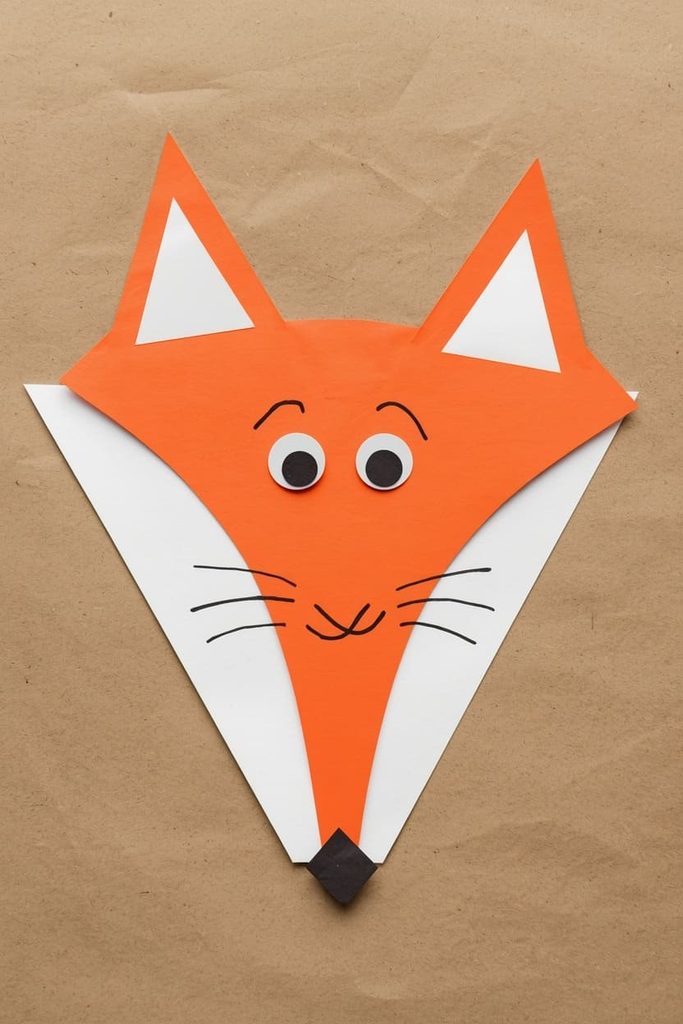
Fox ends in the letter X, and this workaround is one of the most reliable ways real alphabet curricula fill the X gap — plus foxes are genuinely fun to make.
How to make it:
- Cut a 6-inch triangle from orange paper for the fox’s face, with slightly rounded corners.
- Cut two smaller triangles from the same orange paper for ears, about 2.5 inches tall.
- Glue the ears to the top corners of the face triangle, pointing outward.
- Cut two tiny white triangles and glue them inside each ear.
- Cut a white oval, about 3 inches, and glue it to the lower half of the face for the snout area.
- Glue on two googly eyes above the white snout patch.
- Cut a small black triangle for the nose and glue it at the tip of the white snout.
- Draw a thin black line down from the nose and curve it into a small smile.
- Add thin black marker lines on the cheeks for whisker detail.
Materials Needed:
- Orange construction paper
- White construction paper
- Black paper
- Googly eyes
- Black marker
Tips:
- The ear triangles are the trickiest cut — model it slowly before handing over the scissors.
- Talk through the “ends in X” idea with your child so they understand why fox counts for this letter.
Paper Box Craft
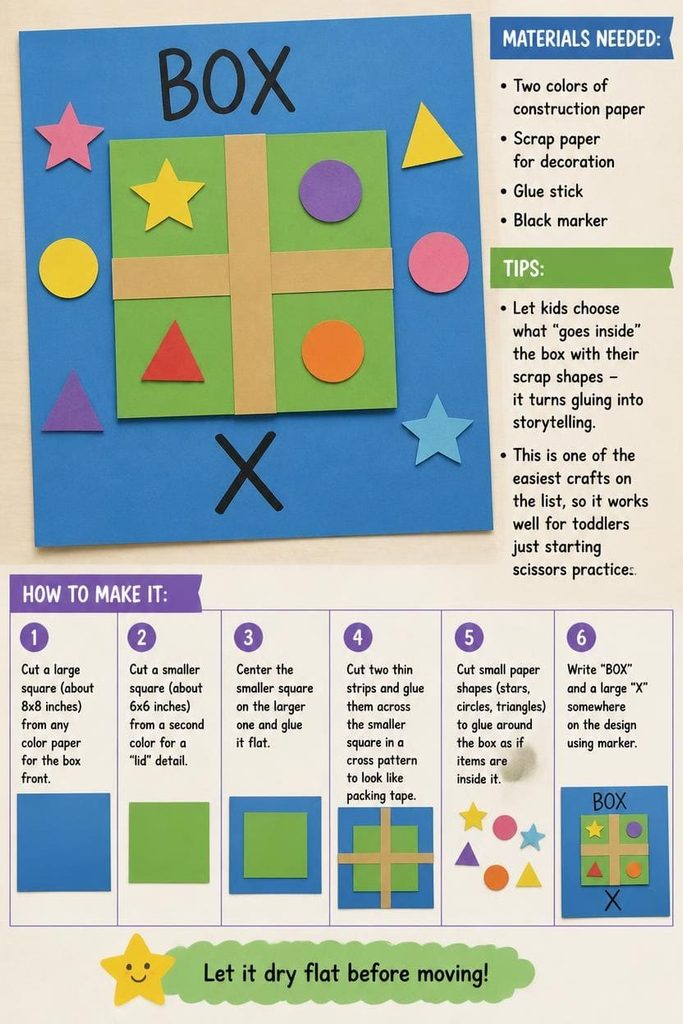
Box also ends in X, and this flat version teaches the shape and concept of a box without any folding or 3D construction.
How to make it:
- Cut a large square, about 8×8 inches, from any color paper for the box front.
- Cut a smaller square, about 6×6 inches, from a second color for a “lid” detail glued on top.
- Center the smaller square on the larger one and glue flat.
- Cut two thin strips and glue them across the smaller square in a cross pattern to look like packing tape.
- Cut small paper shapes (stars, circles, triangles) to glue around the box as if items are inside it.
- Write “BOX” and a large “X” somewhere on the design using marker.
- Let dry flat before moving.
Materials Needed:
- Two colors of construction paper
- Scrap paper for decoration
- Glue stick
- Black marker
Tips:
- Let kids choose what “goes inside” the box with their scrap shapes — it turns gluing into storytelling.
- This is one of the easiest crafts on the list, so it works well for toddlers just starting scissors practice.
Paper Number Six Craft
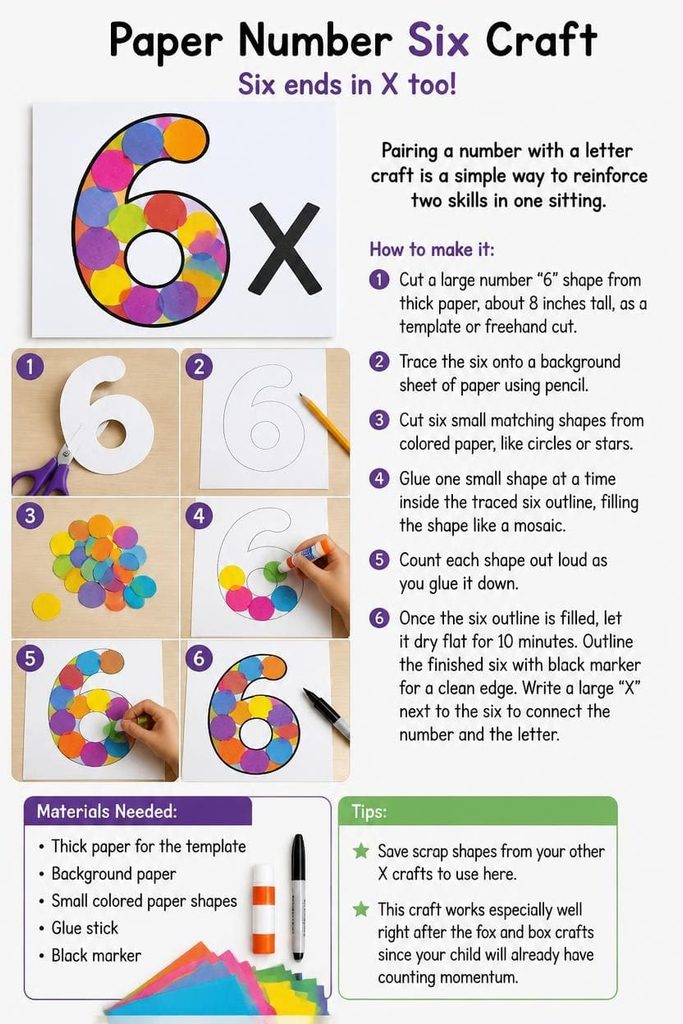
Six ends in X too, and pairing a number with a letter craft is a simple way to reinforce two skills in one sitting.
How to make it:
- Cut a large number “6” shape from thick paper, about 8 inches tall, as a template or freehand cut.
- Trace the six onto a background sheet of paper using pencil.
- Cut six small matching shapes from colored paper, like circles or stars.
- Glue one small shape at a time inside the traced six outline, filling the shape like a mosaic.
- Count each shape out loud as you glue it down.
- Once the six outline is filled, let it dry flat for 10 minutes.
- Outline the finished six with black marker for a clean edge.
- Write a large “X” next to the six to connect the number and the letter.
Materials Needed:
- Thick paper for the template
- Background paper
- Small colored paper shapes
- Glue stick
- Black marker
Tips:
- Save scrap shapes from your other X crafts to use here.
- This craft works especially well right after the fox and box crafts since your child will already have counting momentum.
FAQ: Letter X Crafts
Why is X the hardest letter of the whole alphabet to craft for?
Almost no common English words start with X, and the few that do — like X-ray and xylophone — get repeated everywhere. That’s why most lists run dry after two ideas.
Is it okay to use “ends in X” words like fox and box instead of “starts with X” words?
Yes. This is a standard, widely used approach in real preschool and homeschool curricula, since true X-start words are so limited. Naming it honestly with your child even becomes a small lesson of its own.
How do I explain the X sound to a toddler?
Point out that X often makes a “ks” sound, like at the end of fox or box, rather than a sound at the start of a word. That’s different from most letters, and it’s worth saying out loud.
Can I do these crafts with a 2-year-old?
Yes, with prep. Pre-cut every shape ahead of time and let your toddler focus on placing and gluing. The box craft is the easiest starting point.
How do I make this work for older kids too?
Have older kids cut their own shapes freehand instead of using a template, and add a short fact-finding step, like looking up what X-rays actually show inside the body.
How should I display the finished crafts?
Line all five up across a wall with mini clothespins, or group them onto one poster board labeled “X is for…” across the top.

Sohel Rana is the writer, editor, publisher, and founder of The Tidy Porch. He is the man who is responsible for the craft (my wife created) being converted into a written piece. He also helps her wife (Sumona) by capturing videos of each craft. In short, he brings each craft created by her wife in front of you by transforming it into an article and a video.
