
Last fall, I moved into an apartment with an entryway barely wider than my shoulders. Within a week, shoes piled up against the door so badly that guests had to squeeze sideways to get in.
One night, my sister tripped over a sneaker and nearly dropped the pizza she was holding. That was my breaking point.
I couldn’t add a closet or knock down a wall. I had about two feet of space and a rental lease that said no drilling. So I got creative, and it finally worked.
Here are 5 complete ideas you can follow from start to finish, even in the tightest entryway, plus the products that make each one simple to set up.
Top 5 Products for a Small Entryway
Over-the-Door Shoe Organizer — This hangs on any standard door and holds up to 24 pairs without touching your floor or walls at all.
Slim Vertical Shoe Tower — This narrow tower fits into spaces as tight as 12 inches, stacking shoes upward instead of sideways.
Wall-Mounted Floating Shoe Shelf — This shelf uses vertical wall space to hold shoes above the floor, freeing up every inch below.
Stackable Shoe Organizer Cubes — These modular cubes let you build storage to your exact space, adding or removing sections as needed.
Narrow Shoe Cabinet with Doors — This slim cabinet fits into tight corners while hiding your shoes completely behind closed doors.
A No-Drill Rack for Renters Who Can’t Touch the Walls
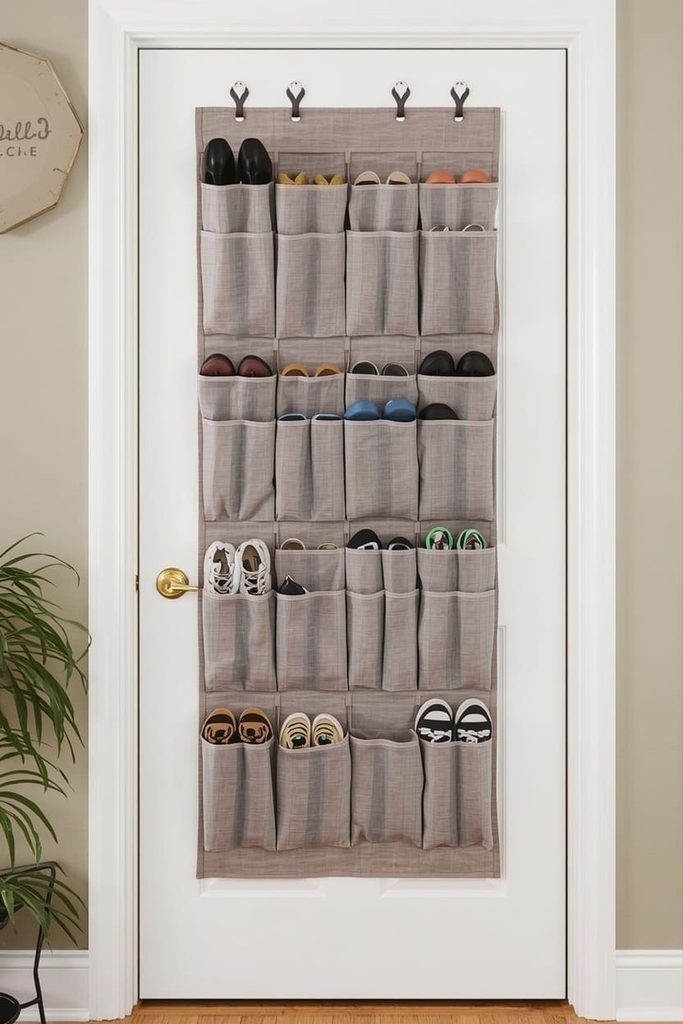
This idea is perfect if you’re renting and your lease forbids holes in the walls. An over-the-door organizer gives you real storage without a single screw.
What you’ll need:
- An over-the-door shoe organizer
- A tape measure, to check your door thickness
Steps:
- Measure your door’s thickness before buying. Most organizers fit doors up to 1.75 inches thick.
- Choose a door that gets light daily use, like a coat closet or a spare bedroom door.
- Hang the organizer over the top of the door, letting the hooks rest on the inside edge.
- Slide shoes into each pocket, toes first, to keep the fabric from sagging.
- Group shoes by person or by season so everyone can find their pair fast.
- Check the hooks every few weeks to make sure they haven’t loosened from daily door use.
This works because it uses a door you already own instead of taking up any floor space, which matters most in a rental with strict rules. It also comes down in seconds if you move, since nothing is permanently attached, and it travels with you to the next apartment.
A Vertical Tower for Hallways Under 15 Inches Wide
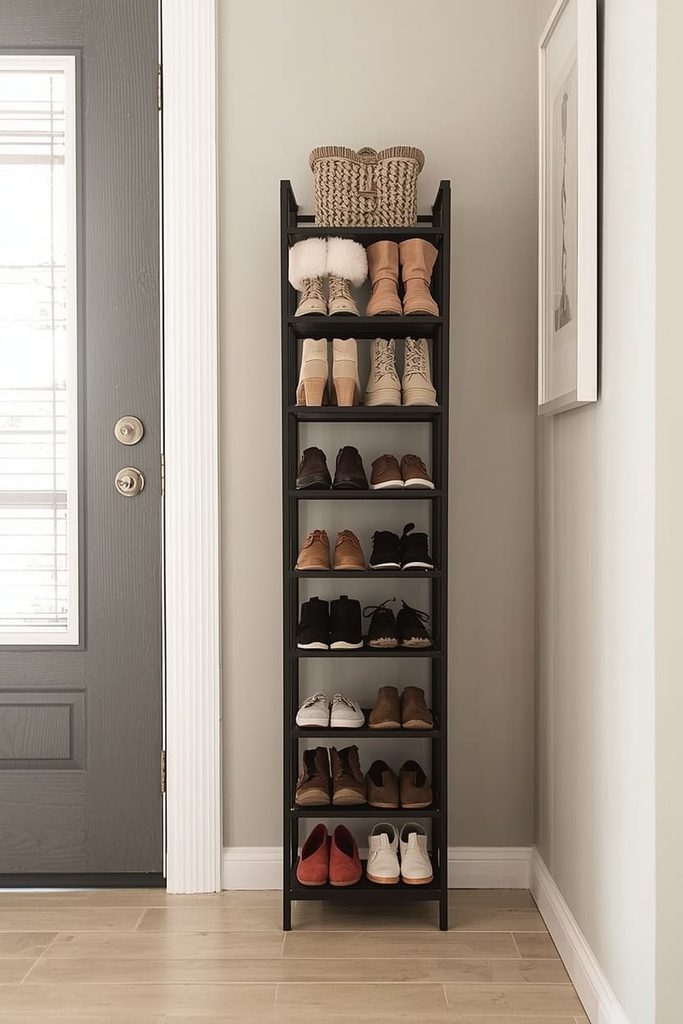
This idea works best if your entryway is a narrow strip, common in older apartments and railroad-style layouts. A vertical tower fits where a bench or cabinet simply cannot.
What you’ll need:
- A slim vertical shoe tower
- A measuring tape
- Anti-tip wall straps
Steps:
- Measure the narrowest point of your hallway. Many vertical towers fit spaces as tight as 12 inches wide.
- Slide the tower flush against the wall, away from the door’s swing path.
- Attach anti-tip straps for safety, especially if kids or pets pass through often.
- Load heavier shoes, like boots, on the bottom shelf to keep the tower steady.
- Reserve the top shelf for the shoes you grab most, so you’re not bending down constantly.
This works because it climbs upward instead of spreading out, which is the only way to add storage when your floor space is already maxed out. A tower this narrow can slide into gaps that most furniture simply can’t reach.
A Floating Shelf for Zero Floor Footprint
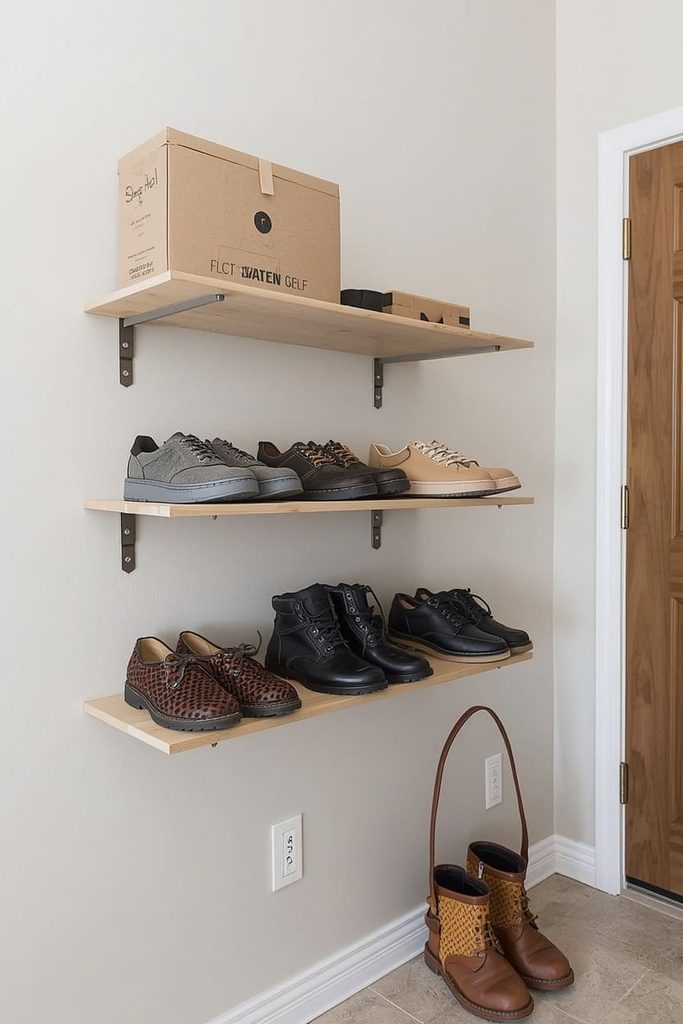
This idea suits you if you have wall space but absolutely no floor space to spare. A floating shelf keeps shoes completely off the ground.
What you’ll need:
- A wall-mounted floating shoe shelf
- A stud finder
- A drill
- A level
Steps:
- Find a wall stud with your stud finder before marking anything. This keeps the shelf steady under weight.
- Mark a height between 12 and 18 inches off the floor, low enough to reach but high enough to sweep beneath.
- Use a level to draw a straight line so the shelf sits even.
- Drill and mount the bracket directly into the stud.
- Line shoes up with toes facing out, leaving small gaps so the shelf doesn’t look crowded.
This works because it removes shoes from the floor entirely, which frees up every inch of walking space in a hallway that has none to spare. Once it’s mounted, it also becomes nearly invisible when the shoes are lined up neatly.
Stackable Cubes That Grow With Your Space
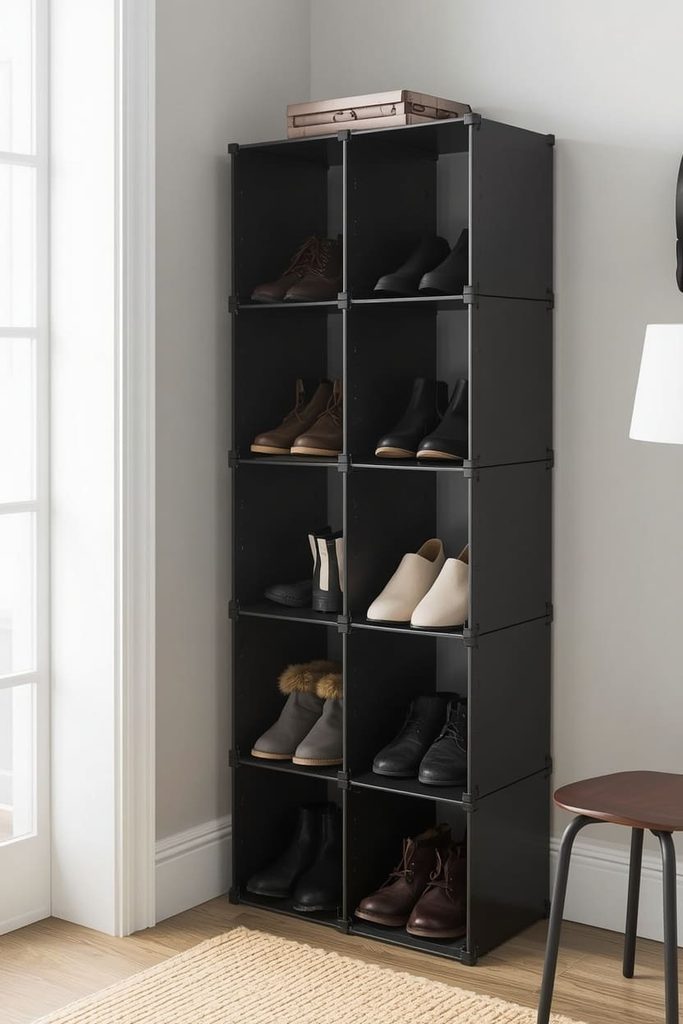
This idea fits you if your entryway has an odd shape or you’re not sure how much storage you’ll need long term. Stackable cubes let you build exactly what fits, one piece at a time.
What you’ll need:
- A set of stackable shoe cubes
- A flat, clear section of wall or corner
Steps:
- Measure your available corner or wall space, both width and height.
- Start with a small stack of 2-3 cubes rather than buying the full set right away.
- Snap or stack the cubes together following the manufacturer’s instructions.
- Slide one pair of shoes into each cube, keeping heavier boots on the bottom row.
- Add more cubes later if you need extra room, or remove some if you downsize.
- Rearrange the stack whenever your space changes, since the cubes aren’t fixed in one shape.
This works because it adapts to almost any leftover space, corner, or nook, instead of forcing you into one fixed size that might not fit. You can even split the cubes into two smaller stacks if one big tower won’t work in your layout.
A Narrow Cabinet for Tight Corners
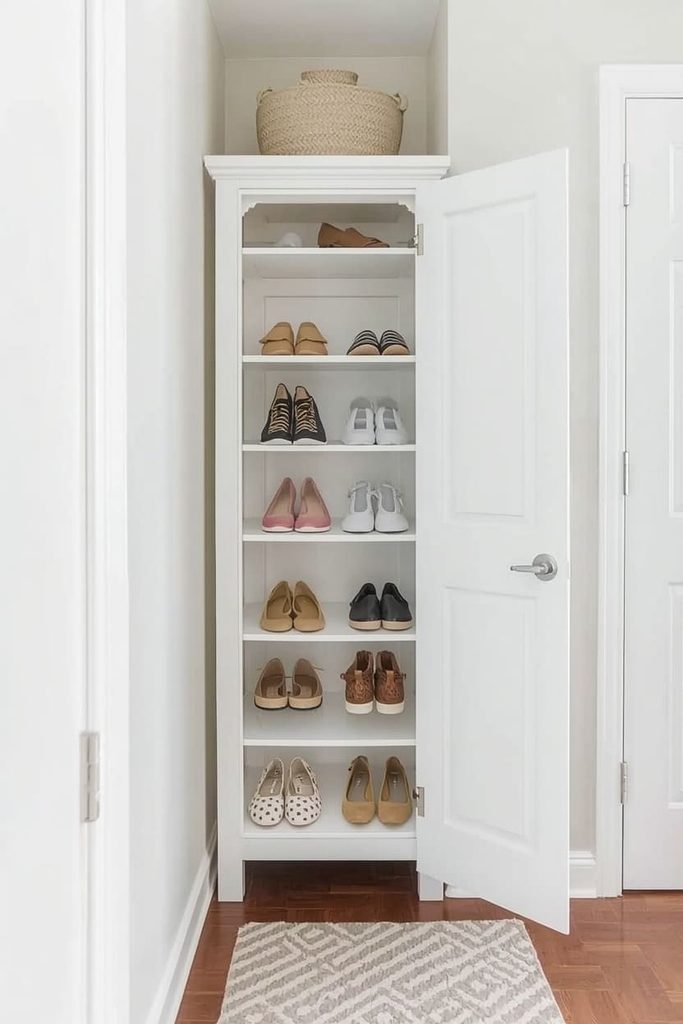
This idea works well if you have a small corner near your door that’s currently empty or wasted. A narrow cabinet fits into that gap while hiding every shoe from view.
What you’ll need:
- A narrow shoe cabinet with doors
- A screwdriver, for assembly
- Furniture pads for the floor
Steps:
- Measure the corner or gap you want to fill, checking both width and depth.
- Choose a cabinet that’s no more than 8-10 inches deep for a true tight-corner fit.
- Assemble the cabinet, checking that each shelf sits level as you go.
- Add furniture pads under the legs to protect your floor.
- Sort shoes by how often you wear them, keeping daily pairs on the most accessible shelf.
- Close the doors fully so the cabinet blends into the wall instead of standing out.
This works because it turns dead corner space into real storage, which is often the only unused space left in a small entryway. A closed cabinet in that spot does double duty, hiding shoes while filling a gap that would otherwise sit empty and unused for years.
How to Measure Your Entryway Before Buying Shoe Storage
The right size starts with three numbers: width, height, and depth of your available space. Skipping this step is the fastest way to end up with something that doesn’t fit.
Measure the narrowest point of your entryway, not just the widest part. A hallway often narrows near a door frame or light switch, and that narrow point decides what will actually fit through.
Check your ceiling height too if you’re considering a tall tower or stacked cubes. Leave at least a few inches of clearance so the piece doesn’t feel cramped against the ceiling. This small buffer also makes it easier to reach the top shelf without stretching.
Write every number down on your phone before you shop. This one habit stops you from buying something too deep, too tall, or too wide for the space you actually have.
It also helps to measure at different times of day, especially if your entryway shares space with a coat rack, mail table, or umbrella stand. What looks like open space in the morning might feel cramped once everyone’s shoes, bags, and jackets pile up by evening.
Small Entryway Shoe Storage Mistakes to Avoid
The biggest mistake is buying based on looks alone, without checking the depth of the piece first. A beautiful cabinet that’s 16 inches deep will swallow a narrow hallway meant for something half that size.
Another common mistake is forgetting about the door swing. If your storage blocks the door from opening fully, you’ll fight with it every single day until you finally get rid of it. Always test the door with the piece in place before deciding it’s the final spot.
People also often buy the biggest piece they can afford, assuming more storage is always better. In a small space, a piece that’s too large makes the whole area feel more cramped, not less. A slightly smaller piece that fits well almost always looks and functions better than an oversized one crammed into a corner.
Lastly, renters sometimes assume they have no options without drilling. Over-the-door racks, stackable cubes, and slim freestanding towers all work without touching a single wall.
One more mistake is ignoring how the storage piece will look once it’s actually full. A wire rack that looks sleek empty in a photo can look messy the moment real, mismatched shoes fill every slot. Choose pieces with some visual structure, like doors or defined cubbies, so a full load still looks intentional.
How Many Shoes You Really Need to Store by the Door
Most households only need daily storage for 4-8 pairs, even with multiple people living there. Everything else can rotate into a closet or bin further inside the home.
Think about what you actually wear each week: work shoes, sneakers, maybe one pair of boots in winter. Those are the pairs that belong by the door, ready to grab on your way out. Everything else earns its spot in a closet instead.
Seasonal shoes, like sandals or heavy snow boots, don’t need a spot in your entryway most of the year. Store them elsewhere and swap them in only when the season actually calls for them. This single swap alone can free up nearly half the space in a truly small entryway.
Keeping your by-the-door count low means your small storage solution will actually keep up, instead of overflowing again within a week of setting it up.
If you live with roommates or a growing family, revisit this number every season. A count that worked in summer might feel too tight once winter boots and extra layers enter the mix, so it pays to check in every few months instead of setting the rule once and forgetting it.
Frequently Asked Questions
What’s the best shoe storage for a tiny apartment entryway? An over-the-door organizer or a slim vertical tower works best in the tightest apartment entryways. Both add real storage without needing floor space you don’t have. Choose based on whether you have a nearby door or open wall to use, and pick whichever one matches your household’s shoe count.
How do I store shoes without drilling into the wall? Over-the-door racks, stackable cubes, and freestanding vertical towers all work without any drilling. These options are ideal for renters with strict lease rules. Look for pieces that stand on their own or hang over an existing door, so you never need a landlord’s permission.
How many pairs of shoes fit in a small entryway? Most small entryway solutions comfortably hold 6-12 pairs, depending on the style you choose. Vertical towers and over-the-door racks tend to hold the most per square foot. Stick to your weekly rotation and store the rest elsewhere, so the space never feels overloaded.
Can I use shoe storage in a hallway less than 15 inches wide? Yes, slim vertical towers and floating wall shelves are built for hallways this narrow. Measure the exact width before buying to make sure the piece will clear the space. Avoid anything advertised as a bench or cabinet in spaces this tight, since those styles need more room than they let on in photos.
How do I keep small entryway storage from feeling cluttered? Set a strict limit on how many shoes live there at once, and stick to it. Rotate seasonal pairs into a closet the moment the weather changes. A smaller, well-kept storage spot always looks tidier than an overflowing large one, no matter how many square feet you’re working with.

Sohel Rana is the writer, editor, publisher, and founder of The Tidy Porch. He is the man who is responsible for the craft (my wife created) being converted into a written piece. He also helps her wife (Sumona) by capturing videos of each craft. In short, he brings each craft created by her wife in front of you by transforming it into an article and a video.
