
Last spring, I stood in my bedroom in one sock. The other shoe was somewhere in my wardrobe. I dug through a heap of heels, flats, and sneakers.
Ten minutes later, I found it under a boot. I was late, and I was annoyed. My wardrobe was only 4 feet (122 cm) wide, so a big shoe unit would not fit. I needed storage inside it.
Over a few weekends, I tried several fixes. Five worked well. Each one is a full project you can finish at home. Pick the one that fits your wardrobe, then let’s get your shoes off the floor.
How to Measure Your Wardrobe Before You Choose Shoe Storage
Measure the inside, not the outside. Panels and doors eat space you cannot use.
Write down three numbers. Get the inside width and the inside depth. Then measure from the floor to the lowest hanging clothes. Note where your doors open or slide, since a bulky rack can block them.
Next, count your pairs. Sort them into daily, weekly, and rarely worn. Only the first two groups need easy reach.
Now match an idea to your life. No tools? Try Idea 1, 2, or 5. Own a drill? Build Idea 3 or 4. Lots of heels? Idea 2 and Idea 5 handle them best.
Idea 1: Hang a Pocket Organizer on the Inside of Your Wardrobe Door
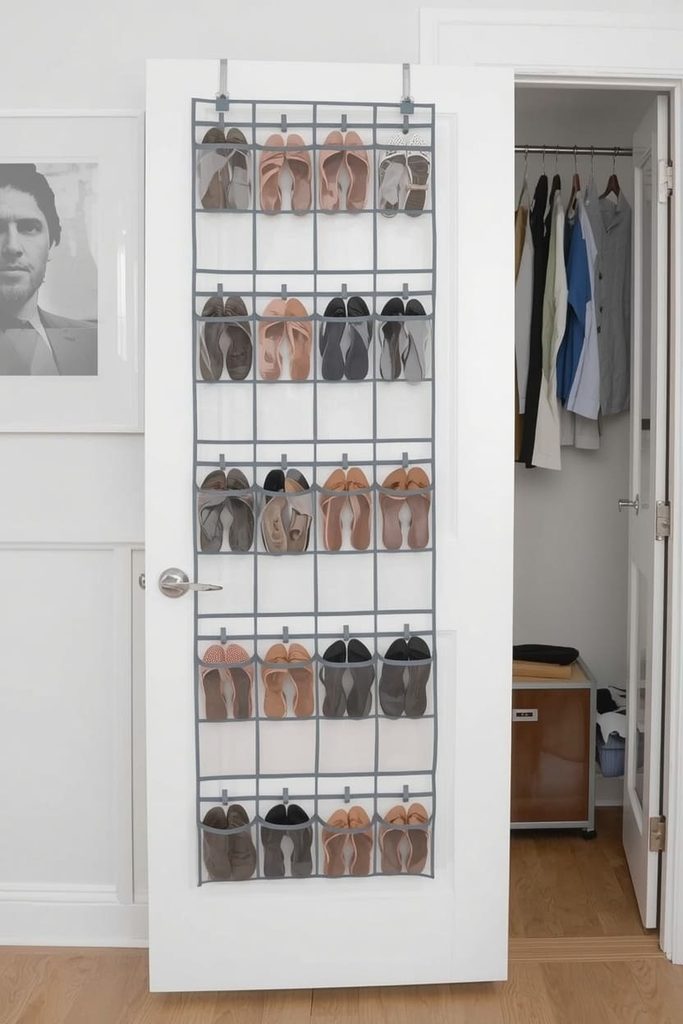
A door pocket organizer holds six pairs on a hinged wardrobe door. It costs about $12 to $25 and takes ten minutes. You need no tools.
The back of your door is wasted space. A 12-pocket organizer is about 14 in (36 cm) wide, so it fits most doors. Each pocket holds one shoe. Twelve pockets give you six pairs. Your floor stays open for bags and baskets. There is one catch. Over-door hooks need a hinged door with a flat top edge. Sliding doors will not work.
What You Need
- A 12-pocket organizer with metal over-door hooks
- Felt furniture pads, about $3
- A tape measure
How to Do It
- Measure the thickness of your door’s top edge. Most hooks fit doors 0.75 to 1.75 in (2 to 4.5 cm) thick.
- Open the door all the way.
- Measure from the door’s inside face to your hanging clothes. You need about 4 in (10 cm) of space.
- Stick a felt pad on each hook where it touches the door.
- Hang the organizer from the top edge, centered on the door.
- Close the door slowly. Check that no hanger catches on a pocket.
- Load lighter pairs in the top pockets. Put heavier ones near the bottom.
Tips
- Fill it in stages. Start with four pairs and watch how the door swings.
- Wipe the clear pockets every month. Dust shows up fast.
- Skip this idea if your door feels thin or wobbly. A bent door is hard to fix.
Idea 2: Add a Slanted Three-Tier Rack to Your Wardrobe Floor
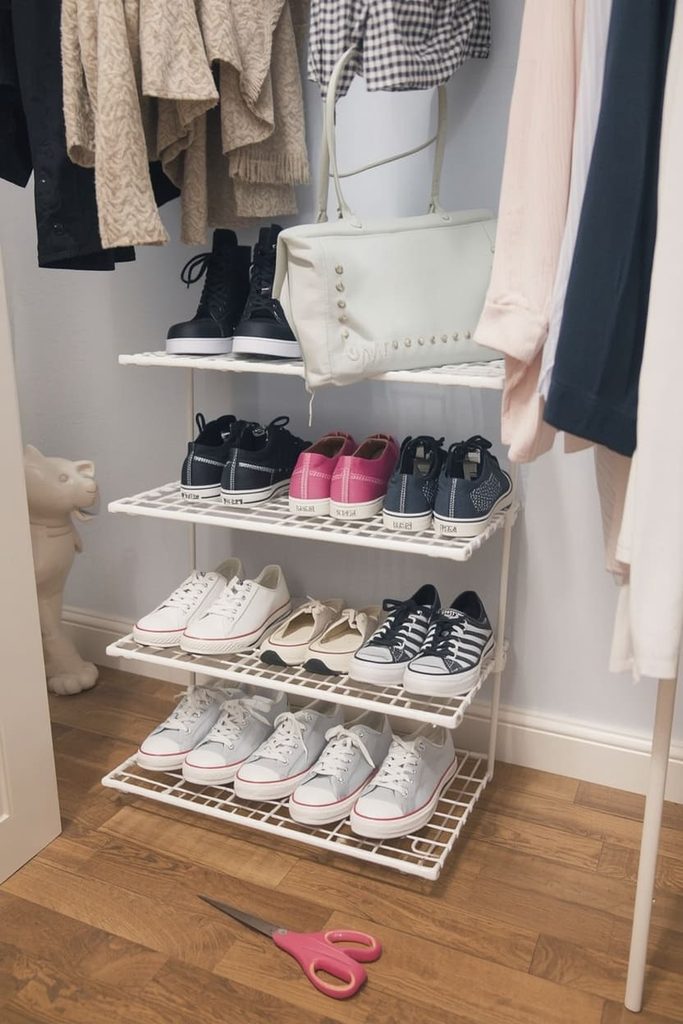
A slanted three-tier rack holds about nine pairs on the floor of your wardrobe. It costs $20 to $40 and takes 15 minutes. You need no tools.
The tilt is the trick. Each step shows the toe of every pair, so you stop digging. A rack about 24 in (61 cm) wide fits three pairs per tier. Three tiers add up to nine pairs. Most racks need only 10 to 12 in (25 to 30 cm) of floor depth. That leaves room for a bag in front.
What You Need
- A slanted three-tier shoe rack, about 24 in (61 cm) wide
- Non-slip shelf liner, about $5
- Scissors
- A tape measure
How to Do It
- Measure the width of your wardrobe floor.
- Measure from the floor to the lowest hem or shelf above it.
- Subtract 2 in (5 cm) from that height. This is the tallest rack that will fit.
- Pick a rack at least 1 in (2.5 cm) narrower than your floor width.
- Clear the floor and wipe it down.
- Build the rack using the box directions. Set the tiers to the angle you like.
- Cut the liner to match each tier. Lay it flat.
- Slide the rack against the back wall.
- Put tall sneakers on the bottom tier and low flats on top.
Tips
- Keep the top tier clear of long dress hems. Fabric snags on shoe buckles.
- Line up heels toe-out. You can then spot each pair at a glance.
- A rack that is too wide will bend or jam. Leave that 1 in (2.5 cm) gap.
Idea 3: Build a Pull-Out Tray So Back-Row Shoes Come to You
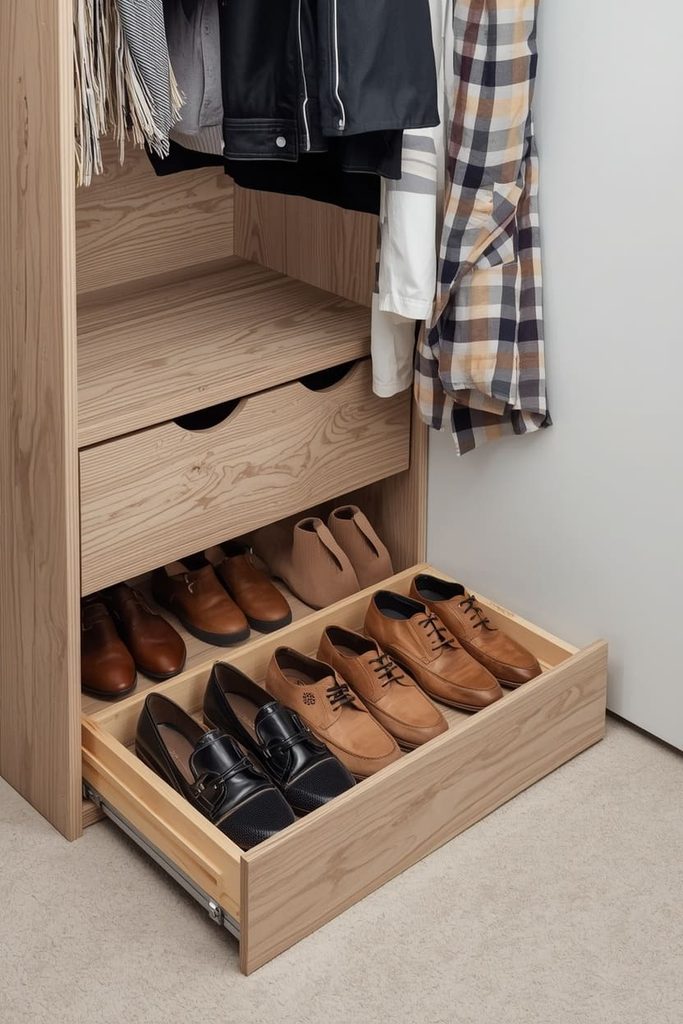
A pull-out tray holds about four pairs and slides out like a drawer. It costs $25 to $45 and takes about 90 minutes. You need a drill, so renters should ask first.
Deep wardrobes hide shoes in the back. A tray fixes that. You pull it forward and see everything. The base I used is 22 by 15 in (56 by 38 cm). Shoes lie side by side across the width, with about three pairs fitting across the depth. A second tray on top of the first doubles your count.
What You Need
- One sheet of 0.5 in (12 mm) plywood, cut by the store: one base 22 x 15 in (56 x 38 cm), two sides 15 x 3 in (38 x 8 cm), one front 23 x 3 in (58 x 8 cm)
- One pair of 16 in (40 cm) side-mount ball-bearing slides, $12 to $18
- Wood glue and 1 in (25 mm) screws
- 0.5 in (12 mm) screws for the slides
- Drill, level, pencil, sandpaper
How to Do It
- Measure your inside width. Subtract 1 in (2.5 cm). That is your tray’s outer width. My example wardrobe was 24 in (61 cm) wide inside.
- Sand every cut edge until smooth.
- Glue a side to each long edge of the base. Screw up through the base from below.
- Glue the front across the two sides. Screw it in place.
- Pull each slide apart into two pieces.
- Screw the inner pieces to the tray sides, flush with the bottom edge.
- Mark the wardrobe wall so the slide sits 2 in (5 cm) above the floor. Check it with the level.
- Screw the outer pieces to the wardrobe side panels with the short screws.
- Slide the tray in. Test it three times.
Tips
- Use screws that stop short of the panel’s outer face. Long ones poke through.
- Fix the slides before you add shoes. You can then adjust easily.
- Never skip the 1 in (2.5 cm) gap math. A tray that is too wide will not slide.
Idea 4: Build Two Plank Shelves on Wood Cleats
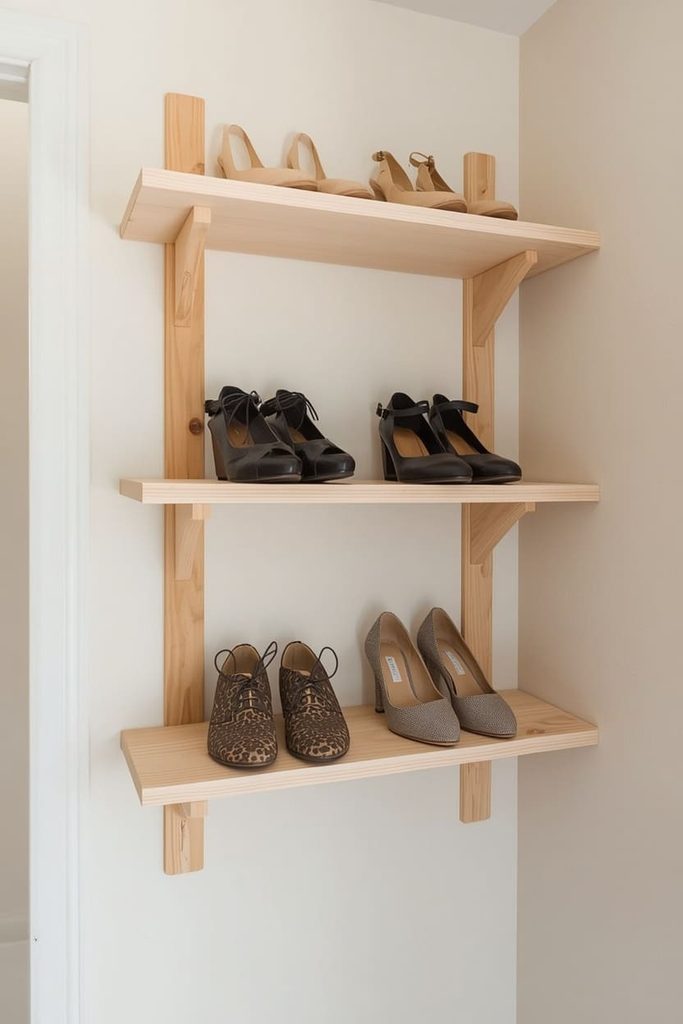
Two plank shelves plus the floor below hold about nine pairs. The build costs $20 to $35 and takes two hours. You need a drill and a saw, or a store that cuts wood.
Shelves turn tall empty space into storage. A real 1×10 pine board is about 9¼ in (23.5 cm) deep. That is enough for most adult shoes. A 24 in (61 cm) shelf fits three pairs. Two shelves hold six. The floor beneath holds three more.
What You Need
- Two 1×10 pine boards, cut to your inside width minus ¼ in (6 mm)
- A 1×1 in (2.5 x 2.5 cm) wood strip, cut into four 9 in (23 cm) cleats
- 1¼ in (32 mm) screws for cleats
- 1 in (25 mm) screws for shelves
- Drill, level, pencil, sandpaper
- Paint or clear sealer
How to Do It
- Find your tallest shoe. Add 1 in (2.5 cm) to its height. Mine was 7 in (18 cm).
- Mark the first shelf top at 8 in (20 cm) above the floor. Mark the second at 16 in (41 cm).
- Draw level lines on both inside walls at those marks.
- Set a cleat’s top edge ¾ in (2 cm) below each line. That is where the board sits flush.
- Pre-drill, then screw each cleat to the panel. Stop the screws short of the outer face.
- Sand each board. Paint or seal it and let it dry.
- Rest the boards on the cleats.
- Screw down through each board into the cleats.
Tips
- Test your screw length on a scrap of the same panel first.
- Add a bead of wood glue under each cleat. It adds strength.
- Plan more room for heels. They need about 8 in (20 cm) of height.
Idea 5: Hang a Shelf Organizer From the Rail for Heels, Flats, and Kids’ Shoes
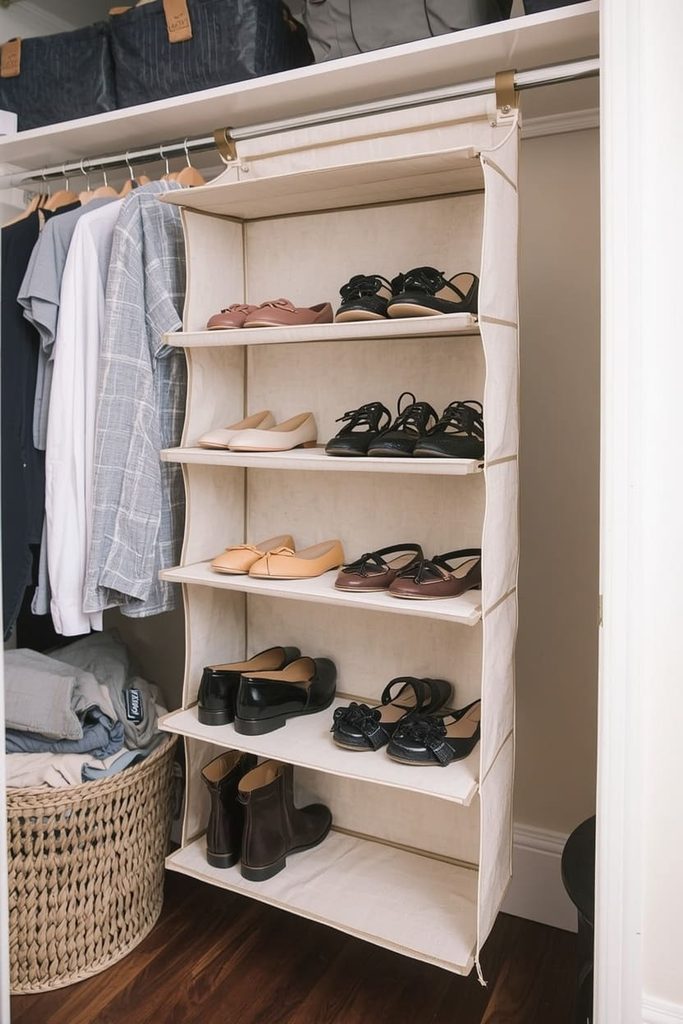
A hanging shelf organizer holds six pairs of adult shoes or more kids’ pairs. It costs $15 to $30 and takes five minutes. You need no tools.
This idea uses the air beside your clothes. A six-shelf organizer is about 12 in (30 cm) wide. Each shelf holds one adult pair or two pairs of small kids’ shoes. The fabric is soft, so it protects heels from scratches. It also shifts easily if your needs change.
What You Need
- A six-shelf hanging organizer with strap or hook closures
- Boot shapers, about $8 for a pair
- A tape measure
How to Do It
- Measure the clear space on your rail. You need at least 13 in (33 cm).
- Shift your clothes to make a gap.
- Wrap the top straps around the rail. Fasten them.
- Pull the sides out so each shelf sits flat.
- Place heels toes-out on the top shelves.
- Put flats and kids’ shoes in the middle.
- Keep the bottom shelf for heavier pairs.
- Slide a boot shaper into each tall boot. Lay the boots on their sides on the floor beneath the organizer.
Tips
- Hang it near the door end of the rail. You can reach it faster.
- Check the rail’s strength. A thin rail can sag under a full load.
- Do not stuff shelves. Crushed toes lose shape over time.
FAQs About Wardrobe Shoe Rack Storage
How many pairs of shoes fit in a small wardrobe?
Most small wardrobes hold 9 to 15 pairs with one of these ideas. Combine two ideas and you can reach about 20. Store the rest under your bed.
How do I keep dust off my shoes?
Close the doors fully. Wipe shelves monthly with a damp cloth. For special pairs, use clear boxes with lids.
How should I store high heels?
Stand them toes-out on a slanted rack or a hanging shelf. This keeps heels from digging into each other. Never stack them.
How do I store tall boots?
Slide in a boot shaper so they stay upright. Lay them flat on the wardrobe floor, or hang them by their pull tabs. Do not let the shafts fold.
Can I add shoe storage to a sliding-door wardrobe?
Yes. Ideas 2, 3, 4, and 5 work well with sliding doors. Idea 1 does not, because the hooks need a hinged door.
How do I stop my wardrobe from smelling like shoes?
Dry every pair before you put it away. Let wardrobe doors stand open for an hour each week. Tuck a cedar block into one corner.
Pick One Idea and Start This Weekend
You do not need a full dressing room. You need one idea that fits your wardrobe. Measure the inside tonight and write the three numbers down. Choose the project that suits your tools and budget. Finish it by Sunday. Next time you rush out the door, you will find both shoes in seconds.

Sohel Rana is the writer, editor, publisher, and founder of The Tidy Porch. He is the man who is responsible for the craft (my wife created) being converted into a written piece. He also helps her wife (Sumona) by capturing videos of each craft. In short, he brings each craft created by her wife in front of you by transforming it into an article and a video.
