
I still remember her face. She leaned in close to sniff my paper peonies before she caught herself.
“Wait,” she said, “these are paper?”
That moment changed how I craft. I stopped making flat, cartoonish flowers. I started chasing shadow, curl, and layers instead.
Now my mantel gets mistaken for a flower shop every spring. If you want that same double-take, you’re in the right place. These five flowers will get you there.
Top 5 Amazon Picks for 3D Paper Flowers
- Italian Crepe Paper Sheets – This heavyweight crepe stretches and curls without tearing, which is the secret to realistic petal edges.
- Floral Stem Wire (18-24 gauge) – Sturdy wire gives your flowers real structure so they hold their shape in arrangements.
- Ceramic Curling Tool Set – These small metal tools shape tight curls and cupped petals that scissors just can’t replicate.
- Hot Glue Gun with Fine-Tip Nozzle – Precision glue application matters when you’re layering dozens of tiny petals close together.
- Floral Tape (Stem Wrap) – This self-sealing tape hides wire and glue seams for a clean, professional stem finish.
The One Technique That Makes Every Flower Look Real
Before we get into each flower, learn this trick. It works on all five. Take any petal edge and run it gently along a curling iron barrel, a pencil, or a ceramic tool.
Don’t rush. Light pressure, slow pull.
This creates a soft curve instead of a flat, stiff edge. Real flower petals aren’t flat. They ripple, cup, and bend toward light. That single curl is what tricks the eye.
Skip it, and your flower reads as paper. Add it, and suddenly it breathes.
3D Paper Flower Crafts You Can Try Today
3D Paper Rose
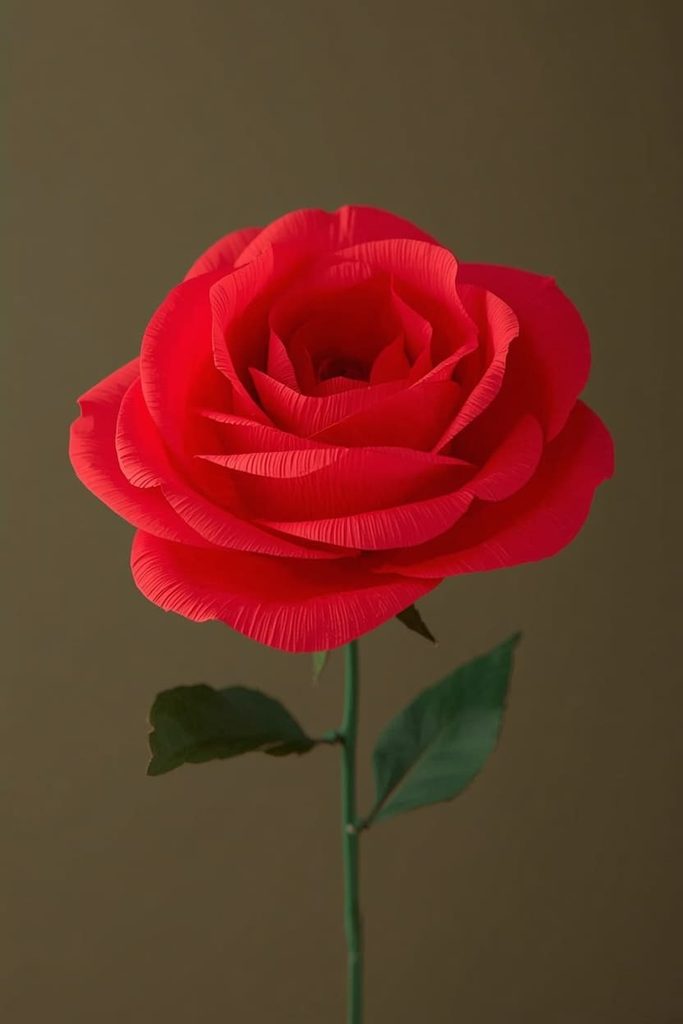
This rose is built petal by petal around a wire stem, growing from a tight bud to a full, open bloom. The layered cupping is what makes it look freshly cut instead of flat and folded.
Materials Needed
- Red or blush crepe paper (one full sheet)
- 18-gauge floral wire, cut to 12 inches
- Ceramic curling tool or pencil
- Hot glue gun
- Floral tape
- Scissors
Step-by-Step Instructions
- Cut five petal templates in graduating sizes, from 1.5 inches to 3.5 inches tall. Use these to cut five petals of each size from your crepe paper, for 25 petals total.
- Curl the top edge of every petal outward using your ceramic tool. Hold the paper at the very edge and pull slowly so the curl sits only in the top third of the petal.
- Cup each petal by pressing your thumb into the center from the back side while curving the two side edges forward. This gives the petal a slight bowl shape.
- Bend a small hook at the top of your wire stem. This anchors your first petal.
- Take your smallest petal and roll it tightly around the hook, sealing the base with a dab of hot glue. This forms your rosebud center.
- Add your next three smallest petals one at a time, overlapping each by about a third, gluing only at the base. Keep the top of each petal loose so it flares outward.
- Continue adding petals in size order, rotating slightly with each one so they spiral around the stem rather than stacking in a straight line.
- Once all 25 petals are attached, gently peel back the two or three outermost petals with your fingers to create an open, blooming look.
- Wrap floral tape around the base of the flower and down the entire stem, pulling gently to stretch and seal it as you go.
Tip
If your petals feel too stiff after cutting, stretch the crepe paper gently between your fingers before curling. This softens the fibers and makes the curl hold its shape longer.
3D Paper Sunflower
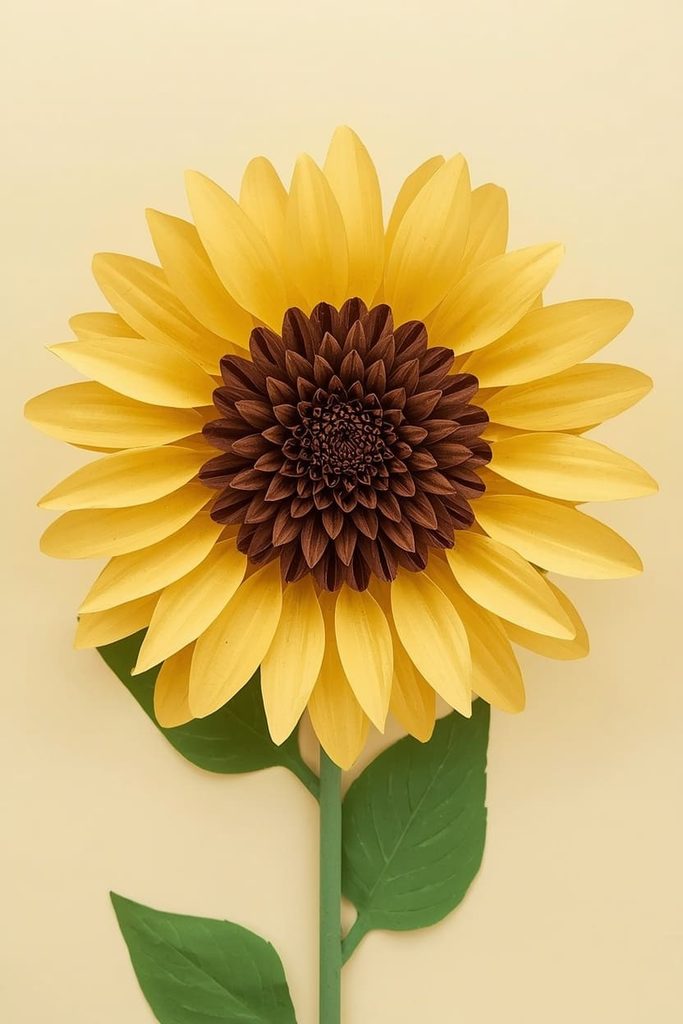
This sunflower pairs long, pointed petals with a textured brown center that mimics real seed heads. The center is what sells the realism here, so don’t rush that step.
Materials Needed
- Yellow or gold cardstock (one sheet)
- Brown crepe paper (half sheet)
- 18-gauge floral wire, cut to 14 inches
- Hot glue gun
- Scissors
- Floral tape
Step-by-Step Instructions
- Cut a petal template about 3 inches long and 1 inch wide at the base, tapering to a point. Use it to cut 14 petals from your yellow cardstock.
- Curl only the top half-inch of each petal tip, leaving the base completely flat and straight.
- Cut a strip of brown crepe paper roughly 2 inches wide and 10 inches long.
- Starting at one end, roll the strip tightly around itself to form a coil about 1.5 inches wide. Glue the loose end down to secure it.
- Gently unroll the top layer of the coil about a quarter-inch and fluff it with your fingertips to create a bumpy, textured surface.
- Attach the coiled center to the top of your wire stem with hot glue, letting it sit flat like a disc.
- Glue your 14 petals around the back edge of the center in one continuous ring, overlapping each petal slightly and angling the tips outward.
- Add a second, shorter row of petals behind the first row, positioned in the gaps between the front petals for extra fullness.
- Wrap floral tape from the base of the flower down the stem to finish.
Tip
For extra texture on the center, dab a little brown paint or chalk pastel into the fluffed coil before attaching it. This deepens the shadows between the bumps.
3D Paper Tulip
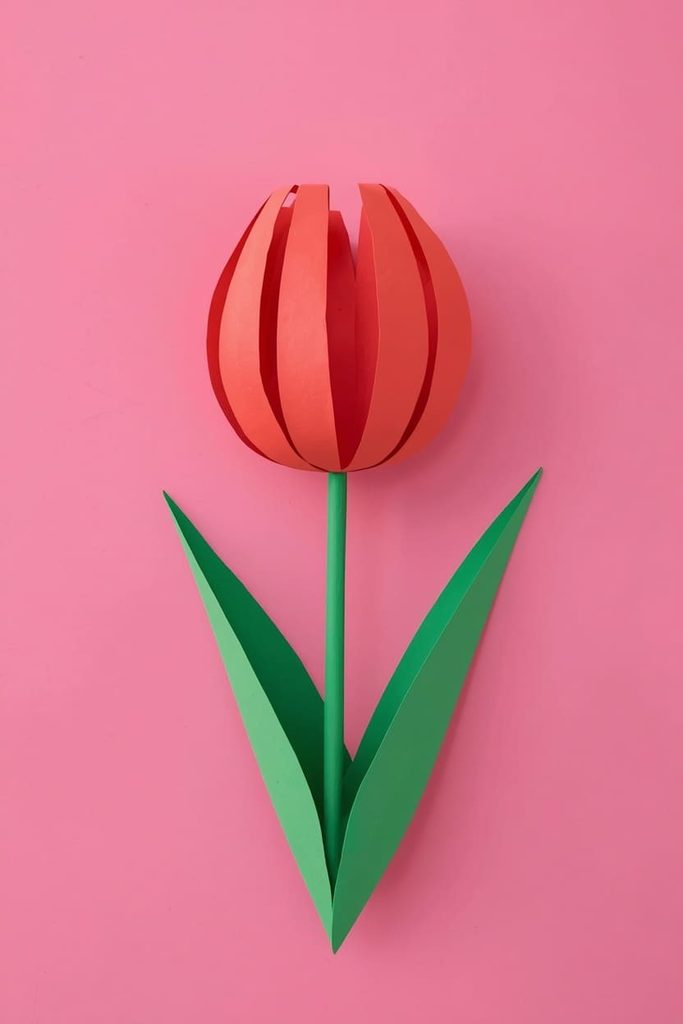
This tulip stays closed and cupped rather than fully open, which is what makes real tulips so recognizable. Two rotated layers of petals create the classic spiral twist.
Materials Needed
- Sturdy cardstock in pink, red, or yellow (one sheet)
- 18-gauge floral wire, cut to 12 inches
- Hot glue gun
- Scissors
- Floral tape
- Green cardstock for leaves (optional)
Step-by-Step Instructions
- Cut six petals shaped like elongated teardrops, each about 3 inches tall and 2 inches wide at the base.
- Cup each petal by pressing your thumb firmly into the center of the inside face while curving the outer edges inward, forming a small bowl shape.
- Bend a small loop at the top of your wire stem to give your first petals something to anchor to.
- Take three petals and glue their bases around the loop, spacing them evenly so their points meet at the top center.
- Take your remaining three petals and glue them around the stem just below the first layer, rotating them so each one sits in the gap between two petals above.
- Press the outer layer of petals gently outward at the base to widen the flower slightly while keeping the top pinched closed.
- If adding leaves, cut two long, pointed leaf shapes from green cardstock and glue them to the stem a few inches below the flower head.
- Wrap floral tape around the base of the flower and down the length of the stem.
Tip
Cardstock holds a cupped shape far better than crepe paper for tulips. If your petals keep springing flat, switch to a slightly heavier weight cardstock.
3D Paper Lotus
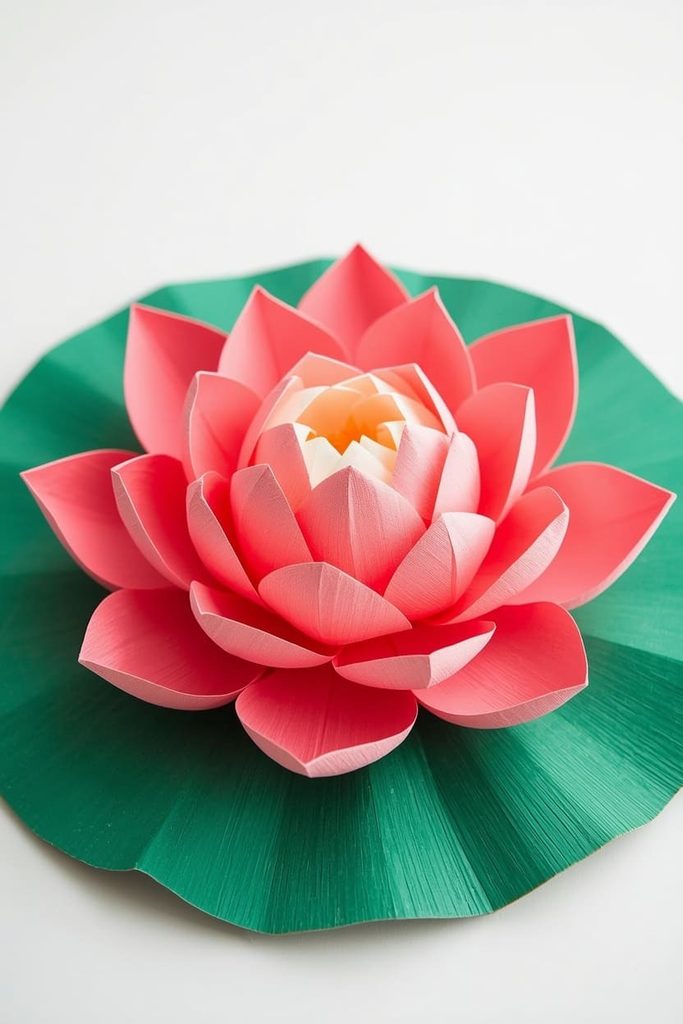
This lotus uses backward-curving petals layered around a flat base, which is the opposite curl direction from most other flowers. That detail alone is what makes it instantly recognizable.
Materials Needed
- Pink and white crepe paper (half sheet each)
- Sturdy cardboard or foam disc, 3 inches wide
- Hot glue gun
- Scissors
- Ceramic curling tool
Step-by-Step Instructions
- Cut three petal sizes, rounded at the top like a spoon shape: small (1.5 inches), medium (2.5 inches), and large (3.5 inches). Cut about eight petals of each size.
- Curl each petal tip backward, away from the center of the petal, using your ceramic tool. This is the opposite direction from the rose petals.
- For an ombré effect, dip the tip of each petal in diluted pink paint or blend pink and white crepe paper for different petal sizes.
- Starting with the largest petals, glue them flat around the outer edge of your cardboard disc, tips curling downward and outward like an open flower base.
- Add a second ring of medium petals slightly closer to the center, gluing them so they sit in the gaps between the outer petals.
- Add a final ring of small petals at the very center, curled tightly to represent the unopened middle of the bloom.
- Let the glue set fully before handling, since the disc base needs time to hold the weight of all three layers.
Tip
Work from the outside in, not the center out. Lotus flowers look most realistic when the largest, most open petals anchor the shape first.
3D Paper Peony
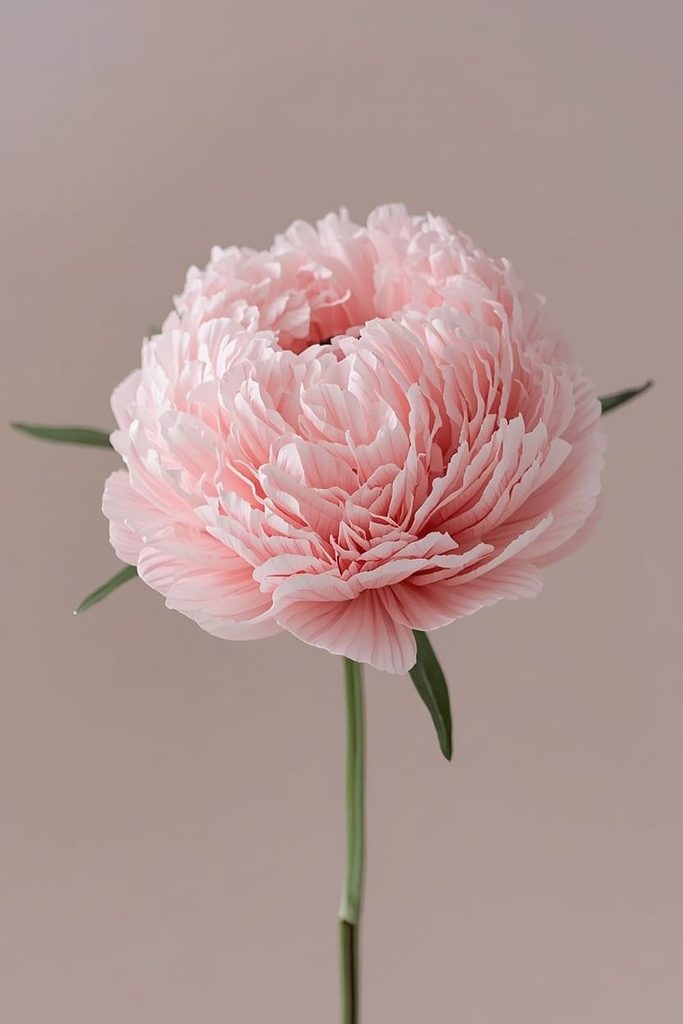
This peony relies on volume, not curl. Dozens of small, ruffled petals build up in a tight spiral to create the full, rounded shape peonies are known for.
Materials Needed
- Soft crepe paper in your chosen color (two sheets)
- 18-gauge floral wire, cut to 12 inches
- Hot glue gun
- Scissors
- Floral tape
Step-by-Step Instructions
- Cut 20 to 25 small, rounded petals about 2 inches tall, with slightly irregular, ruffled edges rather than smooth curves.
- Stretch the top edge of each petal gently between your fingers and thumbs to create a natural ripple. Do not curl these edges with a tool.
- Bend a small hook at the top of your wire stem to anchor the first petals.
- Roll your smallest, most tightly ruffled petal around the hook and glue the base to form a small center bud.
- Add three or four petals around that center, gluing only at the base and overlapping generously so no gaps show.
- Continue building outward in a tight spiral, adding petals in small clusters of three or four rather than one at a time, to save time and keep the shape even.
- As you move to the outer layers, use your largest petals and angle them slightly downward and outward for a fuller, blooming look.
- Once all petals are attached, gently fluff and separate the outer layers with your fingers so the flower doesn’t look flat from any angle.
- Wrap floral tape around the base and down the stem to finish.
Tip
Petal count matters more than precision here. If your peony looks sparse, add more small petals to the outer layers rather than trying to make existing petals bigger.
Displaying and Storing Your Paper Flowers
Keep finished flowers away from direct sunlight since crepe paper can fade over time. Store extras flat in a shoebox with tissue paper between layers to protect the curls.
For arrangements, group different flower types together rather than displaying one type alone. Mixing your rose, tulip, and peony together in one vase creates the layered, textured look of a real bouquet.
FAQs About 3D Paper Flowers
What paper works best for 3D paper flowers?
Italian crepe paper is the top choice because it stretches and curls without ripping, giving petals a soft, lifelike movement that regular paper can’t match.
How do you make paper flowers look less flat?
Curl or cup every petal edge before assembly. This single step adds shadow and dimension that flat-cut petals never have.
Can you make 3D paper flowers without a curling tool?
Yes. A pencil, chopstick, or even the edge of a scissor blade works fine for creating curls if you don’t own a dedicated tool.
How long do paper flowers last?
With proper storage away from sunlight and moisture, crepe and cardstock paper flowers can last for years without fading or losing shape.
What’s the easiest 3D paper flower for beginners?
The tulip is the simplest of these five since it only uses six petals in two layers, making it a good starting point before tackling peonies or roses.
Every flower here uses the same core idea. Curl, cup, layer, repeat. Once your hands learn that rhythm, you won’t need instructions anymore. You’ll just start creating.

Sohel Rana is the writer, editor, publisher, and founder of The Tidy Porch. He is the man who is responsible for the craft (my wife created) being converted into a written piece. He also helps her wife (Sumona) by capturing videos of each craft. In short, he brings each craft created by her wife in front of you by transforming it into an article and a video.
