
A rose flower paper craft is a simple and beautiful DIY project that turns ordinary colored paper into a lovely handmade flower.
With just a few basic supplies, you can create delicate petals, green leaves, and a realistic-looking rose to use as a decoration or handmade gift. This easy paper rose is also a fun activity for kids and beginners.
Follow the step-by-step instructions below to make your own colorful paper rose using simple cutting, shaping, rolling, and gluing techniques.
Materials Needed
- Colored craft papers – Choose your favorite color for the rose and green paper for the leaves and stem.
- Craft glue – Use paper-friendly glue to attach the petals, leaves, and other pieces.
- Pencil – For sketching and marking the petal and leaf shapes.
- Scissors – For carefully cutting the paper pieces.
How to Make a Rose Flower With Paper: Step-by-Step Craft Guide
Step 1: Choose the Paper Colors
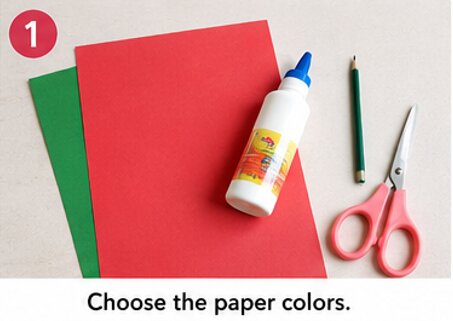
Start by selecting the colors for your paper rose. You can use red, pink, yellow, white, or any other color you like for the flower. Choose green craft paper for the leaves and stem.
For a more colorful arrangement, you can make several roses using different shades. Keep your paper flat and ready for sketching.
Step 2: Draw the Rose Petals
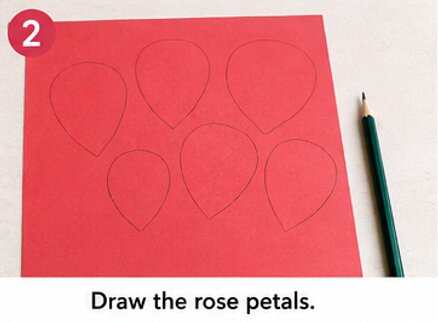
Take the colored craft paper you selected for the flower. Using a pencil, lightly draw several petal shapes.
Make the petals in different sizes. Smaller petals will work well for the center of the rose, while larger petals can be used toward the outside. You don’t need every petal to be perfectly identical. Slight variations can make the finished flower look more natural.
Carefully cut around each pencil outline with scissors.
Step 3: Cut the Petals
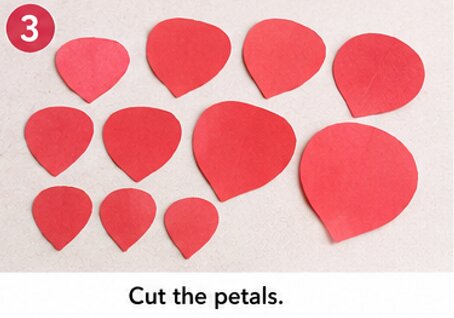
Once all the petals are drawn, carefully cut them out.
Prepare enough petals to build a full rose. You can start with several small petals and gradually increase the size. If you want a fuller flower, simply cut a few extra petals.
Try to keep the cuts smooth, but small imperfections are perfectly fine for a handmade paper flower.
Step 4: Shape the Petals
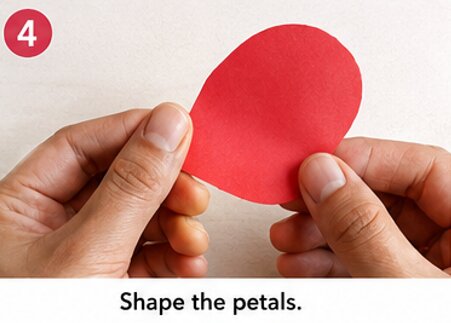
Now give the flat paper petals a little dimension. Gently curve each petal using your fingers.
You can slightly bend the outer edges backward or curl them inward depending on the look you want. Avoid making sharp creases because soft curves will give your rose a more natural appearance.
Shape the smaller petals more tightly and keep the larger petals slightly open.
Step 5: Create the Center of the Rose
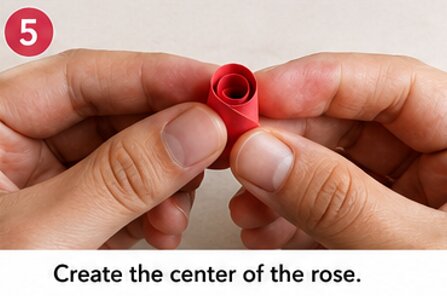
Take one of the smallest petals and gently curl it inward to form the center of the flower.
Apply a small amount of craft glue along the edge or bottom portion of the petal. Roll or wrap it around itself to create a small bud-like shape.
Hold it for a few seconds so the glue can secure the paper.
Step 6: Add the Next Petals
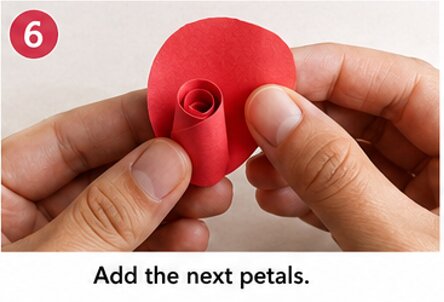
Take another small petal and place it around the center. Apply a small amount of glue to the lower portion of the petal and attach it to the rose center.
Slightly overlap the new petal with the previous one. Continue adding the smaller petals one at a time, rotating the flower as you work.
Don’t glue every petal completely flat. Leaving the upper edges slightly open will help create the layered appearance of a real rose.
Step 7: Build the Outer Layers
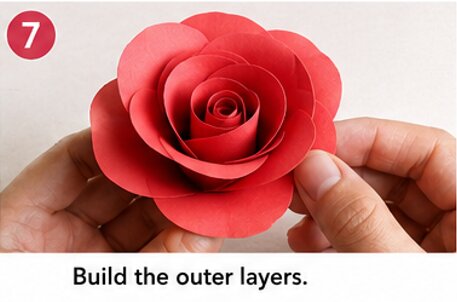
Once the center is formed, begin adding the larger petals.
Place each larger petal around the flower, slightly overlapping the previous petal. Add a small amount of craft glue near the bottom of each piece and press it gently into place.
Continue layering the petals until your rose reaches the desired size.
For a fuller paper rose, add more petals around the outside. Keep the outer petals more open and curved to create a blooming effect.
Step 8: Adjust the Rose Shape
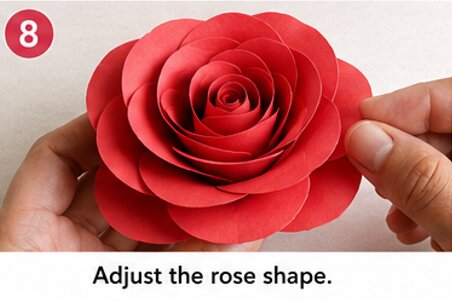
Look at your paper flower from different angles and adjust the petals where needed.
Gently curl a few outer petals outward and arrange the inner petals closer together. If some petals appear too flat, carefully reshape them with your fingers.
This step helps transform the layered paper pieces into a more realistic rose flower.
Step 9: Make the Leaves
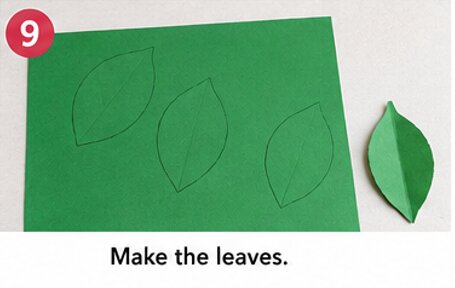
Take a sheet of green craft paper and use a pencil to draw several simple leaf shapes.
Cut out the leaves with scissors. For a more natural appearance, make a few leaves slightly different in size.
You can lightly fold each leaf down the center to create a subtle crease. This gives the paper leaves more dimension.
Step 10: Create the Stem
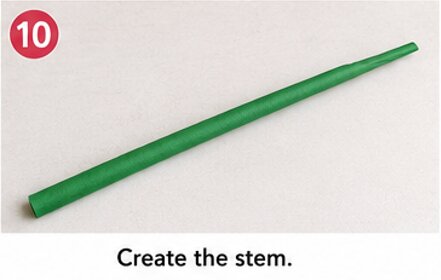
Cut a narrow strip of green paper to make the flower stem.
Roll the strip tightly from one end to the other and secure the edge with craft glue. If you prefer a thicker stem, fold or roll another strip of green paper around the first one.
Make sure the stem is firmly glued before attaching it to the flower.
Step 11: Attach the Leaves
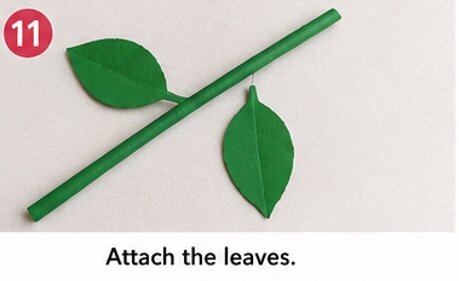
Apply a small amount of craft glue to the bottom of each green leaf.
Attach the leaves around the stem, positioning them at slightly different angles. Press them gently until the glue holds.
You can use two or three leaves depending on the look you want for your paper rose.
Step 12: Attach the Stem to the Rose
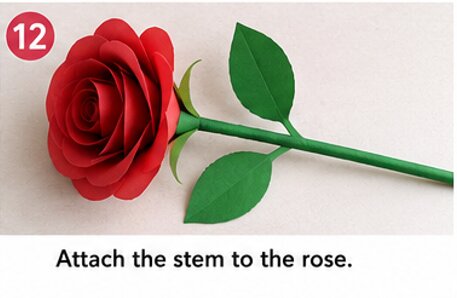
Finally, attach the green stem to the bottom of your paper rose.
Apply glue to the base of the flower and carefully connect the stem. Hold the pieces together for a few seconds and allow the glue to dry completely.
If necessary, add a small piece of green paper around the base to make the connection look neat.
Step 13: Give Your Paper Rose a Final Touch
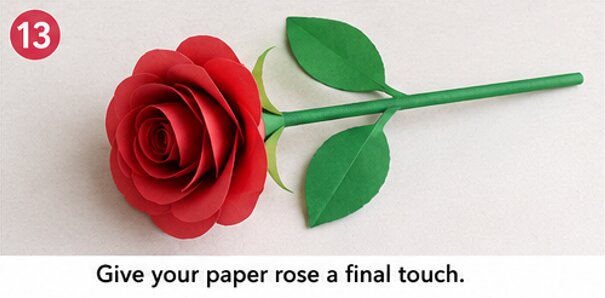
Once everything is secure, gently arrange the petals, leaves, and stem.
Open some outer petals slightly while keeping the center curled inward. You can also make several roses in different colors and arrange them together as a handmade paper bouquet.
Your beautiful rose flower paper craft is now ready to display!
Give It A Try
Making a rose flower from colored paper is an easy and enjoyable way to turn simple craft supplies into a beautiful handmade decoration.
You can experiment with different paper colors, petal sizes, and flower shapes to create your own unique designs.
Make a single paper rose for a small decoration or create several flowers for a colorful bouquet. Gather your paper, glue, pencil, and scissors, and give this simple DIY paper rose craft a try!

Sohel Rana is the writer, editor, publisher, and founder of The Tidy Porch. He is the man who is responsible for the craft (my wife created) being converted into a written piece. He also helps her wife (Sumona) by capturing videos of each craft. In short, he brings each craft created by her wife in front of you by transforming it into an article and a video.
