
Create a beautiful lotus flower paper craft using just construction paper, glue, and scissors. This simple DIY project transforms colorful paper into a layered lotus with delicate petals and a bright center.
It is easy enough for kids and beginners while also making a lovely handmade decoration. You can use your paper lotus for classroom projects, home décor, greeting cards, or a colorful flower display.
Follow the steps below to learn how to make a paper lotus flower from scratch.
Materials Needed
- Construction paper – Use pink, red, or any color you prefer for the lotus petals. Green paper can be used for the leaf.
- Glue – Regular craft glue or paper glue works well for attaching the petals.
- Scissors – Use scissors to cut the petals, center, and leaf shapes.
Step-by-Step Instructions to Make a Lotus Flower Paper Craft
Step 1: Choose Your Construction Paper
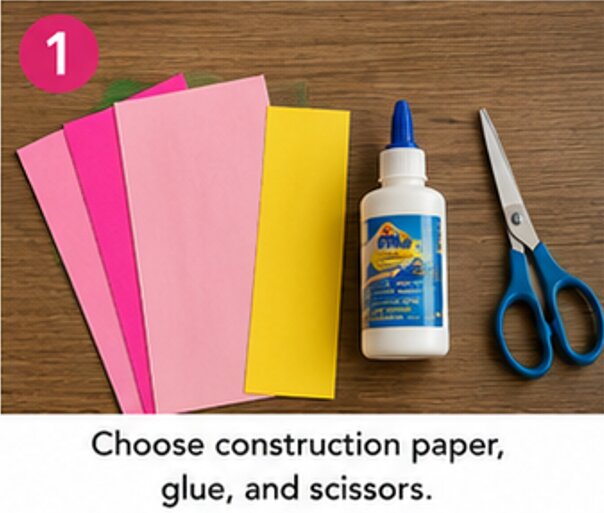
Begin by choosing the colors for your paper lotus. Pink and white create a soft, natural look, while bright pink, purple, or red can make the flower more colorful.
You will need one or more colors for the petals, yellow construction paper for the flower center, and green paper for the lotus leaf.
Step 2: Draw the Lotus Petals
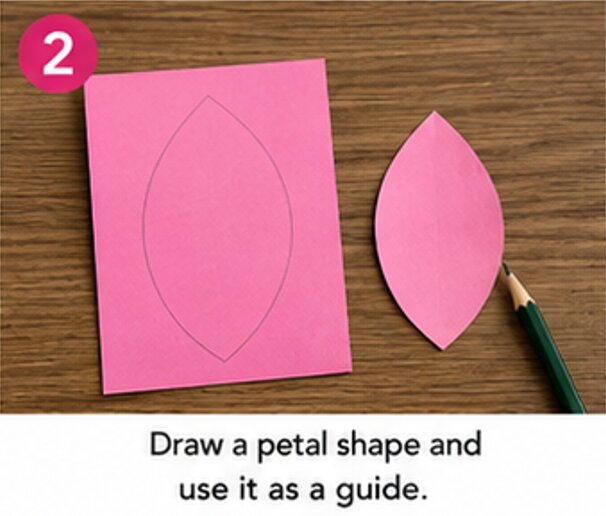
Take your chosen construction paper and draw a simple petal shape with a pencil. A lotus petal should be slightly pointed at the top and wider toward the bottom.
You can draw one petal first and use it as a guide for creating the others. Make several large petals and several smaller ones so your flower will have multiple layers.
Step 3: Cut Out the Petals
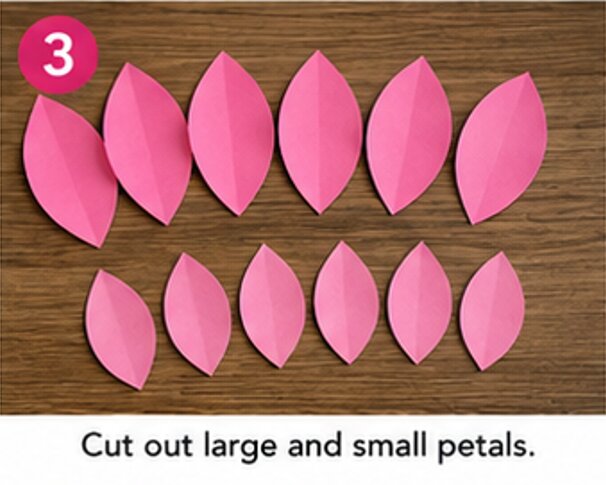
Carefully cut along the outlines with scissors. Prepare approximately 8–10 large petals and 8–10 smaller petals.
The petals do not have to be perfectly identical. Small differences in size and shape can give your handmade lotus a more natural appearance.
Step 4: Shape the Paper Petals
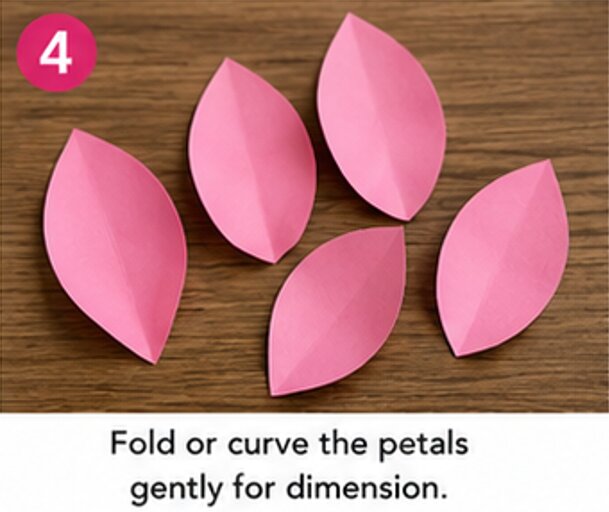
Give each petal some dimension by gently folding it lengthwise or curving it with your fingers.
Avoid making a sharp crease. A soft fold or gentle curve will help the petals stand upright and create a realistic blooming effect.
Shape the smaller petals more tightly and leave the larger petals slightly open.
Step 5: Make the Lotus Center
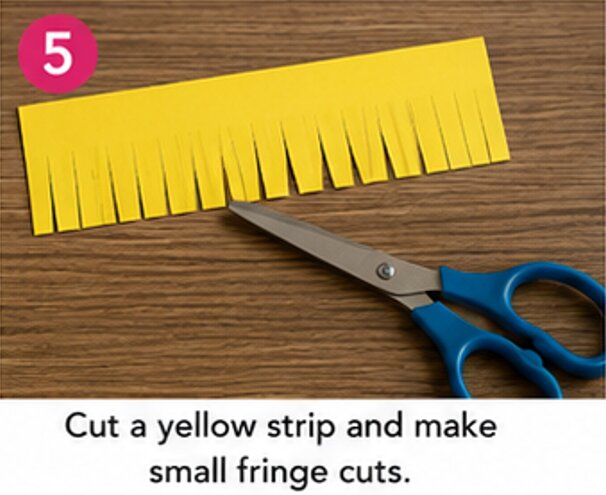
To create the center of the flower, cut a long, narrow strip from yellow construction paper.
Make small cuts along one long edge of the strip, creating a fringe. Be careful not to cut all the way through the strip.
Roll the strip tightly from one end to the other and add a little glue at the end to hold it in place.
Step 6: Open the Center
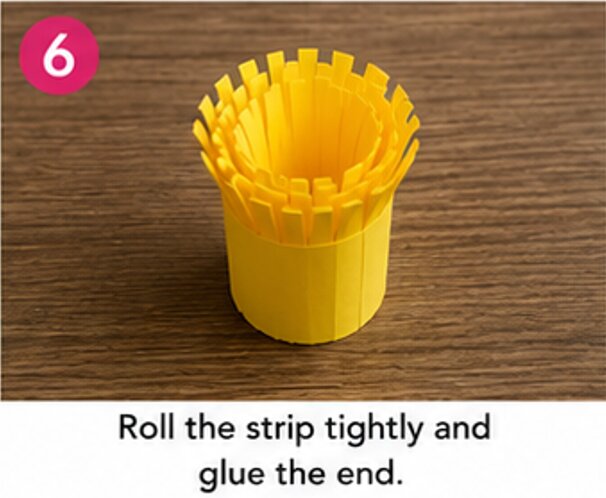
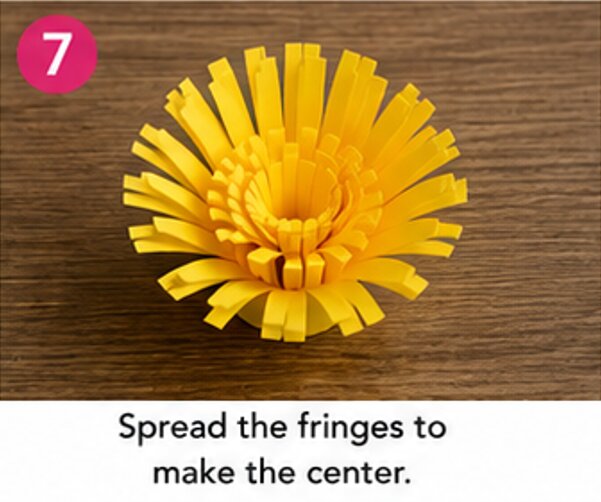
Once the glue has dried, gently spread the small fringes around the top of the rolled yellow strip.
This creates a bright, textured center for your paper lotus. Adjust the fringe pieces with your fingers so they stand slightly outward.
Step 7: Attach the Small Petals
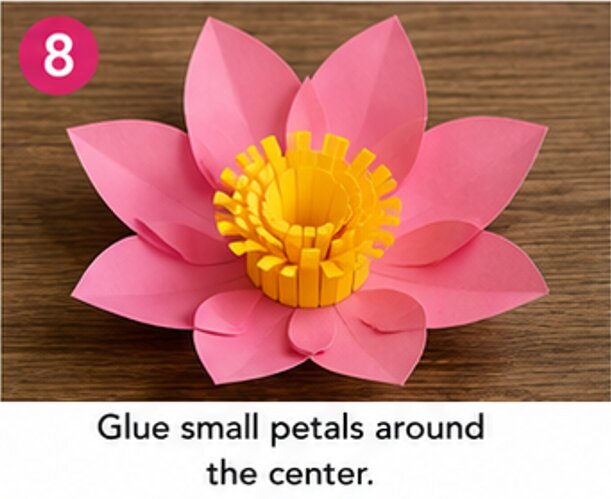
Take the smaller paper petals and begin attaching them around the yellow center.
Apply a small amount of glue to the bottom of each petal. Place the petals around the center, slightly overlapping one another.
Continue working around the flower until the first layer is complete. Keep the petals close together to create a full center.
Step 8: Add the Next Layer of Petals
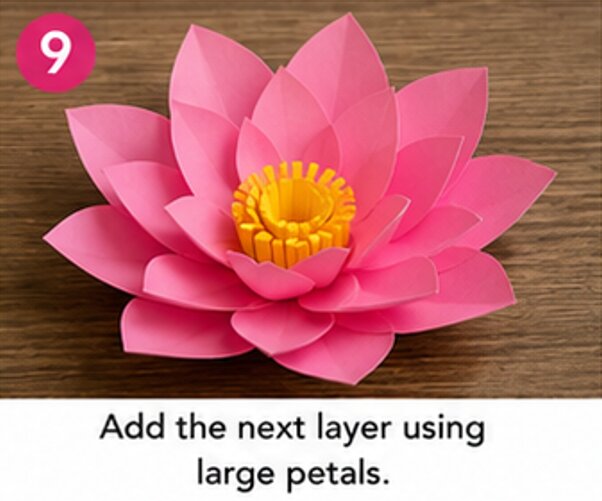
Now take the larger petals and begin creating the next layer.
Glue each petal slightly below and between the petals from the previous layer. Overlapping the petals will help hide gaps and make the lotus look fuller.
Rotate the flower as you work so the petals are distributed evenly around the center.
Step 9: Continue Building the Lotus
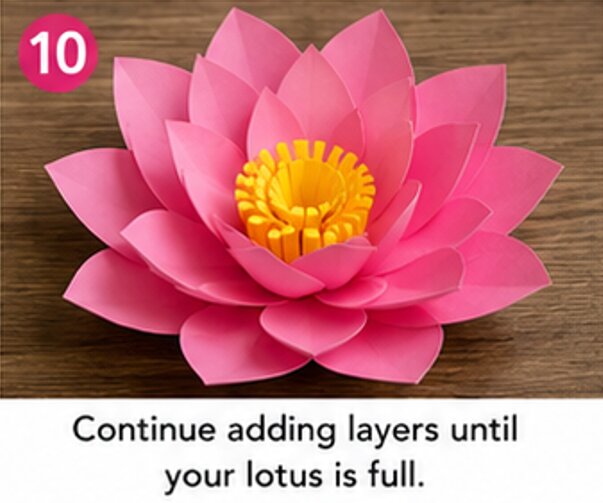
Keep adding layers of large petals until you reach the desired size.
For a more open lotus, gently curve the outer petals away from the center. For a fuller flower, keep the petals closer together.
You can also alternate different shades of construction paper to create a colorful layered effect.
Step 10: Adjust the Petal Arrangement
Once all the petals have been attached, inspect your flower from the top and sides.
Gently adjust any petals that look too flat or crowded. Curve the outer petals outward and leave the inner petals slightly upright.
This simple adjustment gives your paper flower more depth and makes it look like a blooming lotus.
Step 11: Make a Lotus Leaf
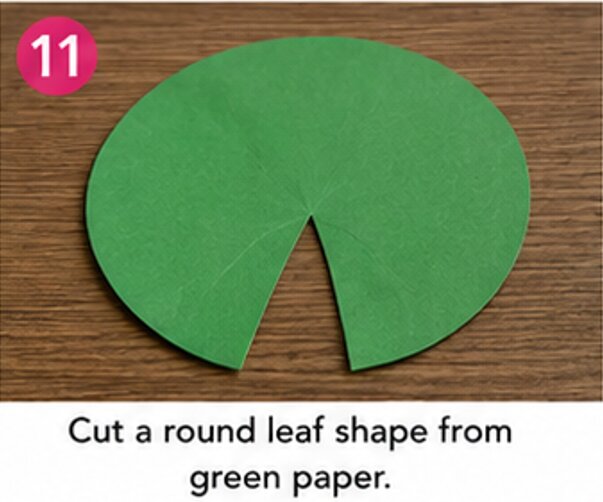
To complement the flower, create a simple paper lotus leaf.
Take a piece of green construction paper and cut out a large round or slightly oval shape. Make a small V-shaped cut from the outer edge toward the center to give it the characteristic appearance of a lotus leaf.
You can gently fold the leaf or add a few light creases to give it dimension.
Step 12: Place the Lotus on the Leaf
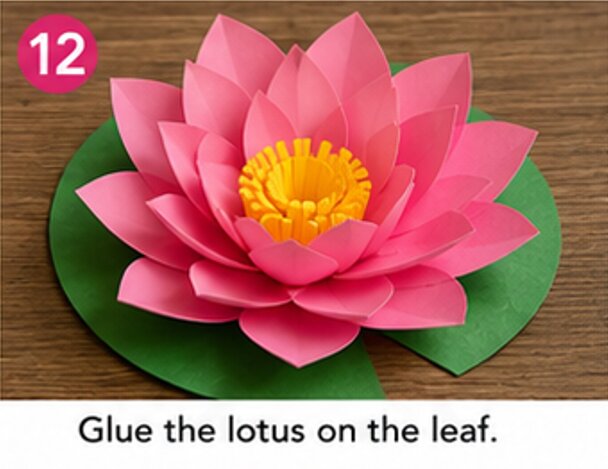
Apply a small amount of glue to the bottom of your finished lotus flower.
Place it in the center of the green paper leaf and press gently for a few seconds. Allow the glue to dry completely before moving the craft.
Your beautiful lotus flower paper craft is now complete!
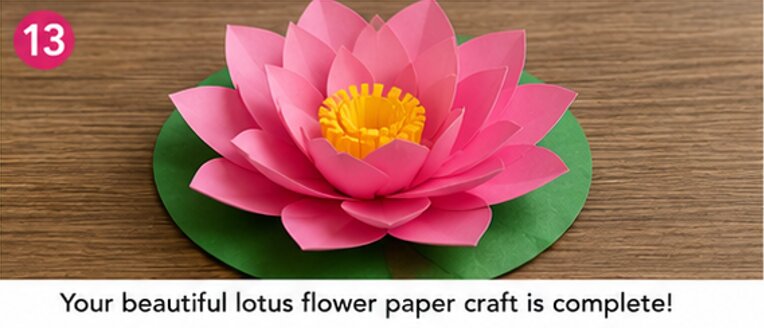
Step 13: Create More Paper Lotuses
Once you have mastered the basic technique, try making several lotus flowers in different colors.
You can experiment with different petal sizes, color combinations, and numbers of layers. Arrange several paper lotuses together to create a handmade floral display or use them to decorate a classroom, craft table, or special event.
Give It A Try
This lotus flower paper craft is a simple and creative way to turn ordinary construction paper into a beautiful handmade flower.
With only paper, glue, and scissors, you can create layered petals, a bright flower center, and a green lotus leaf.
Experiment with different colors and sizes to make your own unique designs. Gather your supplies and give this easy paper lotus craft a try!

Sohel Rana is the writer, editor, publisher, and founder of The Tidy Porch. He is the man who is responsible for the craft (my wife created) being converted into a written piece. He also helps her wife (Sumona) by capturing videos of each craft. In short, he brings each craft created by her wife in front of you by transforming it into an article and a video.
