
Bring a little springtime creativity to your day with this easy tulips flowers paper craft. Using simple construction paper, glue, and a marker, kids can create colorful tulip blooms with just a few easy steps.
This handmade flower project is perfect for preschoolers, kindergarteners, classroom activities, or a fun afternoon at home.
You can make tulips in different colors and arrange them together to create a cheerful paper flower garden or a beautiful handmade bouquet.
Disclaimer: This post may contain affiliate links.
Materials Needed
- Construction paper in colors of your choice
- Green construction paper for the stems and leaves
- Glue
- Marker
- Scissors
- Pencil
- Ruler, optional
How To Make Tulip Paper Flower: Step-by-Step Craft Guide
Step 1: Gather Your Craft Supplies
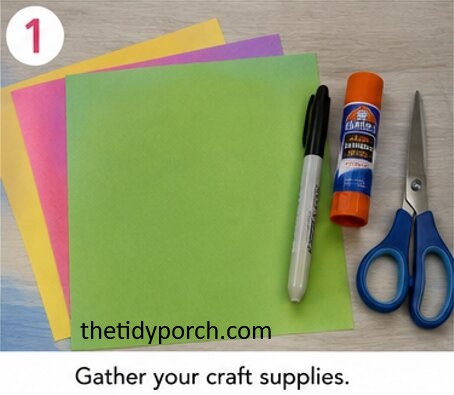
Before starting your tulip paper craft, gather all the materials and place them on a clean, flat work surface.
Choose bright colors for the tulip flowers, such as pink, red, yellow, purple, orange, or blue. Use green construction paper for the stems and leaves.
Keeping everything nearby makes the craft easier and more enjoyable, especially when children are working on their own.
Step 2: Draw the Tulip Flower
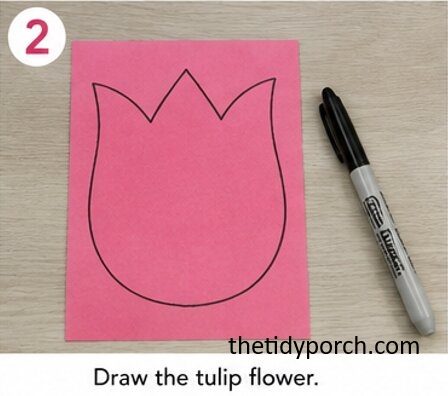
Take a piece of colored construction paper and use a pencil or marker to draw the outline of a tulip flower.
A simple tulip shape can look like a rounded flower head with several small points along the top. You don’t need a perfect outline. A slightly imperfect handmade shape can make the finished flower look more charming.
For younger children, an adult can draw the tulip outline first so they can concentrate on cutting and assembling the craft.
Step 3: Cut Out the Tulip
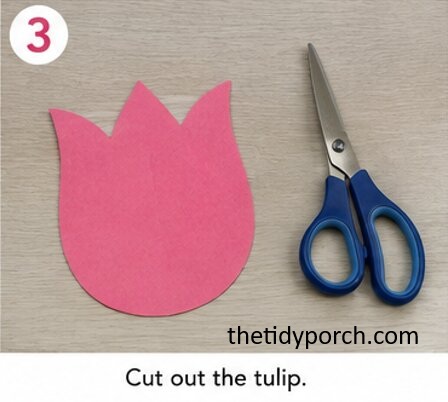
Carefully cut around the tulip outline using scissors.
Follow the drawn line as closely as possible, but don’t worry if the edges aren’t perfectly smooth. Handmade paper crafts often look more natural when they have small variations.
Once you’ve finished cutting, set the tulip flower aside while you prepare the other pieces.
Step 4: Create the Tulip Petals
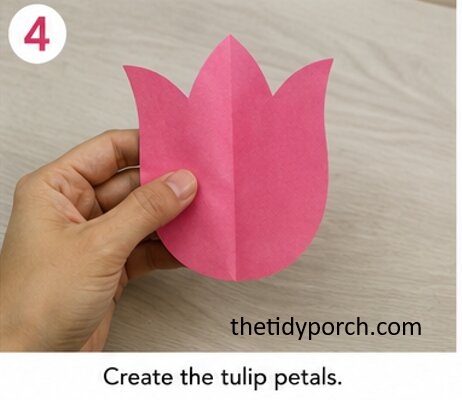
To give your flower more dimension, lightly fold the tulip shape down the middle.
You can also gently bend the outer sections of the flower backward or forward to create a slightly curved appearance.
Avoid making sharp creases because you want the tulip petals to retain a soft, rounded shape.
If you’re making several flowers, experiment with different petal shapes and folds to create a variety of handmade tulips.
Step 5: Draw and Cut the Stem
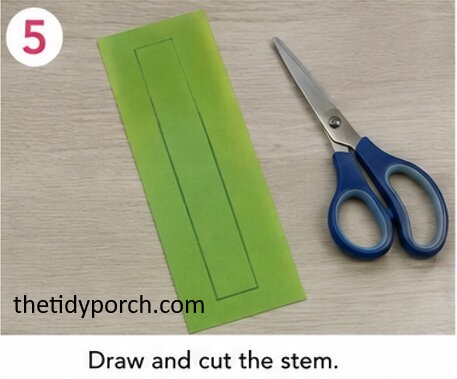
Take a sheet of green construction paper and draw a long, narrow stem.
Make the stem wide enough to support the flower but narrow enough to look like a natural tulip stalk.
Cut along the outline with scissors. If you are making a large paper flower, you can make a slightly wider stem for better support.
Step 6: Make the Tulip Leaves
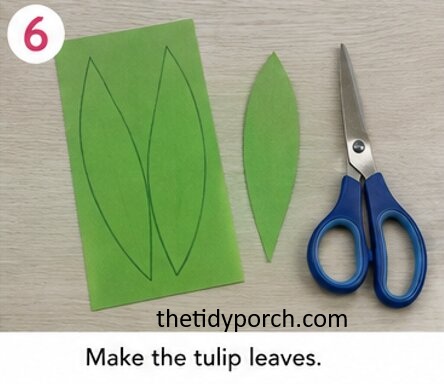
Using the same green construction paper, draw one or two long, pointed leaf shapes.
Tulip leaves are usually long and narrow, so make the leaves slightly curved rather than perfectly straight. This gives your paper flower a more natural appearance.
Cut out the leaves carefully.
You can make two leaves for each tulip or experiment with different sizes and shapes.
Step 7: Add Details With a Marker
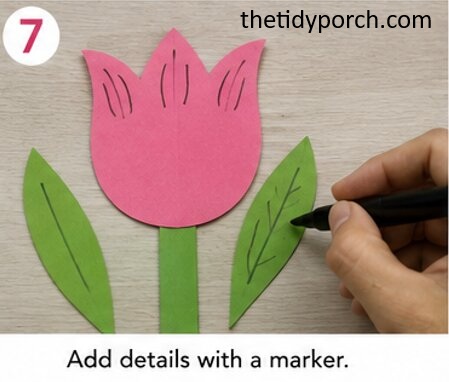
Use a marker to add simple details to the tulip petals and leaves.
For example, you can draw a few curved lines inside the flower to suggest the natural texture of the petals. Add a central line to each leaf to make it look more realistic.
Keep the details simple. A few lines are enough to give your construction paper tulip extra character.
You can also use a darker shade of marker that complements the color of your flower.
Step 8: Attach the Stem to the Flower
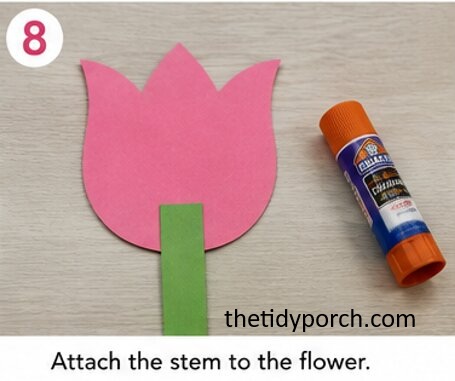
Turn the tulip flower over and apply a small amount of glue to its lower center.
Place the top of the green paper stem behind the flower and press it gently against the glue.
Hold the pieces together for a few seconds so they stay securely attached.
Allow the glue to set before moving on to the next step.
Step 9: Attach the Leaves
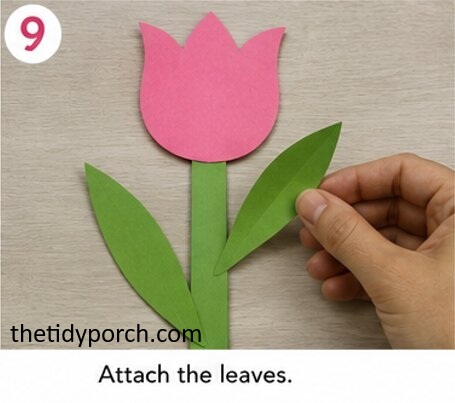
Apply a small amount of glue to the bottom portion of each green leaf.
Position the leaves along the stem, with one pointing slightly to the left and another toward the right.
Press them gently onto the stem and hold them in place until the glue grips.
You can adjust the angle of the leaves to make each tulip look slightly different.
Step 10: Shape the Finished Tulip
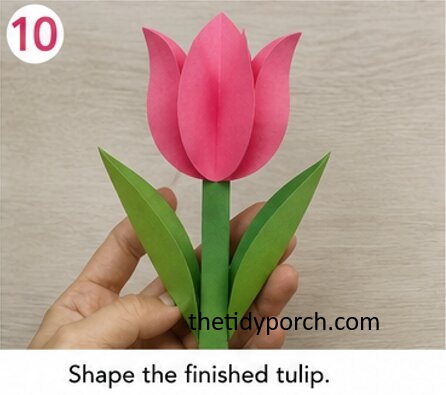
Once all the pieces are attached, gently shape the flower with your fingers.
Curve the petals slightly forward to give the tulip a three-dimensional appearance. You can also bend the stem or leaves very gently to make the flower look more natural.
Be careful not to fold or crease the construction paper too much.
Step 11: Make More Paper Tulips
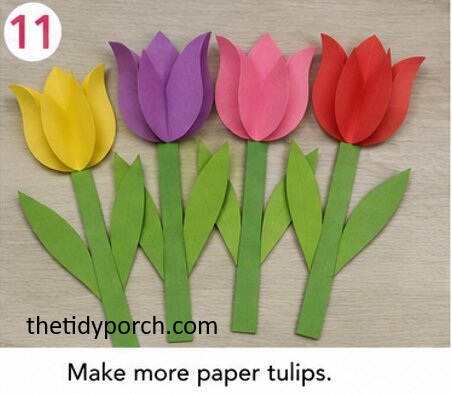
Repeat the process with different colors of construction paper to create a collection of paper tulip flowers.
Try making red, yellow, pink, purple, and orange tulips. You can also create flowers in unusual colors for a fun and imaginative paper garden.
Vary the size of the flower heads and leaves to make your collection more interesting.
Step 12: Arrange Your Paper Tulips
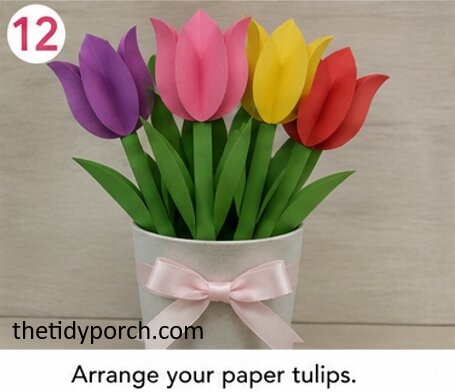
When your tulips are finished, arrange them together to create a colorful display.
You can glue several tulips onto a large sheet of blue construction paper to create a spring garden scene. Add grass, clouds, butterflies, or a paper sun to turn it into a larger art project.
Another option is to arrange the flowers into a handmade paper tulip bouquet.
For a classroom activity, each child can make a different colored tulip and combine all the flowers into one large spring-themed display.
Give It A Try
This tulips flower paper craft is a simple and creative way to turn basic construction paper into cheerful handmade flowers.
With just paper, glue, scissors, and a marker, kids can practice cutting, drawing, folding, and assembling while creating something they can proudly display.
Experiment with different tulip colors, petal shapes, and leaf arrangements to make every flower unique. Gather your craft supplies and give this easy paper tulip craft a try!

Sohel Rana is the writer, editor, publisher, and founder of The Tidy Porch. He is the man who is responsible for the craft (my wife created) being converted into a written piece. He also helps her wife (Sumona) by capturing videos of each craft. In short, he brings each craft created by her wife in front of you by transforming it into an article and a video.
