
Looking for a simple and colorful craft project? This flower tissue paper craft is an easy way to turn a few basic supplies into beautiful handmade flowers.
The soft, lightweight tissue paper creates delicate, fluffy petals, while cardstock provides a sturdy base. You can make the flowers in one color or combine several shades for a vibrant look.
Add a ribbon or cord to turn your finished flower into a hanging decoration, or use several flowers to create a handmade bouquet.
Materials Needed
- Tissue paper in one or more colors
- Scissors
- Tacky glue
- Cardstock
- Ribbon or cord, about 6 inches long
- Perfume, optional
- Pencil
- Ruler
Disclaimer: This post may contain affiliate links.
How to Make a Flower Tissue Paper Craft
Step 1: Prepare the Tissue Paper
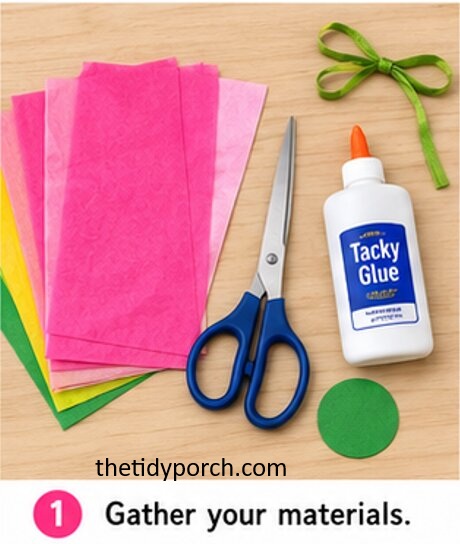
Choose one or more tissue paper colors for your flower. You can use a single shade for a simple, elegant flower or combine two or three colors for a more vibrant design.
Place the tissue paper flat on your work surface. Smooth out any large wrinkles so it is easier to measure and cut. Since tissue paper is lightweight and delicate, handle it gently throughout the project.
Step 2: Cut the Tissue Paper
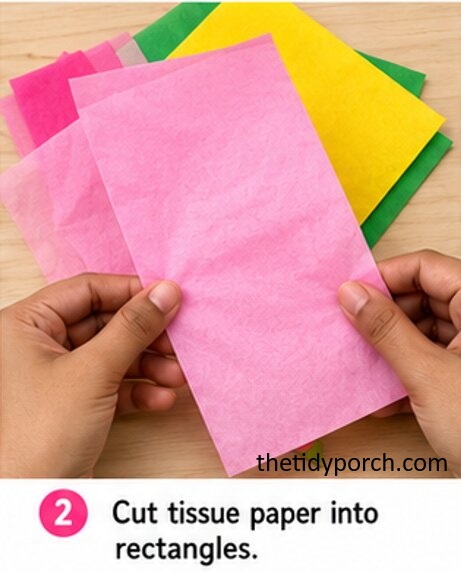
Measure and cut several tissue paper pieces into similar-sized rectangles. The exact size can vary depending on how large you want your finished flower to be.
For a small decorative flower, pieces around 5 × 7 inches work well. If you want a larger bloom, use bigger sheets.
Try to keep the pieces reasonably even, but they do not need to be perfectly measured. Slight variations can give your handmade flower a natural appearance.
Step 3: Layer the Tissue Paper
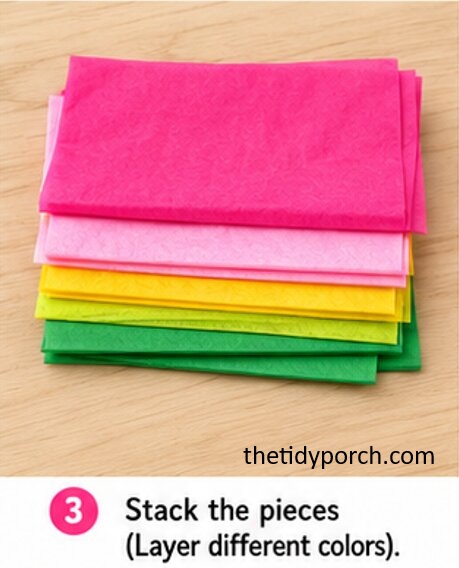
Stack the tissue paper rectangles on top of one another. If you’re using multiple colors, alternate the shades to create colorful layers.
Smooth the stack with your fingers and align the edges as closely as possible. A few uneven edges are fine and can make the finished flower look more handmade.
The more layers you use, the fuller and fluffier your flower will become.
Step 4: Fold the Tissue Paper
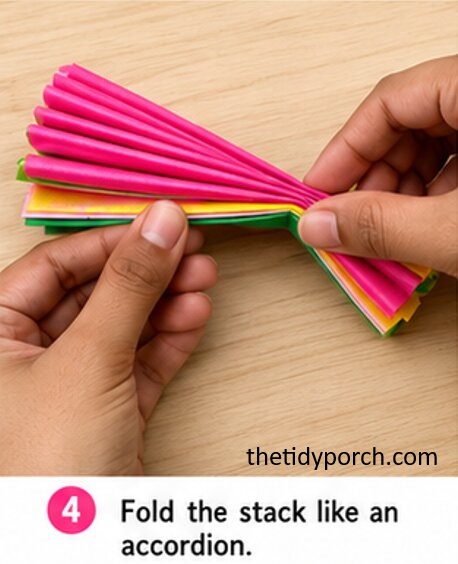
Starting from one short edge, begin folding the entire tissue paper stack back and forth like an accordion.
Make each fold approximately the same width. Continue folding until you reach the opposite end.
Press each crease gently with your fingers to help keep the folded stack together. Avoid pressing too hard because tissue paper can tear easily.
Step 5: Secure the Center
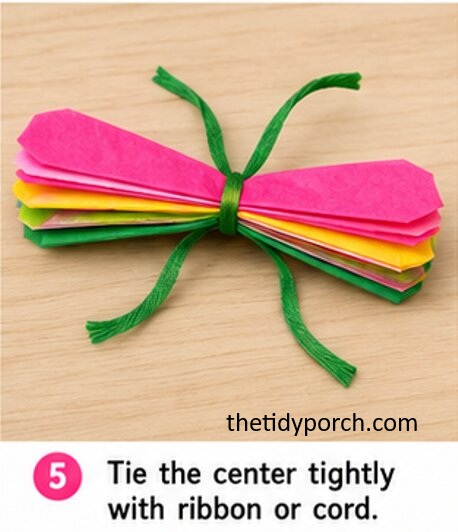
Once the entire stack has been accordion-folded, find the center.
Wrap a small piece of ribbon or cord around the middle and tie it securely. Leave enough ribbon at the top to create a hanging loop if you plan to display the flower as a decoration.
Make sure the center is tight enough to hold all the tissue paper layers together.
Step 6: Shape the Ends
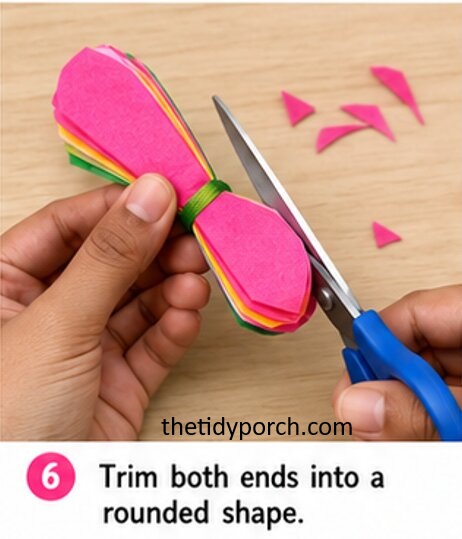
Use scissors to trim the two ends of the folded tissue paper.
You can cut the ends into a rounded shape for soft-looking petals, or make small angled cuts for a slightly different flower design.
If children are making the craft, an adult can help with the cutting when necessary.
Don’t worry if both sides aren’t perfectly identical. Natural-looking flowers often have small imperfections.
Step 7: Open the Tissue Paper Layers
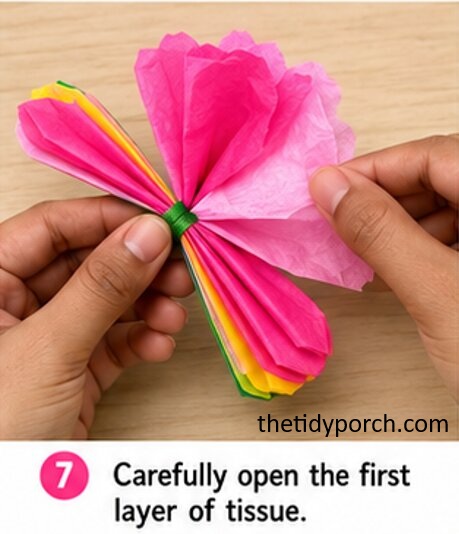
This is the step that transforms the flat folded stack into a flower.
Carefully lift one tissue paper layer from one side of the center. Pull it upward and toward the middle, gently separating it from the layers underneath.
Continue lifting the layers one at a time. Work slowly so you don’t accidentally tear the delicate tissue paper.
Once you have opened several layers on one side, turn the flower over and repeat the process on the other side.
Step 8: Fluff and Shape the Flower
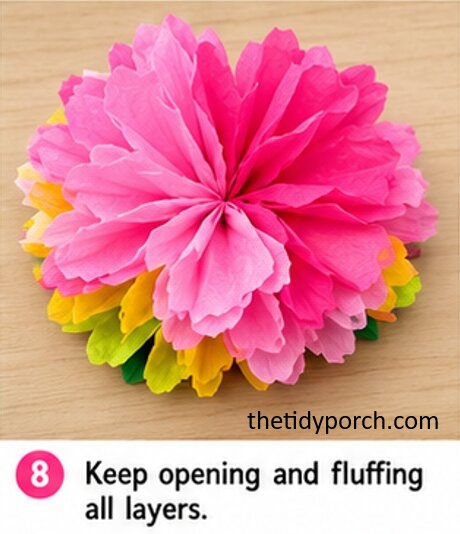
Continue separating and spreading the tissue paper layers until the flower becomes full and rounded.
Use your fingertips to gently fluff the petals and arrange any sections that look flat. Spread the layers evenly around the center to create a balanced bloom.
If you want a fuller flower, carefully pull the outer layers slightly farther apart. For a tighter bloom, leave the layers closer together.
Step 9: Prepare a Cardstock Base
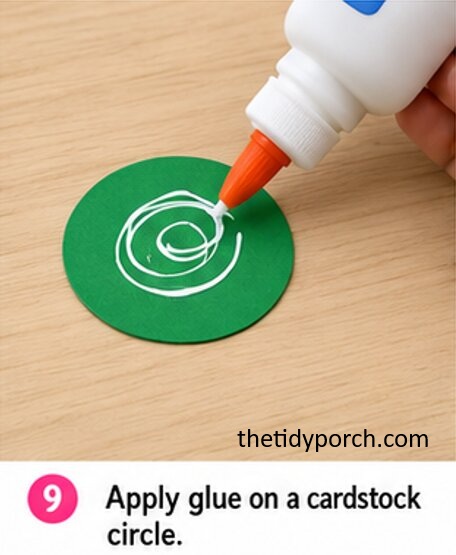
Cut a small circle from cardstock. This will provide a sturdy base for your tissue paper flower.
The cardstock circle should be smaller than the overall flower so it remains hidden beneath the petals.
Apply a small amount of tacky glue to the cardstock circle. Avoid using too much adhesive because excess glue can soak into the delicate tissue paper.
Step 10: Attach the Flower to the Cardstock
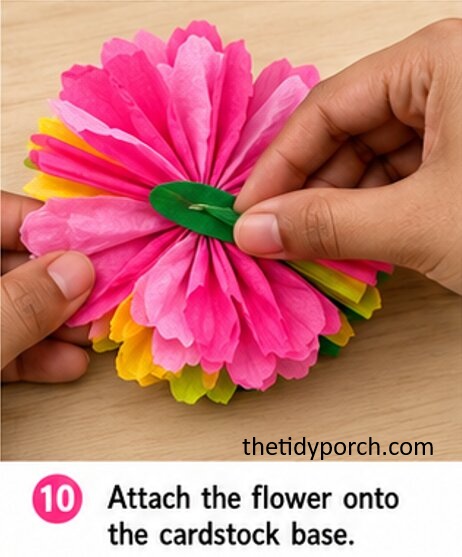
Carefully position the center of your tissue paper flower over the glued cardstock.
Press the center gently against the cardstock so it sticks securely. Hold it in place for a few moments to allow the tacky glue to grip.
If needed, add a little more glue around the center rather than applying large amounts to the petals.
Allow the adhesive to dry according to the glue manufacturer’s instructions.
Step 11: Add the Hanging Ribbon or Cord
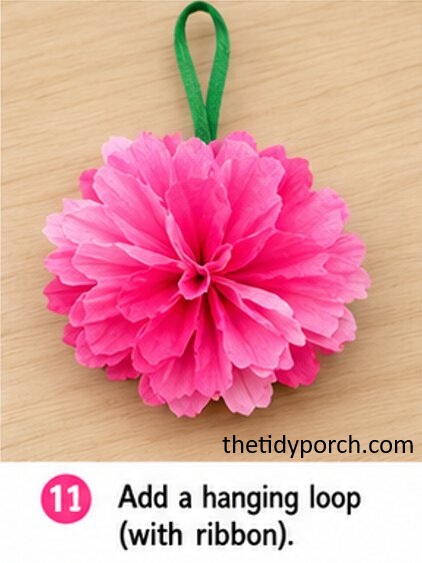
If you want to turn your flower into a hanging decoration, use the ribbon or cord you attached earlier to create a small loop.
Tie the ends securely and check that the knot is strong enough to support the lightweight flower.
You can hang your finished bloom from a wall hook, doorknob, decorative branch, or other suitable spot.
Step 12: Add a Light Fragrance (Optional)
For a scented flower, you can add a very small amount of perfume to the finished craft.
Spray lightly from a distance rather than soaking the tissue paper. Too much moisture can make the tissue paper wrinkle, tear, or lose its shape.
This step is completely optional. Your flower will look beautiful even without fragrance.
Step 13: Make More Flowers
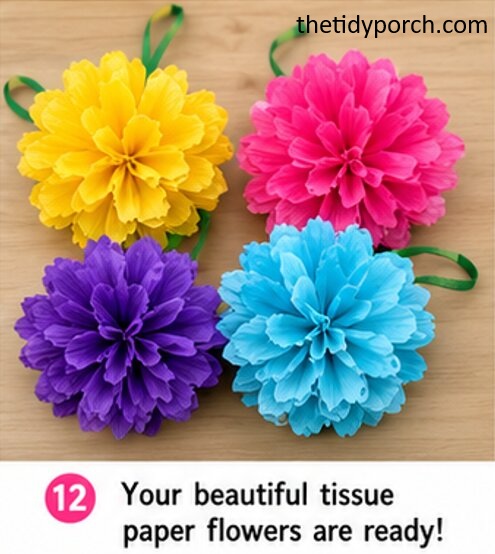
Once you have completed your first tissue paper flower, experiment with different colors and sizes.
Try combining contrasting shades for bright floral decorations or use similar colors for a softer appearance. You can also make several flowers and arrange them together as a handmade paper flower bouquet.
Mixing different flower sizes can make the arrangement look more interesting and natural.
Give It A Try
This flower tissue paper craft is a simple, affordable project that turns ordinary tissue paper into beautiful handmade blooms.
With just a few basic supplies, you can experiment with colors, layers, shapes, and sizes to create flowers that match your style.
Make a single flower for a small decoration or create several to form a cheerful bouquet. Gather your tissue paper, scissors, and glue, and give this easy DIY flower craft a try!

Sohel Rana is the writer, editor, publisher, and founder of The Tidy Porch. He is the man who is responsible for the craft (my wife created) being converted into a written piece. He also helps her wife (Sumona) by capturing videos of each craft. In short, he brings each craft created by her wife in front of you by transforming it into an article and a video.
