
One morning, I tripped over a pile of shoes and nearly took out the coat rack. My entryway is tiny. There is no closet by the door.
Shoes just landed wherever they landed. I stood there holding one shoe and a lot of frustration. Sound familiar?
I had a Kallax shelf sitting in the corner. It held nothing but a plant. Then I turned it into a shoe station, and the pile vanished. That one cheap shelf now does the work of three pieces of furniture.
Below are five ways to set yours up. Each one comes with supplies, steps, and tips you can use this weekend.
What to Know Before You Buy or Build
Pick the smallest Kallax that fits your shoe count. A 2×2 unit fits a small entryway and holds about four people’s daily shoes. A 2×4 gives you eight cubes when you need more. A 1×4 works well on its side as a low bench.
Check the cube size. Each cube is about 13 by 13 inches inside. Measure yours before you buy bins or inserts. Sizes can differ by model.
Know what fits. One cube usually holds one or two pairs of adult shoes. It holds three or four pairs of kids’ shoes. That is plenty for daily wear.
Anchor it to the wall. Tall units can tip, especially with kids around. Use the anti-tip hardware that comes with the shelf. It takes ten minutes. It also keeps your family safe. That is the only step here that needs a drill.
Choose your spot. Look for a wall near the door. Leave about 20 inches of floor in front so the door still opens and people can bend down. A shelf in the wrong place will just move the pile somewhere else.
Idea 1: One Cube Per Person for a Labeled Family Shoe System
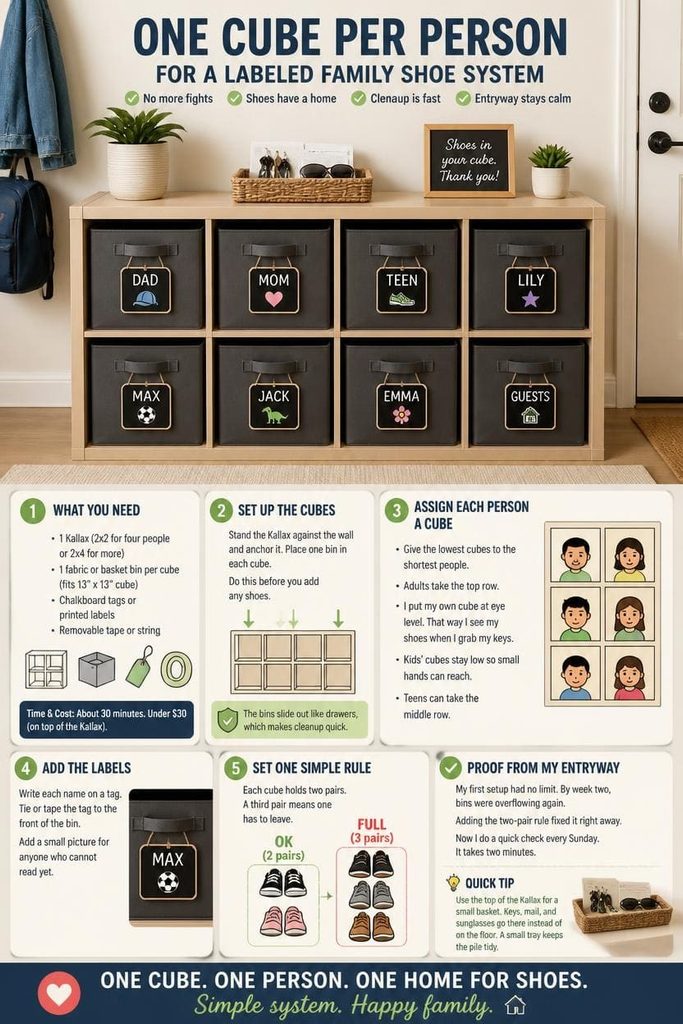
Give every person one cube and one bin. Each person then knows exactly where their shoes go. Fights over “who left this here” stop fast.
What you need:
- 1 Kallax, 2×2 for four people or 2×4 for more
- 1 fabric or basket bin per cube, sized for a 13 by 13 inch cube
- Chalkboard tags or printed labels
- Removable tape or string
Time and cost: About 30 minutes. Under $30 on top of the Kallax.
Set Up the Cubes
Stand the Kallax against the wall and anchor it. Place one bin in each cube. Do this before you add any shoes. The bins slide out like drawers, which makes cleanup quick. Pick bins in one color. A matching set looks calm, even when the shoes are not.
Assign Each Person a Cube
Give the lowest cubes to the shortest people. Adults take the top row. I put my own cube at eye level. That way I see my shoes when I grab my keys. Kids’ cubes stay low so small hands can reach. Teens can take the middle row.
Add the Labels
- Write each name on a tag.
- Tie or tape the tag to the front of the bin.
- Add a small picture for anyone who cannot read yet.
Set One Simple Rule
Each cube holds two pairs. A third pair means one has to leave. This rule keeps the system from filling up.
Proof from my entryway: My first setup had no limit. By week two, bins were overflowing again. Adding the two-pair rule fixed it right away. Now I do a quick check every Sunday. It takes two minutes.
Quick tip: Use the top of the Kallax for a small basket. Keys, mail, and sunglasses go there instead of on the floor. A small tray keeps the pile tidy.
Idea 2: Entryway Bench: Lay the Kallax on Its Side and Add a Cushion
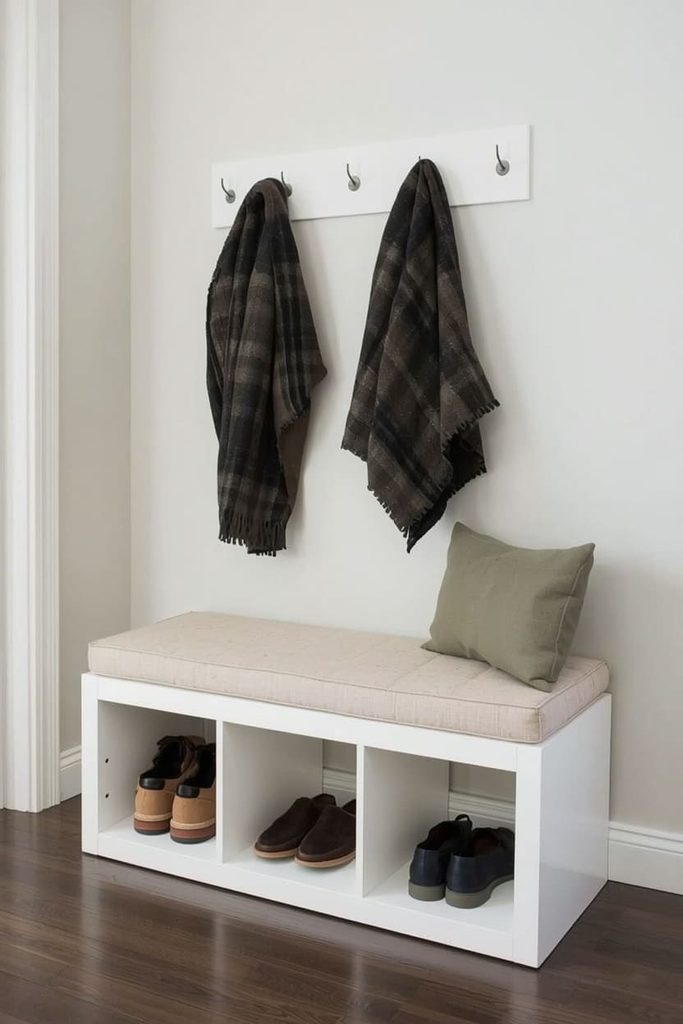
A Kallax laid on its side becomes a bench with built-in shoe cubes. You sit to put on shoes, and you store them right under you. It saves floor space in a tight entry.
What you need:
- 1 Kallax, 1×4 (four cubes in a row)
- 1 piece of 2-inch-thick foam, cut to the top size
- Fabric, about 1 yard
- Hot glue or fabric glue
- Felt furniture pads
- Non-slip rug pad
Time and cost: About 60 minutes. Under $35 on top of the Kallax.
Lay the Unit Flat
Set the 1×4 on its side with the openings facing you. Stick felt pads under each corner. The felt protects your floor and helps the bench stay put. Measure the height. Mine came out to about 16 inches, which is a comfortable seat before the cushion.
Cut the Foam
Trace the top of the bench onto the foam. Cut along the line with a serrated bread knife. A sharp knife gives smooth edges. Dull knives tear the foam. Cut a bit small, not big. You can always trim more, but you cannot add foam back.
Cover the Cushion
- Lay the fabric face down.
- Set the foam on top.
- Pull the fabric tight over each edge.
- Glue the edges to the underside of the foam.
- Fold the corners like a gift wrap.
Work on a clean floor so the fabric stays clean.
Keep It From Sliding
Cut a rug pad to the bench top. Place it under the cushion. Now the seat stays put when you sit down.
Proof from my bench: My first cushion slid off every time I sat. I felt silly. The rug pad fixed it in one minute. Check IKEA’s stated weight limit for your model before anyone sits, and do not let people stand on it.
Quick tip: Put baskets in the two middle cubes for hats and gloves. Keep shoes in the end cubes. Slide a folded towel in one cube for wet boots in winter.
Idea 3: Double-Up Cubes That Fit Two Pairs in Each Space
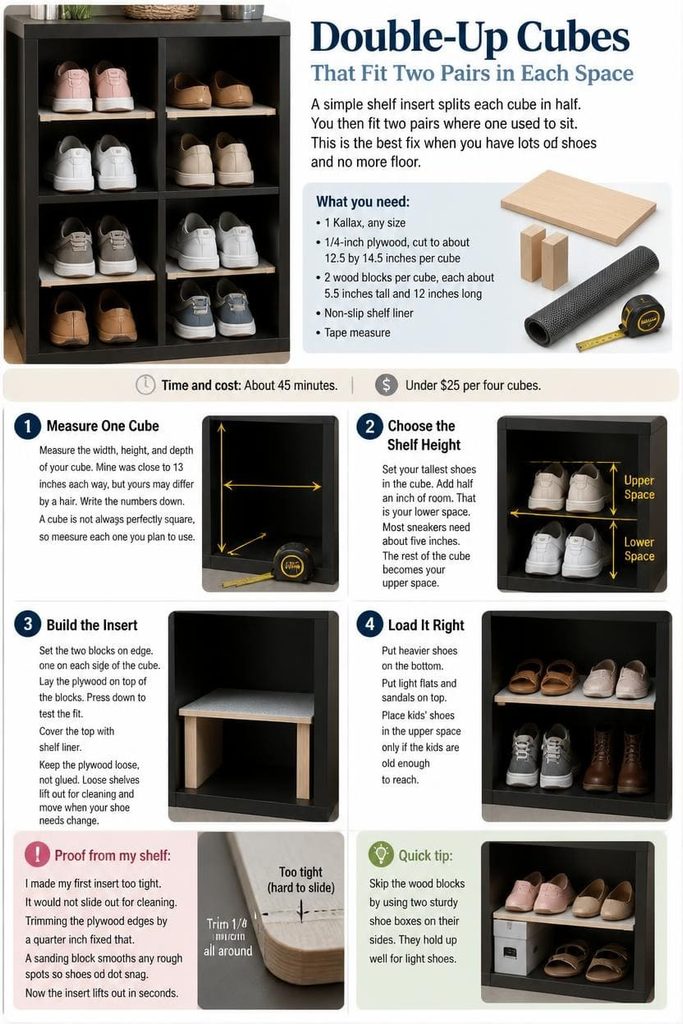
A simple shelf insert splits each cube in half. You then fit two pairs where one used to sit. This is the best fix when you have lots of shoes and no more floor.
What you need:
- 1 Kallax, any size
- 1/4-inch plywood, cut to about 12.5 by 14.5 inches per cube
- 2 wood blocks per cube, each about 5.5 inches tall and 12 inches long
- Non-slip shelf liner
- Tape measure
Time and cost: About 45 minutes. Under $25 per four cubes.
Measure One Cube
Measure the width, height, and depth of your cube. Mine was close to 13 inches each way, but yours may differ by a hair. Write the numbers down. A cube is not always perfectly square, so measure each one you plan to use. Ask the hardware store to cut the plywood and the blocks to size.
Choose the Shelf Height
Set your tallest shoes in the cube. Add half an inch of room. That is your lower space. Most sneakers need about five inches. The rest of the cube becomes your upper space.
Build the Insert
- Set the two blocks on edge, one on each side of the cube.
- Lay the plywood on top of the blocks.
- Press down to test the fit.
- Cover the top with shelf liner.
Keep the plywood loose, not glued. Loose shelves lift out for cleaning and move when your shoe needs change.
Load It Right
Put heavier shoes on the bottom. Put light flats and sandals on top. Place kids’ shoes in the upper space only if the kids are old enough to reach.
Proof from my shelf: I made my first insert too tight. It would not slide out for cleaning. Trimming the plywood edges by a quarter inch fixed that. A sanding block smooths any rough spots so shoes do not snag. Now the insert lifts out in seconds.
Quick tip: Skip the wood blocks by using two sturdy shoe boxes on their sides. They hold up well for light shoes.
Idea 4: Kid-Height Shoe Station With Picture Labels and Easy-Grab Bins
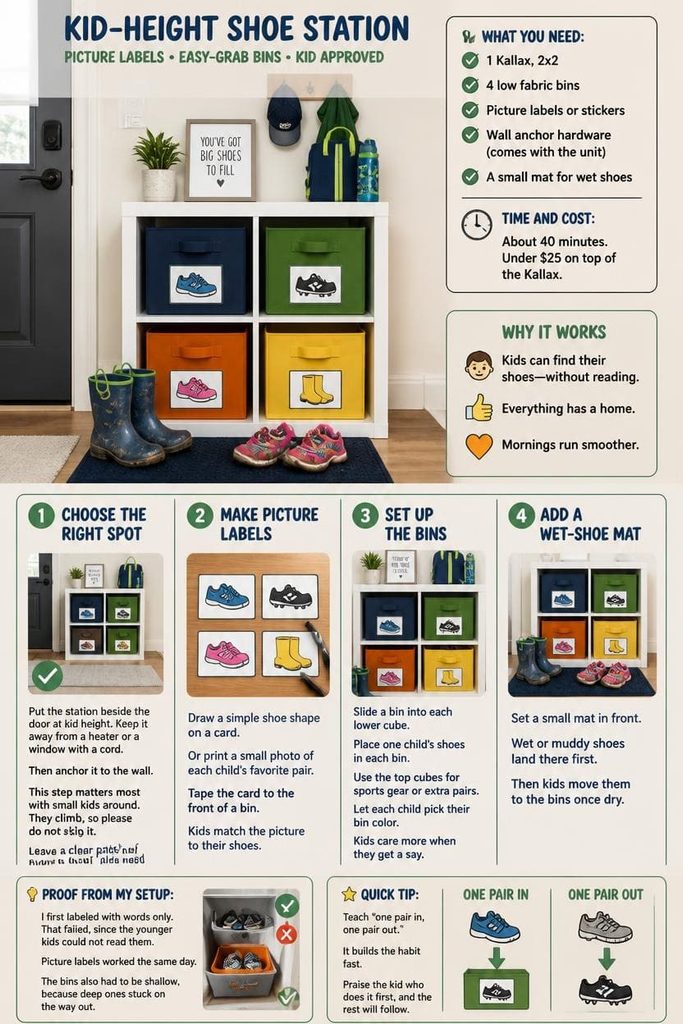
A low 2×2 Kallax lets small kids reach their own shoes. Picture labels tell them where things go, even before they read. Mornings run smoother when kids can do it themselves.
What you need:
- 1 Kallax, 2×2
- 4 low fabric bins
- Picture labels or stickers
- Wall anchor hardware (comes with the unit)
- A small mat for wet shoes
Time and cost: About 40 minutes. Under $25 on top of the Kallax.
Choose the Right Spot
Put the station beside the door at kid height. Keep it away from a heater or a window with a cord. Then anchor it to the wall. This step matters most with small kids around. They climb, so please do not skip it. Leave a clear patch of floor in front. Kids need room to sit and pull shoes on.
Make Picture Labels
Draw a simple shoe shape on a card. Or print a small photo of each child’s favorite pair. Tape the card to the front of a bin. Kids match the picture to their shoes.
Set Up the Bins
- Slide a bin into each lower cube.
- Place one child’s shoes in each bin.
- Use the top cubes for sports gear or extra pairs.
Let each child pick their bin color. Kids care more when they get a say.
Add a Wet-Shoe Mat
Set a small mat in front. Wet or muddy shoes land there first. Then kids move them to the bins once dry.
Proof from my setup: I first labeled with words only. That failed, since the younger kids could not read them. Picture labels worked the same day. The bins also had to be shallow, because deep ones stuck on the way out.
Quick tip: Teach “one pair in, one pair out.” It builds the habit fast. Praise the kid who does it first, and the rest will follow.
Idea 5: Hidden Shoe Storage With Fabric Doors and No Drilling Into the Unit
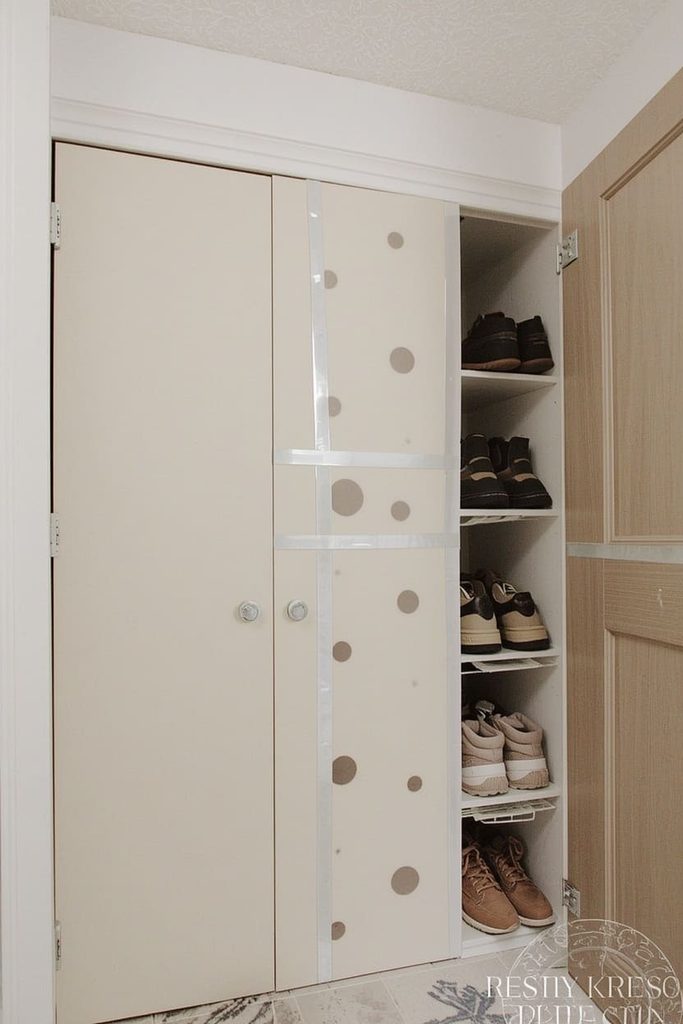
Fabric panels hide the mess and soften the look of your entry. They attach with sticky strips, so there is no drilling into the unit. This is my favorite trick for a shelf that shares a room with the couch.
What you need:
- 1 Kallax, any size
- Fabric, cut 1 inch larger than each cube opening
- Iron-on hem tape
- Adhesive hook-and-loop strips
- Rubbing alcohol and a cloth
- Scissors and a measuring tape
Time and cost: About 75 minutes. Under $30 on top of the Kallax.
Measure Every Opening
Each cube opening is about 13 inches square. Measure your own. Cut one fabric panel per cube, one inch bigger on every side. That extra inch is your hem. Pick fabric thick enough to hide the shoe shapes. Light cotton can show shadows.
Hem Without Sewing
- Fold each edge over by half an inch.
- Press with an iron.
- Slip hem tape under the fold.
- Press again until it holds.
Prep the Surface
Wipe the front edge of each cube with rubbing alcohol. Let it dry. Clean surfaces hold sticky strips much better than dusty ones. Wait a full hour before you press on the fabric. The glue on the strips needs time to grab.
Attach the Panels
Stick one strip to each cube edge. Press the matching strip on the fabric. Then press the panel into place. Add a strip to every corner so the fabric lies flat.
Proof from my shelf: My first panels curled at the corners after a week. Adding a strip to all four corners fixed it. Test one strip on a hidden edge first, since sticky strips can lift some finishes.
Quick tip: Leave one cube open. Use it for the pair you wear every day. That way you never have to lift a panel when you are late.
Frequently Asked Questions
How many pairs of shoes can a Kallax hold?
A 2×2 holds about 4 to 8 pairs of adult shoes. A 2×4 holds about 8 to 16. Add double-up inserts and those numbers can nearly double.
Is a Kallax strong enough to sit on?
It can work as a bench when laid on its side. Check IKEA’s stated weight limit for your model first. Sit down gently, and do not let anyone stand on it.
How do I keep a Kallax from tipping?
Anchor it to the wall with the anti-tip hardware in the box. Do this even if you think the shelf feels steady. Kids can pull on a shelf harder than you would guess.
How do I hide the shoes?
Use fabric panels, baskets with lids, or closed bins. Fabric panels on sticky strips look best. They also keep dust off your shoes.
Does a Kallax work in a rental?
Yes, in most cases. It stands on its own and moves easily. The wall anchor needs two small screw holes. You can patch those when you move out.

Sohel Rana is the writer, editor, publisher, and founder of The Tidy Porch. He is the man who is responsible for the craft (my wife created) being converted into a written piece. He also helps her wife (Sumona) by capturing videos of each craft. In short, he brings each craft created by her wife in front of you by transforming it into an article and a video.
