
Last winter, I stood in my hallway holding one boot and no place to put it. Shoes were stacked by the stairs like a small mountain.
Right above that mess sat a dark, empty nook. I had walked past it for years. Every morning, I stepped over the pile and ignored the answer sitting right there. Maybe your hallway looks the same.
That weekend, I measured it. Then I tried seven ways to turn it into shoe storage. Some took a saw. Some took nothing but a basket.
Below, you will find each one with a supply list, steps, and tips. Pick the one that fits your skill and your stairs.
What to Measure and Check Before You Start
Measure the depth, the width, and the height at three points. Then check for wires, pipes, and utility items. Do both before you buy anything. A few minutes with a tape measure can save you a whole weekend of rework. Write your numbers down in one place. You will use them again in every idea below.
Measure the slope. Note the height at the front, the middle, and the back of the nook. Sloped spaces fool the eye. Mine looked deep, but it was only 30 inches tall at the back.
Check the space. Look for outlets, wires, pipes, or a utility panel. Keep them clear and easy to reach. If you are unsure about something, leave that spot empty.
Plan for kids. Keep low shelves away from the slope where a small head could bump. Round off any sharp corners with sandpaper. Anchor any tall unit to the wall. Do not cut or change the stair structure. Check your local rules before any big change.
Idea 1: Rolling Pull-Out Shoe Drawers That Slide Out for a Full View
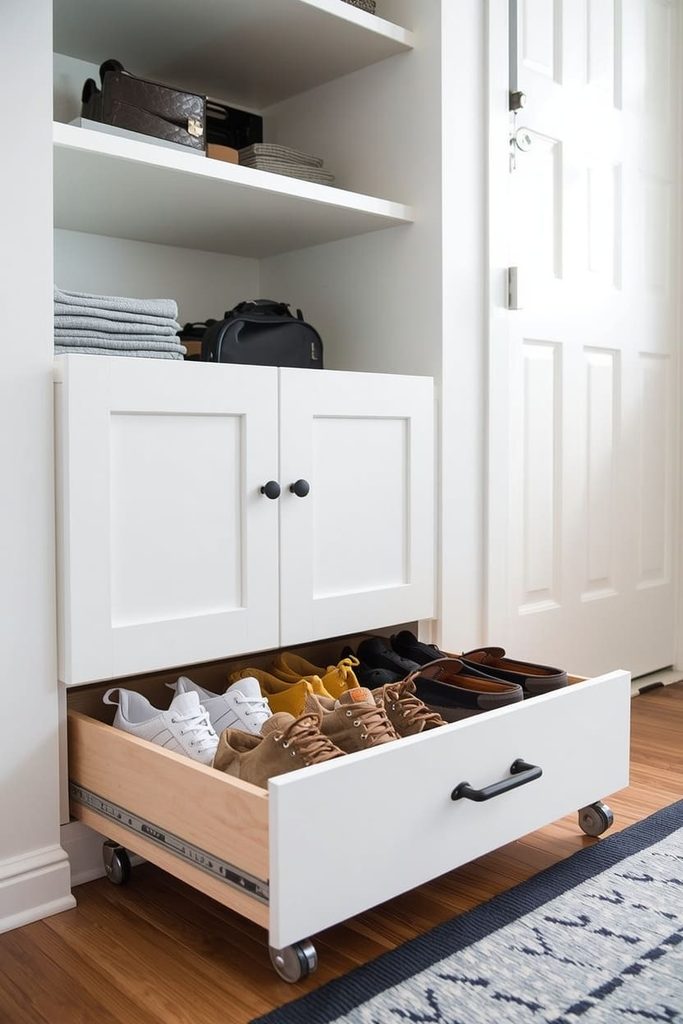
Build a low wooden box on casters, and you get a pull-out shoe drawer with no track. It rolls out to show every pair and slides back to hide them. This is a DIY build.
What you need:
- 3/4-inch plywood, about a quarter sheet
- 1/4-inch plywood for the base
- 4 swivel casters
- Wood glue and 1 1/4-inch screws
- Drill and saw (or ask the store to cut it)
- 1 drawer handle
Time and cost: About 3 hours. Under $60.
Size the Box to the Nook
Make the box about 6 inches tall. Casters add 2 more inches, so measure the lowest point of your opening first. Mine ended up 16 inches wide and 24 inches deep. That fit two rows of shoes. Leave a half inch of space on each side so the box rolls freely.
Build and Roll
- Cut two sides, a front, a back, and a base.
- Glue and screw the sides to the base.
- Add the front and back.
- Screw a caster near each corner.
- Attach the handle to the front.
Sand the edges before you start. Rough plywood snags socks and skin.
Proof from my nook: My first box tipped when I pulled it out. The casters sat too close to the edge. Moving each one an inch inward fixed it. Now the box glides with one finger.
Quick tip: Line the bottom with a boot mat. Drips will not soak into the wood.
Idea 2: Angled Open Shelves That Follow the Slope of Your Stairs
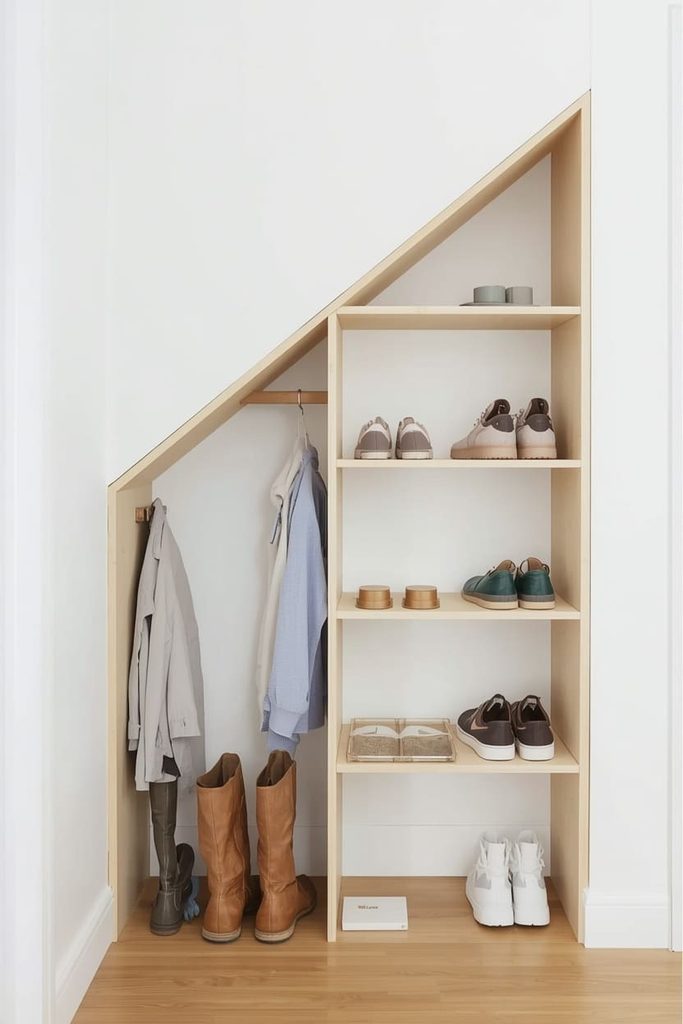
Cut the shelf sides to match your stair slope, and every inch of the nook works. The shelves sit tight under the ceiling and hold more shoes. You will need a saw, so this one is DIY.
What you need:
- 3/4-inch plywood or pine boards
- Cardboard for a pattern
- Jigsaw or hand saw
- Shelf cleats or L-brackets and screws
- Level and pencil
Time and cost: About 4 hours. Under $90.
Make a Cardboard Pattern
Hold a big piece of cardboard against the side of the nook. Trace the slope with a pencil. Cut along the line and test the fit. A pattern saves you from wasting wood. Ask a helper to hold the cardboard flat. Tape it in place so it does not slip.
Assemble the Frame
- Trace the pattern onto two side panels and cut them.
- Mark shelf spots 8 inches apart.
- Screw a cleat at each mark.
- Rest the shelves on the cleats and screw them down.
- Anchor the frame to the wall.
Check each shelf with a level before you screw it down. A tilted shelf lets shoes roll.
Proof from my nook: My first shelves sat 12 inches apart. Half the space was empty air. Eight inches fit sneakers and flats. Boots got one taller spot at the bottom. That small change made the shelves feel twice as roomy.
Quick tip: Add a thin wood strip along each shelf front. Shoes stay put when kids toss them in.
Idea 3: Kid-Height Cubbies With Labeled Bins So Kids Put Shoes Away Themselves
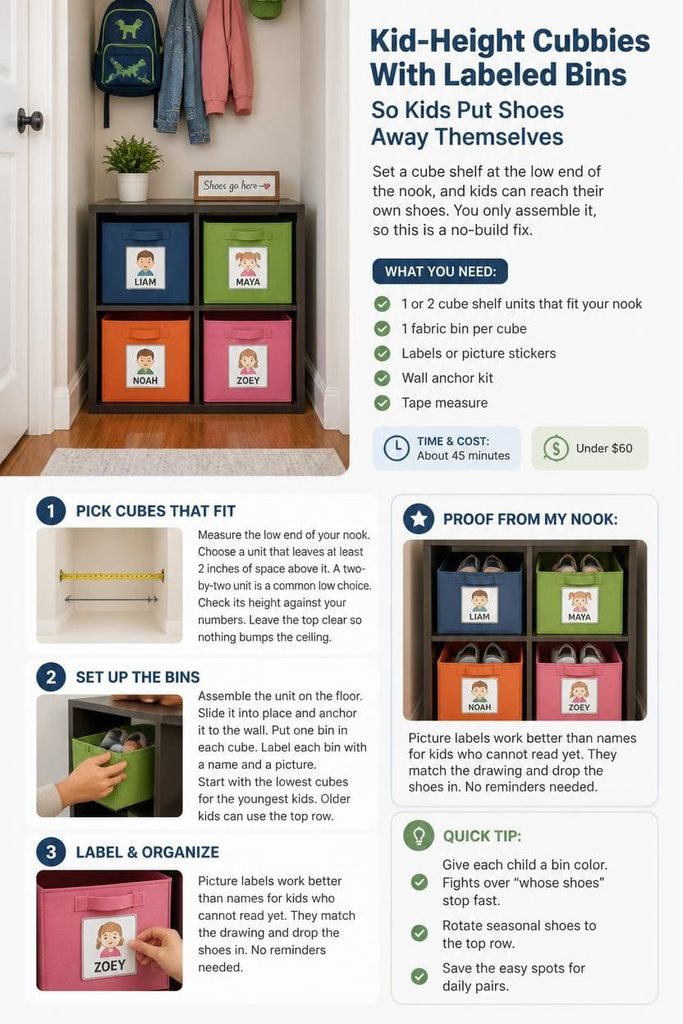
Set a cube shelf at the low end of the nook, and kids can reach their own shoes. You only assemble it, so this is a no-build fix.
What you need:
- 1 or 2 cube shelf units that fit your nook
- 1 fabric bin per cube
- Labels or picture stickers
- Wall anchor kit
- Tape measure
Time and cost: About 45 minutes. Under $60.
Pick Cubes That Fit
Measure the low end of your nook. Choose a unit that leaves at least 2 inches of space above it. A two-by-two unit is a common low choice. Check its height against your numbers. Leave the top clear so nothing bumps the ceiling.
Set Up the Bins
- Assemble the unit on the floor.
- Slide it into place and anchor it to the wall.
- Put one bin in each cube.
- Label each bin with a name and a picture.
Start with the lowest cubes for the youngest kids. Older kids can use the top row.
Proof from my nook: Picture labels work better than names for kids who cannot read yet. They match the drawing and drop the shoes in. No reminders needed.
Quick tip: Give each child a bin color. Fights over “whose shoes” stop fast. Rotate seasonal shoes to the top row. Save the easy spots for daily pairs.
Idea 4: Hidden Cabinet Doors That Make the Nook Look Built-In
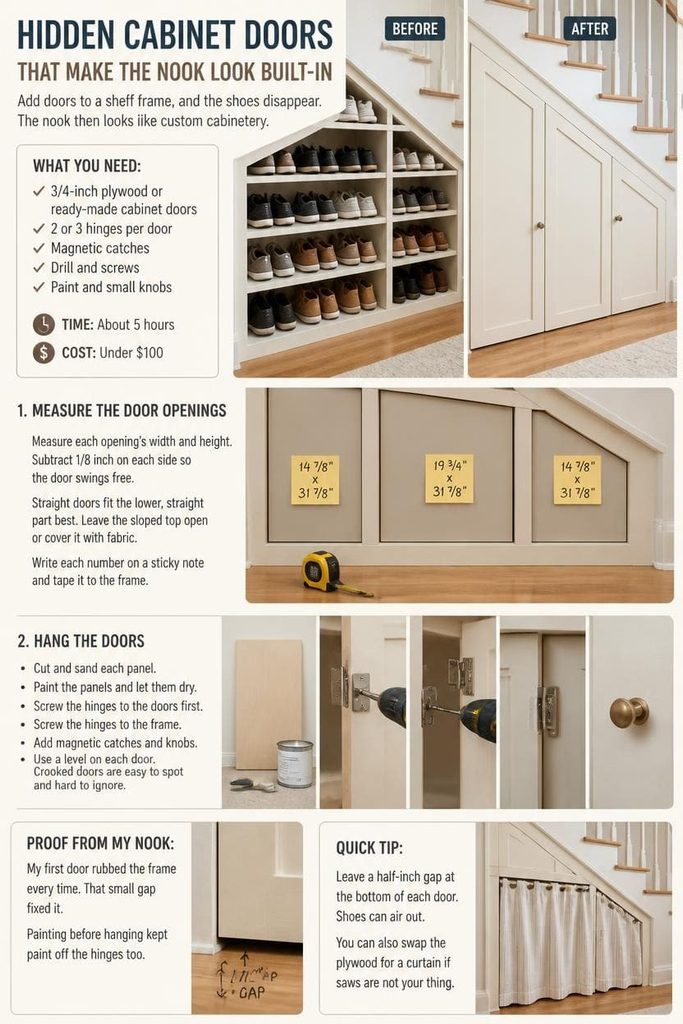
Add doors to a shelf frame, and the shoes disappear. The nook then looks like custom cabinetry. This is a DIY build with basic tools.
What you need:
- 3/4-inch plywood or ready-made cabinet doors
- 2 or 3 hinges per door
- Magnetic catches
- Drill and screws
- Paint and small knobs
Time and cost: About 5 hours. Under $100.
Measure the Door Openings
Measure each opening’s width and height. Subtract 1/8 inch on each side so the door swings free. Straight doors fit the lower, straight part best. Leave the sloped top open or cover it with fabric. Write each number on a sticky note and tape it to the frame.
Hang the Doors
- Cut and sand each panel.
- Paint the panels and let them dry.
- Screw the hinges to the doors first.
- Screw the hinges to the frame.
- Add magnetic catches and knobs.
Use a level on each door. Crooked doors are easy to spot and hard to ignore.
Proof from my nook: My first door rubbed the frame every time. That small gap fixed it. Painting before hanging kept paint off the hinges too.
Quick tip: Leave a half-inch gap at the bottom of each door. Shoes can air out. You can also swap the plywood for a curtain if saws are not your thing.
Idea 5: Enclosed Under-Stairs Cupboard Reset With Racks and Hooks
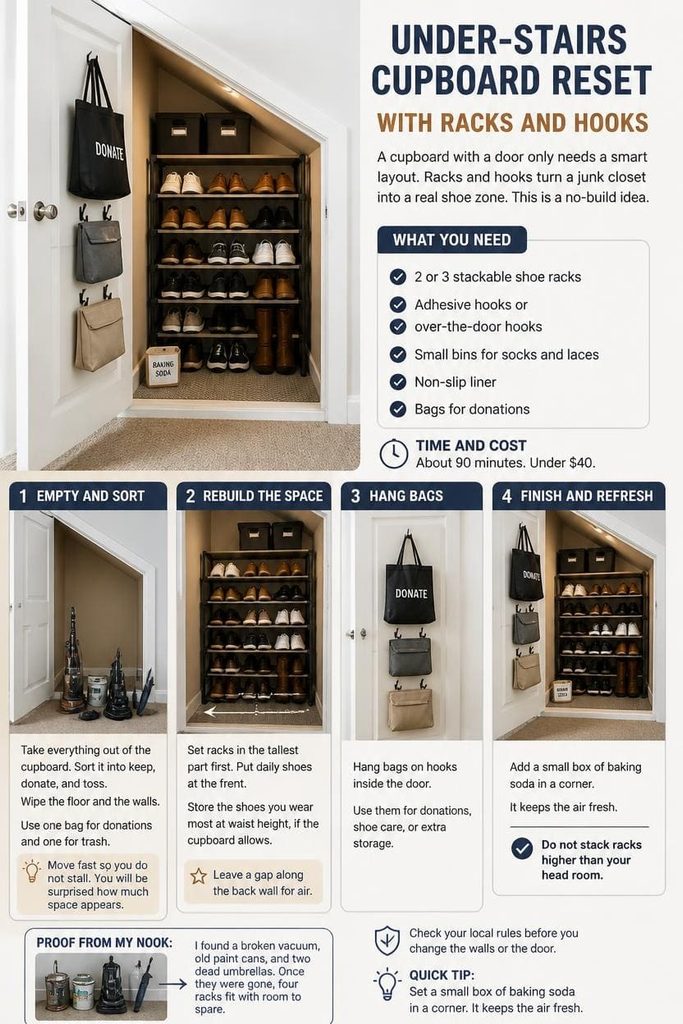
A cupboard with a door only needs a smart layout. Racks and hooks turn a junk closet into a real shoe zone. This is a no-build idea.
What you need:
- 2 or 3 stackable shoe racks
- Adhesive hooks or over-the-door hooks
- Small bins for socks and laces
- Non-slip liner
- Bags for donations
Time and cost: About 90 minutes. Under $40.
Empty and Sort
Take everything out of the cupboard. Sort it into keep, donate, and toss. Wipe the floor and the walls. Use one bag for donations and one for trash. Move fast so you do not stall. You will be surprised how much space appears.
Rebuild the Space
- Set racks in the tallest part first.
- Put daily shoes at the front.
Store the shoes you wear most at waist height, if the cupboard allows. 3. Hang bags on hooks inside the door. 4. Leave a gap along the back wall for air.
Proof from my nook: I found a broken vacuum, old paint cans, and two dead umbrellas. Once they were gone, four racks fit with room to spare. Check your local rules before you change the walls or the door.
Quick tip: Set a small box of baking soda in a corner. It keeps the air fresh. Do not stack racks higher than your head room.
Idea 6: Basket and Crate Lineup That Renters Can Move Anywhere
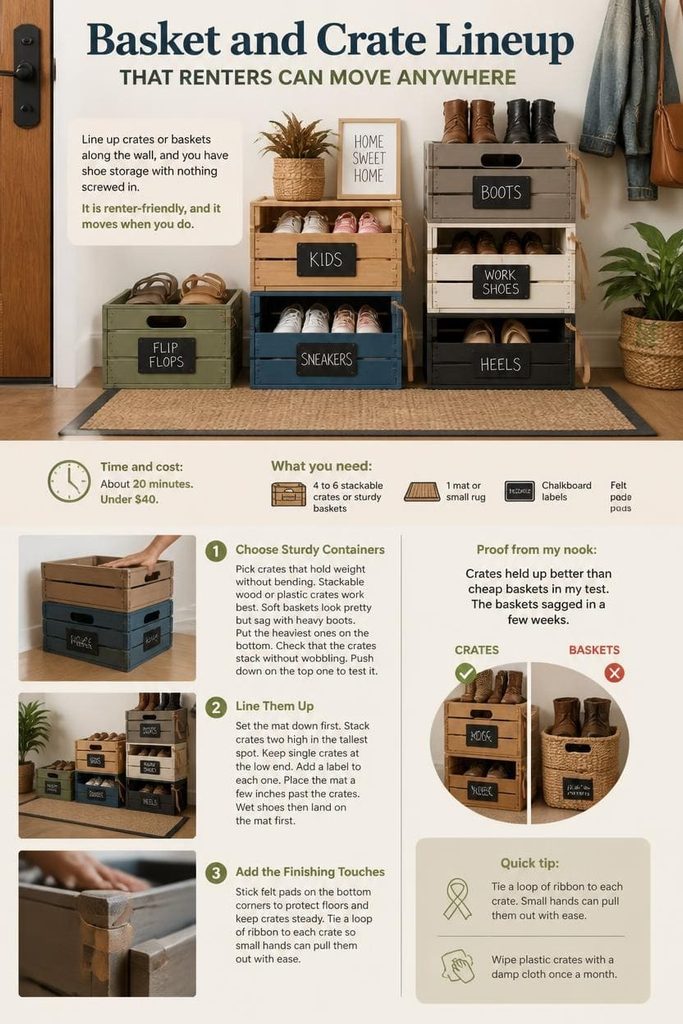
Line up crates or baskets along the wall, and you have shoe storage with nothing screwed in. It is renter-friendly, and it moves when you do. Nothing needs building here.
What you need:
- 4 to 6 stackable crates or sturdy baskets
- 1 mat or small rug
- Chalkboard labels
- Felt pads
Time and cost: About 20 minutes. Under $40.
Choose Sturdy Containers
Pick crates that hold weight without bending. Stackable wood or plastic crates work best. Soft baskets look pretty but sag with heavy boots. Put the heaviest ones on the bottom. Check that the crates stack without wobbling. Push down on the top one to test it.
Line Them Up
- Set the mat down first.
- Stack crates two high in the tallest spot.
- Keep single crates at the low end.
- Add a label to each one.
Place the mat a few inches past the crates. Wet shoes then land on the mat first.
Proof from my nook: Crates held up better than cheap baskets in my test. The baskets sagged in a few weeks.
Quick tip: Tie a loop of ribbon to each crate. Small hands can pull them out with ease. Wipe plastic crates with a damp cloth once a month.
Idea 7: Stair-Foot Bench With Shoe Cubbies and a Boot Tray
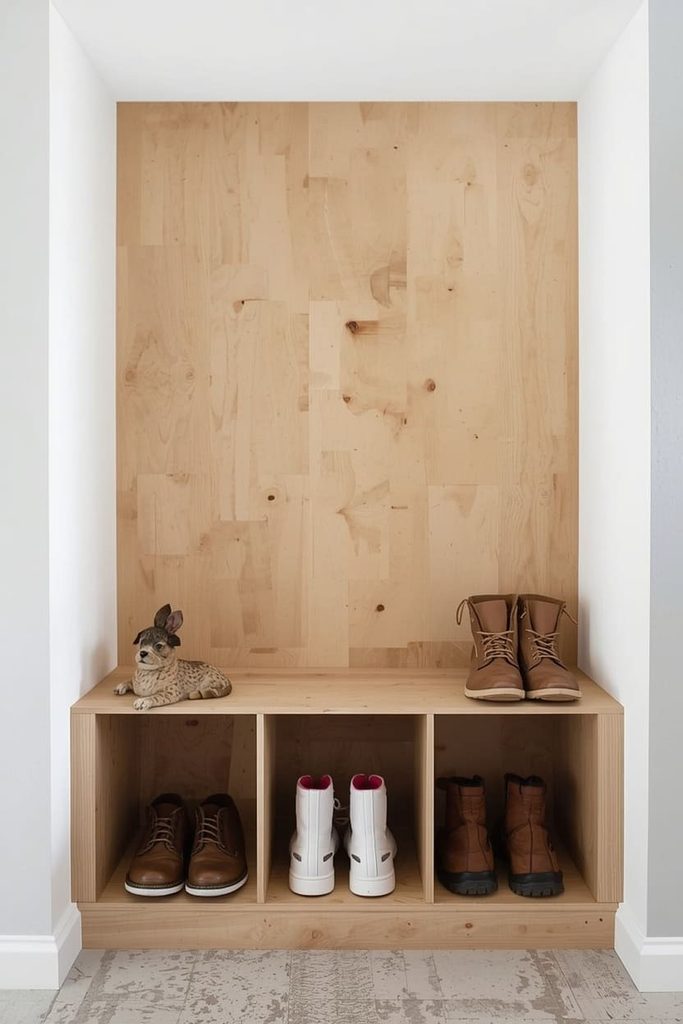
Build a simple bench with open cubbies below. You sit to put on shoes, and the shoes are right under you. This is an easy DIY build.
What you need:
- 3/4-inch plywood, about a half sheet
- Wood glue and screws
- Sandpaper and paint
- Boot tray
- Thin foam cushion (optional)
Time and cost: About 4 hours. Under $80.
Plan the Size
Aim for a bench height near 17 inches. Fit the width to your nook. Leave enough room to walk past and to open any door. Stand on your stairs and check where you step. The bench should never block that path.
Build the Bench
- Cut two sides, a top, a middle shelf, and a back.
- Glue and screw the sides to the top.
- Add the shelf about 8 inches from the floor.
- Sand and paint the whole bench.
- Set the boot tray on the bottom.
Round the bench corners with sandpaper. Kids run past it fast.
Proof from my nook: My first bench was 20 inches tall. It felt like a barstool for short legs. Cutting it down to 17 inches made it comfortable. It also gives everyone a place to sit and tie laces.
Quick tip: Add a strip of non-slip tape under the cushion. It will not slide off.
Frequently Asked Questions
How many pairs of shoes fit under stairs?
It depends on your nook. A small one may hold about 8 pairs. A deep one with shelves can hold 20 or more. Measure your shoes first and count the pairs you own.
How do I fit shelves in a sloped space?
Trace the slope onto cardboard and cut your side panels to match. You can also keep short units at the low end. Save the tall end for boots.
Can I do this in a rental?
Yes. Crates, baskets, and cube shelves need no building, so crates are the easiest choice. Ask your landlord before you anchor a tall unit, since anchors need small holes.
How do I stop odors in a closed nook?
Let shoes dry fully before you store them. Leave a gap for air along the back wall. A small box of baking soda helps too.
Is under-stairs storage safe for kids?
It can be. Anchor tall units to the wall and keep low shelves away from the slope. Sand rough edges, and keep wires and utility items out of reach.

Sohel Rana is the writer, editor, publisher, and founder of The Tidy Porch. He is the man who is responsible for the craft (my wife created) being converted into a written piece. He also helps her wife (Sumona) by capturing videos of each craft. In short, he brings each craft created by her wife in front of you by transforming it into an article and a video.
