
My son sat at the kitchen table last October, staring at a worksheet with a giant letter M on it. He was supposed to trace it ten times.
He traced it twice, then used the pencil to poke a hole through the paper. That was the end of letter M practice for the day.
So I pulled out construction paper instead. Scissors, glue, a few googly eyes. Twenty minutes later he had a mouse with an M-shaped body and he was naming everything else in the house that started with M.
That’s the difference. You don’t need a worksheet. You need something he can hold.
Here are 7 letter M crafts that actually get finished, and actually stick.
The 5 Supplies That Make Every One of These Crafts Easier
You probably have some of this already, but these five make the difference between a smooth afternoon and a sticky mess.
- Crayola Construction Paper Pack (Assorted Colors) — gives you every base color you need for mice, monkeys, and monsters without a separate trip to the store.
- Fiskars Blunt-Tip Kids Scissors — cuts paper cleanly without cutting fingers, which matters a lot at this age.
- Elmer’s Disappearing Purple School Glue Sticks — goes on purple so kids can see where they’ve applied it, then dries clear.
- Googly Eyes Assorted Size Pack (100+ Pieces) — turns any paper shape into a character in about two seconds.
- Crayola Broad Line Washable Markers — adds detail work like whiskers, spots, or mitten patterns without bleeding through thin paper.
Moon Craft: A Nighttime M That Glows on the Wall
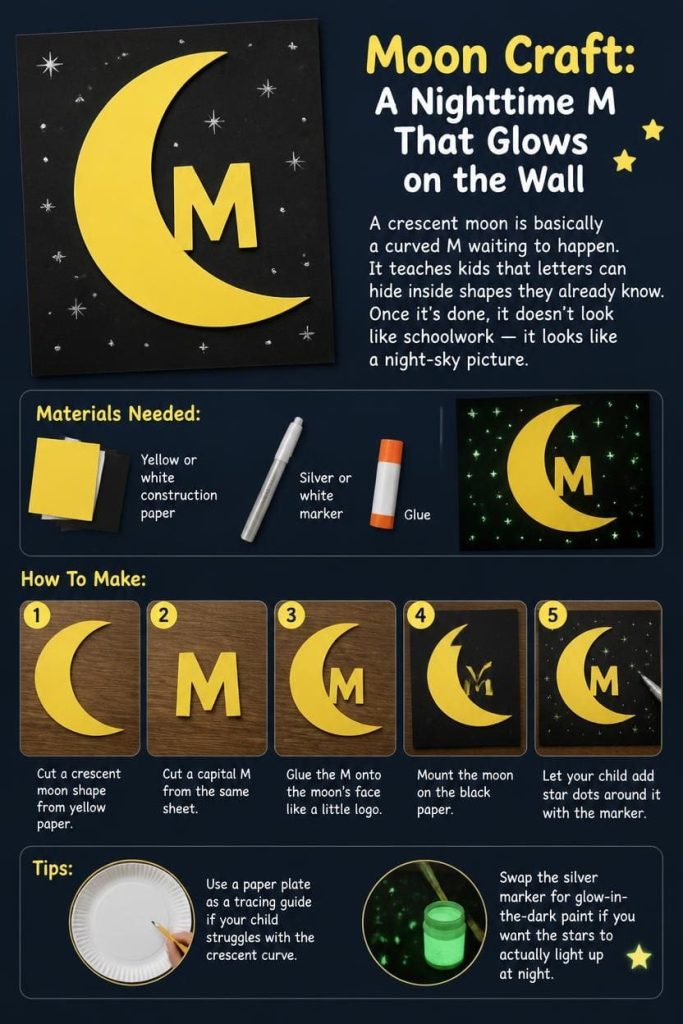
A crescent moon is basically a curved M waiting to happen. It teaches kids that letters can hide inside shapes they already know. Once it’s done, it doesn’t look like schoolwork — it looks like a night-sky picture.
Materials Needed:
- Yellow or white construction paper
- Black paper for the background
- Silver or white marker
- Glue
How To Make:
- Cut a crescent moon shape from yellow paper
- Cut a capital M from the same sheet
- Glue the M onto the moon’s face like a little logo
- Mount the moon on the black paper
- Let your child add star dots around it with the marker
Tips:
- Use a paper plate as a tracing guide if your child struggles with the crescent curve
- Swap the silver marker for glow-in-the-dark paint if you want the stars to actually light up at night
Mouse Craft: A Paper Mouse Built From the Letter Itself
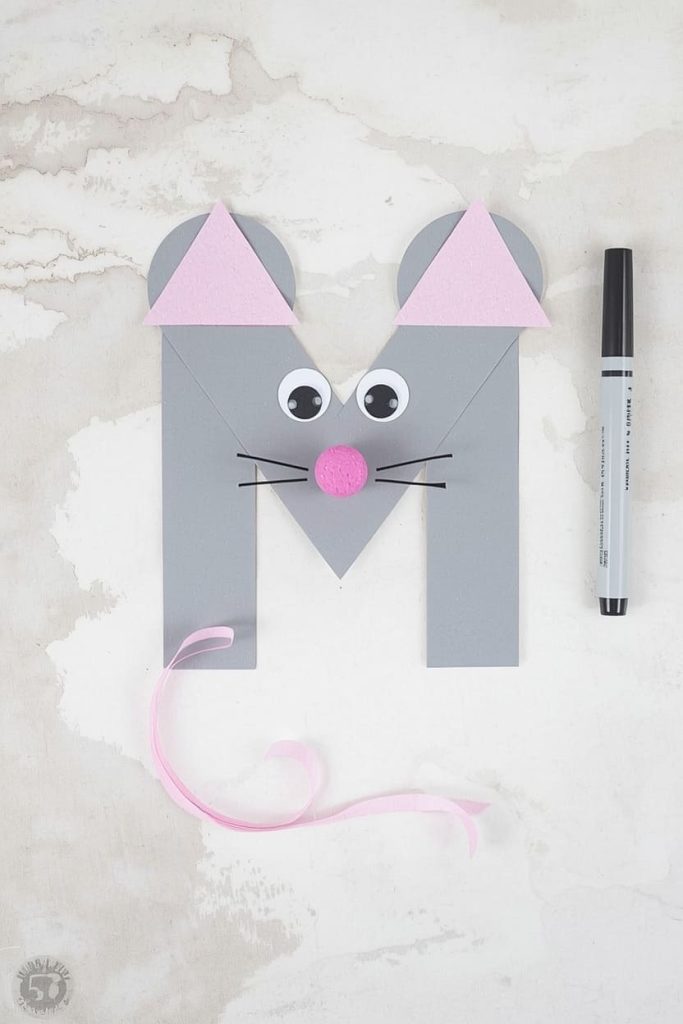
This is the craft that convinced my son letter M was worth learning. The mouse’s body IS the letter M, laid on its side. It’s also one of the strongest crafts on this list for fine motor development.
Materials Needed:
- Gray or brown construction paper
- Pink paper scraps
- Googly eyes
- Black marker
How To Make:
- Cut a large capital M from gray paper
- Lay the M on its side so the two humps become the mouse’s back and head
- Add a pink triangle nose and pink ear circles
- Glue on googly eyes
- Curl a strip of paper into a tail and attach it
- Draw on whiskers with the marker
Tips:
- Curl the tail by wrapping the paper strip tightly around a pencil, then releasing it — this is a real pincer-grip workout for little hands
- Keep a few extra ear circles pre-cut, since these are the piece most likely to go missing mid-craft
Monkey Craft: Swinging Letter M Arms
A monkey’s arms naturally curve, which turns the letter M into a monkey mid-swing. The rounded shape does most of the work here, so it’s a satisfying craft even on a slower attention day.
Materials Needed:
- Brown construction paper
- Tan paper for the face and belly
- Black marker
- Glue
How To Make:
- Cut a rounded M shape to form the monkey’s arms and head outline
- Add a tan oval face and a tan belly patch
- Draw on two dot eyes with the marker
- Curl the bottom points of the M upward so the monkey looks like it’s hanging from a branch
Tips:
- If your child struggles cutting the curves, pre-draw the M shape lightly in pencil first and let them cut on the line
- Tape a length of yarn above the finished monkey to make it look like it’s actually swinging from something
Mermaid Craft: A Sparkly M-Shaped Tail
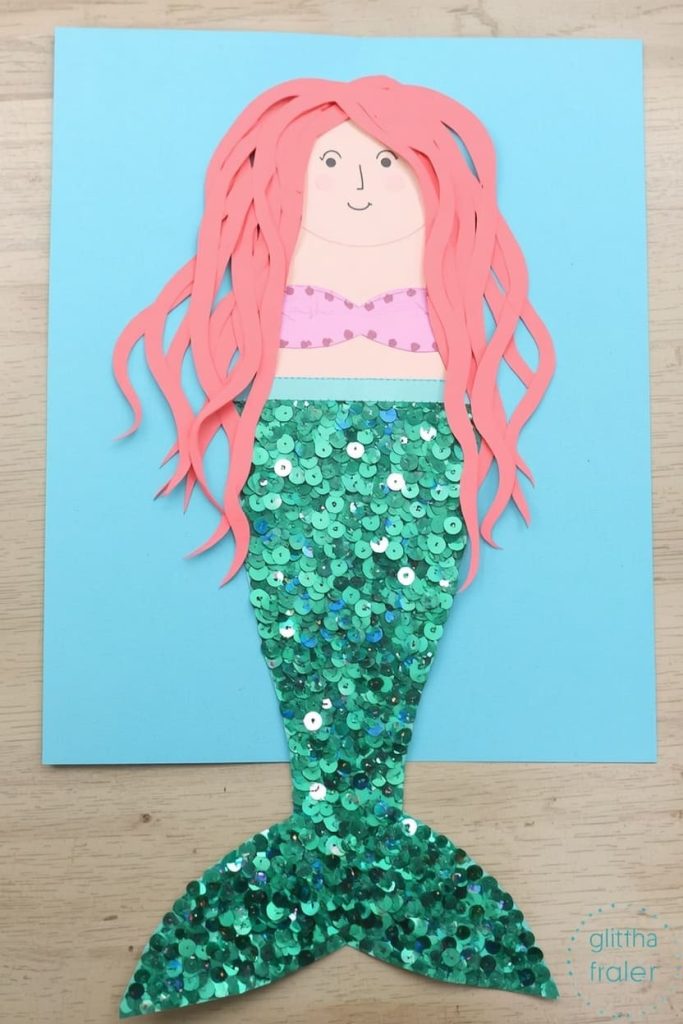
Mermaid crafts are consistently one of the highest-engagement themes for this age range, and the tail fin is an easy M shape once you turn it sideways. It also photographs well for a classroom wall.
Materials Needed:
- Teal or purple construction paper
- Skin-tone paper for the mermaid’s top half
- Sequins or glitter glue (optional)
- Marker
How To Make:
- Cut a capital M and rotate it sideways so the points face outward — this becomes the two-pointed tail fin
- Glue the tail to a simple paper body with arms and hair
- Add facial features with the marker
- Add sequins along the tail for extra sparkle, if using
Tips:
- Skip the sequins entirely if you want a low-mess version — the tail shape reads clearly on its own
- Use glitter glue instead of loose glitter to avoid the mess spreading past the table
Mushroom Craft: A Cheerful M-Topped Toadstool
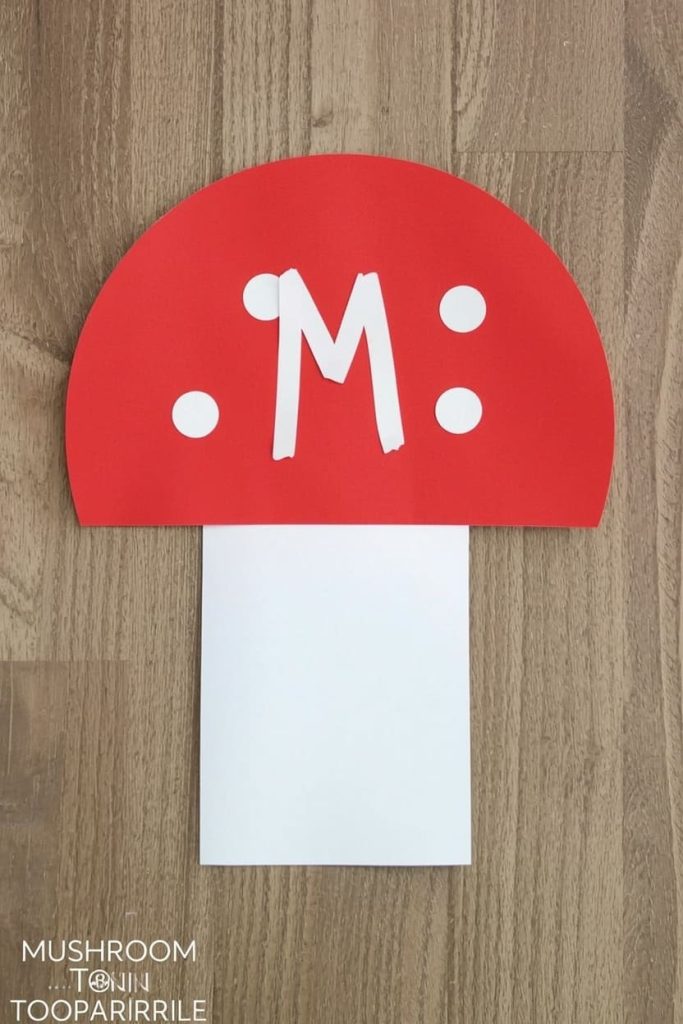
Mushrooms are one of the fastest letter M crafts on this list, which makes them a good pick for a rainy afternoon with low patience reserves. Because it’s only two pieces, it’s also the craft I’d hand a 2-year-old while an older sibling works on something harder.
Materials Needed:
- Red and white construction paper
- White marker or small white paper dots
- Glue
How To Make:
- Cut a rounded capital M from red paper to form the mushroom cap
- Cut a rectangle stem from white paper
- Glue the stem beneath the cap
- Dot the cap with small white circles or marker dots
Tips:
- Pre-cut a stack of white dots ahead of time so this becomes a pure gluing activity for toddlers
- Line up several finished mushrooms in a row for an easy garden-themed bulletin board
Mailbox Craft: An Interactive M for Letter Recognition
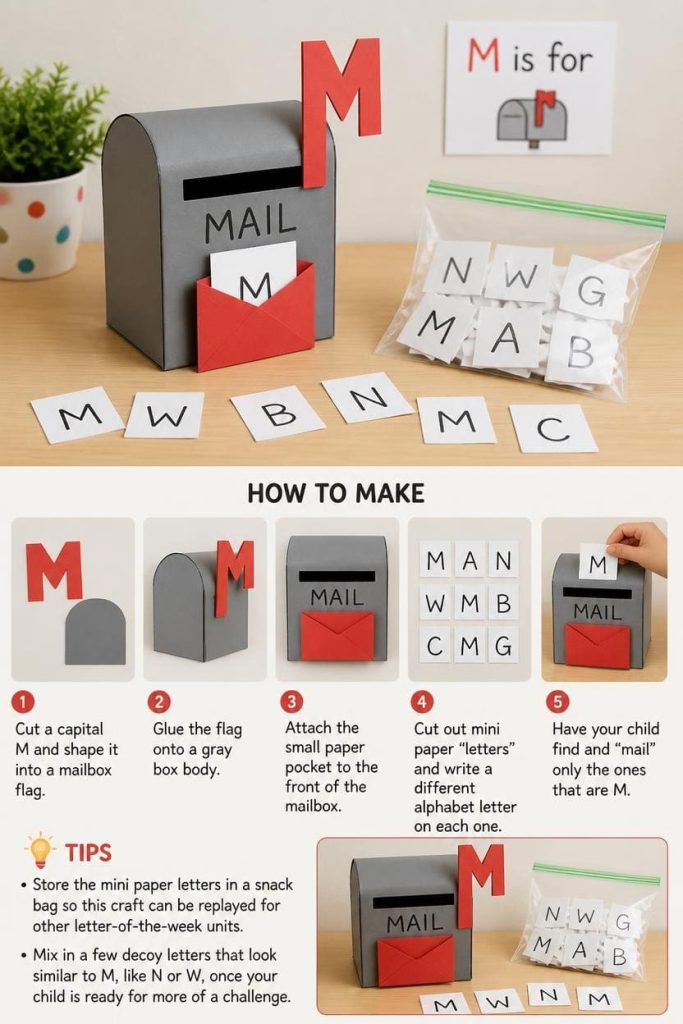
This one turns into a game after it’s built, which stretches the letter-M lesson well past the craft itself. It’s worth the extra ten minutes of setup, since it becomes a reusable letter-sorting activity instead of a one-time project.
Materials Needed:
- Red and gray construction paper
- A small envelope or folded paper pocket
- Marker
How To Make:
- Cut a capital M and shape it into a mailbox flag
- Glue the flag onto a gray box body
- Attach the small paper pocket to the front of the mailbox
- Cut out mini paper “letters” and write a different alphabet letter on each one
- Have your child find and “mail” only the ones that are M
Tips:
- Store the mini paper letters in a snack bag so this craft can be replayed for other letter-of-the-week units
- Mix in a few decoy letters that look similar to M, like N or W, once your child is ready for more of a challenge
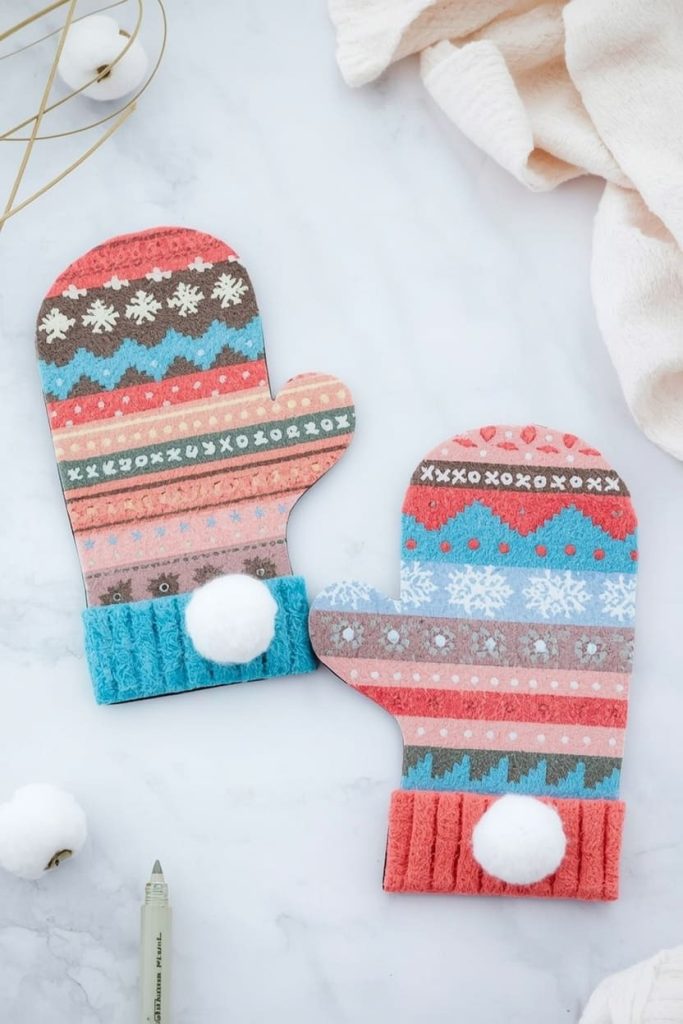
Mitten Craft: A Cozy Winter M
Mittens are shaped almost exactly like a rounded M when you turn them on their side, which makes this one of the easiest shape connections on the list. Save this one for December, since it pairs naturally with a winter or holiday bulletin board.
Materials Needed:
- Felt-look paper or regular construction paper in winter colors
- Cotton balls (optional)
- Marker
How To Make:
- Cut two matching mitten shapes from an M outline, rounding the top edge
- Decorate both mittens with marker patterns like stripes, snowflakes, or dots
- Glue a cotton ball at the wrist of each mitten for a cuff, if using
Tips:
- Cut both mittens at once by folding the paper in half first, so they match without extra tracing
- String the finished mittens on twine for a quick garland across a window or shelf
FAQs
What age is best for these letter M crafts?
Most of these work well for ages 2 to 6, though the cutting-heavy ones like the mermaid and monkey are easier for kids 4 and up. For younger toddlers, pre-cut the pieces and let them focus on gluing and decorating.
Do I need any special tools to make these?
No. Everything on this list uses basic paper, glue, scissors, and markers. Nothing requires a printer, laminator, or craft cutting machine.
How do I keep the mess to a minimum?
Stick to glue sticks instead of liquid glue, and pre-cut small detail pieces like eyes or dots ahead of time. That alone cuts cleanup time in half.
Can I turn these into a full letter-of-the-week unit?
Yes. Pick two or three crafts per day and pair them with an M-word scavenger hunt around the house — moon, mouse, mailbox, mitten are all things kids can spot at home.
Which craft is best for a classroom of multiple kids?
The mushroom craft is fastest and uses the fewest pieces, which makes it easiest to prep in bulk for a group. The mailbox craft is best if you want an activity that continues after the craft itself is done.

Sohel Rana is the writer, editor, publisher, and founder of The Tidy Porch. He is the man who is responsible for the craft (my wife created) being converted into a written piece. He also helps her wife (Sumona) by capturing videos of each craft. In short, he brings each craft created by her wife in front of you by transforming it into an article and a video.
