
Last spring my daughter asked me what letter came after M. I told her it was N, and she immediately asked what N craft we were making. I panicked a little.
N doesn’t hand you easy answers the way M does with the moon and mouse. So I sat at the table with her and just started folding paper into shapes until something looked right. A little nest showed up first, and she loved it more than half the M crafts we’d made.
That’s the thing about letter N. It takes a little more creativity, but the crafts that work, really work. Here are 7 that will actually get finished.
The 5 Supplies That Make Every One of These Crafts Easier
You probably have some of this already, but these five make N week a lot smoother.
- Crayola Construction Paper Pack (Assorted Colors) — gives you every base color you need for a nest, narwhal, or night sky scene without a store run.
- Fiskars Blunt-Tip Kids Scissors — cuts paper cleanly without cutting little fingers, which matters most on the noodle and necklace crafts.
- Elmer’s Disappearing Purple School Glue Sticks — goes on purple so kids can see where they’ve applied it, then dries clear.
- Crayola Broad Line Washable Markers — adds detail work like narwhal spots or notebook lines without bleeding through thin paper.
- Amazon Basics Kraft Paper Roll — a cheap, sturdy base for bigger projects like the nest and the night sky scene.
Nest Craft: A Woven-Look N Made From Paper Strips
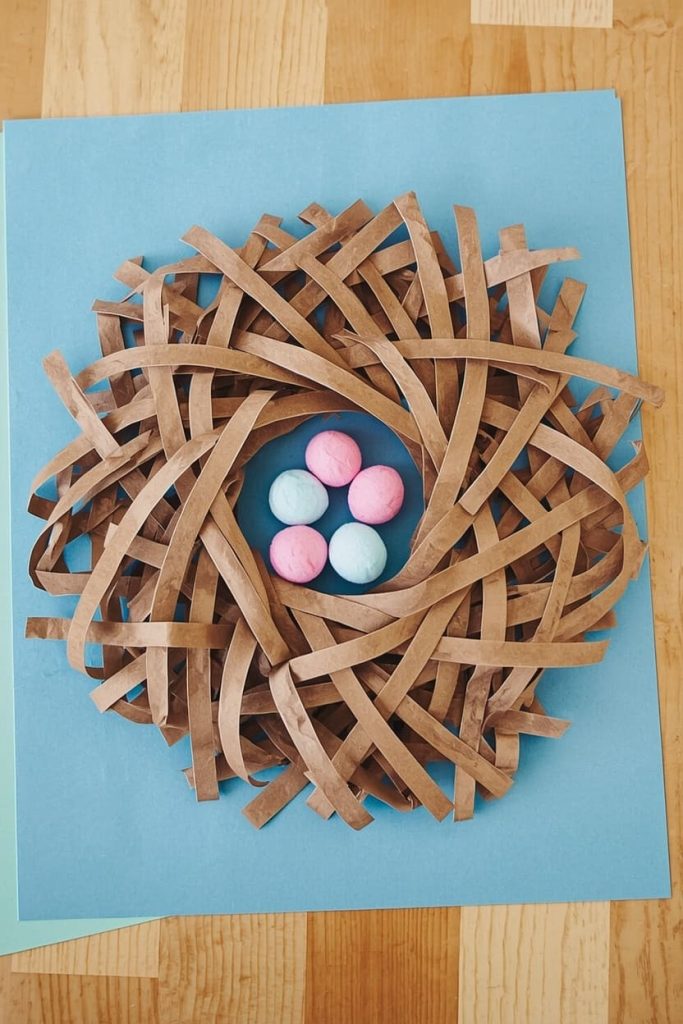
A bird’s nest is a natural fit for letter N, and the woven texture makes it look far more advanced than it actually is to build. This is the craft that saved N week for me, and it’s genuinely one of my daughter’s favorite projects from the whole alphabet series.
Materials Needed:
- Brown construction paper
- Blue paper for the background
- Small pom-poms or paper egg cutouts
- Glue
How To Make:
- Cut the brown construction paper into strips about half an inch wide, cutting from the short end of the sheet so each strip is long
- Cut anywhere from 8 to 12 strips, depending on how full you want the nest to look
- Take one strip at a time and wrap it around your finger or a marker to give it a loose curl, then let it spring back slightly
- Starting from the outer edge of your blue background paper, glue down the curled strips one at a time in a rough circle, overlapping each strip slightly over the last
- Work your way inward, layering more strips until the circle looks full and only a small open space remains in the center
- Let the glue set for a few minutes before moving the paper
- Add pom-poms or paper egg cutouts into the open center of the nest, gluing each one down individually
Tips:
- Curling the strips first, before gluing, makes the nest look woven instead of flat
- Swap the pom-poms for a few tiny paper letter N cutouts if you want the letter to show up twice
Necklace Craft: A Wearable N Kids Can Show Off All Day
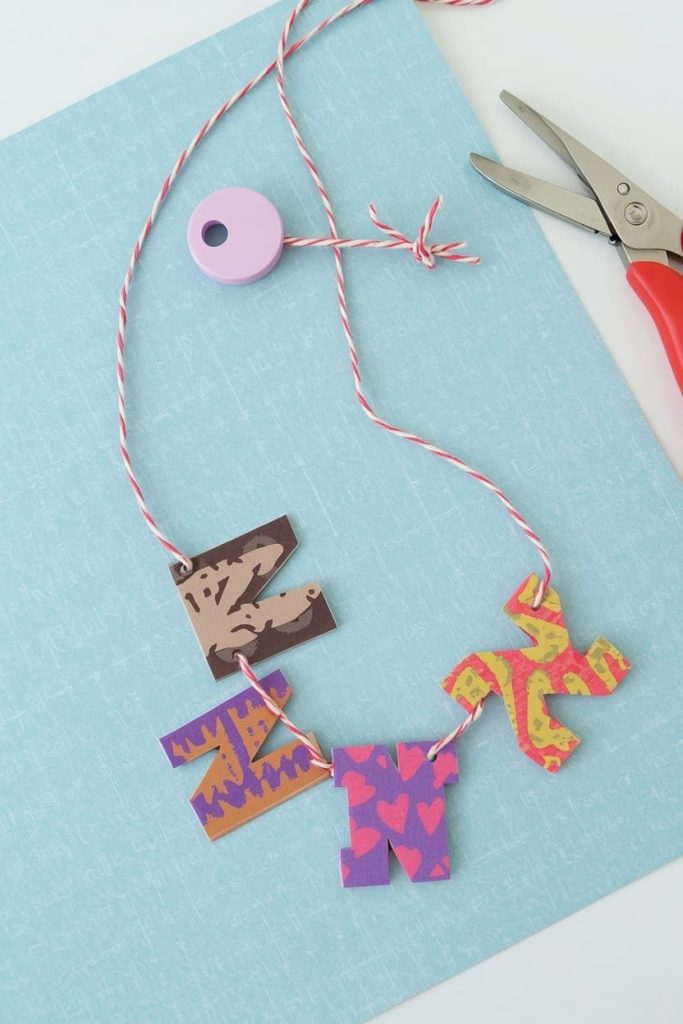
A paper necklace turns letter practice into something your child can wear, which makes it stick in a different way than a craft that just sits on a shelf. It’s also one of the fastest projects on this list.
Materials Needed:
- Colored construction paper or cardstock
- Yarn or string
- Hole punch
- Markers
How To Make:
- Draw 3 to 5 capital N shapes onto cardstock, keeping each one about 2 to 3 inches tall so they’re easy for small hands to hold and decorate
- Cut out each N shape
- Using a hole punch, make one hole near the top edge of each N, centered so the shape will hang straight
- Let your child decorate each N with markers, stickers, or small stamps before stringing them
- Cut a piece of yarn or string long enough to slip over your child’s head with a few extra inches for tying, usually around 24 to 30 inches
- Thread the yarn through the hole in each N shape, sliding them along until they’re evenly spaced
- Tie the two ends of the yarn together in a secure double knot, checking that the necklace fits comfortably before your child wears it
Tips:
- Cardstock holds up far better than regular paper if your child wants to actually wear this for a few hours
- Alternate N shapes with paper beads or pasta pieces for a more textured necklace
Narwhal Craft: A Long-Nosed N for Ocean Lovers
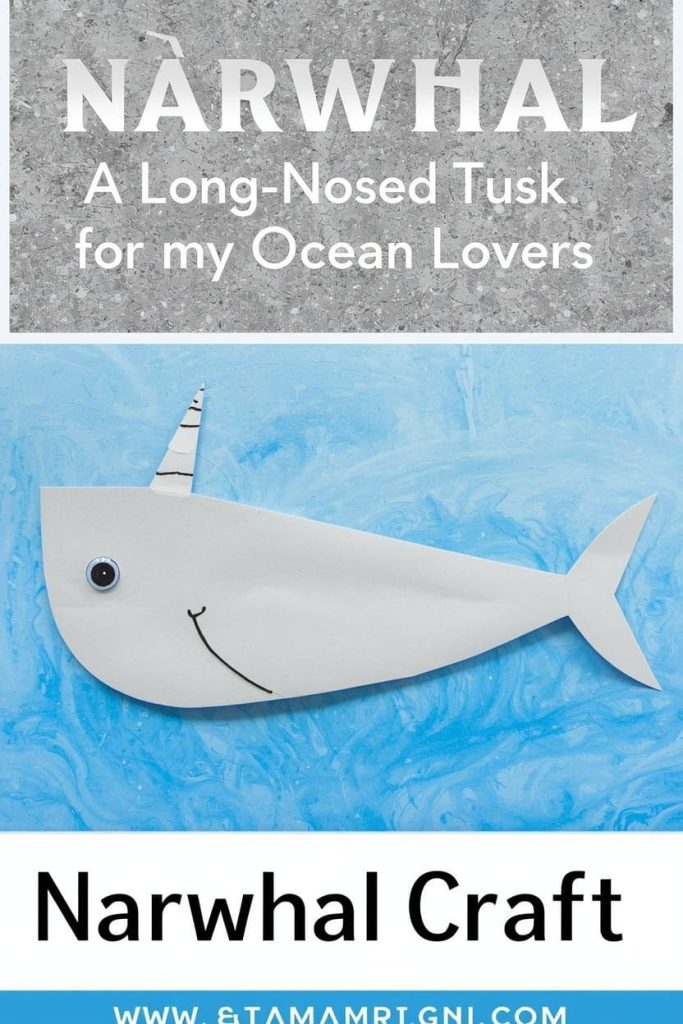
The narwhal’s tusk is basically a straight line waiting for a letter, which makes this one of the more visually striking crafts on the list. Kids who are into ocean animals tend to remember this one longer than most because the narwhal itself is a bit of a novelty.
Materials Needed:
- Gray or blue construction paper
- White paper for the tusk
- Googly eyes
- Glue
How To Make:
- On gray or blue paper, draw a long oval body shape that tapers slightly at one end to form the narwhal’s nose, then cut it out
- From white paper, cut a long, narrow triangle to serve as the tusk — about the same length as the narwhal’s body works well proportionally
- Apply a thin line of glue along one straight edge of the tusk
- Press the tusk onto the pointed end of the narwhal’s body so it extends outward like a horn
- Glue on one googly eye near the top of the head, close to the base of the tusk
- Cut a small triangle from the same gray or blue paper to use as a fin, then glue it onto the top of the body
- Let everything dry flat for a few minutes before moving it, since the tusk is the piece most likely to shift
Tips:
- Add a spiral pattern to the tusk with a marker for a more realistic look
- Group several finished narwhals together on blue paper for an ocean-scene bulletin board
Noodle Craft: A Textured N Using Dry Pasta
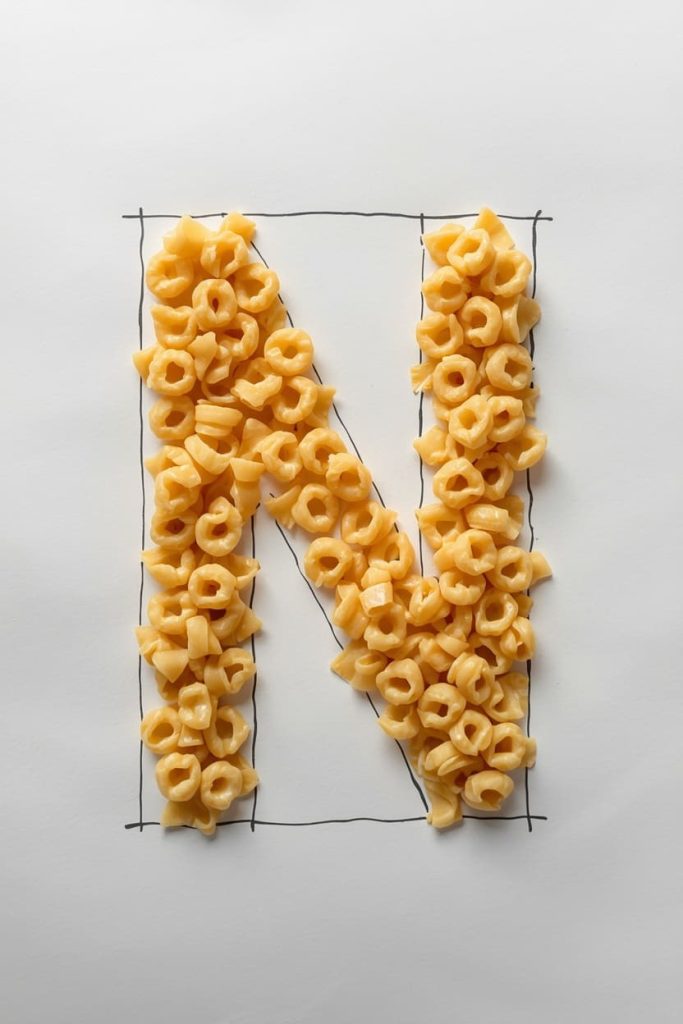
This one leans slightly outside pure paper, but it’s worth the exception, since dried pasta is one of the easiest textures for small hands to work with and it teaches a different kind of fine motor control than cutting does.
Materials Needed:
- Cardstock with a large capital N outline pre-drawn
- Dry pasta (bowtie, elbow, or rotini work well)
- Glue
- Paint (optional)
How To Make:
- Draw a large capital N onto the cardstock, making the letter thick enough (at least 1.5 inches wide) that pasta pieces have room to sit along the lines
- Squeeze a line of glue along one small section of the letter outline at a time, rather than covering the whole letter at once, so the glue doesn’t dry out before your child places the pasta
- Have your child press pasta pieces one by one along the glued section, working in small stretches until the entire letter outline is covered
- Continue applying glue and placing pasta section by section until the full N is filled in
- Set the finished piece flat somewhere it won’t be bumped, and let it dry for at least an hour, though overnight is safer for a fully secure hold
- Once completely dry, paint the pasta using a paintbrush, covering each piece fully
- Let the paint dry fully, which usually takes another hour, before hanging or displaying it
Tips:
- Let the glue set for at least 20 minutes before painting, or the pasta will slide out of place
- Mix pasta shapes for extra texture instead of using just one type
Night Sky Craft: An N Cut From the Stars
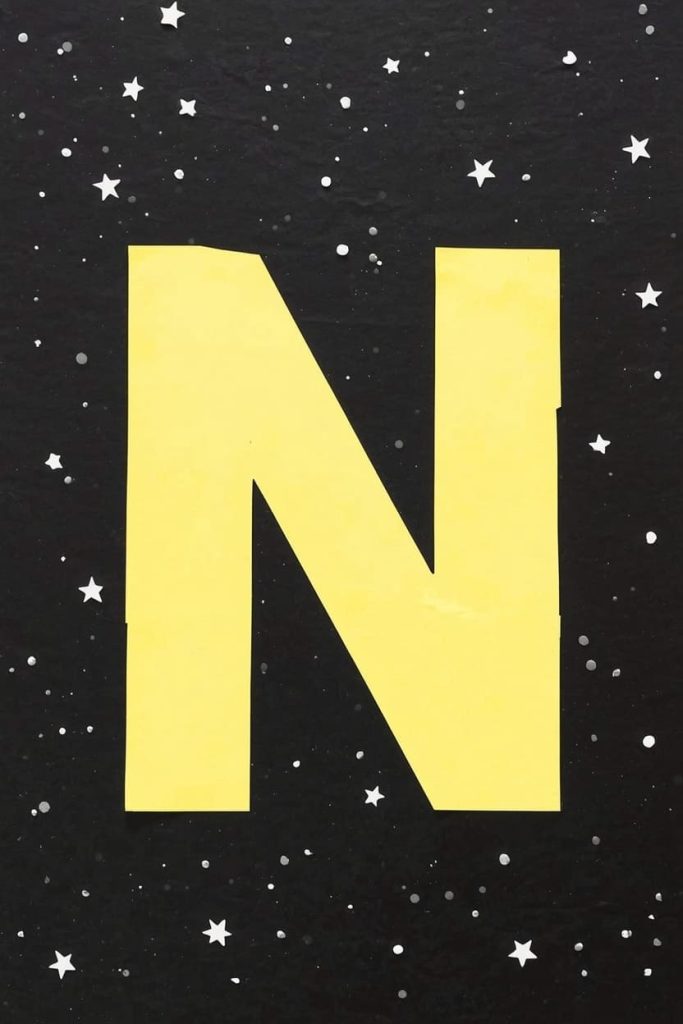
A night sky scene gives you a lot of visual payoff for very little material, which makes it a strong pick when you want something photo-worthy without a lot of setup time.
Materials Needed:
- Black construction paper
- Yellow or silver paper
- White paint or a white gel pen
- Glue
How To Make:
- Draw a large capital N onto yellow or silver paper, sized to take up most of the height of your black background sheet
- Cut out the N carefully, following the drawn lines
- Apply glue to the back of the N in a thin, even layer, covering the edges especially well so they don’t curl up later
- Center the N onto the black background paper and press it down firmly, smoothing from the middle outward
- Dip a toothpick into white paint, or use a white gel pen directly, and add small dot stars scattered around the N
- Space the stars unevenly, in small clusters, rather than in a perfect grid, for a more natural night-sky look
- If adding a moon, cut a small crescent shape from white or silver paper and glue it into one of the corners once the stars are dry
Tips:
- Use a toothpick dipped in white paint to make small, even star dots
- This pairs naturally with the Letter M moon craft if you want to display them side by side
Notebook Craft: A Mini N-Covered Journal
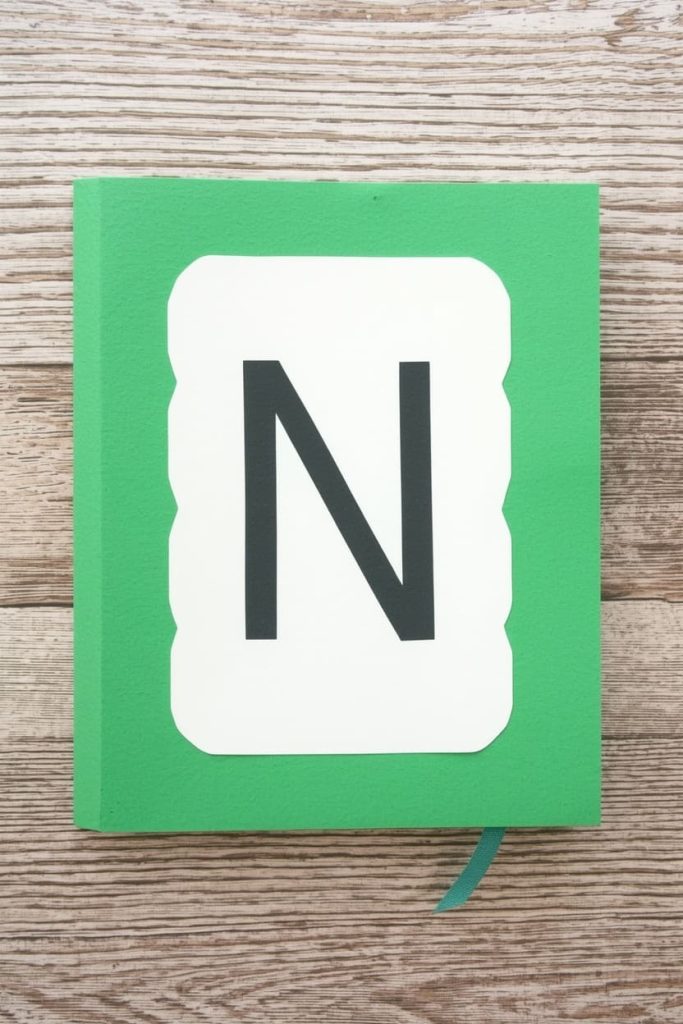
This craft doubles as an actual usable item, which makes it a favorite for parents who want the project to have a life past the day it’s made. Kids can keep drawing in it long after N week is over.
Materials Needed:
- Construction paper or cardstock for the cover
- A few blank sheets of plain paper
- Stapler
- Markers or stickers
How To Make:
- Take one piece of cardstock and fold it in half evenly to form the notebook’s front and back cover, creasing firmly along the fold
- Take 4 to 6 sheets of plain paper and fold each one in half the same way
- Stack the folded plain sheets together, then nest them inside the folded cardstock cover so all the folds line up along the same spine
- Open the whole stack flat along the spine and place 2 to 3 staples evenly along the fold line to bind everything together
- Close the notebook and press along the spine to flatten it
- On the front cover, draw a large capital N in the center, leaving room around it for decorating
- Let your child color in the N and add markers, stickers, or drawings around it to finish the cover
Tips:
- Let your child fill the first page with N words as a built-in extension activity
- Use a different paper color for every few pages inside to make it feel more special
Newspaper Hat Craft: A Foldable N-Topped Hat
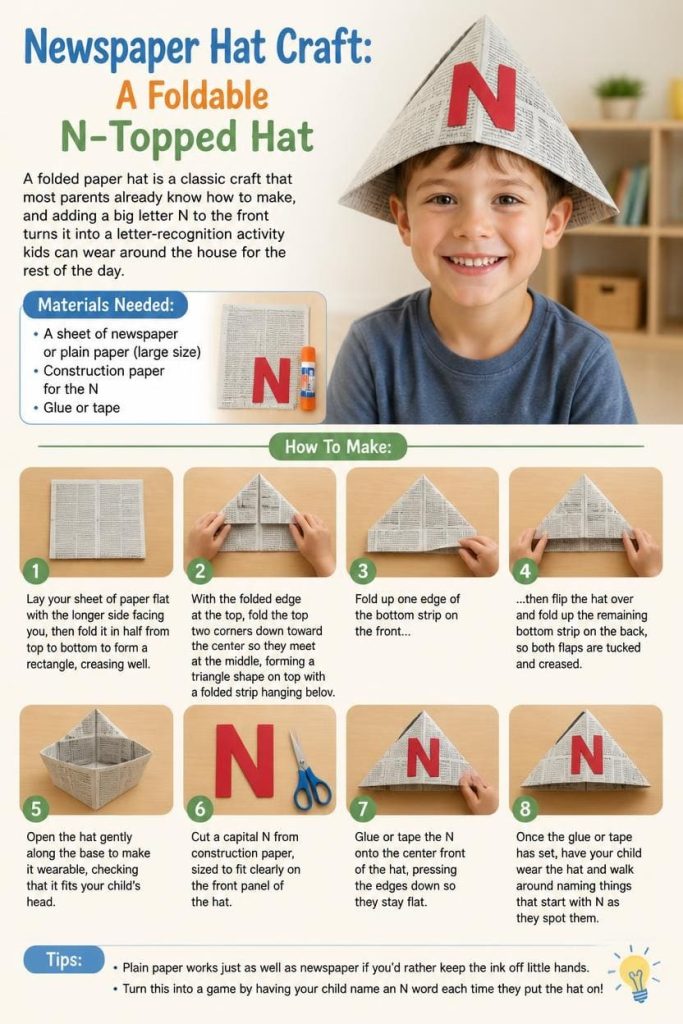
A folded paper hat is a classic craft that most parents already know how to make, and adding a big letter N to the front turns it into a letter-recognition activity kids can wear around the house for the rest of the day.
Materials Needed:
- A sheet of newspaper or plain paper (large size)
- Construction paper for the N
- Glue or tape
How To Make:
- Lay your sheet of paper flat with the longer side facing you, then fold it in half from top to bottom to form a rectangle, creasing well
- With the folded edge at the top, fold the top two corners down toward the center so they meet at the middle, forming a triangle shape on top with a folded strip hanging below
- Fold up one edge of the bottom strip on the front, then flip the hat over and fold up the remaining bottom strip on the back, so both flaps are tucked and creased
- Open the hat gently along the base to make it wearable, checking that it fits your child’s head
- Cut a capital N from construction paper, sized to fit clearly on the front panel of the hat
- Glue or tape the N onto the center front of the hat, pressing the edges down so they stay flat
- Once the glue or tape has set, have your child wear the hat and walk around naming things that start with N as they spot them
Tips:
- Plain paper works just as well as newspaper if you’d rather keep the ink off little hands
- Turn this into a game by having your child name an N word each time they put the hat on
FAQs
What age is best for these letter N crafts?
Most of these work well for ages 2 to 6, though the necklace and noodle crafts are easier for kids 4 and up because of the fine motor control involved. For younger toddlers, pre-cut the shapes and let them focus on gluing and decorating.
Why is letter N harder to craft than other letters?
N simply has fewer everyday objects that are instantly recognizable and easy to shape from paper, compared to a letter like M or B. Picking themes like nest, narwhal, and night sky works around that by leaning on shapes that translate well into paper rather than forcing a literal N object.
Do I need any special tools to make these?
No. Everything on this list uses basic paper, glue, scissors, and markers, aside from the noodle craft, which just needs a bag of dry pasta from your pantry.
How do I keep the mess to a minimum?
Stick to glue sticks instead of liquid glue for most of these, and pre-cut small detail pieces like the narwhal tusk or necklace shapes ahead of time. The noodle craft is the messiest one on the list, so save that for a day when you don’t mind a bit of glue on the table.
Which craft is best for a classroom of multiple kids?
The necklace craft is fastest and easiest to prep in bulk, since you can pre-cut and pre-punch the N shapes ahead of time. The notebook craft is best if you want an activity that continues being useful after N week ends.

Sohel Rana is the writer, editor, publisher, and founder of The Tidy Porch. He is the man who is responsible for the craft (my wife created) being converted into a written piece. He also helps her wife (Sumona) by capturing videos of each craft. In short, he brings each craft created by her wife in front of you by transforming it into an article and a video.
