
My daughter came home from preschool last week and told me S week was “the sun and nothing else.”
Every craft, every day, was some version of a yellow circle with triangle rays glued on. By Wednesday she was bored of it. So that weekend I sat down with her and tried to come up with S crafts that didn’t feel like the same yellow circle over and over.
A little paper snail showed up first, and she asked to make three more before dinner.
Letter S has more good options than most letters get credit for. Here are 7 that go past the obvious ones.
The 5 Supplies That Make Every One of These Crafts Easier
You probably have some of this already, but these five make S week a lot smoother.
- Crayola Construction Paper Pack (Assorted Colors) — gives you every base color you need for a snail, sailboat, or strawberry without a store run.
- Fiskars Blunt-Tip Kids Scissors — cuts paper cleanly without cutting little fingers, which matters most on the spider and sailboat crafts.
- Elmer’s Disappearing Purple School Glue Sticks — goes on purple so kids can see where they’ve applied it, then dries clear.
- Crayola Broad Line Washable Markers — adds detail work like snake patterns or sock stripes without bleeding through thin paper.
- Googly Eyes Assorted Size Pack (100+ Pieces) — turns the snail, spider, and snake into characters in about two seconds.
Snake Craft: A Coiled S Made From One Long Strip
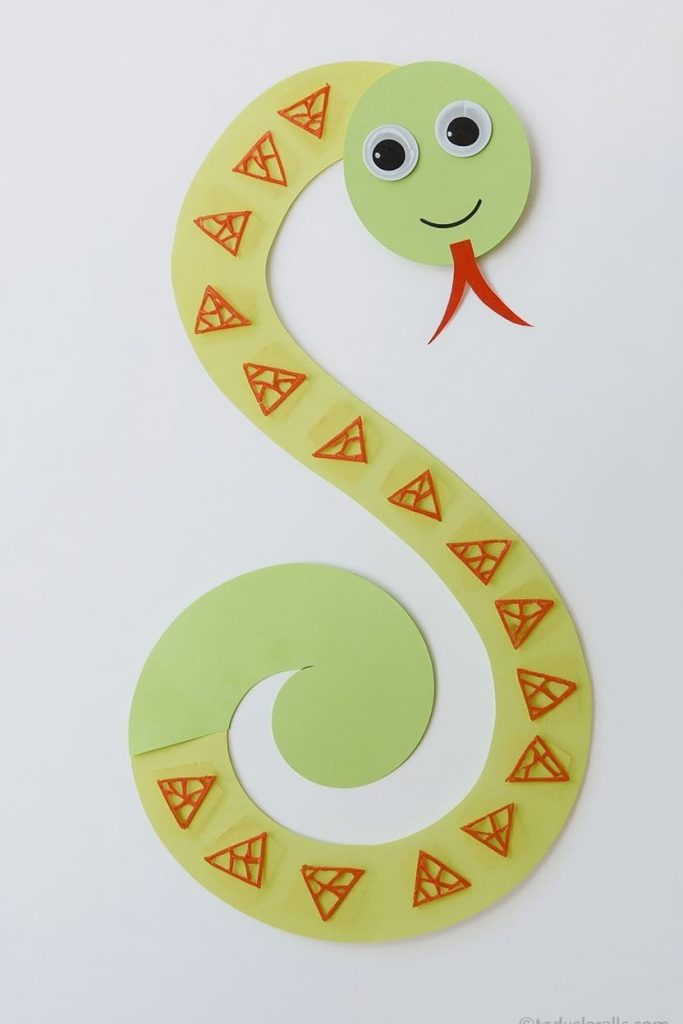
A snake is the most obvious letter S craft out there, but it earns its spot because the letter S actually IS the snake’s body. There’s no interpreting required, which makes this one of the easiest wins for younger toddlers.
Materials Needed:
- Green or any bright construction paper
- Googly eyes
- Red paper scrap for the tongue
- Glue
How To Make:
- Cut a long strip of paper, about 1.5 inches wide and running the full length of the sheet
- Starting at one end, curve the strip into an S shape on a flat surface, adjusting the curls until it looks balanced
- Once you’re happy with the shape, glue the strip down onto a background sheet in that S position, working in small sections and pressing firmly as you go
- Glue a googly eye near one end of the strip to mark the snake’s head
- Cut a thin V-shaped tongue from red paper and glue it just under the eye
Tips:
- Practice the S curve on the table before adding any glue, so you’re not fighting the shape while it’s sticky
- Add small triangle scales along the body with a marker for extra texture once the glue has dried
Sunflower Craft: A Layered S-Shaped Petal Flower
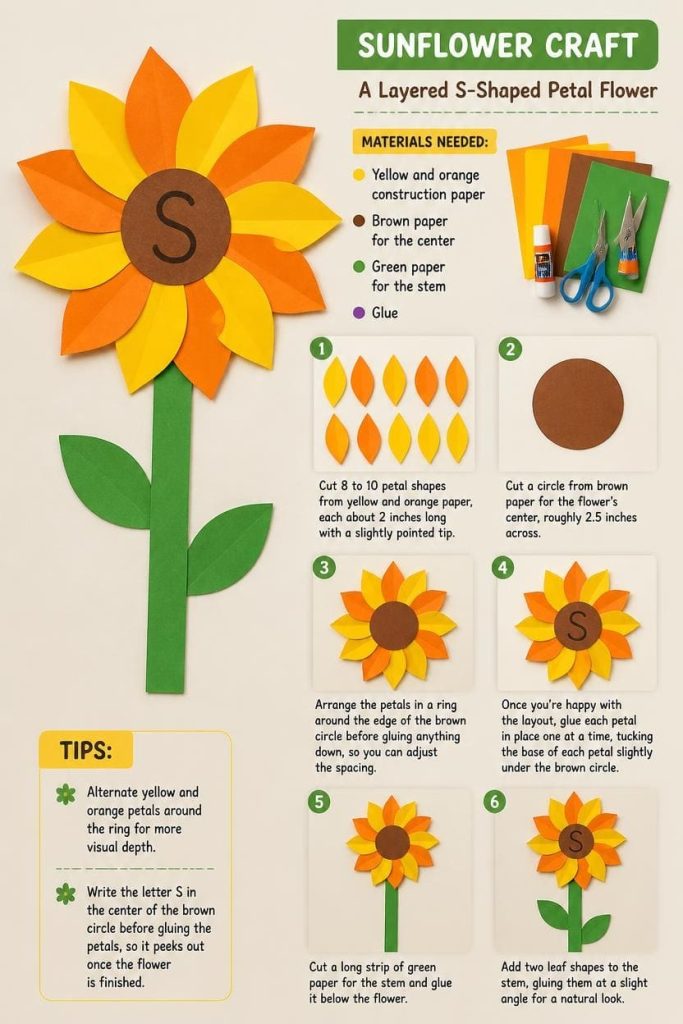
A sunflower is a fresher pick than the standard sun face, and the petals give kids a chance to practice cutting curved shapes instead of straight lines. It’s also one of the more photogenic crafts on this list.
Materials Needed:
- Yellow and orange construction paper
- Brown paper for the center
- Green paper for the stem
- Glue
How To Make:
- Cut 8 to 10 petal shapes from yellow and orange paper, each about 2 inches long with a slightly pointed tip
- Cut a circle from brown paper for the flower’s center, roughly 2.5 inches across
- Arrange the petals in a ring around the edge of the brown circle before gluing anything down, so you can adjust the spacing
- Once you’re happy with the layout, glue each petal in place one at a time, tucking the base of each petal slightly under the brown circle
- Cut a long strip of green paper for the stem and glue it below the flower
- Add two leaf shapes to the stem, gluing them at a slight angle for a natural look
Tips:
- Alternate yellow and orange petals around the ring for more visual depth
- Write the letter S in the center of the brown circle before gluing the petals, so it peeks out once the flower is finished
Spider Craft: A Bendy-Legged S You Can Hang Anywhere
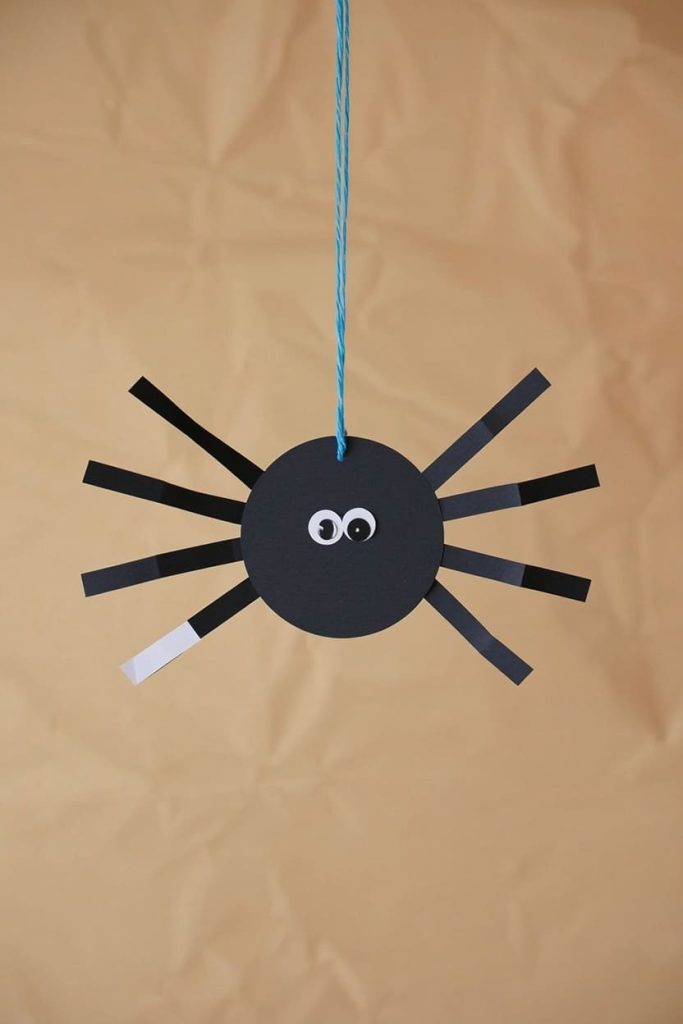
A spider is one of the few S crafts that kids ask to make again on their own, since the legs give it personality the moment it’s finished. This one also builds real cutting practice, since the legs are thin strips that require some control.
Materials Needed:
- Black construction paper
- Googly eyes
- White or gray paper for detail (optional)
- Glue
How To Make:
- Cut a large oval from black paper for the spider’s body
- Cut 8 thin strips of black paper, each about 4 inches long, for the legs
- Fold each leg strip in one or two places to create bent “knee” joints, creasing firmly at each fold
- Glue 4 legs along each side of the body, spacing them evenly and angling them slightly downward like a real spider’s stance
- Glue on two googly eyes near the front of the body
- Let the glue dry completely before picking it up, since the legs take the longest to set
Tips:
- Fold all 8 legs before gluing any of them down, so the process moves faster once you start attaching
- Hang the finished spider from a string taped to the ceiling for a fun 3D display, if you don’t mind stepping slightly outside the paper-only rule
Snail Craft: A Spiral-Shell S Made From Rolled Paper
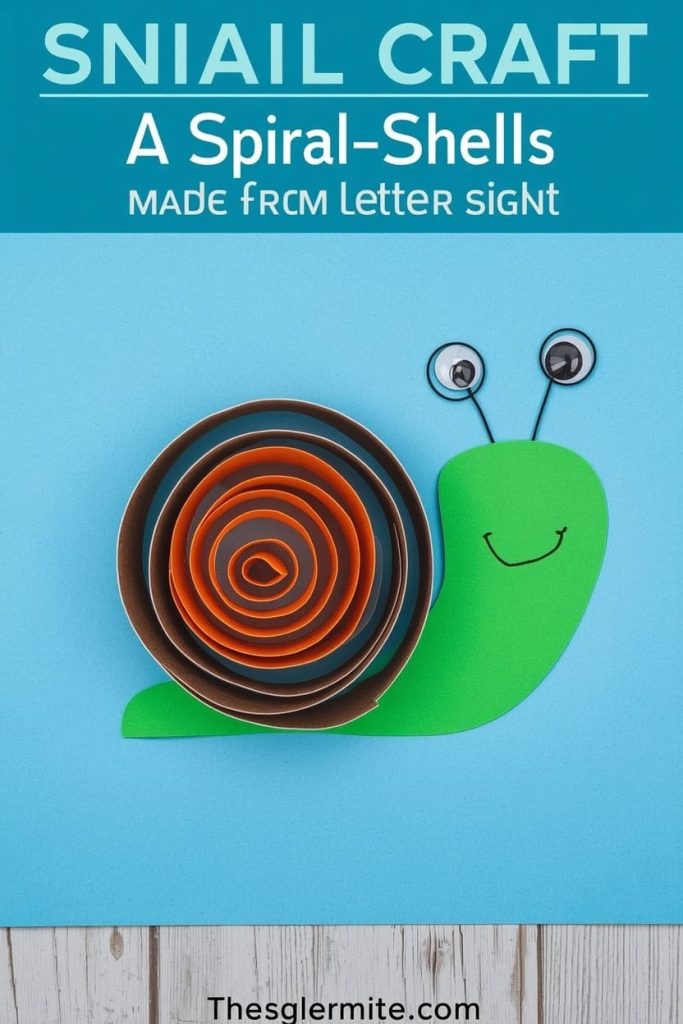
A snail’s shell is a spiral, and a spiral is really just a fancier S, which makes this one of the most satisfying letter S crafts once kids see the connection. It’s also a great fine motor project since the spiral takes some patience to roll evenly.
Materials Needed:
- Brown or orange paper for the shell
- Green paper for the body
- Googly eyes
- Glue
How To Make:
- Draw a spiral shape onto the brown or orange paper, starting from the outer edge and winding inward, then cut along the spiral line
- Gently curl the cut spiral strip by hand until it coils into a rounded shell shape, adjusting the tightness as you go
- Glue the outer end of the spiral down onto a background sheet or a green body cutout, letting the rest of the coil sit naturally on top
- Cut a curved green body shape for the snail and glue the shell on top of one end of it
- Glue a googly eye near the front of the body
Tips:
- Draw the spiral lightly in pencil first if your child is doing the cutting, so they have a clear line to follow
- Use two different shades of brown or orange in alternating spiral rings for a striped shell look
Sailboat Craft: A Triangle-Sailed S for a Simple Ocean Scene
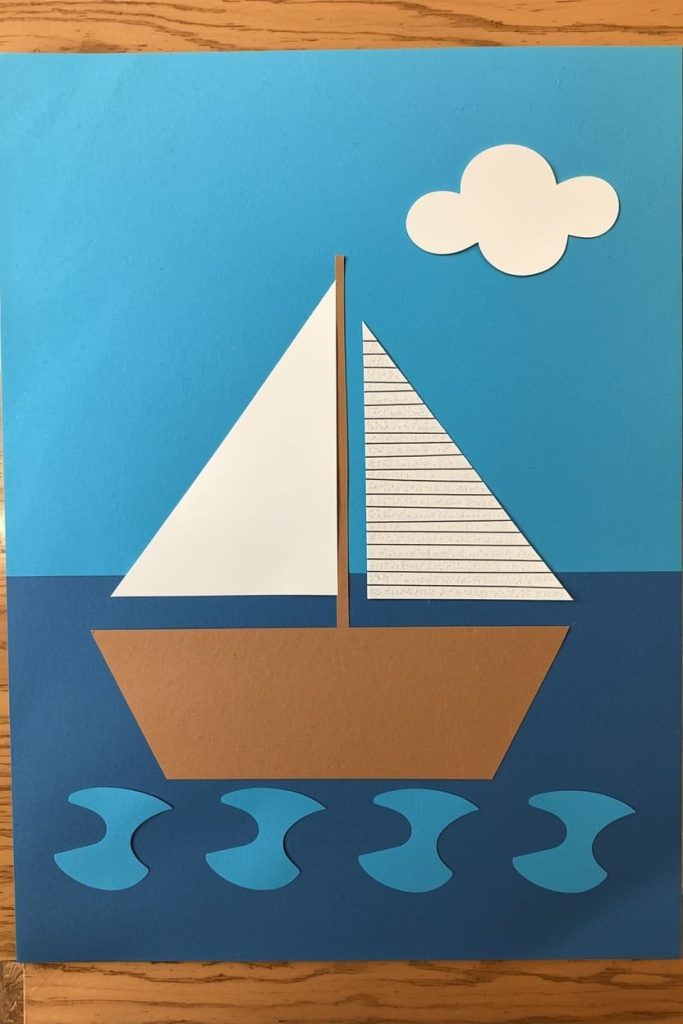
A sailboat brings in a triangle sail and a rectangle hull, which gives kids practice with two different basic shapes in one craft. It also sets up nicely as part of a bigger ocean-themed board if you’re doing a series of animal or nature letters.
Materials Needed:
- Blue paper for the background and water
- White or striped paper for the sail
- Brown paper for the boat hull
- Glue
How To Make:
- Cut a wavy strip along the bottom third of the blue background paper to represent water, using a separate darker blue sheet if you want contrast
- Cut a rectangle or trapezoid shape from brown paper for the boat’s hull and glue it just above the water line
- Cut a triangle from white or striped paper for the sail
- Glue a thin vertical strip of paper as the mast, standing up from the center of the hull
- Attach the triangle sail to the mast, lining up the straight edge of the triangle along the mast strip
Tips:
- Cut two sails instead of one and layer them slightly overlapping for a fuller-looking boat
- Add a few paper cloud shapes near the top of the background to fill out the scene
Sock Craft: A Cozy S-Shaped Pair for a Laundry Day Lesson
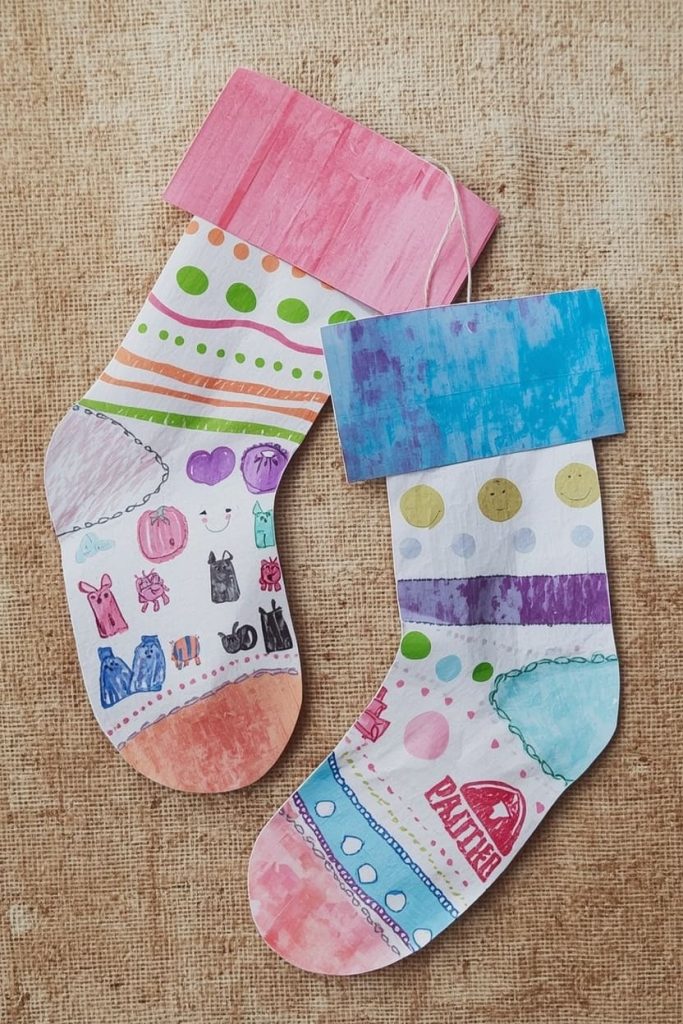
A pair of paper socks is an easy, low-mess option that also works well as a matching activity, since kids can create a pair and practice sorting by pattern or color afterward.
Materials Needed:
- Construction paper in two or more colors
- Markers or small paper shapes for patterns
- Glue
- String or twine (optional)
How To Make:
- Fold a sheet of paper in half and cut a sock shape through both layers so you get two matching socks at once
- Repeat with a second color if you want a mismatched pair, or use the same color for a matching set
- Decorate each sock with stripes, dots, or small paper cutout patterns using the marker or extra paper scraps
- If displaying them as a mini laundry line, punch a small hole at the top of each sock
- Thread a piece of string through the holes and hang the socks along the string
Tips:
- Folding the paper before cutting guarantees both socks come out the same size and shape
- Use this as a matching game by making several pairs in different patterns and having your child find the matches
Strawberry Craft: A Seeded S-Shaped Fruit With Texture
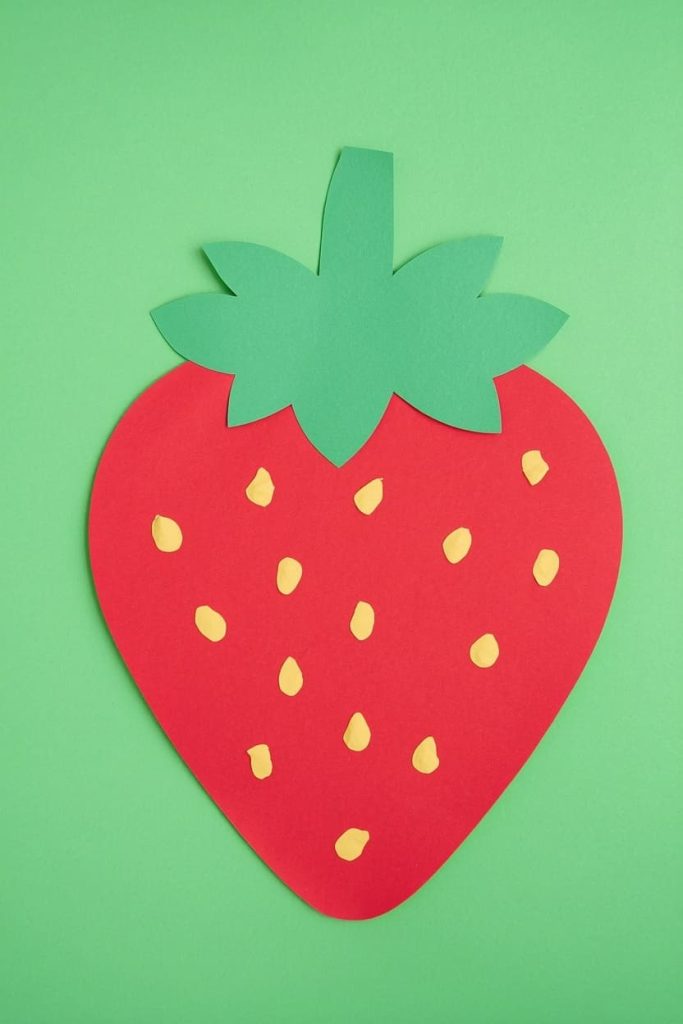
A strawberry brings in a fun texture step, since dotting on the seeds gives younger kids extra practice with small, controlled movements that are different from cutting or gluing.
Materials Needed:
- Red construction paper
- Green paper for the leaves and stem
- Yellow marker or yellow paper dots for seeds
- Glue
How To Make:
- Draw a rounded triangle shape on red paper, wider at the top and tapering to a point at the bottom, then cut it out
- Cut a small zigzag leaf shape from green paper to sit at the top of the strawberry
- Glue the green leaf shape onto the top edge of the red strawberry body
- Cut a short green strip for the stem and glue it just above the leaves
- Use the yellow marker to dot small seed shapes across the surface of the strawberry, or glue on tiny yellow paper dots instead
Tips:
- Let the seed-dotting be the last step, since the red paper needs to be fully glued down and flat before adding detail
- Group a few finished strawberries together on a green background for a simple garden-themed display
FAQs
What age is best for these letter S crafts?
Most of these work well for ages 2 to 6, though the spider and sailboat crafts are easier for kids 4 and up because of the smaller cut pieces involved. For younger toddlers, pre-cut the shapes and let them focus on gluing and decorating.
Why does this list skip some of the usual “letter S” ideas?
Sun and star crafts show up in almost every letter S round-up, so this list leans toward less expected options like snail, sailboat, and strawberry while still including a snake craft, since that one directly mirrors the letter shape itself.
Do I need any special tools to make these?
No. Everything on this list uses basic paper, glue, scissors, and markers. Nothing requires a printer, laminator, or craft cutting machine.
How do I keep the mess to a minimum?
Stick to glue sticks instead of liquid glue, and pre-cut small detail pieces like spider legs or sailboat sails ahead of time. The strawberry seed-dotting step is the messiest one, so save that for a table you don’t mind wiping down.
Which craft is best for a classroom of multiple kids?
The sock craft is fastest and easiest to prep in bulk, since the fold-and-cut method makes matching pairs quickly. The snail craft is best if you want a project that doubles as a fine motor exercise for a longer classroom session.

Sohel Rana is the writer, editor, publisher, and founder of The Tidy Porch. He is the man who is responsible for the craft (my wife created) being converted into a written piece. He also helps her wife (Sumona) by capturing videos of each craft. In short, he brings each craft created by her wife in front of you by transforming it into an article and a video.
