
My nursery wall sat blank for three months. I kept telling myself I’d find “the right art.” Nothing felt right, and nothing fit the budget either.
Then I made one paper flower. Then five. Then thirty.
By the end of a weekend, that blank wall had turned into the first thing every visitor asked about. It cost less than a single framed print.
If you’ve got a wall staring back at you — a nursery, a gallery corner, a backdrop for photos — I’ve been exactly where you are. Below are seven paper flower wall projects. Each one tells you what to make, how many flowers you’ll need, and how to hang it without damaging a thing.
The 5 Supplies I Use for Every Wall Project
You don’t need a full craft studio. These five items handle nearly everything below.
- Crepe paper rolls in mixed colors — Stretches and curls like real petals, giving flowers dimension that flat paper can’t match.
- Command strips or hooks (large size) — Mount flowers without nails, holes, or damage to rental walls.
- A hot glue gun with extra glue sticks — Bonds petal layers fast, so you’re not waiting around between steps.
- A foam board or wood dowel backing — Gives your arrangement a sturdy base you can hang as one piece instead of individual flowers.
- A paper flower template pack — Saves hours of trial and error by giving you pre-sized petal shapes for different flower styles.
A Giant Paper Peony Cluster for a Nursery Accent Wall
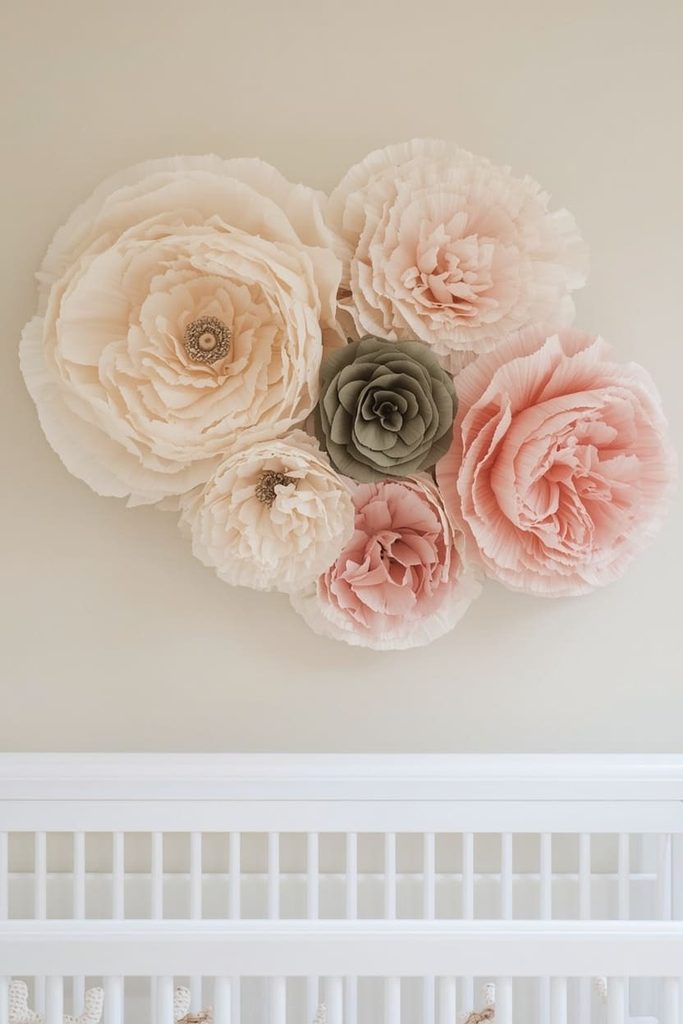
Nurseries call for soft colors and rounded shapes, and giant peonies deliver both without looking too busy for a small room.
What you’ll need: Heavyweight crepe paper in blush, cream, and sage, floral wire, hot glue, and Command strips.
How to make it: Cut petals in three sizes per flower, cupping each one by stretching the center with your thumbs. Layer smallest to largest around a wire base, then curl the outer edges with a pencil for movement. For a standard crib-wall accent, plan on 5–7 flowers ranging from 8 to 16 inches wide.
How to mount it: Attach a Command strip to the back of each flower’s densest point, then press directly onto the wall in a loose cluster, largest flower toward the center.
Difficulty: Moderate. Time: About 3 hours total for a 7-flower cluster.
Styling tip: Angle the cluster slightly off-center above the crib rather than dead-center — it reads more like intentional art.
A Cascading Paper Flower Wall for a Wedding Backdrop
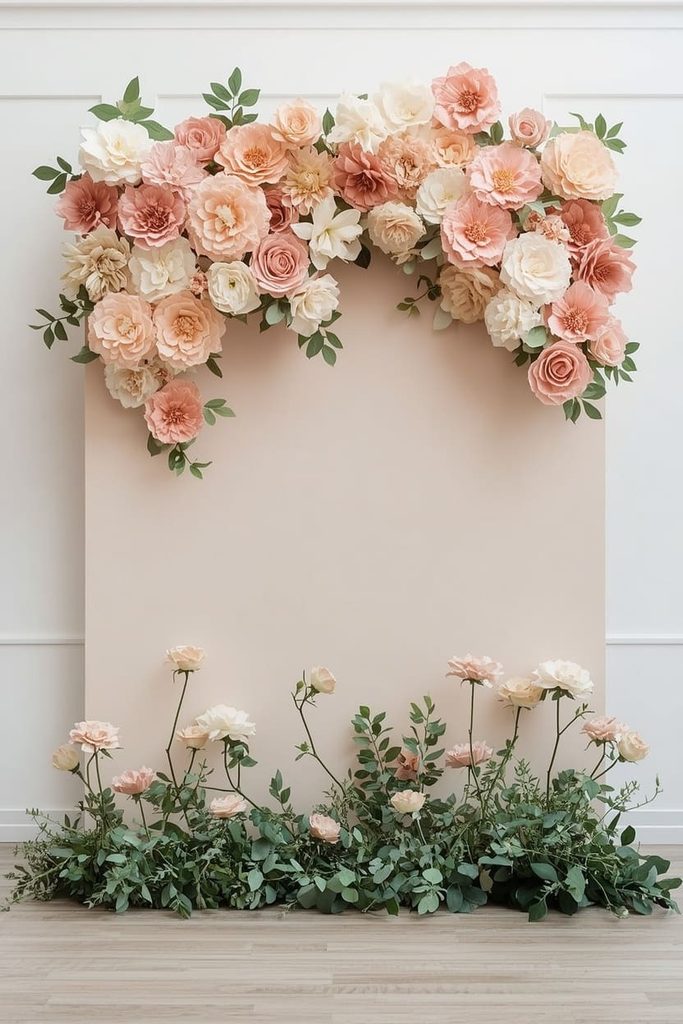
This is the look people picture when they say “paper flower wall” — a lush, floor-to-ceiling cascade behind a sweetheart table or photo booth.
What you’ll need: 40–60 flowers in varying sizes (4–14 inches), a large foam board or fabric backdrop panel, hot glue, and greenery stems.
How to make it: Batch-make flowers in three sizes to save time — treat it like an assembly line, cutting all petals first, then gluing. Arrange largest flowers along the top third, medium ones through the middle, and smaller blooms with greenery filling gaps near the bottom.
How to mount it: Glue flowers directly onto the foam board panel, working top to bottom so lower flowers overlap and hide the panel’s edge. Lean the finished panel against the wall or hang it from ceiling hooks.
Difficulty: Advanced, due to volume. Time: 8–10 hours spread across a few days.
Styling tip: Leave a flower-free “window” at head height so it frames the couple in photos instead of competing with them.
A Single Oversized Bloom as a Statement Focal Point
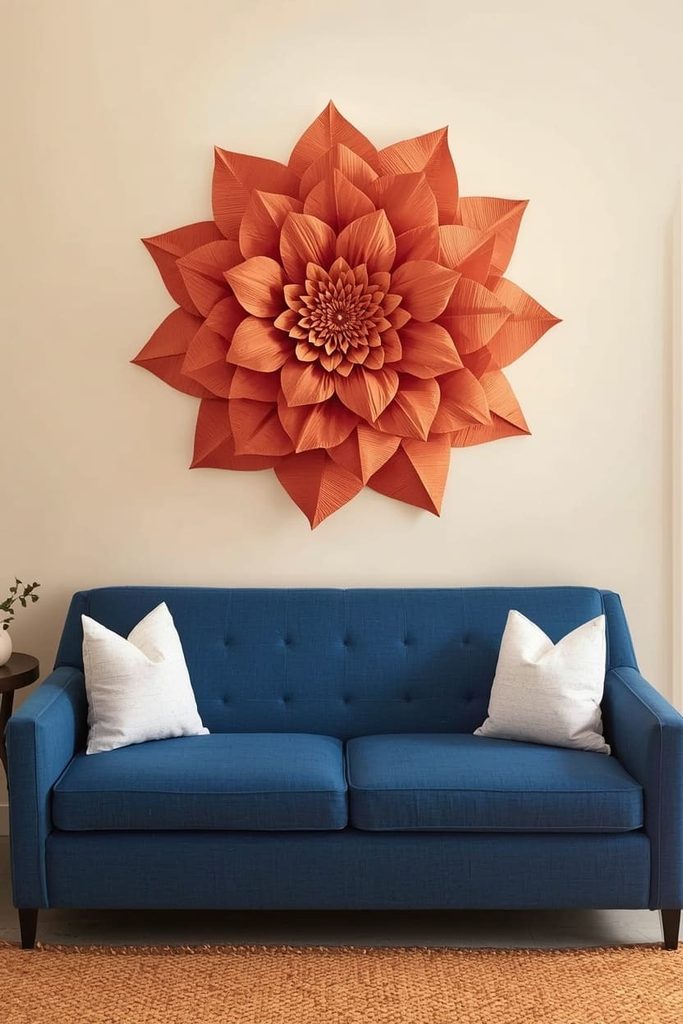
Sometimes one giant flower does more than a cluster of small ones. This works especially well above a headboard or sofa.
What you’ll need: Heavyweight crepe paper in one bold color, a large cardboard or foam circle base (18–24 inches), floral wire, and heavy-duty Command strips.
How to make it: Cut oversized petals — 20 to 25 of them — in graduating sizes. Glue the smallest directly to the center of your circular base, working outward in rings so each layer overlaps the last. Curl every petal edge for a soft, organic look.
How to mount it: Use two or three heavy-duty Command strips spaced evenly across the back for even weight distribution.
Difficulty: Moderate. Time: 2 hours.
Styling tip: Pick a color that contrasts your wall, not matches it — the flower should read instantly, even from across the room.
A Paper Flower Monogram for a Gallery Wall
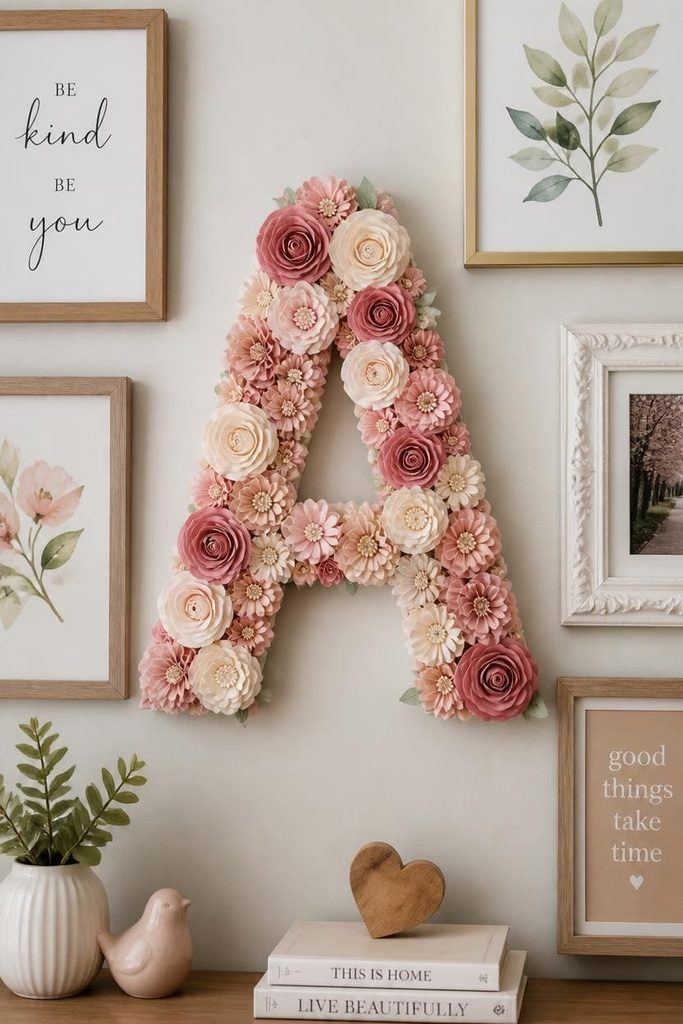
A flower-covered letter adds a personal touch that fits naturally into a gallery wall mix, next to frames and prints.
What you’ll need: A cardboard or wooden letter (12–18 inches tall), 15–20 small paper flowers, hot glue, and a wall hook or Command strip.
How to make it: Make small flowers, 2–4 inches wide, in a mix of two or three coordinating colors. Starting at one end of the letter, glue flowers close together, angling some sideways so no cardboard shows through.
How to mount it: Attach a Command hook to the back before you start gluing flowers — it’s much harder to add after the letter is covered.
Difficulty: Easy to moderate. Time: 2–3 hours.
Styling tip: Use a monogram for a first name initial in a nursery, or a last-name initial for an entryway gallery wall.
A Vertical Paper Flower Garland for a Narrow Wall
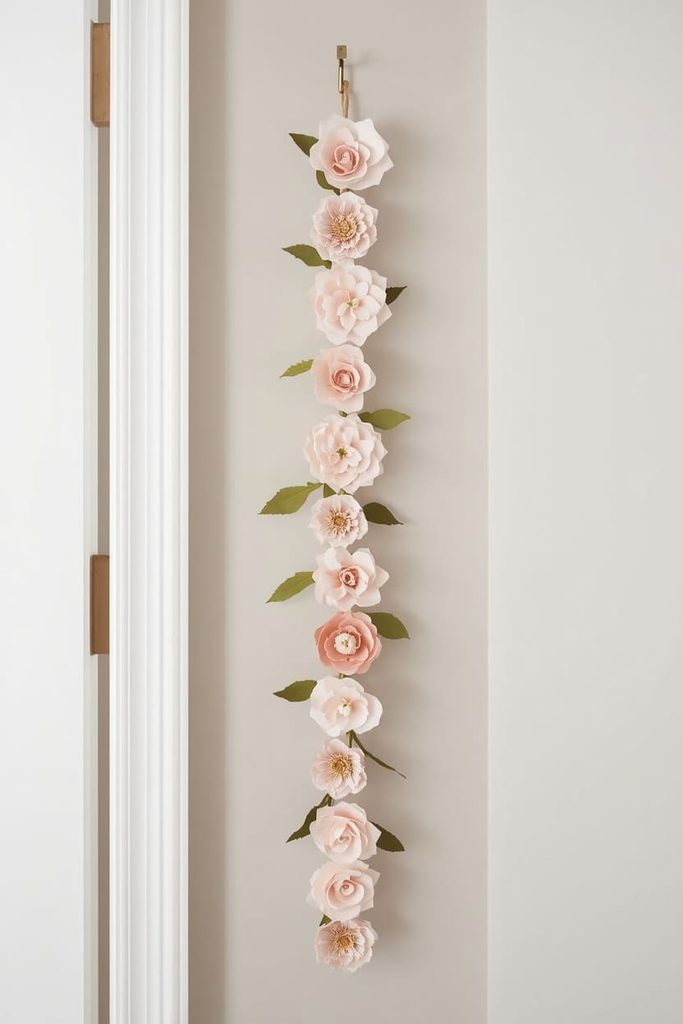
Narrow walls, like hallway corners or the space beside a doorway, need a vertical layout instead of a spread-out cluster.
What you’ll need: 12–15 small to medium flowers, ribbon or twine (about 4 feet), faux leaves, and a single wall hook.
How to make it: Arrange flowers along your ribbon from top to bottom, largest near the top and tapering smaller toward the bottom. Glue each flower directly to the ribbon, tucking leaves between blooms to hide gaps.
How to mount it: Hang from one hook at the top; the garland’s own weight keeps it straight against the wall.
Difficulty: Easy. Time: 90 minutes.
Styling tip: Let the last flower hang slightly past a shelf or door frame edge for a natural, unstructured finish.
A Paper Flower Photo Backdrop Panel for Parties
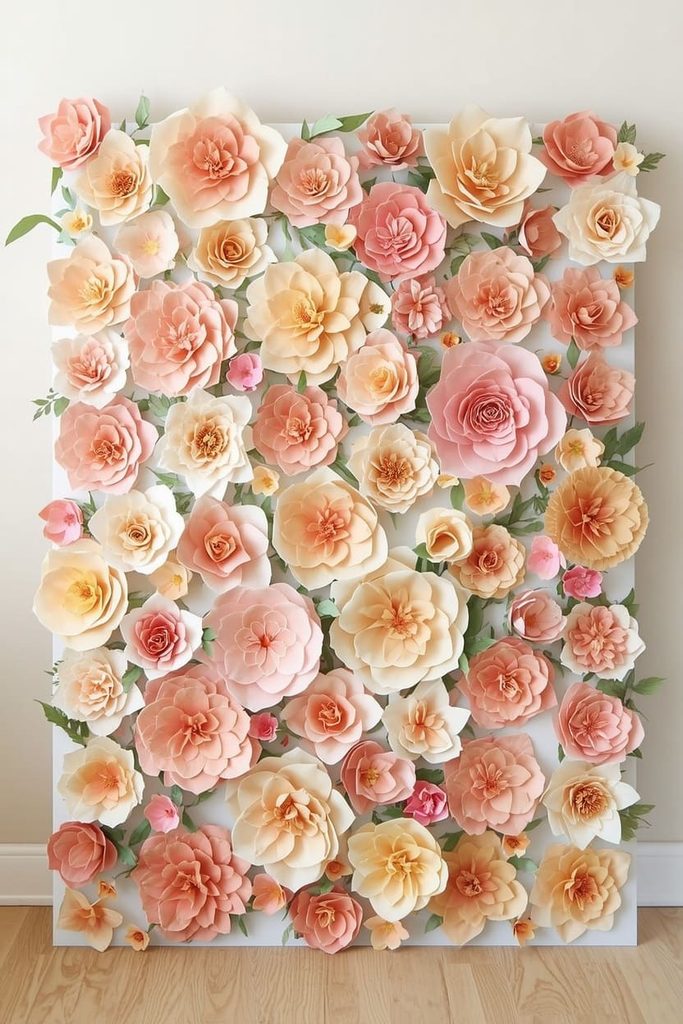
This is a portable option — perfect if you need a backdrop that comes down after the party instead of living on your wall permanently.
What you’ll need: A lightweight foam board (4×6 feet or smaller), 25–35 flowers, hot glue, and painter’s tape for temporary hanging.
How to make it: Cover the board in a loose, scattered pattern rather than a tight grid — leave some board space visible between flower clusters for visual breathing room. Mix three or four flower sizes so it doesn’t look uniform.
How to mount it: Lean the panel against a wall on an easel, or use painter’s tape at the top corners for a temporary hang that won’t damage paint.
Difficulty: Moderate. Time: 4–5 hours.
Styling tip: Store it flat under a bed between events — foam board holds its shape well if it isn’t bent.
A Scattered Mini Flower Wall for a Reading Nook
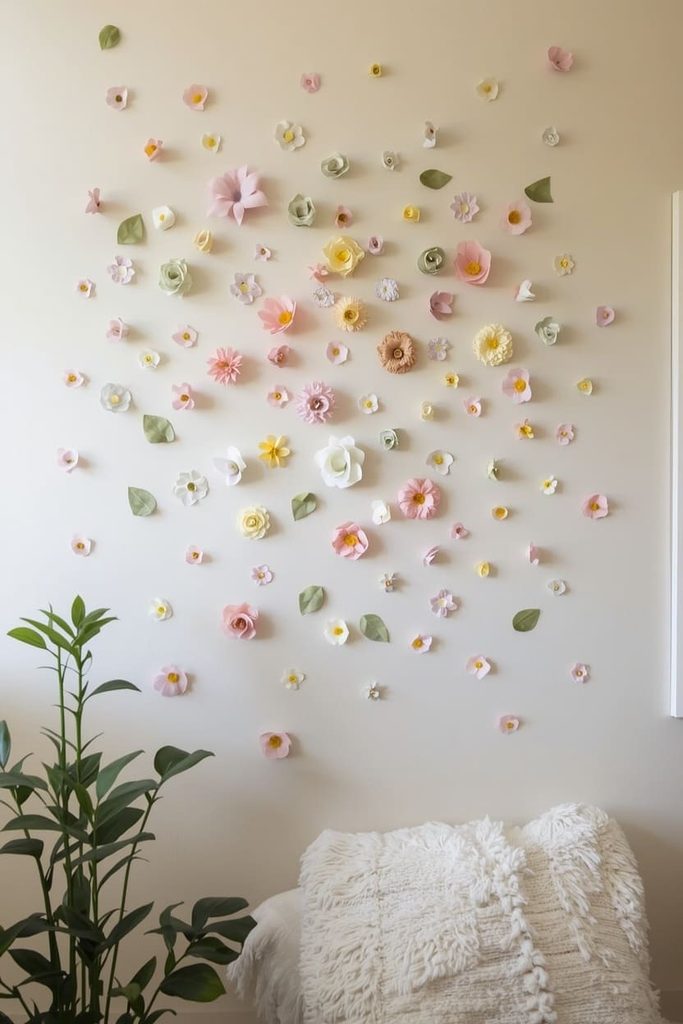
Small, spaced-out flowers create a whimsical look that works well in a kid’s reading corner or a small accent nook without overwhelming the space.
What you’ll need: 10–15 mini flowers (2–3 inches), Command strips (small size), and optional paper leaves.
How to make it: Make flowers in a mix of two or three soft colors. Keep petal counts low — five or six per flower — since the charm here is simplicity, not density.
How to mount it: Place flowers in a loose, uneven scatter rather than a grid. Step back every few flowers to check the spacing looks natural, not measured.
Difficulty: Easy. Time: 1 hour.
Styling tip: Add a few paper leaves between flowers to break up the color and add depth.
FAQs About Paper Flower Wall Crafts
How many paper flowers do I need for a standard wall? For an accent cluster, 5–10 flowers usually fill an 8- to 10-square-foot area. For a full backdrop wall, plan on 40 or more, mixing sizes so the coverage looks layered instead of flat.
Will Command strips actually hold paper flowers without damaging the wall? Yes, as long as you match the strip size to the flower’s weight. Heavier flowers need the large or heavy-duty version, and all strips remove cleanly from painted drywall when pulled straight down, not outward.
What size paper flowers work best for a small wall versus a large one? Small walls and nooks look best with flowers under 6 inches, so the display doesn’t feel cramped. Larger walls and backdrops can handle flowers 10 inches and up without looking oversized.
Can I make a paper flower wall display that’s removable for renters? Yes. Mount flowers to a foam board or fabric panel instead of directly on the wall, then hang the whole panel with Command hooks. You can take it down and reuse it in a new space later.
How do I keep the spacing from looking too even or artificial? Vary your flower sizes and angle some blooms slightly instead of facing them all forward. Step back and view the wall from a distance every 8–10 flowers to catch spots that look too uniform.
How long does a full paper flower wall project take to finish? Small accent clusters take 1–3 hours. Full backdrop walls with 40+ flowers usually take 8–10 hours, so plan to spread the work across two or three sessions rather than one sitting.

Sohel Rana is the writer, editor, publisher, and founder of The Tidy Porch. He is the man who is responsible for the craft (my wife created) being converted into a written piece. He also helps her wife (Sumona) by capturing videos of each craft. In short, he brings each craft created by her wife in front of you by transforming it into an article and a video.
