
Last December, a small voice at my craft table asked, “Can we make a tree?” I said yes. Then I grabbed the wrong supplies.
Glue went everywhere. Paint landed on my sleeve. The tree ended up sad and soggy. That day taught me something.
The right craft matters more than the fancy one. A tree should fit your child’s age and your patience. So I sorted my favorites.
Below you will find 17 Christmas tree crafts for kids, grouped by age, mess, and time. Pick one that fits your day. You will finish it, and your child will love it.
How to Pick the Right Christmas Tree Craft for Your Child
Start with your child’s age. Then check the mess level and the time. That is the whole trick.
Age sets the skills. Toddlers (2 to 3) can tear, stick, and press. Preschoolers (4 to 5) can paint, stamp, and cut with help. Kids 6 and up can fold, layer, and follow many steps. A craft that is too hard ends in tears. A craft that is too easy ends in boredom.
Mess sets your stress. Be honest about your day. If you feel tired, pick a no-mess craft. If you have a free hour and an old tablecloth, bring out the paint.
Time sets the plan. Some trees take 10 minutes. Others need 30 or more, plus drying. Match the craft to nap time, class time, or a quiet evening.
Every idea below has a tag line. It shows age, mess, and time at a glance. Here is my quick-pick guide:
- Need an easy Christmas tree craft in 10 minutes? Try the torn paper tree, washi tape tree, or cupcake liner tree.
- Hate cleanup? Choose the washi tape tree or the folded paper tree.
- Want a keepsake for grandparents? Make the handprint tree or the layered paper tree.
- Have a group of kids? Go with the paper plate tree or the sponge-stamped tree.
- Have a rainy afternoon? Build the popsicle stick tree or the pasta tree.
What You Need for Most of These Crafts
Most of these trees use the same basic supplies. You probably own them already. A short list saves you a trip to the store.
Your basic kit:
- Green construction paper and cardstock
- White and blue paper for backgrounds
- Washable green, brown, red, and yellow paint
- Glue sticks and white school glue
- Safety scissors
- Washable markers
- Paintbrushes
- Tape and washi tape
- A tray or old tablecloth
- Baby wipes
Easy swaps:
- No green paper? Paint white paper green and let it dry. You can also tear pages from a green magazine.
- No cardstock? Cut up a cereal box.
- No brown paper? Use a brown paper bag for the trunk.
- No star? Cut one from yellow paper or foil.
Set up before your child sits down. Cover the table. Pour paint into shallow dishes. Cut the shapes you need. Prep takes five minutes and saves a lot of stress.
A quick safety note: Small items like buttons and pom-poms can choke little ones. Keep them for older kids, and stay close.
Christmas Tree Crafts for Toddlers (Ages 2 to 3)
Toddlers need quick wins. These five trees use simple moves like tearing, pressing, and dabbing. Keep your own hands close, and expect a little wonderful chaos.
1. Torn Paper Tree
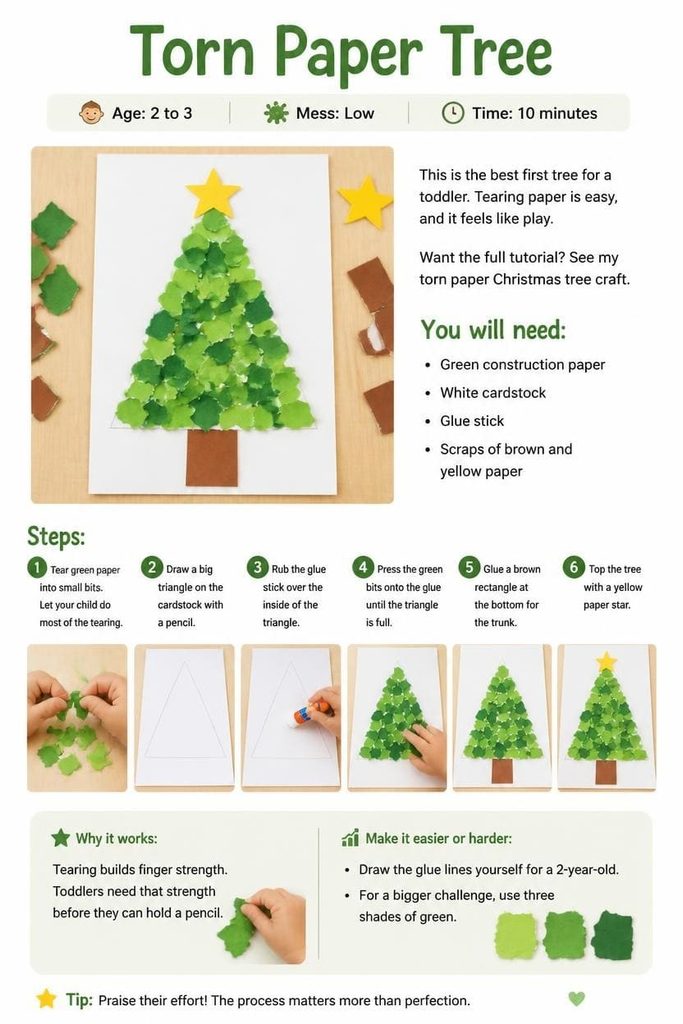
Age: 2 to 3 | Mess: Low | Time: 10 minutes
This is the best first tree for a toddler. Tearing paper is easy, and it feels like play. Want the full tutorial? See my torn paper Christmas tree craft.
You will need:
- Green construction paper
- White cardstock
- Glue stick
- Scraps of brown and yellow paper
Steps:
- Tear green paper into small bits. Let your child do most of the tearing.
- Draw a big triangle on the cardstock with a pencil.
- Rub the glue stick over the inside of the triangle.
- Press the green bits onto the glue until the triangle is full.
- Glue a brown rectangle at the bottom for the trunk.
- Top the tree with a yellow paper star.
Why it works: Tearing builds finger strength. Toddlers need that strength before they can hold a pencil.
Make it easier or harder: Draw the glue lines yourself for a 2-year-old. For a bigger challenge, use three shades of green.
2. Tissue Paper Tree
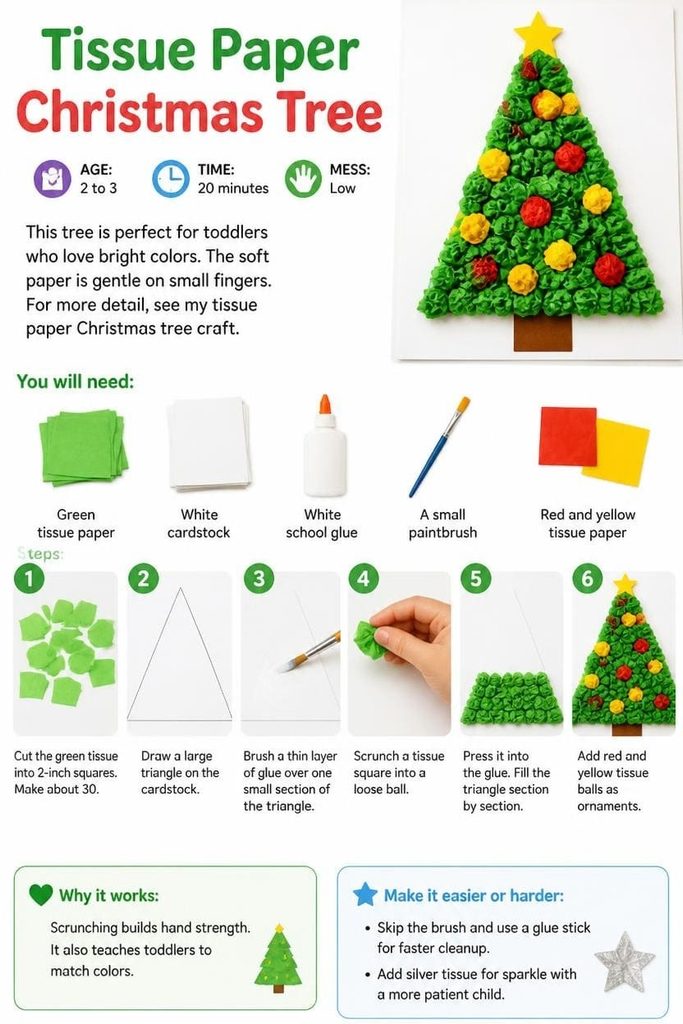
Age: 2 to 3 | Mess: Low | Time: 20 minutes
This tree is perfect for toddlers who love bright colors. The soft paper is gentle on small fingers. For more detail, see my tissue paper Christmas tree craft.
You will need:
- Green tissue paper
- White cardstock
- White school glue
- A small paintbrush
- Red and yellow tissue paper
Steps:
- Cut the green tissue into 2-inch squares. Make about 30.
- Draw a large triangle on the cardstock.
- Brush a thin layer of glue over one small section of the triangle.
- Scrunch a tissue square into a loose ball. Press it into the glue.
- Fill the triangle section by section.
- Add red and yellow tissue balls as ornaments.
Why it works: Scrunching builds hand strength. It also teaches toddlers to match colors.
Make it easier or harder: Skip the brush and use a glue stick for faster cleanup. Add silver tissue for sparkle with a more patient child.
3. Washi Tape Tree
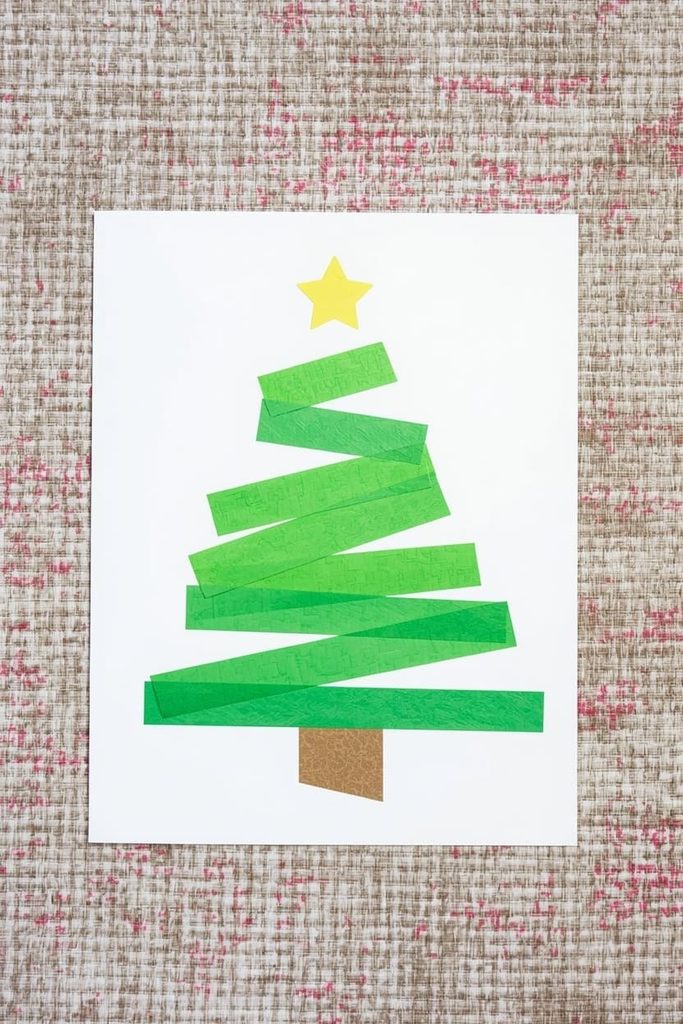
Age: 2 to 3 | Mess: None | Time: 10 minutes
This is my go-to when I want zero cleanup. Washi tape peels and re-sticks, so mistakes are easy to fix.
You will need:
- Green washi tape
- White or blue cardstock
- Brown washi tape
- A star sticker
Steps:
- Tear five strips of green tape. Make them different lengths, from two to six inches.
- Stick the strips along the edge of the table so they are easy to grab.
- Place the shortest strip near the top of the cardstock.
- Add the next longest strip below it. Keep going until the longest strip sits at the bottom.
- Stick a small piece of brown tape under the tree.
- Press a star sticker on top.
Why it works: Peeling and placing tape builds finger control and hand-eye coordination.
Make it easier or harder: Pre-tear the strips for younger toddlers. Ask older ones to sort the strips by length first.
4. Cotton Ball Snow Tree
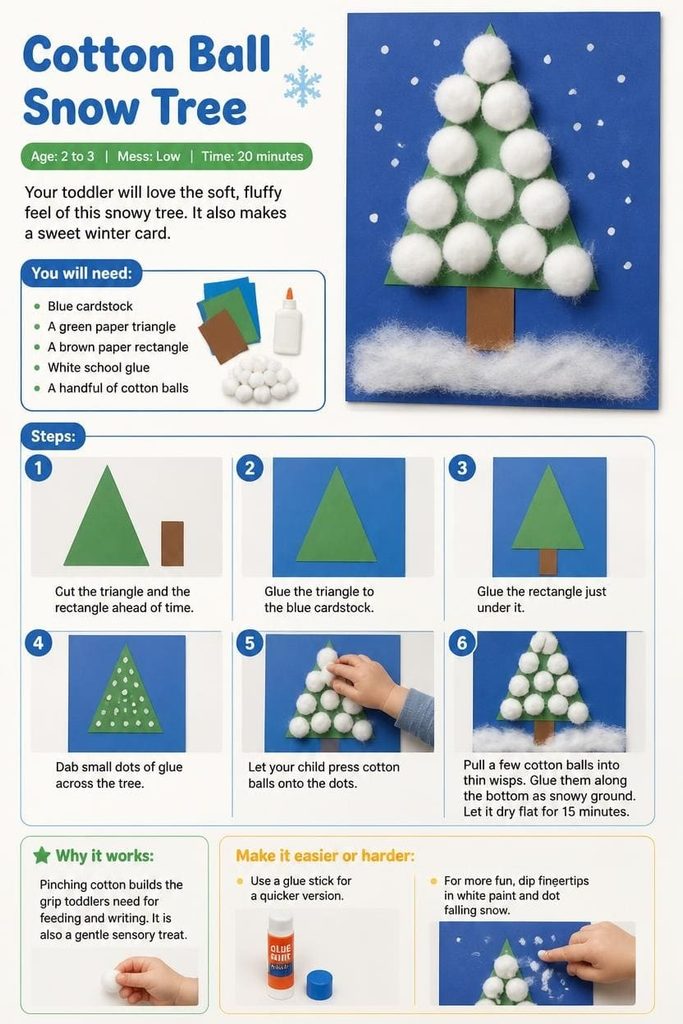
Age: 2 to 3 | Mess: Low | Time: 20 minutes
Your toddler will love the soft, fluffy feel of this snowy tree. It also makes a sweet winter card.
You will need:
- Blue cardstock
- A green paper triangle
- A brown paper rectangle
- White school glue
- A handful of cotton balls
Steps:
- Cut the triangle and the rectangle ahead of time.
- Glue the triangle to the blue cardstock. Glue the rectangle just under it.
- Dab small dots of glue across the tree.
- Let your child press cotton balls onto the dots.
- Pull a few cotton balls into thin wisps. Glue them along the bottom as snowy ground.
- Let it dry flat for 15 minutes.
Why it works: Pinching cotton builds the grip toddlers need for feeding and writing. It is also a gentle sensory treat.
Make it easier or harder: Use a glue stick for a quicker version. For more fun, dip fingertips in white paint and dot falling snow.
5. Handprint Tree
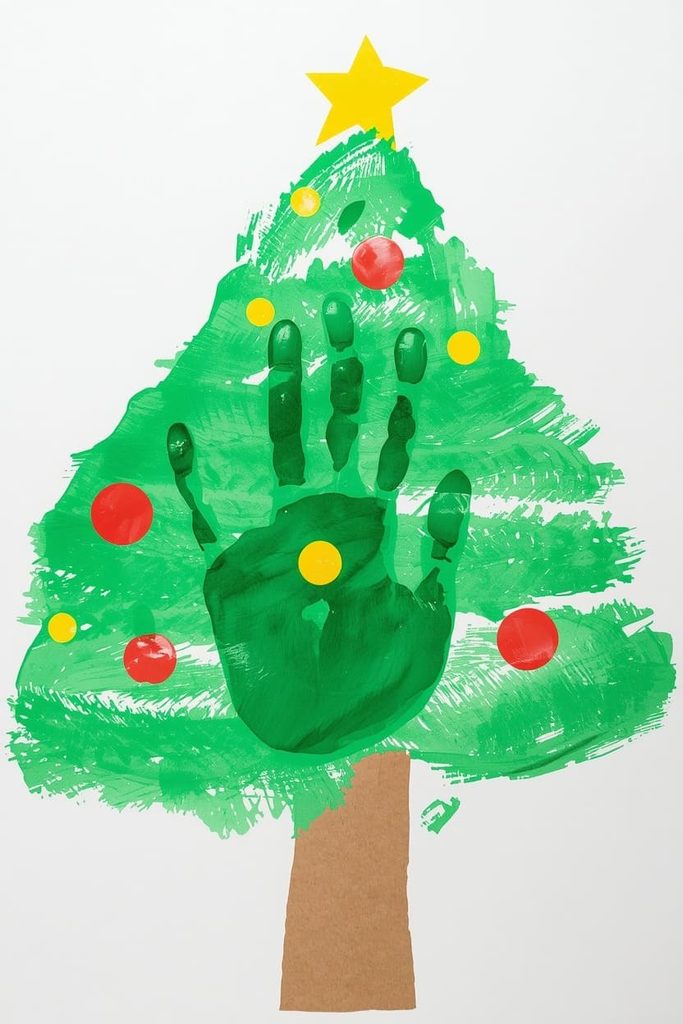
Age: 2 to 3 | Mess: Bring the paint | Time: 20 minutes
Choose this tree when you want a keepsake. A tiny handprint is something grandparents treasure for years. My full guide is here: handprint Christmas tree craft.
You will need:
- Washable green paint
- A paintbrush
- White cardstock
- Red and yellow paint
- A paper bag scrap for the trunk
- Baby wipes
Steps:
- Pour green paint onto a plate. Brush a thin coat over your child’s palm and fingers.
- Press the hand near the bottom of the paper, fingers pointing up. Lift straight up.
- Wipe the hand and repaint it. Press a second print higher, overlapping the first palm.
- Make a third print at the top.
- Let the paint dry, then glue on a brown trunk.
- Add ornaments with fingertip dots of red and yellow.
Why it works: Pressing and lifting teaches gentle control. The print also shows how fast your child grows.
Make it easier or harder: Use a foam brush for a smoother print. Write your child’s name and the year on the back.
Christmas Tree Crafts for Preschoolers (Ages 4 to 5)
Preschoolers want to do more on their own. These six trees add painting, stamping, and counting. They also work well for a preschool class.
6. Paper Plate Tree
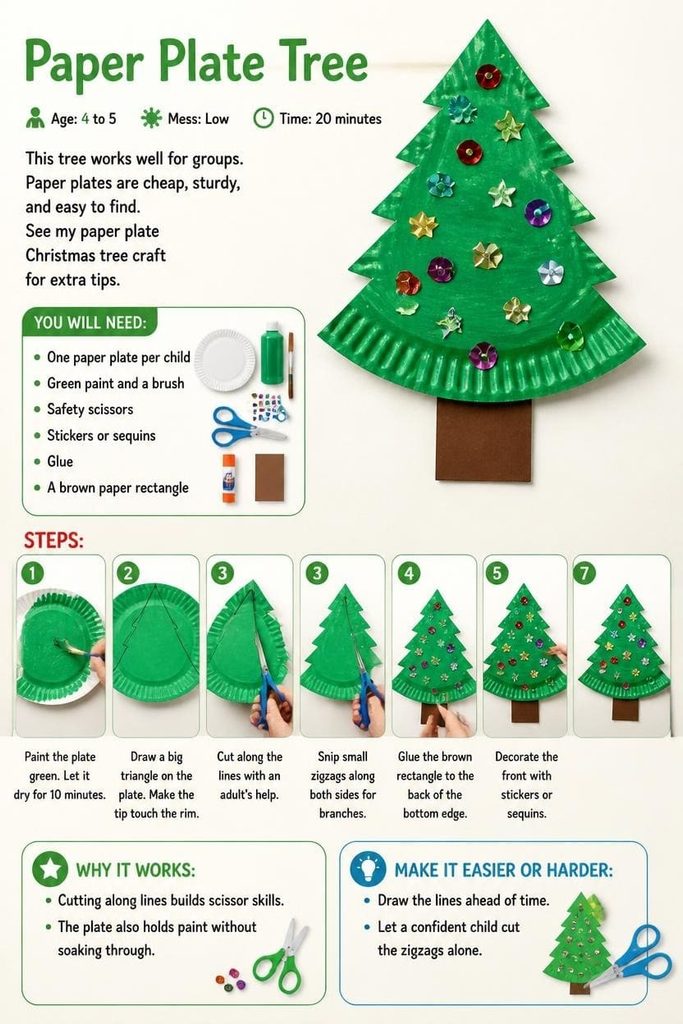
Age: 4 to 5 | Mess: Low | Time: 20 minutes
This tree works well for groups. Paper plates are cheap, sturdy, and easy to find. See my paper plate Christmas tree craft for extra tips.
You will need:
- One paper plate per child
- Green paint and a brush
- Safety scissors
- Stickers or sequins
- Glue
- A brown paper rectangle
Steps:
- Paint the plate green. Let it dry for 10 minutes.
- Draw a big triangle on the plate. Make the tip touch the rim.
- Cut along the lines with an adult’s help.
- Snip small zigzags along both sides for branches.
- Glue the brown rectangle to the back of the bottom edge.
- Decorate the front with stickers or sequins.
Why it works: Cutting along lines builds scissor skills. The plate also holds paint without soaking through.
Make it easier or harder: Draw the lines ahead of time. Let a confident child cut the zigzags alone.
7. Coffee Filter Tree
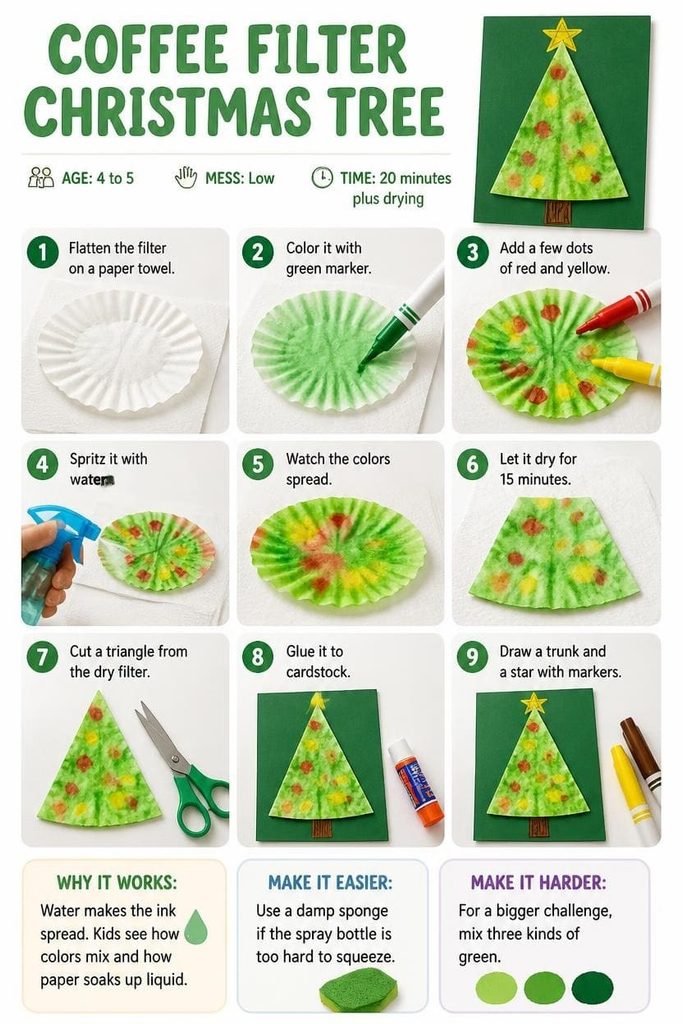
Age: 4 to 5 | Mess: Low | Time: 20 minutes plus drying
Watching colors bleed is pure magic for preschoolers. This craft doubles as a mini science lesson. I wrote a longer version: coffee filter Christmas tree craft.
You will need:
- One white coffee filter
- Washable markers in green, red, and yellow
- A spray bottle of water
- Paper towels
- Scissors and a glue stick
- Cardstock
Steps:
- Flatten the filter on a paper towel.
- Color it with green marker. Add a few dots of red and yellow.
- Spritz it with water. Watch the colors spread.
- Let it dry for 15 minutes.
- Cut a triangle from the dry filter.
- Glue it to cardstock. Draw a trunk and a star with markers.
Why it works: Water makes the ink spread. Kids see how colors mix and how paper soaks up liquid.
Make it easier or harder: Use a damp sponge if the spray bottle is too hard to squeeze. For a bigger challenge, mix three kinds of green.
8. Fork Painted Tree
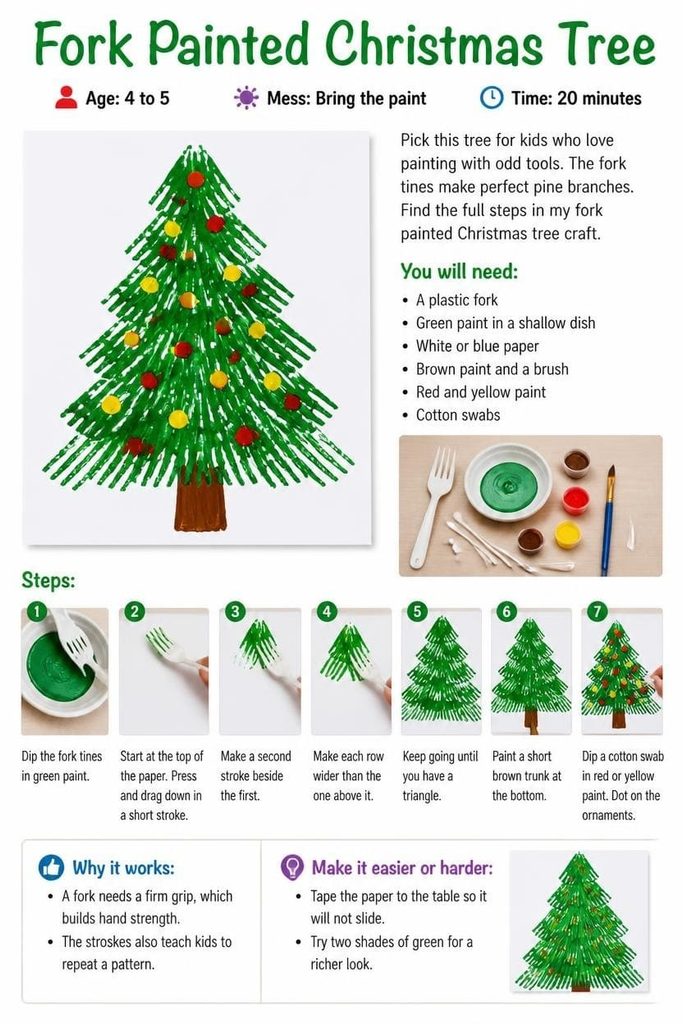
Age: 4 to 5 | Mess: Bring the paint | Time: 20 minutes
Pick this tree for kids who love painting with odd tools. The fork tines make perfect pine branches. Find the full steps in my fork painted Christmas tree craft.
You will need:
- A plastic fork
- Green paint in a shallow dish
- White or blue paper
- Brown paint and a brush
- Red and yellow paint
- Cotton swabs
Steps:
- Dip the fork tines in green paint.
- Start at the top of the paper. Press and drag down in a short stroke.
- Make a second stroke beside the first.
- Make each row wider than the one above it. Keep going until you have a triangle.
- Paint a short brown trunk at the bottom.
- Dip a cotton swab in red or yellow paint. Dot on the ornaments.
Why it works: A fork needs a firm grip, which builds hand strength. The strokes also teach kids to repeat a pattern.
Make it easier or harder: Tape the paper to the table so it will not slide. Try two shades of green for a richer look.
9. Sponge-Stamped Tree
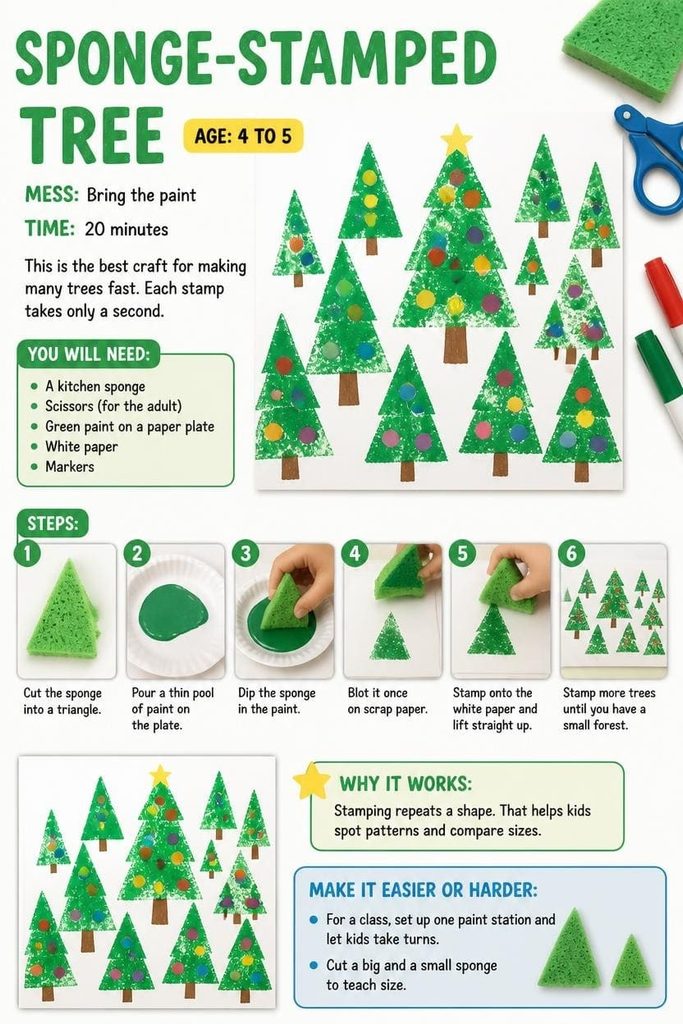
Age: 4 to 5 | Mess: Bring the paint | Time: 20 minutes
This is the best craft for making many trees fast. Each stamp takes only a second.
You will need:
- A kitchen sponge
- Scissors (for the adult)
- Green paint on a paper plate
- White paper
- Markers
Steps:
- Cut the sponge into a triangle.
- Pour a thin pool of paint on the plate.
- Dip the sponge in the paint. Blot it once on scrap paper.
- Stamp onto the white paper and lift straight up.
- Stamp more trees until you have a small forest.
- When the paint dries, add trunks and ornaments with markers.
Why it works: Stamping repeats a shape. That helps kids spot patterns and compare sizes.
Make it easier or harder: For a class, set up one paint station and let kids take turns. Cut a big and a small sponge to teach size.
10. Pom-Pom Counting Tree
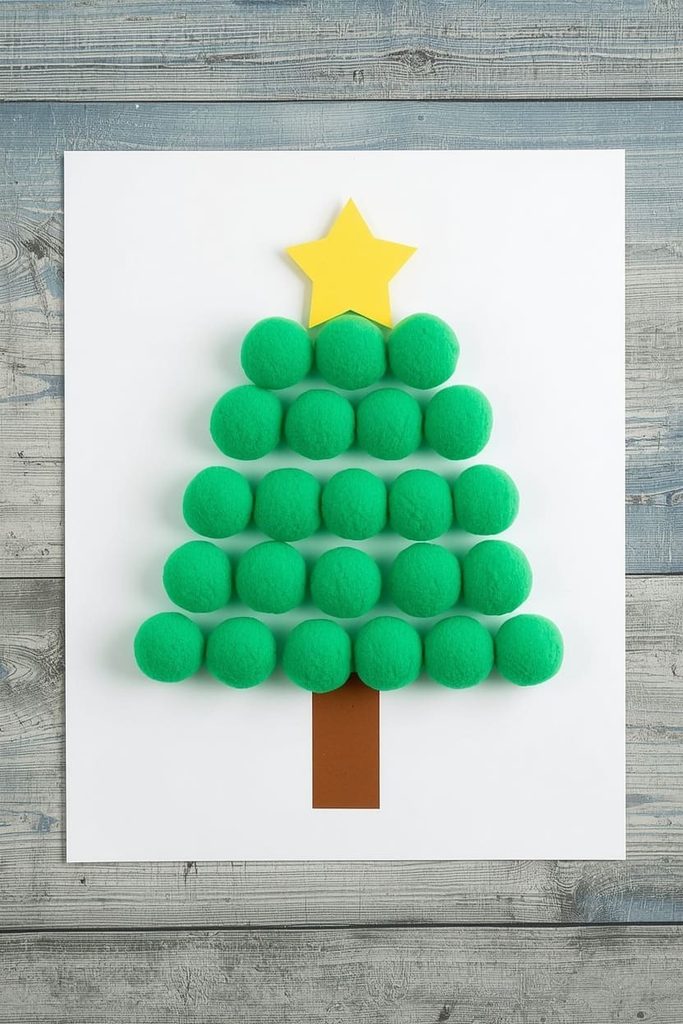
Age: 4 to 5 | Mess: Low | Time: 20 minutes
This tree sneaks in a math lesson. Your child counts each row as they build.
You will need:
- Cardstock
- 15 large green pom-poms
- Tacky glue
- Tweezers or kitchen tongs
- A brown paper trunk
- A yellow paper star
Steps:
- Glue the brown trunk at the bottom of the cardstock.
- Put one dot of glue near the top. Set one pom-pom on it.
- Add two glue dots below. Set two pom-poms.
- Keep going with rows of three, four, and five.
- Pick up each pom-pom with tweezers for an extra challenge.
- Glue the star above the first pom-pom.
Why it works: Counting rows teaches number order. Tweezers train the pincer grip.
Make it easier or harder: Let your child use fingers instead of tweezers. Then ask how many pom-poms sit in the bottom two rows. Stay close, since pom-poms are small.
11. Cupcake Liner Tree
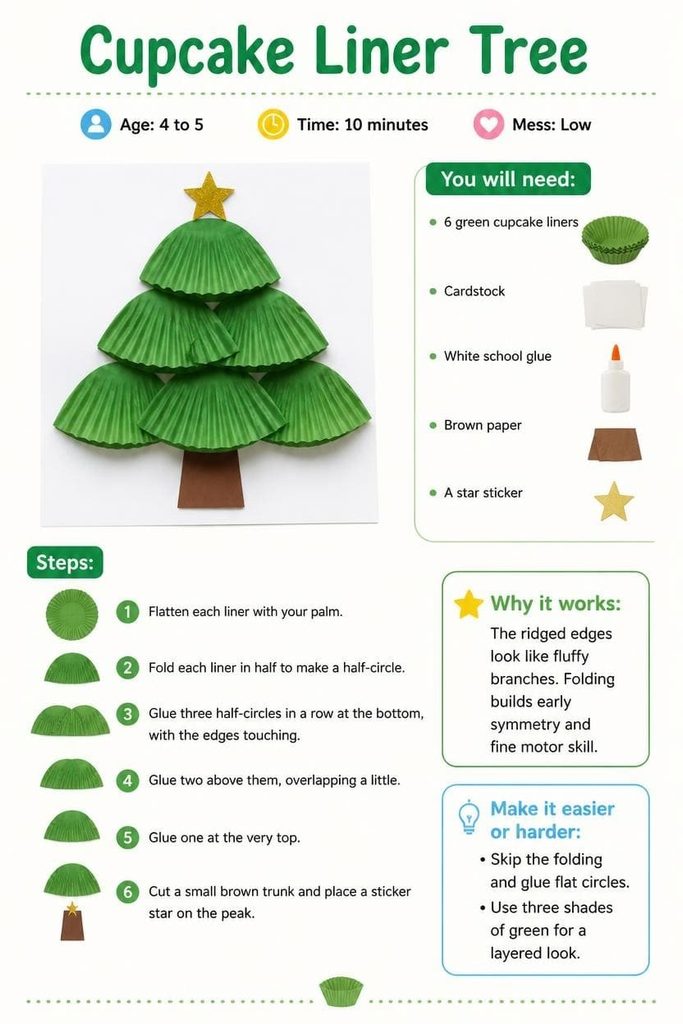
Age: 4 to 5 | Mess: Low | Time: 10 minutes
Reach for this tree when time is short. Six cupcake liners and some glue are all you need.
You will need:
- 6 green cupcake liners
- Cardstock
- White school glue
- Brown paper
- A star sticker
Steps:
- Flatten each liner with your palm.
- Fold each liner in half to make a half-circle.
- Glue three half-circles in a row at the bottom, with the edges touching.
- Glue two above them, overlapping a little.
- Glue one at the very top.
- Cut a small brown trunk and place a sticker star on the peak.
Why it works: The ridged edges look like fluffy branches. Folding builds early symmetry and fine motor skill.
Make it easier or harder: Skip the folding and glue flat circles. Use three shades of green for a layered look.
Christmas Tree Crafts for Early Elementary Kids (Ages 6+)
Older kids like projects with steps and a polished finish. These six trees use measuring, folding, layering, and patience. Most take 20 minutes or longer.
12. Triangle Tree
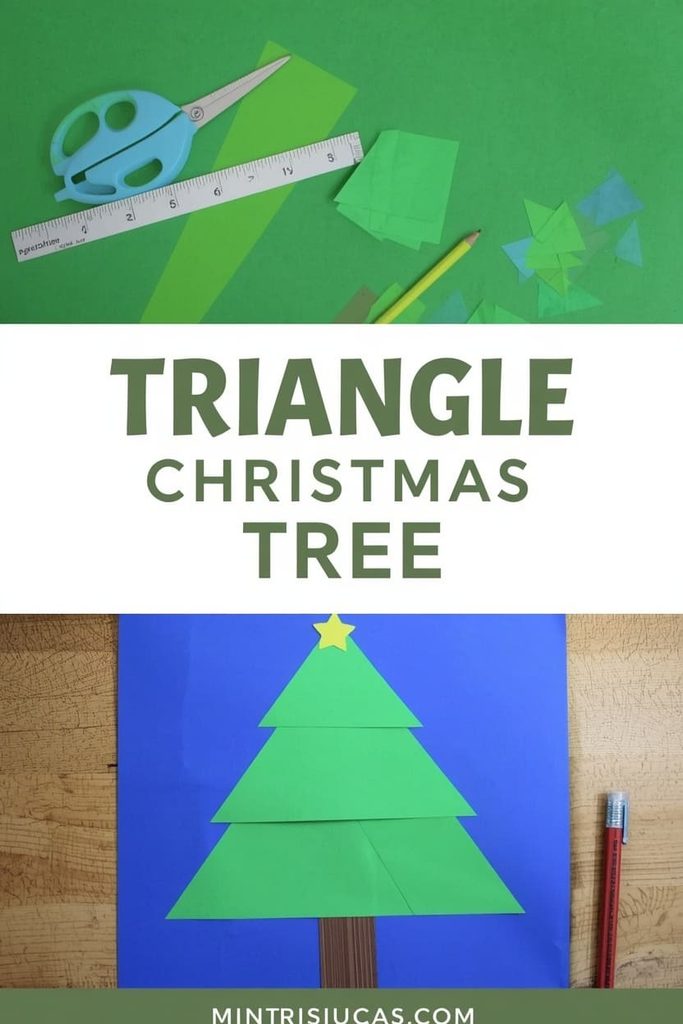
Age: 6+ | Mess: Low | Time: 20 minutes
This tree teaches shapes in a simple way. You cut squares, then turn them into triangles. I explain more in my triangle Christmas tree craft.
You will need:
- Green paper
- Ruler and pencil
- Scissors
- Glue stick
- Blue cardstock
- Scraps of brown and yellow paper
Steps:
- Measure and cut three squares. Make them 5, 4, and 3 inches wide.
- Cut each square from corner to corner. Keep one triangle from each.
- Glue the biggest triangle near the bottom of the cardstock.
- Glue the middle triangle above it. Let the tips overlap a little.
- Glue the smallest triangle on top.
- Add a paper trunk and a tiny star.
Why it works: Kids see that two triangles make one square. That builds early geometry.
Make it easier or harder: Pre-cut the squares for a quicker craft. Add a fourth size, then save the spare triangles for a mini tree.
13. Folded Paper Tree
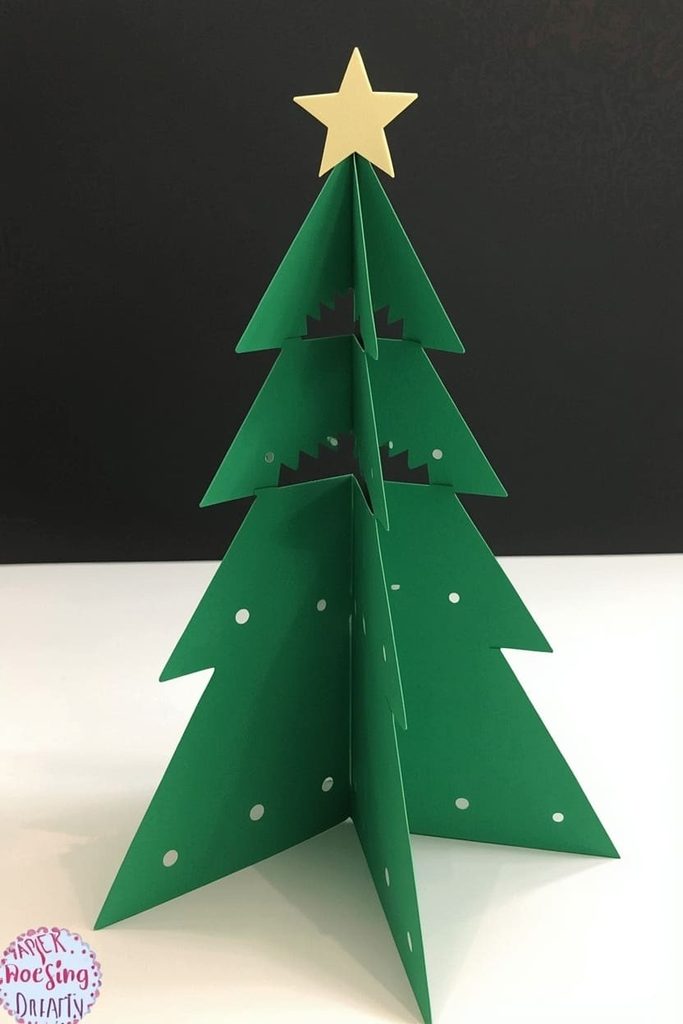
Age: 6+ | Mess: None | Time: 20 minutes
This one stands on its own. It is a great pick for a tabletop display. See my folded paper Christmas tree craft for photos.
You will need:
- 2 sheets of green construction paper
- Pencil
- Scissors
- Stickers for decorating
Steps:
- Fold one sheet in half the short way.
- Draw half a tree along the fold. Give it zigzag edges.
- Cut it out and unfold it. Trace it onto the second sheet and cut a matching tree.
- On the first tree, cut a slit from the bottom center up to the middle.
- On the second tree, cut a slit from the top center down to the middle.
- Slide the two slits together. The tree will stand up.
Why it works: Cutting on the fold teaches symmetry. The slot trick shows how flat shapes can make a 3D object.
Make it easier or harder: Draw the zigzag lines for your child. Or make three trees in different sizes for a standing forest.
14. Layered Paper Tree
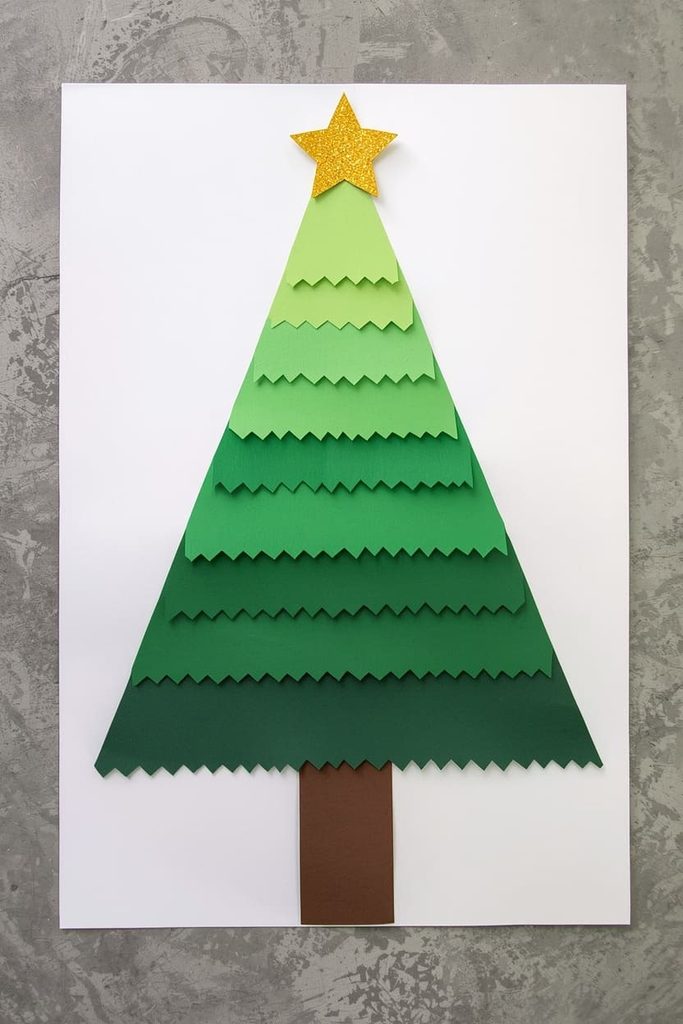
Age: 6+ | Mess: Low | Time: 30+ minutes
This is the tree I make for gifts. The layers add depth that looks store-bought. Get the full tutorial in my layered paper Christmas tree craft.
You will need:
- Dark and light green paper
- Ruler and scissors
- Glue
- Foam adhesive squares (optional)
- White cardstock
- Brown paper and gold paper
Steps:
- Cut five strips, each 1.5 inches tall. Make them 8, 6.5, 5, 3.5, and 2 inches long.
- Cut a zigzag along the bottom of every strip.
- Glue the longest strip near the bottom of the cardstock.
- Glue the next strip above it so the zigzag covers the top edge below.
- Continue up to the shortest strip.
- Stick foam squares under the top two layers for height.
- Finish with a brown trunk and a gold star.
Why it works: Layers build planning skills. Kids must think about the order before they glue.
Make it easier or harder: Cut one strip as a template to trace. For a richer look, alternate dark and light greens.
15. Popsicle Stick Tree
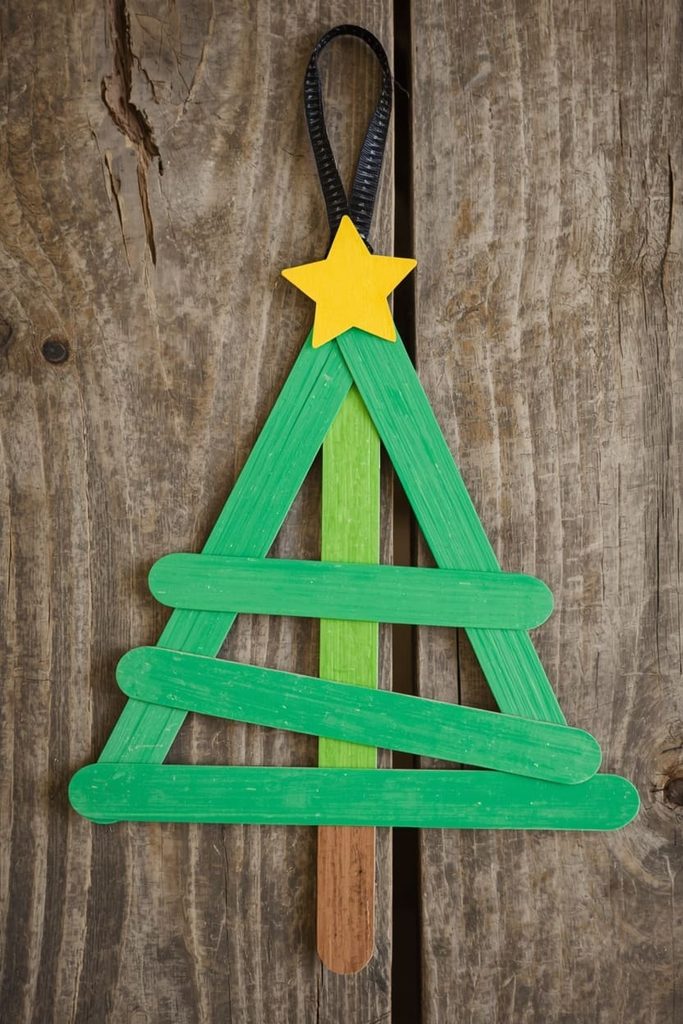
Age: 6+ | Mess: Low | Time: 30+ minutes with drying
This craft makes a sturdy tree you can hang. It is great for a rainy afternoon.
You will need:
- 2 jumbo craft sticks
- 1 regular craft stick
- 1 mini craft stick
- Green and brown paint
- Tacky glue
- Ribbon and a yellow paper star
Steps:
- Paint all four sticks green. Paint the bottom inch of one jumbo stick brown.
- Let the paint dry for 20 minutes.
- Stand the brown-tipped jumbo stick upright. This is the trunk.
- Glue the second jumbo stick across it near the bottom. Glue the regular stick across the middle. Glue the mini stick near the top.
- Let the glue set for 15 minutes.
- Tape a ribbon loop to the back. Glue the star on top.
Why it works: Comparing stick sizes teaches measuring. Waiting for glue to set builds patience.
Make it easier or harder: Use glue dots for a faster set. Add tiny bead ornaments for a fancier tree.
16. Button Tree
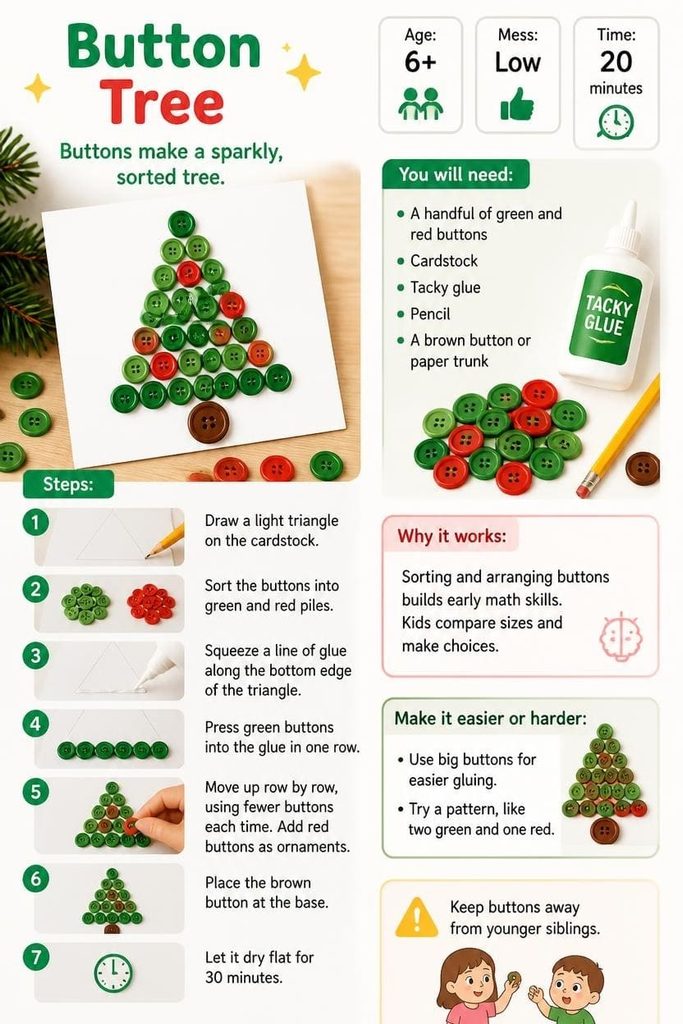
Age: 6+ | Mess: Low | Time: 20 minutes
Buttons make a sparkly, sorted tree. It suits kids who love patterns and collecting.
You will need:
- A handful of green and red buttons
- Cardstock
- Tacky glue
- Pencil
- A brown button or paper trunk
Steps:
- Draw a light triangle on the cardstock.
- Sort the buttons into green and red piles.
- Squeeze a line of glue along the bottom edge of the triangle.
- Press green buttons into the glue in one row.
- Move up row by row, using fewer buttons each time.
- Add red buttons as ornaments. Place the brown button at the base.
- Let it dry flat for 30 minutes.
Why it works: Sorting and arranging buttons builds early math skills. Kids compare sizes and make choices.
Make it easier or harder: Use big buttons for easier gluing. Try a pattern, like two green and one red. Keep buttons away from younger siblings.
17. Pasta Tree
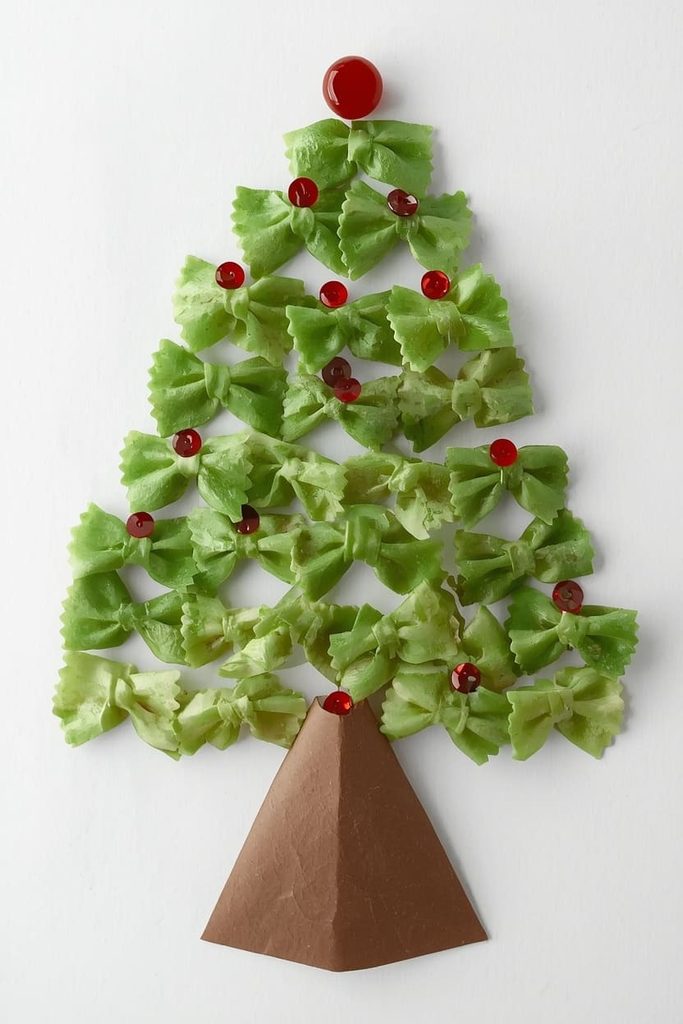
Age: 6+ | Mess: Bring the paint | Time: 30+ minutes with drying
Use this one to turn pantry pasta into art. Bow-tie pasta looks just like tiny branches.
You will need:
- About 21 pieces of bow-tie pasta
- Green paint
- A zip-top bag
- Wax paper
- Tacky glue
- Cardstock
- Brown paper and red sequins
Steps:
- Put the pasta in the bag. Add a big squirt of green paint.
- Seal the bag and shake until the pasta is coated.
- Spread the pasta on wax paper. Let it dry for 30 minutes.
- Glue one piece at the top of the cardstock. Add rows of two, three, four, five, and six below it.
- Glue a brown paper trunk at the bottom.
- Add red sequins as ornaments. Let the glue dry for an hour.
Why it works: Building rows teaches counting up by one. The dried paint adds a fun texture.
Make it easier or harder: Use larger pasta, like rigatoni, for easier gluing. For a bigger challenge, glue the pasta around a paper cone to make it 3D.
Tips to Keep Tree Crafts Low Stress
- Prep first. Cut shapes and pour paint ahead of time. Kids lose interest while you hunt for scissors.
- Cover the table. An old tablecloth saves your sanity. A baking tray works too.
- Keep wipes close. Clean small hands before they touch the next surface.
- Let your child lead. A crooked tree is still a great tree. Resist the urge to fix it.
- Make a spare. One tree might rip or get lost. A backup keeps the peace.
- Label each craft. Write your child’s name and the year on the back. You will be glad you did.
- Show them off. Hang the trees on a string across a window. You get a mini forest.
Frequently Asked Questions
What is the best Christmas tree craft for a 2-year-old?
The torn paper tree is the best pick. Tearing is easy, and a glue stick keeps the mess low. Most toddlers finish it in about 10 minutes.
What is the easiest Christmas tree craft with no mess?
The washi tape tree wins for zero mess. You only need tape and paper. The folded paper tree is another clean choice for older kids.
How can I make a Christmas tree craft last as a keepsake?
Write your child’s name and the year on the back. Store the craft flat in a folder or a large envelope. For a fragile tree, slide it into a frame with a mat. Handprint and layered paper trees keep best.
How do I run one Christmas tree craft with a group of kids?
Pick a simple craft, like the paper plate tree or the sponge-stamped tree. Set up stations for glue, paint, and decorations. Pre-cut the shapes. Give each child a labeled tray.
What can I use if I have no green paper or paint?
Paint white paper green, or color it with green markers. Tear green pages from an old magazine. You can also use green tissue paper, fabric scraps, or a coffee filter colored green.
Pick one tree and try it today. Your child will remember the time together more than the craft. Save this article to your Pinterest board so you can find these 17 easy Christmas tree crafts all December.

Sohel Rana is the writer, editor, publisher, and founder of The Tidy Porch. He is the man who is responsible for the craft (my wife created) being converted into a written piece. He also helps her wife (Sumona) by capturing videos of each craft. In short, he brings each craft created by her wife in front of you by transforming it into an article and a video.
